This site is supported by our readers. We may earn a commission, at no cost to you, if you purchase through links.

You’ll know they’re ready when the leaves start yellowing and vines begin dying back naturally.
Here’s the vital part: harvest before your area’s first frost, as cold temperatures will damage your precious tubers overnight.
Sweet potatoes need those final warm weeks in the soil to develop their signature sweetness, converting starches into sugars that make them so delicious.
Watch both your planting calendar and local weather forecasts closely, as timing this harvest just right means the difference between bland, starchy roots and the sweet, flavorful potatoes that’ll transform your fall cooking, with a focus on avoiding cold temperatures and ensuring the right conditions for flavorful development.
Table Of Contents
- Key Takeaways
- Importance of Timely Harvest
- Best Time to Harvest Sweet Potatoes
- Preparing for Harvest
- Curing Sweet Potatoes
- Storing Sweet Potatoes
- Signs of Sweet Potato Ripeness
- Creative Uses for Harvested Sweet Potatoes
- Frequently Asked Questions (FAQs)
- When to harvest sweet potatoes?
- How to harvest sweet potatoes after four months?
- Should sweet potatoes be cut before harvesting?
- How do you harvest sweet potatoes?
- How long can I leave sweet potatoes in the ground?
- How do you know when a sweet potato is not ripe?
- How do I know when to pull up my potatoes?
- How many sweet potatoes will I get from one plant?
- How do I know when sweet potatoes are ready to harvest?
- What month do you pick sweet potato?
- Conclusion
Key Takeaways
- You’ll harvest sweet potatoes 90-120 days after planting when leaves turn yellow and vines wither naturally – but always dig them up before your area’s first frost hits, as freezing temperatures will damage the tubers overnight.
- You should reduce watering 3-4 weeks before harvest to concentrate sugars and toughen skins – this strategic drought stress triggers beneficial changes that improve flavor and storage quality.
- You’ll need to cure your freshly harvested sweet potatoes at 80-85°F with 85-90% humidity for 7-10 days – this process heals minor scratches, converts starches to sugars, and prepares them for long-term storage.
- You can store properly cured sweet potatoes for 6-10 months at 55-60°F with high humidity – but you’ll need to check weekly for soft spots or rot and remove damaged tubers immediately to protect your entire harvest.
Importance of Timely Harvest
You’ll maximize your sweet potato harvest when you time it just right, avoiding the pitfalls of harvesting too early or too late.
Getting the timing wrong means you’ll either end up with small, starchy tubers that lack sweetness, or woody, damaged roots that won’t store well through winter, which can be considered a harvest failure.
Avoiding First Fall Frost
One killing frost can transform your thriving sweet potato patch into a blackened wasteland overnight. When temperatures plummet to 30°F or below, your sweet potatoes face immediate danger from cold damage that makes harvesting sweet potatoes an urgent priority.
Don’t let winter steal your golden harvest—timing beats perfection when frost threatens your sweet potato patch.
Frost protection starts with vigilant temperature monitoring throughout early fall.
Smart gardeners know that immediate harvest becomes necessary when frost threatens. Once frost blackens the vines, vine decay happens rapidly, and you’ll lose precious tubers you’ve nurtured all season.
Here’s your frost-fighting action plan:
- Check nightly forecasts starting in mid-September for frost warnings
- Use soil thermometers to track ground temperature changes
- Cover plants with row covers or blankets when frost’s predicted
- Harvest immediately after any frost damage appears on vines
Don’t wait for perfect harvest signs when frost looms. Your sweet potato harvest depends on staying one step ahead of winter’s first bite.
Reducing Watering Before Harvest
After protecting your sweet potatoes from frost, the next smart move involves managing water like a pro.
Reduce watering 3-4 weeks before your planned sweet potato harvest to trigger beneficial drought stress. This water cutback isn’t neglect—it’s strategic preparation that transforms your crop.
Here’s what happens when you dial down the irrigation:
- Sugar Concentration increases as plants focus energy on tuber quality
- Skin Toughening occurs, creating natural armor against storage damage
- Soil Moisture decreases, making harvesting sweet potatoes much easier
- Root development peaks while vines signal maturity through yellowing
Smart gardeners know that slightly stressed plants often produce superior results. When to harvest becomes clearer as reduced watering encourages those telltale yellowing leaves that say "we’re ready!
Stressed plants reveal their secrets – yellow leaves whisper "harvest time has arrived!
This approach is similar to how succession planting works to extend the growing season.
Preventing Cracking and Damage
With reduced watering behind you, proper Harvest Timing becomes your shield against cracking and damage.
Sweet potatoes develop tender skins that bruise easily, making Gentle Handling your top priority.
Tool Selection matters more than you’d think.
A garden fork works better than a shovel since it won’t slice through your precious tubers.
Start digging 18 inches from the plant base to avoid accidentally piercing roots.
Soil Moisture plays a sneaky role in damage prevention.
Wet ground makes tubers more prone to splitting, while bone-dry soil creates stress cracks.
You want slightly moist conditions for the smoothest harvest.
| Prevention Method | Why It Works |
|---|---|
| Skin Toughening (reduce water 2-3 days prior) | Creates stronger, more resilient outer layer |
| Harvest on overcast days | Prevents sun damage to exposed tubers |
| Handle one at a time |
Minimizes pressure and contact damage.
When harvesting sweet potatoes, treat each tuber like a fragile egg.
Place them gently in containers rather than tossing them.
This damage-free approach guarantees your sweet potatoes cure properly and store longer.
Remember, patience during harvest pays dividends in storage quality.
Best Time to Harvest Sweet Potatoes
Nailing down the best time harvest sweet potatoes makes all the difference between a mediocre crop and prize-winning tubers. Sweet potato maturity occurs when multiple harvest indicators align perfectly for your harvesting timeline.
Your harvesting sweet potatoes window typically opens 90-140 days after planting, but don’t rely solely on calendar dates. Variety differences mean some cultivars mature faster than others, while weather adjustments become necessary during unusual seasons.
To prevent decay, it’s vital to dig them up before frost kills vines.
Watch for these key signs:
- Yellowing leaves indicate the plant’s energy is shifting to tuber development
- Tuber size reaches 2 inches diameter and 5 inches long when mature
- Vines begin wilting naturally as growth slows
- Frost impact threatens, requiring immediate action before damage occurs
This harvesting guide helps you’ll capture peak sweetness and storage potential.
Preparing for Harvest
You’ll need to take several key steps before you actually dig up your sweet potatoes to guarantee a successful harvest.
Proper preparation, including cutting vines and loosening soil around the plants, protects your tubers from damage and makes the harvesting process much easier, which involves complete concepts and proper preparation.
Cutting and Removing Vines
Why cut vines before harvesting sweet potatoes? This essential step clears your path to those buried treasures. Using sharp pruning shears, snip vines at soil level about 7-10 days before harvest.
This Vine Removal Timing allows Skin Toughening and prevents tool damage during digging. Yellowing leaves signal sweet potato maturity, making Cutting Techniques even more important.
Proper Foliage Disposal supports Disease Prevention. To prevent spoilage, consider controlling temperature and humidity post-harvest.
- The satisfying snap of shears cutting through weathered vines
- Clear sight lines revealing where your sweet potatoes hide
- Toughened skins protecting your harvest investment
- Disease-free garden beds ready for next season’s success
Loosening Soil Around The Crown
Now that you’ve cleared the vines, grab your garden fork or spading fork for the delicate work ahead.
Start digging sweet potatoes eighteen inches from the crown to avoid root damage avoidance.
Work at optimal depth of 6-10 inches, using gentle technique with circular motions.
These soil loosening tools help free tubers without bruising their tender skins.
You can find the ideal garden fork for this task online.
Maintain proper crown proximity while harvesting sweet potatoes – patience here prevents costly mistakes that’ll haunt your harvesting efforts later.
Lifting Sweet Potatoes Gently
After you’ve loosened the soil around your sweet potato plants, the gentle lifting process becomes your moment of truth. Think of it as handling precious cargo rather than ordinary vegetables. Tool Selection matters here – your garden fork should work at a slight angle beneath the root zone, prioritizing Avoiding Bruising over speed.
Gentle Lifting requires patience and the right technique:
- Support the weight by sliding both hands underneath each tuber before lifting
- Lift straight up rather than pulling sideways to prevent snapping or cracking
- Inspect each root immediately for damage while keeping tubers separated
During harvest time, remember that digging sweet potatoes isn’t a race. Work methodically around each plant, allowing proper Root Inspection as you go. If you encounter resistance, return to Soil Loosening rather than forcing the issue.
This careful approach during harvesting helps your sweet potatoes maintain their integrity for superior storage and eating quality. A quality digging tool is essential for this task.
Handling Damaged Roots
After gently lifting your sweet potatoes, examine each one for damage.
Sort bruised or cut tubers for Immediate Consumption since they won’t survive storage. Bruise Prevention starts here – handle remaining roots like fragile eggs.
Assess Injury Severity by checking for Milky Juice leaking from wounds. Minor scratches heal during curing sweet potatoes, but deep cuts require Discarding Sections to prevent rot.
Keep damagefree tubers separate from injured ones during harvesting. Remember, one rotting sweet potato can spoil your entire harvest, so be ruthless in your sorting process.
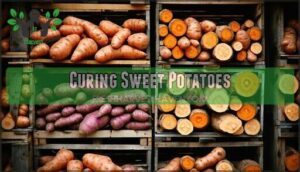
Curing Sweet Potatoes
After you’ve carefully harvested your sweet potatoes, you’ll need to cure them properly to develop their sweetness and prepare them for long-term storage.
This essential step transforms freshly dug tubers into the flavorful, shelf-stable sweet potatoes you can enjoy throughout the winter months, making them a great source of flavorful nutrition.
Ideal Temperature and Humidity
After your sweet potatoes are safely out of the ground, curing temperature becomes your next priority. Your freshly harvested tubers need specific conditions to develop their signature sweetness and extend storage life.
Curing sweet potatoes requires precise environmental control:
- Maintain temperatures between 80°F-85°F consistently
- Keep humidity levels at 85%-90% throughout the process
- Make certain good air circulation without direct sunlight exposure
This warm, humid environment heals minor harvest wounds while converting starches to sugars. Proper curing also helps with toughening the skins, which reduces post-harvest losses.
The humidity impact on flavor development can’t be overstated—it’s what transforms your bland, starchy tubers into the sweet, creamy potatoes you’re expecting. Think of curing as letting your harvest reach its full potential.
Curing Outdoors or Indoors
When curing your freshly harvested sweet potatoes, you have two viable options.
Outdoor curing works perfectly in warm climates with consistent temperatures above 80°F, but indoor curing provides superior humidity control for ideal results.
Set up a garage, shed, or spare room with a space heater to maintain ideal 80-85°F temperatures.
Indoor environments offer better ventilation management and protection from weather fluctuations during this critical postharvest handling phase.
Maintaining Humidity With Paper or Cloth
Proper humidity control during sweet potato curing makes the difference between success and spoilage. You’ll need to create the perfect moisture environment using simple materials that allow your tubers to breathe while retaining essential humidity.
Paper humidity and cloth moisture techniques work beautifully for home storage:
- Wrap each sweet potato in newspaper to maintain consistent moisture retention
- Use breathable cotton cloths for excellent material breathability
- Place damp paper towels nearby without direct contact
- Check daily for mold while maintaining ideal conditions
For specialized needs, consider using humidity control options for superior results. These methods guarantee your harvesting efforts pay off with properly cured sweet potatoes ready for long-term storage.
Healing Small Scratches and Converting Starches
Beyond maintaining humidity, your sweet potatoes undergo remarkable changes during curing.
Minor scratches and bruises heal naturally as skins toughen, while starches convert to sugars for enhanced sweetness.
This transformation impacts storage life substantially.
| Curing Process | Timeline | Benefits |
|---|---|---|
| Scratch Healing | 3-5 days | Prevents rot entry |
| Starch Conversion | 7-10 days | Increases sweetness |
| Skin Toughening | 10-14 days | Extends storage |
| Sugar Development | Throughout curing | Improves flavor |
| Moisture Balance | Continuous | Prevents decay |
Storing Sweet Potatoes
After you’ve properly cured your sweet potatoes, you’ll need to store them correctly to enjoy your harvest for months to come.
Creating the right storage environment protects your hard work and guarantees you’ll have sweet, flavorful potatoes throughout the winter season.
Optimal Storage Conditions
After curing your sweet potatoes, you’ll need perfect storage conditions to maximize their winter storage life.
Temperature control matters most—maintain 55°F to 60°F, never refrigerating them. Humidity levels should stay at 85-90% with proper ventilation needs.
Choose a dark root cellar or similar space for spoilage prevention.
- Imagine savoring your harvest through cold winter months
- Feel proud knowing you’ve preserved nature’s candy perfectly
- Experience the satisfaction of self-sufficient food storage
Checking for Signs of Rot
After proper storage conditions are established, regular monitoring becomes your best defense against spoilage. Identifying Rot early protects your entire harvest from widespread contamination.
Preventing Rot starts with weekly inspections, handling each tuber gently to detect problems before they spread.
Watch for these warning signs during storage checks:
- Soft spots that yield under gentle pressure
- Dark discoloration or unusual patches on skin surfaces
- Musty odors indicating internal decay processes
- Moisture leakage or visible mold growth patterns
Rotting Mechanisms accelerate quickly once started, making prompt detection key for preserving your carefully cured tubers throughout winter storage.
Removing Affected Sweet Potatoes
Once you spot trouble during storage inspections, swift action prevents your entire sweet potato harvest from going south. Identifying rot early means checking for soft spots, dark patches, or that telltale musty smell that signals decay.
| Condition | Action Required | Timeline |
|---|---|---|
| Soft spots | Remove immediately | Within 24 hours |
| Surface scratches | Monitor closely | Check weekly |
| Strong odor | Discard completely | Same day |
Salvageable portions can still work for immediate consumption if you cut away affected areas generously. However, when tubers show extensive damage, discarding safely protects your remaining storage.
Don’t toss diseased sweet potatoes in regular trash—consider composting options for mildly affected ones, though severely rotted specimens need different disposal methods. Think of this as protecting your investment. One bad apple spoils the bunch, and the same principle applies here before frost season arrives.
Storage Duration
Sweet potatoes reward your patience with impressive shelf life when stored correctly.
Properly cured sweet potatoes last 6-10 months at ideal temperatures (50-60°F) with humidity control around 85-90%.
The curing process dramatically impacts storage duration by toughening skins and preventing rot.
To further extend shelf life, consider maintaining optimal humidity during storage.
- Your winter meals will thank you for taking time with proper temperature effects and storage techniques.
Signs of Sweet Potato Ripeness
You’ll know your sweet potatoes are ready for harvest when the leaves start turning yellow and the vines begin to wilt, typically 90 to 120 days after planting.
These visual cues, combined with checking your planting calendar and testing a sample tuber, will help you determine the perfect timing for maximum yield and sweetness.
Yellowing and Wilting Leaves
After properly storing your sweet potatoes, you’ll want to recognize when to harvest your next crop.
Yellowing leaves signal crop maturity – your plants are shifting energy from foliage to root development.
This Leaf Color Changes process happens as Chlorophyll Breakdown occurs and Photosynthesis Decline begins.
| Maturity Indicators | What You’ll See | Timeline |
|---|---|---|
| Early yellowing | Lower leaves turn yellow | 90-100 days |
| Vine Dieback | Stems become brittle | 100-110 days |
| Widespread yellowing | Most foliage affected | 110+ days |
| Complete wilting | Vines die back | Harvesting time |
Don’t confuse drought stress with natural sweet potatoes maturity – check soil moisture first.
Checking The Calendar for Harvest Date
Beyond visual cues, your harvest calendar becomes your roadmap to success.
Count 100-140 days from your planting date to determine when sweet potatoes reach maturity.
Different variety days to harvest vary substantially, so check seed packet information for specific timing.
Set calendar reminders for your target harvest time, then monitor weather forecasts to adjust harvest timing around frost prediction threats in your area.
Digging Up a Test Tuber
When uncertainty clouds your harvesting timeline, digging up a test tuber provides the clearest answer.
Carefully excavate around one plant’s crown, avoiding damage to surrounding roots while checking for readiness indicators.
Your test dig should reveal:
- Tuber size measuring at least 2 inches in diameter and 5 inches long
- Skin condition showing smooth, firm surfaces without major blemishes
- Starch content versus sweetness level indicating proper maturity.
This simple inspection confirms when to harvest your entire sweet potato crop.
Assessing Size and Maturity
Once you’ve dug up your test tuber, you’re ready to evaluate the entire crop’s readiness.
Look for sweet potatoes with a tuber diameter of about 2 inches and root length extending 5+ inches—this represents ideal usable size for harvesting.
Count the days planted to confirm you’re within the 100-110 day window.
Examine leaf color for yellowing and check stem condition for wilting, both signaling maturity.
The skin should show rich, vibrant coloring that indicates peak sweetness has developed.
Don’t rush this assessment—properly mature tuber size guarantees maximum flavor and storage life from your harvest.
Creative Uses for Harvested Sweet Potatoes
Once you’ve successfully harvested your sweet potatoes, you’ll discover countless ways to transform these nutritious tubers into satisfying meals and treats.
From hearty sheet pan dinners with beef to creamy slow cooker mashes and even decadent desserts, your harvest can supply your kitchen with versatile ingredients for months to come, making sweet potatoes a nutritious addition.
Sheet Pan Recipes With Beef
Transforming your freshly harvested sweet potatoes into hearty sheet pan meals with beef creates weeknight dinners that practically cook themselves. Your fall harvest becomes the foundation for these one-pan wonders that combine natural sweetness with savory protein.
Beef Cut Selection matters – choose sirloin strips, ground beef, or cubed chuck roast for ideal results.
These Vegetable Pairings work beautifully:
- Cubed sweet potatoes with beef strips and colorful bell peppers – ready in 25 minutes
- Seasoned meatballs nestled among sweet potato chunks for contrasting textures
- Thinly sliced beef with sweet potato wedges and red onion for maximum caramelization
Seasoning Blends like paprika, garlic powder, and rosemary enhance both ingredients. Set Cooking Temperatures to 425°F for proper browning. These Serving Suggestions complete your harvesting rewards perfectly.
Combining With Spinach for Quiche
After mastering those satisfying beef combinations, your sweet potatoes can create something equally impressive for brunch lovers.
Transform your fall harvest into a stunning quiche by using thinly sliced sweet potatoes as a naturally gluten-free crust. This spinach pairing delivers impressive nutritional benefits while offering endless quiche variations.
Layer your sweet potato slices in a pie dish, then fill with sautéed spinach, eggs, and creamy cheeses like feta or gruyere.
These recipe adaptations work beautifully for weekend entertaining or meal prep. The natural sweetness balances the earthy spinach perfectly, creating serving suggestions that’ll have guests asking for your secret to harvesting such delicious results from simple ingredients.
Slow Cooker Mashed Sweet Potatoes
Your freshly harvested sweet potatoes transform beautifully into creamy, hands-off mashed perfection using your slow cooker. This Slow Cooker Prep method delivers restaurant-quality results while you handle other tasks during harvest season.
Simply peel and cube your sweet potatoes, then cook on low for 4-6 hours until fork-tender. The Creaminess Factors depend on proper timing – don’t rush the process. Add butter and a splash of milk before mashing to your preferred consistency.
Spice Combinations like maple-cinnamon, garlic-herb, or coconut-nutmeg elevate the natural flavor of your sweet potato yield. For Dietary Modifications, substitute coconut milk for dairy or add Greek yogurt for protein.
Here are winning Serving Suggestions for your harvesting bounty:
- Pair with roasted turkey or ham for holiday meals
- Serve alongside grilled chicken with fresh herbs
- Create a sweet-savory side by adding caramelized onions.
This method preserves nutrients while developing deep, caramelized flavor that showcases your perfect harvest timing.
Exploring Sweet Potato Desserts
Your slow cooker mashed sweet potatoes represent just one delicious possibility from your harvest.
Sweet potatoes shine brightest in desserts, where their natural sugars create magic in the kitchen.
| Classic Desserts | Creative Treats | Quick Options |
|---|---|---|
| Sweet Potato Pie | Sweet Potato Brownies | Roasted sweet potato wedges with honey |
| Sweet Potato Bread | Candied yam bites | Sweet potato ice cream |
| Sweet Potato Pudding | Sweet potato cheesecake | Cinnamon sugar fries |
| Sweet Potato Cobbler | Sweet potato donuts | Mashed sweet potato cookies |
| Traditional casserole | Sweet potato truffles | No-bake energy balls |
The flavor of properly cured tubers means you’ll use less sugar in recipes.
Sweet potato pie remains the champion dessert, but don’t overlook sweet potato bread for breakfast treats or sweet potato pudding for elegant dinner endings.
Frequently Asked Questions (FAQs)
When to harvest sweet potatoes?
That perfect harvest moment sneaks up faster than you’d think.
You’ll harvest sweet potatoes 90-130 days after planting, when leaves yellow and vines wither, but always before frost hits your garden.
How to harvest sweet potatoes after four months?
After four months, check if your sweet potato leaves are yellowing and vines withering. Gently dig around plants with a fork, starting 18 inches away to avoid damage.
Should sweet potatoes be cut before harvesting?
You should cut and remove sweet potato vines 2-3 days before harvesting. This toughens the skins, making them less susceptible to damage during digging and improves their storage quality substantially.
How do you harvest sweet potatoes?
Use a garden fork to loosen soil 18 inches from the plant crown.
Dig carefully to avoid bruising tender tubers.
Lift gently by hand, brush off soil, and let them dry for several hours before storing.
How long can I leave sweet potatoes in the ground?
You can leave sweet potatoes in the ground for 90 to 140 days after planting, but don’t wait too long. Harvest before the first killing frost to prevent damage and rot.
How do you know when a sweet potato is not ripe?
You’ll know sweet potatoes aren’t ripe when they’re smaller than two inches wide, feel hard and starchy, lack sweetness.
The plant’s leaves remain green rather than yellowing or withering naturally.
How do I know when to pull up my potatoes?
Check your sweet potatoes after 90-120 days when leaves start yellowing and vines wither. Test dig one tuber—if it’s about 2 inches wide, you’re ready to harvest before frost hits.
How many sweet potatoes will I get from one plant?
Like a treasure chest buried underground, one sweet potato plant typically yields 3-6 tubers.
You’ll harvest more from healthy plants in ideal conditions, with larger varieties producing fewer but bigger sweet potatoes per plant.
How do I know when sweet potatoes are ready to harvest?
You’ll spot harvest-ready sweet potatoes when leaves start yellowing and vines begin withering, typically 90-120 days after planting.
Test dig one tuber—it should measure about 2 inches wide and feel firm.
What month do you pick sweet potato?
You’ll typically harvest sweet potatoes in September or early October, about 100-120 days after planting.
Watch for yellowing leaves and cooler fall weather, but always dig before the first frost hits.
Conclusion
Coincidentally, nature’s timing aligns perfectly with your kitchen’s needs when you master the best time to harvest sweet potatoes.
You’ve learned to watch for yellowing leaves, check your calendar, and beat that first frost deadline.
Now you’re equipped with proper harvesting, curing, and storage techniques that’ll keep your sweet potatoes fresh for months.
Don’t forget to reduce watering beforehand and handle those tubers gently – your patience will reward you with incredibly sweet, flavorful results.
- https://www.bhg.com/how-and-when-to-harvest-sweet-potatoes-7642613
- https://www.marthastewart.com/when-to-harvest-sweet-potatoes-11747823
- https://www.theseasonalhomestead.com/when-to-harvest-sweet-potatoes/
- https://www.reddit.com/r/gardening/comments/16f53is/when_are_sweet_potatoes_ready_for_harvest/
- https://www.purdue.edu/hla/sites/yardandgarden/time-to-harvest-sweet-potatoes/


