This site is supported by our readers. We may earn a commission, at no cost to you, if you purchase through links.
You’ll know your fruit’s ready when it develops full color—ground color changes from green to yellow or cream in apples and pears.
Ripe fruit yields slightly to gentle pressure and releases easily from the branch with minimal tugging.
The sweet aroma intensifies as sugars concentrate.
Weight matters too—ripe fruit feels heavier due to higher juice content.
Touch the stem end; it should give slightly without being mushy.
For stone fruits, check the suture line—it opens as fruit matures.
These natural signals work better than calendar dates since weather affects ripening speed.
Master these techniques and you’ll discover timing secrets that transform good harvests into exceptional ones, using observation skills to make the most of your harvest.
Table Of Contents
- Key Takeaways
- Harvesting Ripe Fruit
- Fruit Ripening Process
- Choosing Fresh Fruits
- Handling and Storing Fruit
- Ripening Techniques and Tips
- Frequently Asked Questions (FAQs)
- How to tell when fruit is ready to harvest?
- What does the Bible mean when it says ripe fruit?
- How do you pick a ripe fruit?
- How to check if a fruit is ripe?
- How can you tell if a fruit is ready for harvest?
- What does the Bible say about harvesting fruit?
- How do you ripen fruit after harvesting?
- What fruit will not ripen after it’s picked?
- How to check if fruit is ripe?
- What are the stages of fruit ripeness?
- Conclusion
Key Takeaways
- You’ll know fruit’s ready when it shows full color changes from green to yellow/cream, yields slightly to gentle pressure, and releases easily from the branch with minimal tugging.
- Trust your nose—sweet, intensifying aromas signal peak ripeness better than calendar dates since weather affects ripening speed differently each season.
- Use the weight test for melons and citrus—ripe fruit feels noticeably heavier due to higher juice content and concentrated sugars.
- Speed up ripening of underripe fruit using the paper bag method, which traps natural ethylene gas to create ideal ripening conditions without compromising quality.
Harvesting Ripe Fruit
You’ll know your fruit is perfectly ripe when it shows clear visual, aromatic, and tactile signs that indicate peak flavor and nutritional content.
Mastering these simple ripeness indicators guarantees you harvest at the prime moment for maximum sweetness and extended storage life.
Visual Ripeness Tests
The visual tests you’ll master start with examining skin texture—smooth for apples, slightly wrinkled for passion fruit.
Color change reveals ripeness: green tomatoes turn vibrant colors like red, while bananas develop yellow hues with brown spots.
Look for ripeness signs in spotting patterns that signal sweetness.
Check stem condition—it should detach easily when fruit’s ready.
Watch for shape changes as fruits soften and expand.
These visual ripeness cues and ripeness indicators help determine perfect harvest time.
Color Indicators for Ripeness
Since fruit color changes signal peak ripeness, you’ll want to master these visual cues. Color indicators reveal when your harvest is ready.
Watch for these ripening signs:
- Green tomatoes developing vibrant colors – shifting from pale green to deep red with uniform color change
- Bananas showing skin texture shifts – yellow base with brown sugar spots indicating sweetness
- Stone fruits displaying deeper pigmentation – peaches and plums exhibiting rich, even fruit color
However, some varieties break the rules. Certain plums stay purple-black when ripe, while specific mango cultivars won’t follow typical visual ripeness cues. Don’t rely solely on fruit color changes – combine color assessment with other ripeness tests for accuracy.
Aroma and Smell Indicators
Your nose reveals ripeness secrets that eyes can’t detect. Fruit Scent intensifies as Aroma Tests reveal peak maturity through Smell Detection.
Trust your nose—it knows when fruit is perfectly ripe.
Sweet aroma signals best harvest timing. Scent volatility increases during ripening, releasing distinctive varietal aromas that trained noses recognize instantly.
| Aroma Quality | Ripeness Level |
|---|---|
| No detectable scent | Underripe |
| Mild fragrance | Nearly ready |
| Strong sweet perfume | Perfect ripeness |
Hold fruit near your nose for Fragrance Analysis. Rich aromatic intensity confirms readiness, while absent smell indicators suggest patience. Sour or fermented odors warn of spoilage – trust your aroma detection instincts completely.
Weight and Density Indicators
Why trust guesswork when weight and density reveal a fruit’s secrets?
Heavy fruits pack more juice content, making mass measurement your reliable ripeness test.
Melons and citrus should feel surprisingly dense for their size—this weight-density relationship correlates with dry matter content and sweetness.
During ripening stages, fruit density increases as sugars concentrate.
However, lighter citrus works better for zesting despite less juice.
For melons, add the classic thump test to your fruit ripeness indicators arsenal.
Fruit Ripening Process
Understanding fruit ripening helps you pick produce at peak flavor and quality.
The ripening process involves complex biochemical changes triggered by ethylene gas, temperature shifts, and environmental factors that transform starches into sugars while softening cell walls, which is crucial for achieving peak flavor.
Ethylene Gas Role
Think of ethylene as nature’s ripening switch that orchestrates fruit maturation behind the scenes. This powerful hormone balance mechanism transforms your harvest through precise gas regulation.
Ethylene production triggers three critical changes:
- Converts starches to sugars, creating that perfect sweetness you’re craving
- Softens cell walls through specialized enzyme activation for ideal texture
- Initiates color development from chlorophyll breakdown to vibrant hues
Smart ethylene management means understanding how ethylene producers like apples accelerate nearby fruits. Control ethylene concentration by separating sensitive produce, or harness ethylene levels strategically—place bananas with hard avocados for faster ripening control.
To maximize the quality of your harvest, consider the importance of fruit ripeness indicators identifying ripeness when determining the best time to pick your produce.
Temperature and Humidity Effects
Beyond the obvious visual cues, temperature control and humidity management dramatically influence your fruit’s ripening journey. Understanding these environmental factors helps you avoid heat stress and fruit spoilage while optimizing ripening speed.
Temperature effects create the foundation for proper ripening. The sweet spot of 65-75°F (18-24°C) allows fruits to develop their full flavor potential. Temperature fluctuations outside this range can wreak havoc—too hot accelerates ripening dangerously, while cold temperatures halt the process entirely.
Humidity levels work hand-in-hand with temperature regulation. Here’s what you need to know:
| Environmental Factor | Ideal Range | Result |
|---|---|---|
| Temperature | 65-75°F (18-24°C) | Ideal ripening conditions |
| Humidity | 80-90% | Prevents dehydration, maintains texture |
| Combined Effect | Both ideal | Maximum flavor development |
Poor humidity control causes fruits to shrivel below 80% or develop mold above 95%. Master these conditions, and you’ll transform average produce into perfectly ripened treasures.
Oxygen and Carbon Dioxide Levels
Temperature creates the foundation, but atmospheric gases orchestrate your fruit’s final ripening performance.
Fruits consume oxygen and release carbon dioxide during respiration, making gas control imperative for harvest timing.
Optimal atmospheric conditions require:
- Oxygen levels above 5% – prevents anaerobic fermentation that creates off-flavors
- Carbon dioxide below 1% – avoids ripening inhibition and maintains normal respiration rates
- Atmospheric pressure monitoring – guarantees consistent gas exchange for proper ethylene gas function
You’ll notice fruits ripen faster when these atmospheric gases stay balanced.
Poor gas control turns perfect produce into disappointing harvests, while proper management extends your fruit’s peak quality window substantially.
Choosing Fresh Fruits
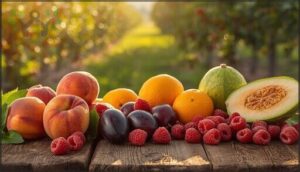
You’ll find that choosing fresh fruits requires understanding specific ripeness cues for different fruit types. Stone fruits, berries, citrus, and melons each display unique indicators that signal peak harvest timing.
Selecting Ripe Stone Fruit
Stone fruit mastery starts with understanding ripeness indicators. Perfect stone fruit selection requires examining skin color—look for vibrant hues without green patches near the stem. Fruit texture matters: gently press the seam area for slight yielding. Don’t squeeze too hard! Stone varieties like peaches develop sweet aromas when ready.
The fruit ripening process continues after purchase, so buying firm fruit prevents bruising during transport. Understanding stone fruit is essential for a successful harvest.
| Stone Fruit | Color Signs | Touch Test |
|---|---|---|
| Peaches | Golden-yellow base, red blush | Gentle give at seam |
| Nectarines | Deep orange-red, no green | Slight softness near stem |
| Plums | Rich purple/red, glossy skin | Moderate firmness |
| Apricots | Orange-gold, slight wrinkles | Plump, heavy feel |
| Cherries | Deep red, high gloss | Firm but not hard |
Harvest timing becomes crucial—ripening stages vary by variety, so trust multiple ripening signs together.
Identifying Ripe Berries and Citrus
Berries and citrus fruits reveal their ripeness through distinct visual and tactile cues that guide successful harvest timing. Master these ripeness indicators for superior fruit quality control.
Perfect berries showcase vibrant berry color—blueberries display deep blue hues without red tinges, while strawberries present uniform red coloration. Citrus texture becomes slightly yielding when gently pressed, indicating proper fruit softening has occurred.
Your senses reveal ripeness stages effectively:
- Visual inspection: Look for consistent coloration and natural surface sheen
- Aroma assessment: Detect sweet fragrance at the blossom end of citrus
- Texture evaluation: Feel for firm yet yielding consistency in berries
- Weight comparison: Choose citrus that feels heavy relative to size
The fruit ripening process varies between varieties, making ripe fruit selection an art requiring patience and observation skills. To achieve the best flavor, consider that tasting confirms ripeness helps to make the best selection.
Checking for Ripeness in Melons
Melons require careful assessment to determine harvest readiness signs. Thumping sound tests reveal ripeness – a hollow resonance indicates perfect harvest time.
The ground spot should appear creamy yellow where the melon rested on soil. Skin texture becomes slightly waxy, and stem condition shows easy detachment.
The weight test confirms density – ripe melons feel heavy for their size.
| Harvest Indicators | Signs of Readiness |
|---|---|
| Thumping Sound | Deep, hollow resonance |
| Ground Spot | Creamy yellow coloration |
| Weight Test | Heavy for size |
| Stem Condition | Easily detached |
| Skin Texture | Slightly waxy surface |
These harvesting methods guarantee fruit ripeness at melon harvest time.
Handling and Storing Fruit
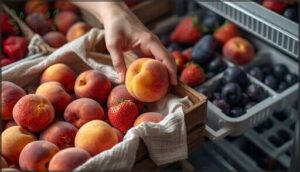
You need to handle ripe fruit gently and store it under the right conditions to keep it fresh and tasty.
Don’t let your harvest turn into a science experiment in the back of the fridge—proper storage prevents spoilage and waste.
Proper Storage for Cut Fruit
How do you keep cut fruit fresh once you’ve sliced into your perfect harvest? Proper storage becomes essential the moment you make that first cut.
Cut fruit requires immediate refrigeration to maintain safety and quality. Without proper postharvest handling, your sliced treasures lose nutrients and develop harmful bacteria within hours at room temperature.
Refrigerate cut fruit immediately—this simple step preserves freshness, prevents spoilage, and protects your juicy investment.
Essential storage tips for maximum shelf life:
- Use airtight fruit containers to prevent flavor transfer and maintain moisture for up to three days
- Apply lemon juice on cut apples or bananas to prevent enzymatic browning reactions
- Keep different cut fruits separate using fruit wrapping or breathable containers to avoid mixing flavors
Smart fruit preservation methods extend storage duration substantially. Proper fruit storage techniques maintain texture, color, and nutritional value while preventing premature spoilage. Using the right fruit storage containers is vital for maintaining freshness and quality.
Refrigeration Requirements for Fruits
After properly storing cut fruit, refrigeration becomes your best friend for extending shelf life.
Set your refrigeration units at 32-39°F with humidity management around 85-95% for ideal fruit storage.
Cherries, grapes, and berries thrive in cold storage, while citrus prefers slightly warmer conditions.
Temperature control slows respiration, doubling freshness compared to countertop storage.
Fruit cooling within thirty minutes preserves vitamins and prevents rapid deterioration.
Room Temperature Storage for Fruits
Not every fruit thrives in cold storage conditions. Some varieties need room temperature to reach their peak ripening stages and avoid fruit spoilage.
Here’s your guide to room temperature fruit storage tips:
- Store bananas, citrus, and mangoes on counters for maximum fruit ripening process
- Keep uncut avocados and peaches in paper bags to accelerate ripening
- Maintain melons and pomegranates at room temperature for best flavor development
- Transfer any cut fruit to refrigeration immediately to extend fruit shelf life
These storage methods and fruit preservation techniques guarantee maximum flavor while preventing premature deterioration. Understanding proper fruit preservation methods is vital for maintaining freshness.
Ripening Techniques and Tips
Once you’ve mastered identifying ripe fruit, you can use several proven techniques to speed up the ripening process for underripe harvests.
These methods harness natural ethylene gas production and controlled environments to achieve ideal ripeness without compromising fruit quality, utilizing complete concepts to guide the process.
Paper Bag Method for Ripening
Beyond proper storage, you can speed up the ripening process using the paper bag method. This technique traps ethylene concentration naturally produced by fruits, creating a controlled environment for ripening control.
Place unripe avocados, pears, or bananas in paper bags – never plastic. Bag storage allows air circulation while concentrating ripening gases.
For an ethylene boost, add a ripe apple or banana to accelerate the process. Fruit wrapping in paper creates ideal conditions without excess moisture.
Check daily, as fruit ripening techniques work quickly. Ripening trays can hold multiple bags efficiently, making this method perfect for batch ripening your harvest.
The use of paper bag materials is essential for effective ripening.
Ethylene Concentration for Ripening
Beyond the simple bag trick lies the science of ethylene concentration. Commercial ripening chambers use 10-100 ppm ethylene gas with controlled humidity levels around 80-90%.
Ethylene production varies by fruit—bananas generate their own while citrus needs external sources.
Monitor gas concentration carefully since excessive ethylene levels accelerate fruit maturation beyond ideal ripening speed, turning perfect produce into mushy disappointments within hours.
Common Mistakes in Fruit Ripening
Despite good intentions, ripening errors can derail your harvest dreams.
You’ll face fruit spoilage when making these common pitfalls:
- Storage mistakes: Refrigerating unripe avocados and peaches halts the ripening process completely
- Overripe disappointment: Trapping excessive moisture in bags creates mold breeding grounds
- Over ripening: Storing too many ripe bananas together causes ethylene overexposure
- Harvest timing failures: Expecting off-season fruit to achieve prime texture ignores natural cycles
Understanding fruit ripeness signs is vital to avoid these mistakes.
Avoiding these spoilage risk mitigation errors and bruising prevention mistakes guarantees consistent success.
Cooking and Enhancing Fruit Flavor
Don’t let imperfect fruit go to waste when cooking methods can reveal hidden flavors.
Heat transforms underripe produce by breaking down cellular structures and concentrating natural sugars through caramelization.
Caramelization
Roasting fruits at 400°F creates natural sugar syrups while developing complex flavor compounds.
Create infused oils by sautéing fruit peels with neutral oils.
Sugar syrups made from cooked fruit enhance desserts, while fruit glazes add shine and intensity to your creations.
This process involves using cooked fruit to make fruit glazes and infused oils for various culinary applications.
Frequently Asked Questions (FAQs)
How to tell when fruit is ready to harvest?
Hand-harvesting accounts for 63% of global fruit harvest. Check color changes, test firmness with gentle pressure, smell for sweet aromas, and see if fruit detaches easily from the stem.
What does the Bible mean when it says ripe fruit?
Biblical "ripe fruit" typically symbolizes spiritual maturity, good deeds, or the results of faith.
You’ll find it represents readiness – believers producing righteousness, character development, or God’s perfect timing for spiritual harvest.
It’s metaphorical language for spiritual growth.
How do you pick a ripe fruit?
Surprisingly, picking perfect fruit isn’t rocket science—you’ll check color changes, smell sweet aromas, feel gentle softness, and verify easy stem detachment to harvest at peak ripeness.
How to check if a fruit is ripe?
Check color changes, give it a gentle squeeze for softness, smell for sweet aroma, and see if it detaches easily from the stem.
How can you tell if a fruit is ready for harvest?
You’ll know fruit’s ready when it shows vibrant color changes, gives slightly to gentle pressure, releases sweet aroma, and detaches easily from the branch with minimal effort.
What does the Bible say about harvesting fruit?
Scripture mentions fruit harvesting in over 40 passages, emphasizing patience and timing.
The Bible teaches you’ll recognize spiritual maturity by examining the "fruit" produced—actions, character, and love that flow naturally from a transformed heart, requiring careful discernment.
How do you ripen fruit after harvesting?
You can ripen climacteric fruits like bananas and tomatoes at room temperature using ethylene gas.
Store them in paper bags with apples or bananas to accelerate ripening through natural ethylene production.
What fruit will not ripen after it’s picked?
Like ripening fruit, timing matters most. Non-climacteric fruits like strawberries, grapes, citrus, and cherries won’t ripen after you’ve picked them—they’re stuck at their harvest sweetness level forever.
How to check if fruit is ripe?
Look for color changes, check texture with gentle pressure, smell for sweet aromas, and test if the fruit detaches easily from its stem or branch.
What are the stages of fruit ripeness?
From green to perfect sweetness – understand fruit’s transformation journey.
You’ll see immature, mature, and overripe stages.
Color changes, texture softens, and sugars develop.
Each variety follows distinct timelines for ideal harvest.
Conclusion
Picture yourself as a fruit detective, armed with sensory clues to crack the perfect ripeness case.
Mastering harvesting ripe fruit transforms your kitchen from ordinary to extraordinary.
You’ve learned to read nature’s signals—color changes, gentle pressure tests, aromatic hints, and weight differences, which are scientific indicators that guide you better than guesswork.
Trust your senses over calendar dates, since environmental factors affect ripening speed.
Apply these techniques consistently, and you’ll enjoy peak-flavor produce every time you harvest.
- https://www.myplate.gov/eat-healthy/food-group-gallery
- https://recipes.howstuffworks.com/pomegranate.htm
- https://www.ediblemontereybay.com/online-magazine/summer-2023/whats-in-season-prune-plums/
- https://emergencemagazine.org/essay/animals-in-the-room/
- https://food52.com/blog/16157-how-%20to-poach-%20fruit-without-%20a-recipe

