This site is supported by our readers. We may earn a commission, at no cost to you, if you purchase through links.

Timing your harvest requires reading multiple signals from the plant itself: the drying stem, the deepening color, the resistance of the skin to your thumbnail. Master these indicators, and you’ll fill your pantry with squash that lasts well into spring, transforming a single growing season into months of homegrown meals.
Table Of Contents
- Key Takeaways
- Harvest Time Factors
- Signs of Ripeness
- Checking for Maturity
- Pre Harvest Preparation
- Cutting The Squash
- Curing Winter Squash
- Storing Winter Squash
- Harvesting at Optimal Time
- Post Harvest Care
- Frequently Asked Questions (FAQs)
- How do I know when winter squash is ready to pick?
- How long can you leave winter squash on the vine?
- What happens if you pick winter squash too early?
- What do squash plants look like when ready to harvest?
- Can you leave squash on the vine too long?
- What does winter squash look like when ripe?
- How big should I let my squash get before I pick it?
- When should you harvest winter squash?
- how do I prepare yellow squash?
- When is the best time to pick squash?
- Conclusion
Key Takeaways
- Harvest winter squash when three key signals align: the rind resists your thumbnail scratch, the stem turns brown and woody, and frost is forecast within two weeks—timing this moment correctly means the difference between six months of storage success and quick rot.
- After cutting squash with sharp, sanitized pruners, leave 1-2 inches of dried stem attached as a natural protective seal, then cure the harvest for 10-14 days at 75-85°F to toughen the skin and heal minor nicks before storage.
- Store cured squash in darkness at 50-55°F with 50-70% humidity while keeping them away from ethylene-producing fruits like apples and bananas, rotating weekly to prevent flat spots and checking for soft patches that signal decay.
- Most gardeners lose crops by waiting too long for extra size rather than reading plant signals—master the visual cues of deepening color, hardening rind, and drying stems to transform one growing season into months of homegrown meals.
Harvest Time Factors
Knowing when to harvest winter squash isn’t just about watching the calendar—you need to factor in what’s happening around your plants. Weather patterns, frost timing, and the specific variety you’re growing all play a role in determining that perfect harvest window.
Let’s break down the three key factors that’ll help you time your harvest just right.
Weather Conditions
Before you even think about harvesting, you’ll want to get friendly with your local weather forecast—because Mother Nature holds all the cards regarding timing your squash pull. Temperature fluctuations and rainfall patterns affect both harvest time and storage conditions. Here’s what you need to watch:
- Frost protection: Harvest before the first hard freeze hits your garden
- Soil moisture: Dry conditions prevent waterlogged stems and rot
- Climate variability: Stable temperatures (70-80°F) improve winter squash harvesting
- Rainfall patterns: Choose dry, sunny days to keep mold at bay
Smart timing now means months of delicious squash later.
Frost Dates
While weather patterns set the stage, your first frost date is the final curtain call that tells you exactly when winter squash needs to come off the vine.
In Climate Zones 3-5, you’re racing against September or early October frosts, while Zone 8 gardeners enjoy extra weeks of ripening time.
Check your regional frost dates and mark your calendar two weeks earlier—that’s your harvest window for ideal Winter Preparation and Cold Hardiness, ensuring proper Curing Process success.
Squash Variety
Once you’ve got your frost timeline squared away, remember that Squash Variety Selection dramatically impacts when you’ll actually harvest. Vining butternut takes 80 to 120 days to reach full maturity, while acorn wraps up faster at 85-100 days. Bush types only need 45 to 55 days, making Variety Comparison essential for planning.
Squash genetics and seed selection determine not just timing but fruit texture and squash nutrition too. Winter squash varieties like spaghetti and Hubbard each have their own ripening rhythm, so knowing your specific squash varieties helps you nail the harvest window perfectly.
For ideal growth, understanding soil pH levels is vital for a successful harvest.
Signs of Ripeness
Knowing when your winter squash is ready makes all the difference between a squash that stores for months and one that rots in a week. You’ll want to check three key indicators before you reach for your pruning shears.
Let’s look at the telltale signs that your squash has reached peak maturity.
Stem Dryness
Think of your squash’s stem as its personal maturity badge—when it shifts from supple green to crisp brown, you’re witnessing the plant’s final curtain call. That stem dryness signals perfect harvest timing, as moisture withdrawal creates a natural cork seal that extends storage life for months.
During stem inspection, you’ll notice the attachment becomes woody and brittle—this dryness level protects against rot during curing. Careful squash management matters here; leaving 2-3 inches of dried stem attached during harvesting prevents entry points for decay. Proper stem care ensures your winter squash reaches its full storage potential.
Rind Color
Your squash’s color transformation tells a clearer ripeness story than any calendar date ever could—those vivid hues aren’t just pretty, they’re your harvest green light. During visual inspection, watch for these ripeness signs:
- Green streaks vanish completely as skin texture matures
- Uniform color spreads across the entire rind—no pale patches remain
- Matte finish replaces glossy sheen, signaling ripe winter squash
- Deep, saturated tones emerge: butternut’s tan, acorn’s forest green
- Color change pairs with rind hardness for reliable harvesting cues
This rind color shift ensures maximum storage potential for months ahead.
Weight and Size
Mature winter squash feel substantial when you lift them—that heft confirms they’ve hit their ideal harvest timing. Butternut squash average 3 to 5 pounds per fruit, while acorn varieties usually weigh 1 to 2 pounds at maturity. Sweet Meat squash can reach 10 to 20 pounds, and kabocha falls between 3 and 6 pounds.
Size consistency across your planting signals the field’s nearing perfect harvest stage, giving you confidence that curing and storage will deliver maximum shelf life. Understanding the different squash varieties is essential for determining the best harvest time.
- Small squash varieties like Gold Nugget and Mini Jack mature at 1 to 2 pounds
- Mid-range fruit size includes butternut and kabocha at 3 to 6 pounds
- Large winter squash such as Sweet Meat can exceed 10 pounds when fully developed
Weight ranges vary dramatically between squash varieties, so know your cultivar’s target before harvesting.
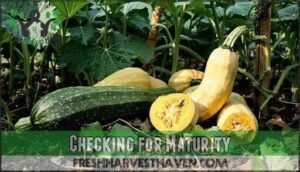
Checking for Maturity
Once your squash looks ready, you’ll want to confirm it’s truly mature before cutting it from the vine. Three quick tests—checking the rind, observing color shifts, and examining the stem—will tell you if it’s time to harvest.
Here’s what to look for in each.
Rind Hardness
Press your fingarnail into the rind—if it slides in easily, that squash isn’t ready yet. A ripe winter squash boasts a rock-hard skin texture that resists even firm pressure.
This hardness test is your most reliable indicator before harvesting. Rind thickness develops as the squash matures, creating that impenetrable barrier essential for curing and storage success.
Once you’ve confirmed proper rind coloration and squash durability through this simple check, you’re looking at months of shelf life ahead.
Color Changes
Most winter squash varieties signal their readiness through a dramatic shift in skin tone—what started as green gradually transforms into the warm, earthy colors you’re hoping to see. Rind coloration becomes uniform as maturity develops—butternut transitions to deep tan, while acorn types shift to dark green or orange.
These color shifts serve as reliable visual cues for harvesting winter squash. Watch for skin hardening alongside these hue indicators, since true ripeness requires both color consistency and texture changes for successful storage.
Stem Hardening
Think of the stem as nature’s own harvest alarm—when it shifts from pliable green to stiff brown, you’re looking at one of winter squash’s most dependable maturity signals. Stem inspection reveals this hardening process through touch—run your finger along the attachment point to feel the shift from soft tissue to woody cork.
Dry stem tips confirm readiness, indicating your squash has completed its nutrient transfer and won’t benefit from additional vine time before harvesting.
This hardened stem sign directly influences curing success and storage longevity.
Pre Harvest Preparation
Before you pick up your pruners, a little preparation goes a long way toward protecting your harvest. Clear the area around your plants, check each squash for any damage, and make sure you’re ready to manage them gently.
These simple steps set you up for a successful harvest that’ll keep your squash fresh for months.
Cleaning The Area
Before you even think about snipping that first squash from the vine, take a good look around—your garden workspace needs to be as clean as your kitchen counter on prep day. Clear away fallen leaves, weeds, and debris from around each plant to prevent contamination during harvest time. This soil sanitation step is vital for proper squash storage later.
Sweep clean pathways between rows for easy movement and weed control. Don’t forget tool maintenance—wipe down your pruners and knives with rubbing alcohol. This garden cleanup reduces disease spread and sets you up for post-harvest care success.
Inspecting for Damage
Once your harvest zone is spotless, run your hands along each squash like you’re checking fruit at the farmers’ market—you’re hunting for any flaw that could sabotage months of careful storage. Your visual inspection should catch soft spots, cracks, or punctures in the skin that invite rot during curing.
Check the stem attachment point—loose or damaged stems won’t protect the fruit. Look for pest holes, mold patches, or discoloration that signals trouble ahead. This damage assessment determines which squash gets stored and which gets eaten first.
Handling With Care
Your pre-harvest inspection means nothing if rough management undoes all that careful scouting—treat each squash like it’s made of glass from this moment forward. Gentle management separates growers who achieve six-month storage from those watching their harvest rot by November.
Gentle handling from vine to storage separates six-month success from November rot—treat each squash like glass during harvest
Here’s your damage control checklist:
- Support the entire fruit when lifting—never yank by the stem alone
- Use padded containers or wheelbarrows as harvest tools to cushion transport
- Place squash gently, avoiding drops or bumps that compromise the rind
One bruise today becomes mold during curing. Proper squash support now protects months of maturity you’ve invested since spring planting.
Cutting The Squash
Once you’ve determined your squash is ready, it’s time to cut it free—but how you make that cut matters more than you might think. The right technique protects your harvest from rot and damage during storage.
Let’s walk through the three key steps that’ll keep your squash in top shape for months to come.
Using Sharp Tools
When you grab the wrong tool for harvest day, you’re setting yourself up for crushed rinds, torn stems, and a whole lot of unnecessary frustration. Sharp blade quality matters more than you’d think—dull pruning shears crush tissue instead of cutting cleanly, creating entry points for rot during curing and storage. Invest in bypass pruners with comfortable grips and practice proper cutting techniques before harvesting begins.
Clean cuts heal faster and resist infection better than ragged tears.
Tool maintenance keeps your garden shears harvest-ready:
- Sanitize between plants using rubbing alcohol to prevent disease transmission
- Sharpen blades monthly during growing season for smooth, clean cuts
- Choose bypass over anvil pruners for living plant tissue
- Test cut thickness on practice stems before approaching your squash
- Follow pruning safety by keeping fingers clear of blade paths
Leaving a Stem
That clean cut you just made won’t mean much if you leave your squash sitting there without its protective grip. Aim for 1-2 inches of stem length during harvesting—this creates a natural barrier against bacteria and mold during curing and storage. Think of it like leaving the cap on a bottle; stem removal basically unseals your squash, inviting decay within weeks instead of months.
Stem health matters as much as stem length. You’ll want woody, brown tissue that’s already begun drying naturally. If the stem’s still green and pliable, you’ve jumped the gun. During stem management, grip the squash body—never yank or twist the stem itself. That’s how you accidentally break it flush with the fruit, eliminating the protection you worked all season to preserve. Proper stem care means treating this small attachment point like the gatekeeper it’s for successful winter squash storage.
Avoiding Damage
One careless bump during harvest can turn a three-month storage prize into next week’s compost pile. Support each squash from underneath while cutting—don’t let it drop or roll. Inspect the fruit for soft spots before storage, since damaged skin compromises curing success.
Clean your pruners between cuts to prevent disease spread, and place harvested squash on cardboard rather than bare soil. Gentle management from vine to storage shelf protects your investment and extends shelf life dramatically.
Curing Winter Squash
Once you’ve harvested your winter squash, curing becomes your next priority. This process toughens the skin, heals minor nicks, and dramatically extends storage life—transforming a good harvest into months of fresh eating.
Here’s how to cure your squash properly using different methods.
Sun Curing
If you’ve ever left a freshly picked tomato on a sunny windowsill to ripen that last little bit, you already know the magic of sun curing—and your winter squash deserves the same treatment.
Place your harvested squash in direct sun exposure where warm temperatures between 80-85°F work their hardening magic on the skin. Ten days of this natural curing method does the trick—just rotate each squash daily so all sides get equal treatment.
This simple step toughens the rind and equips your harvest for months of dry storage ahead.
Indoor Curing
For squash that won’t see the sun—maybe because weather turned or space ran short—an indoor curing station works just as well. Set up your harvesting space where you can hold temperatures steady at 75-85°F with humidity around 75-80%. Good air circulation prevents mold, so crack a window or run a fan.
Let your winter squash cure for 10-14 days, checking for soft spots that signal trouble. This controlled indoor climate perfects the curing process, giving you reliable storage solutions that rival any sun-cured batch.
Monitoring for Spoilage
Daily vigilance during the curing phase separates a bountiful winter stash from a compost pile disaster. Run your hands over each squash, feeling for soft spots that signal the start of fruit decay. Here’s what demands your attention:
- Soft patches indicating internal rot
- Discolored areas showing mold development
- Moisture accumulation between squash
- Pest entry points like tiny holes
- Off odors suggesting spoilage
Catching these spoilage signs early protects your entire harvest and maximizes shelf life through proper storage methods and mold prevention.
Storing Winter Squash
Once you’ve cured your winter squash, proper storage keeps them fresh for months. The right conditions prevent spoilage and maintain quality throughout the season.
Let’s look at three key factors that’ll help your harvest last.
Optimal Storage Conditions
After curing comes the critical phase: creating ideal storage conditions. Keep your winter squash at 50-55°F to prevent premature decay—temperatures below 50°F cause chilling injury that can slash shelf life by 30%. Maintain humidity levels between 50-70% to balance moisture retention without encouraging rot.
Storage containers should allow air circulation; never stack squash directly on top of each other, as contact points trap moisture and accelerate spoilage. Butternut varieties thrive for 2-7 months under these conditions, while acorn types store 1.5-3.5 months. Darkness preserves rind color and extends your harvest’s bounty.
Preventing Ethylene Buildup
Ethylene gas acts like a ripening domino—once one fruit releases it, the chain reaction can prematurely age your entire winter squash stash. That’s why ethylene management matters: isolate your cured squash from ethylene producers like apples, bananas, and ripening tomatoes.
Verify your storage atmosphere includes proper ventilation—stagnant air concentrates gas and accelerates decay.
For enclosed spaces, ethylene absorbers provide an extra layer of gas control, helping your harvest reach its full storage potential.
Rotating Squash
Just like ethylene control protects your squash from invisible threats, physical rotation guards against the visible wear that comes from sitting still too long. When winter squash sits in one position, flat spots develop that weaken the protective rind. Here’s your rotation routine:
- Turn each squash weekly to redistribute pressure points
- Inspect for soft spots during every rotation session
- Remove any showing decay immediately to protect neighbors
- Shift storage locations to optimize air circulation
- Plan next year’s crop rotation and garden planning now
Smart squash rotation extends harvest time enjoyment while proper seed selection and soil preparation set up future seasons. Different squash varieties have varying storage needs, so adjust your rotating squash schedule accordingly.
Harvesting at Optimal Time
Timing your harvest perfectly makes all the difference between squash that lasts months and fruit that spoils within weeks. You’ll want to pick your winter squash when it’s fully mature but before the weather turns too harsh.
Let’s look at two key strategies that’ll help you nail that ideal moment every time.
Avoiding Overripe Squash
Leaving winter squash on the vine beyond peak maturity is like letting a perfectly brewed cup of coffee sit until it’s cold and bitter—you’ve missed the window. Overripe signs appear quickly: the rind softens, developing wrinkled patches or mushy spots that compromise storage potential. Inside, the flesh turns watery and bland as sugars break down, while seeds grow excessively large and stringy.
Regular ripeness testing helps you catch maturity at its ideal point—when the rind resists your thumbnail and the stem has browned completely.
Each squash variety has its own harvest timing window, so know your cultivar’s typical days to maturity and monitor accordingly for peak flavor.
Harvesting in Morning
When you’ve nailed ripeness and dodged the overripe trap, the clock becomes your best friend—and early hours make all the difference. Morning harvest timing gives your winter squash the advantage it needs for long-term storage success. Cool morning air keeps fruit firm during manipulation, reducing stress that compromises quality later. Here’s why harvesting techniques favor early picking:
- Lower temperatures protect rind integrity during transport
- Morning light provides ideal squash inspection conditions
- Reduced heat stress preserves cellular structure
- Stems cut cleanly in cooler conditions
- You’ll finish before midday heat intensifies
Schedule your harvest time between dawn and 10 a.m. for best results—your winter squash will reward careful timing with months of reliable storage.
Post Harvest Care
Once you’ve brought in your winter squash, the work isn’t quite over—what you do next determines how long your harvest stays fresh. The right post-harvest care protects your squash from rot and keeps it shelf-stable for months.
Here’s what you need to focus on to preserve your hard-earned crop.
Cleaning Squash
Your freshly harvested squash might look farm-ready, but a quick cleanup now can mean the difference between months of storage success and early rot. Gently brush off loose soil with a soft cloth—this simple squash brushing prevents pathogens from shortening your shelf life.
Here’s your post-harvesting game plan:
| Method | Temperature/Approach | Purpose |
|---|---|---|
| Squash Brushing | Dry, soft cloth | Removes field debris |
| Fruit Sanitizing | 135-140°F water dip, 3 min | Kills surface pathogens |
| Rind Scrubbing | Gentle wipe only | Clears stubborn dirt |
| Vegetable Washing | Room temp rinse (if needed) | Final cleanup before curing |
Skip aggressive scrubbing—damaging the rind creates entry points for bacteria that’ll sabotage storage later.
Drying Squash
Moisture left on the rind after cleaning is like leaving a welcome mat out for mold—so let’s make sure every squash gets bone-dry before storage. After squash cleaning, proper moisture control sets the stage for successful curing and storing winter squash long-term.
Here’s your air circulation strategy for squash dehydration:
- Pat squash with clean towels immediately after washing
- Arrange specimens on elevated racks in a warm, dry space with strong air circulation
- Allow 24-48 hours for complete surface drying before curing begins
- Check for any damp spots where the rind meets the stem
Dry storage starts with winter squash maturity verification and ends with perfect moisture control—your winter squash harvesting efforts deserve this attention.
Regular Inspection
Each week throughout your storage period, scan every squash for the telltale signs that separate keepers from compost candidates. Run your fingers across each rind checking for soft spots or wrinkles—visual cues that fruit quality is declining.
Squash monitoring catches problems before they spread; one spoiling specimen releases ethylene that accelerates decay in neighbors. Check stem attachments for mold, inspect for pest damage, and rotate your winter squash to examine all sides.
These management techniques and storage checks extend shelf life dramatically, protecting months of harvesting and curing effort with just minutes of weekly attention.
Frequently Asked Questions (FAQs)
How do I know when winter squash is ready to pick?
Three visual cues of maturity tell you harvest timing is right: the rind resists fingernail puncture, the stem turns woody and brown, and tapping the fruit produces a hollow sound—reliable ripeness signs across any squash variety.
How long can you leave winter squash on the vine?
Think of vine life as a ticking clock—your winter squash matures best right there until frost threatens. You can safely leave fruit on the vine until vines die back naturally or temperatures drop near freezing.
Harvest timing depends on squash variety and fruit maturity, but don’t risk freezing damage that’ll ruin storage duration.
What happens if you pick winter squash too early?
Harvesting immature winter squash leads to soft rinds that spoil quickly—often within weeks rather than months.
The flesh stays bland and watery since sugars haven’t fully developed.
Without proper ripeness, even careful curing won’t extend shelf life.
What do squash plants look like when ready to harvest?
As harvest time approaches, you’ll see the vines naturally decline—leaves yellowing and stems turning woody brown. The stem connecting your squash hardens considerably, becoming dry and brittle.
Most strikingly, the rind develops impressive thickness and hardness, resisting puncture when you press your fingernail against the skin surface.
Can you leave squash on the vine too long?
Squash left too long can suffer from vine overstay consequences. For instance, a perfectly ripe butternut exposed to unexpected frost develops soft spots overnight.
Yes, extended vine health deteriorates—expect fruit spoilage from fungal infections, freezing damage, and hungry wildlife targeting your winter squash before proper curing.
What does winter squash look like when ripe?
Ripe winter squash shows unmistakable ripeness signs: hard, thick skin that resists fingernail puncture, deep vibrant fruit color, and a dried brown stem. Tap the rind—a hollow sound confirms maturity.
These skin patterns and rind texture improvements extend shelf life markedly.
How big should I let my squash get before I pick it?
Size matters with winter squash—let fruit reach full maturity before picking. You’ll know they’re ready when rinds harden, colors deepen, and a hollow sound echoes when tapped.
Unlike summer squash, bigger means better flavor and longer storage.
When should you harvest winter squash?
The right harvest timing comes when your squash’s rind resists a fingernail scratch and the stem transitions to a dry, brown state. Full color development signals squash maturity—aim to complete harvesting winter squash before frost threatens, as freezing temperatures compromise fruit quality and storage methods.
how do I prepare yellow squash?
Slice your yellow squash into thin rounds or half-moons for even cooking. Sauté in butter with garlic for 3-4 minutes until tender but still slightly firm.
Overcooking turns it mushy and dulls that delicate, sweet flavor you’re after.
When is the best time to pick squash?
Fruit maturity trumps calendar dates every time. You’ll know your winter squash is ready when the rind resists your thumbnail—that hardness signals proper maturation.
For winter varieties, harvest timing hinges on beating the first frost while summer squash shines when picked young and tender.
Conclusion
What if you could turn three months of growing into six months of eating? Nailing the best time to harvest winter squash means watching your stems dry, your rinds harden, and your frost forecast carefully—then acting decisively when all three align.
Cure your haul properly in warm, dry air for ten to fourteen days, store it in cool darkness, and you’ll have squash that laughs at winter’s scarcity. Your patience at harvest pays dividends every time you crack open a perfectly preserved butternut in February.
- https://vegcropshotline.org/article/maximizing-pumpkin-quality-from-harvest-to-storage/
- https://health.extension.wisc.edu/hotm/winter-squash-activity-guide/
- https://www.themarthablog.com/2018/09/harvesting-the-winter-squash.html
- https://extension.sdstate.edu/harvesting-and-storing-pumpkins-and-winter-squash
- https://www.mofga.org/resources/crops/harvesting-winter-squash-for-flavor-and-storage/


