This site is supported by our readers. We may earn a commission, at no cost to you, if you purchase through links.
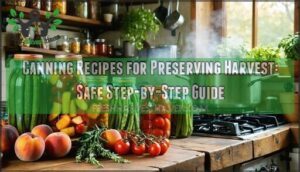 You’ll preserve your harvest’s peak flavor using two main canning methods: water bath canning for high-acid foods like tomatoes, jams, and pickles, and pressure canning for low-acid vegetables and meats. Start with quality produce, sterilize your jars, and follow tested recipes exactly—never reduce vinegar or lemon juice amounts since they’re essential for safety.
Water bath canning reaches 212°F, while pressure canning hits 240°F to eliminate botulism risks. Proper headspace and seal inspection prevent spoilage. The secret lies in matching your canning recipes for preserving harvest to the right method and maintaining precise acidity levels throughout the process.
Table Of Contents
- Key Takeaways
- Essential Canning Methods and Safety
- Preparing for Successful Canning
- Step-by-Step Water Bath Canning Recipes
- Pressure Canning Recipes for Harvest Foods
- Storing and Inspecting Home-Canned Goods
- Frequently Asked Questions (FAQs)
- How long will canned food last in a mason jar?
- What foods should not be canned?
- Where can I find safe canning recipes?
- What fruits can be preserved by canning?
- How do you prepare for a canning harvest?
- How do you preserve a cucumber harvest?
- Is home canning easy?
- Should food preservation be a top priority when Canning?
- Do you have Canning ideas & recipes ready?
- What foods can you preserve through canning?
- Conclusion
Key Takeaways
- You’ll need to match your canning method to your food’s acidity level – use water bath canning for high-acid foods like tomatoes and pickles, and pressure canning for low-acid vegetables and meats to prevent dangerous botulism.
- Never modify the acid ingredients in tested recipes – you can adjust spices and seasonings freely, but don’t reduce vinegar or lemon juice amounts since they’re essential for maintaining safe acidity levels.
- Proper equipment sterilization and seal inspection prevent spoilage – sterilize jars before use, check for cracks or chips, use new lids every time, and regularly inspect stored jars for bulging lids or unusual odors.
- Follow precise processing times and storage guidelines for food safety – stick to tested recipes exactly, maintain correct headspace, process for the full recommended time, and store sealed jars in cool, dark places for up to one year.
Essential Canning Methods and Safety
You’ll master two essential canning methods that keep your harvest safe and delicious for months.
Understanding when to use water bath versus pressure canning prevents dangerous bacteria like botulism while preserving your food’s quality and flavor.
Water Bath Vs. Pressure Canning
Your canning journey starts with choosing the right method for your harvest.
Water bath canning uses boiling water at 212°F for high-acid foods like jams and pickles, while pressure canning reaches 240°F to safely process low-acid foods such as vegetables and meats.
Understanding acid levels determines your canning equipment needs and processing times, ensuring food safety through proper recipe selection and approved canning methods.
High-Acid and Low-Acid Foods
Understanding food pH levels determines your canning method choice. High-acid foods like fruits, tomatoes with added acid, and pickles have pH below 4.6, making them safe for water bath canning.
Low-acid foods including vegetables, meats, and beans require pressure canning to eliminate botulism risks through higher temperatures. To maximize their nutritional value, consider gentle steaming methods when preparing vegetables for canning.
Preventing Botulism and Spoilage
Botulism poisoning poses serious risks when safe canning practices aren’t followed. You must use approved recipes and proper acidity levels for high-acid foods versus low-acid foods.
Watch for spoilage signs like swollen lids, fizzing, or unusual odors. Seal failures require immediate refrigeration. Safe storage in cool, dark places prevents contamination and maintains your preserved harvest’s quality.
Safe Recipe Modifications
Smart modifications can enhance your canning recipes without compromising safety. You can adjust herbs, spices, and dry seasonings freely in approved recipes. Sugar substitutions work with low-sugar pectin, while salt reductions are safe in vegetable recipes.
Never reduce vinegar or lemon juice amounts, as acid adjustments affect safety. Avoid thickening agents and ingredient swaps that change acidity levels in home canning recipes.
Preparing for Successful Canning
Proper preparation is the foundation of successful canning that keeps your family safe and your preserved foods delicious.
You’ll need to select peak-quality produce, sterilize all equipment, and measure ingredients precisely to guarantee safe processing and superior flavor.
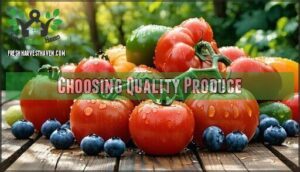
Choosing Quality Produce
Quality produce makes or breaks your canning success. Choose fruit and vegetables at peak seasonality for maximum flavor and acidity. Check ripeness indicators carefully – firm tomatoes with deep color, berries without soft spots, and crisp vegetables work best.
Avoid bruised produce, which harbors bacteria. Organic vs. conventional doesn’t affect safety, but fresher is always better. Proper storage before canning maintains quality until processing.
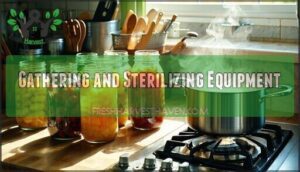
Gathering and Sterilizing Equipment
Once you’ve selected your best produce, gather your canning equipment and inspect every piece. Check canning jars for chips or cracks that could cause seal failure. Examine canning lids for dents or scratches. Clean all canning tools with hot soapy water.
Sterilize jars by boiling them for ten minutes or running them through your dishwasher’s sanitize cycle. Keep jars hot until filling to prevent thermal shock. A jar lifter simplifies hot jar handling. Proper tool maintenance and safe handling guarantee successful preservation results.
Using Jars, Lids, and Rings Properly
Your jars must pass inspection before each use. Check for cracks, chips, or nicks that compromise sealing. Wash canning jars in hot soapy water, then keep them warm.
You can find various sizes available to suit different canning needs. Use new canning lids every time—their sealing compound can’t handle reuse. Apply screw bands finger-tight only, allowing air to escape during processing.
Remove rings after cooling to prevent rust buildup.
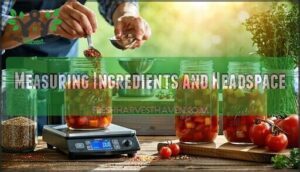
Measuring Ingredients and Headspace
Precise canning recipes depend on accurate measurements and proper headspace for safe preservation. Follow recipe proportions exactly, as ingredient accuracy affects acidity levels and processing safety. Use standard measuring tools and maintain specified headspace in each jar.
- Your family’s safety rides on exact measurements – never guess quantities
Precision in canning isn’t optional—it’s what stands between your family and foodborne illness.
- That perfect seal depends on proper headspace – too much or too little ruins everything
- Recipe adjustments can turn safe foods dangerous – stick to tested formulas
Headspace allows for food expansion during processing. Most canning recipes require ¼ to ½ inch headspace. Remove air bubbles before sealing jars. At higher altitudes, adjust processing times according to tested guidelines for your elevation. Consider using seasonal fall produce for the best flavors.
Step-by-Step Water Bath Canning Recipes
Water bath canning transforms your seasonal harvest into shelf-stable treasures using simple boiling water processing.
You’ll master four essential recipes that preserve summer’s flavors while following proven safety guidelines that protect your family year-round, using simple boiling water processing.
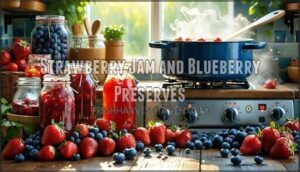
Strawberry Jam and Blueberry Preserves
For summer’s sweetest bounty, combine four cups fresh strawberries or blueberries with three cups sugar and one package pectin. Crush berries partially, leaving some chunks for texture.
Bring mixture to rolling boil for one minute, then ladle into sterilized jars. Process in boiling water bath for ten minutes, ensuring proper headspace and seal.
Tomato Sauce and Salsa
Canning tomatoes requires careful attention to sauce acidity levels for home canning safety. You’ll need an approved recipe that maintains proper pH balance through added lemon juice or citric acid.
The canning process involves preparing your base sauce, then exploring salsa variations with peppers and onions. Recipe innovation within safety guidelines lets you create unique flavor combinations while following established canning safety protocols for reliable preservation results.
A great way to use some of your harvest is to create a garden harvest salsa, which can be a part of canning safety protocols for reliable preservation results.
Pickles and Relishes
Crisp vegetables make the most satisfying pickles and relishes through proper canning process techniques. You’ll master brine recipes using vinegar ratios that guarantee food preservation safety while creating spicy pickles or sweet relishes.
Pickle fermentation requires different methods than water bath canning. Relish variations depend on vegetable combinations and pickling spice blends for superior flavor development.
No-Cook and Low-Sugar Jam Options
No-cook jams offer a fresh alternative to traditional preserves, requiring only fruit, natural sweeteners, and pectin alternatives like chia seeds. These freezer jam recipes skip the heat process but need frozen storage.
Try fruit combinations with artificial sweeteners or honey. Low-sugar jellies use specialized pectin for gelling without compromising safety or taste.
Modified pectins are often used to guarantee proper gelling occurs without high sugar content, which is a key aspect of making no-cook jams.
Pressure Canning Recipes for Harvest Foods
When you’re ready to preserve low-acid vegetables, soups, and meats from your harvest, pressure canning becomes your essential method for safe food storage.
You’ll need to master proper processing times and safety procedures to guarantee your canned goods remain both delicious and safe to eat.
Green Beans and Mixed Vegetables
Fresh green beans require pressure canning since they’re low-acid foods. You’ll want to trim ends and cut beans into uniform pieces for even processing. Pack hot or raw into jars, leaving one-inch headspace. Add salt if desired for flavor. Process pints for 20 minutes, quarts for 25 minutes at 10 pounds pressure.
Mixed vegetable blends follow similar guidelines but require the longest processing time of any ingredient included. Green beans offer cardiovascular health benefits due to their antioxidants and fiber.
Canning Soups, Meats, and Beans
In terms of meat canning safety, proper preparation is your first line of defense. Trim all fat and bruising from meats before packing jars.
For bean pre-soaking, soak dried legumes overnight and rinse thoroughly before processing. Never add soup thickening agents like flour or cornstarch to jars—they prevent proper heat penetration during pressure canning, creating dangerous conditions for low-acid foods preservation.
These guidelines help guarantee safe adjustments to recipes.
Low-Acid Food Processing Times
Processing times for LowAcid Foods vary substantially based on food type and preparation method. You’ll need precise timing to guarantee safety when pressure canning vegetables, meats, and beans.
Follow these processing time guidelines for safe pressure canning:
- Vegetable Processing – Green beans need 20-25 minutes, carrots require 25-30 minutes at 11 psi
- Meat Processing – Most meats need 75-100 minutes depending on cut and Jar Size
- Bean Processing – Dried beans require 75-90 minutes, fresh beans need 20-25 minutes
- Altitude Adjustments – Add 1 psi per 1,000 feet above sea level for dial gauges
- Canning Vegetables – Dense foods like corn need 55 minutes due to slower heat penetration
Your pressure canner must maintain proper pressure throughout the entire processing time for food safety.
Pressure Canner Safety Tips
Proper pressure canner safety prevents dangerous lid explosions and guarantees successful preservation of low-acid foods. Always follow your approved recipe exactly and maintain your canning tools regularly. To guarantee accurate readings, consider purchasing a new pressure gauge.
The following safety checks are crucial for safe and successful canning:
| Safety Check | Action Required |
|---|---|
| Venting Importance | Vent steam for 10 minutes before pressurizing |
| Gauge Calibration | Test pressure gauge annually for accuracy |
| Altitude Adjustments | Increase pressure for elevations above 1,000 feet |
| Canner Maintenance | Inspect gaskets and safety valves before each use |
| Lid Security | Guarantee lid locks properly before processing |
Storing and Inspecting Home-Canned Goods
Once your canning is complete, proper storage and regular inspections guarantee your preserved foods remain safe and delicious for months to come.
Following simple storage guidelines and knowing what signs to watch for will help you confidently enjoy your home-canned harvest all year long.
Labeling and Shelf Life Guidelines
After completing your pressure canning projects, label each jar with contents and processing date for proper rotation methods. Home pantry organization requires systematic date coding to track shelf life effectively.
Your shelfstable canned goods maintain quality for approximately one year when stored correctly. Check seals regularly and follow discarding rules for any compromised jars. Food preservation success depends on accurate labeling requirements and consistent monitoring of your preserved harvest, which relies on proper rotation methods.
Proper Pantry Storage Conditions
Once you’ve labeled your jars, focus on creating the ideal environment for long-term storage. Keep your home pantry between 50-70°F with low humidity levels to prevent rust and seal deterioration. Store jars away from direct light exposure in dark cabinets or closets, as sunlight degrades food quality.
Implement pest prevention by keeping storage areas clean and sealed. Place jars upright on sturdy shelves where temperature control remains consistent year-round for superior shelf-stable food preservation.
Detecting Spoilage and Unsafe Seals
Inspect your canned jars regularly using visual cues and odor detection methods. Check for bulging lids, which indicate dangerous gas production from spoilage organisms. Press each lid’s center – properly sealed lids won’t flex or show lid deflection.
A properly sealed jar should stay silent – any pop, hiss, or give under pressure means trouble
Remove rings and examine for leakage, bubbles, foam, or unusual texture changes. Cloudy liquids, off-colors, and strange smells signal contamination requiring immediate disposal for safe food preservation.
Using Up Unsealed or Older Jars
When jars fail to seal, refrigerate them immediately and use within two weeks. These unsealed canning jars become your first priority for meals. Reprocessing unsealed jars within 24 hours works if you haven’t opened them yet. Simply reheat the contents, add to sterilized jars with new lids, and process again using your original canning equipment timing.
For older jar safety with properly sealed products past their prime, inspect carefully before opening. Creative recipe ideas include turning older canned tomatoes into fresh pasta sauce or transforming pickles into relish. Consider donation options for excess sealed jars to food banks, but never donate anything with food safety concerns or questionable seals. This includes being mindful of food safety concerns and ensuring the quality of donated items, such as sealed jars, and avoiding items with questionable seals.
Frequently Asked Questions (FAQs)
How long will canned food last in a mason jar?
Properly canned foods in mason jars last about one year when stored in cool, dark places.
You’ll want to check seals regularly and discard any jars showing signs of spoilage like mold or off-smells.
What foods should not be canned?
Don’t can dairy products, pasta, rice, flour-based items, or fresh herbs – they’re tricky customers that won’t play nice with standard canning methods and could harbor harmful bacteria.
Where can I find safe canning recipes?
You’ll find tested canning recipes through the USDA’s Complete Guide to Home Canning, Ball canning guides, university extension services, and reputable sites like HealthyCanning.com for guaranteed safety.
What fruits can be preserved by canning?
You can safely preserve most fruits through water bath canning, including apples, berries, cherries, peaches, pears, and citrus. Their natural acidity makes them perfect candidates for this preservation method.
How do you prepare for a canning harvest?
While fresh produce demands immediate attention, proper preparation transforms chaos into organized preservation success. Gather clean jars, lids, and tested recipes first.
Wash everything thoroughly, keep jars hot, and prepare your workspace before starting any canning project, which involves organized preservation success.
How do you preserve a cucumber harvest?
You’ll pickle cucumbers using water bath canning since they’re high-acid. Slice them, pack in sterilized jars with vinegar brine, then process in boiling water for safety.
Is home canning easy?
Home canning isn’t difficult once you understand the basics, but it requires attention to detail and following tested recipes exactly. With proper equipment and safety guidelines, you’ll quickly master this rewarding skill.
Should food preservation be a top priority when Canning?
Food safety should be your number one priority when canning.
You’re dealing with botulism prevention here—one mistake can be dangerous.
Follow tested recipes exactly, use proper processing times, and don’t cut corners on safety steps.
Do you have Canning ideas & recipes ready?
Steam rises from bubbling jars as you transform summer’s bounty into shelf-stable treasures. Yes, I’ve extensive canning recipes ready.
From classic strawberry jam and dill pickles to salsa verde and green beans, you’ll find tested recipes for water bath and pressure canning methods.
What foods can you preserve through canning?
You can preserve fruits (apples, berries, peaches), vegetables (tomatoes, beans, corn), pickles, jams, jellies, sauces, salsas, and soups through canning.
High-acid foods use water bath canning, while low-acid foods require pressure canning for safety.
Conclusion
Mastering canning recipes for preserving harvest transforms your garden’s bounty into year-round sustenance, though some might argue it’s merely an expensive hobby disguised as frugality. You’ve learned the critical differences between water bath and pressure canning methods, essential safety protocols, and proper storage techniques.
These tested canning recipes for preserving harvest guarantee your family enjoys safe, flavorful foods while avoiding costly grocery store prices during off-seasons. Mastering canning recipes can be highly rewarding, and with the right techniques, you can enjoy your harvest all year round.
- https://www.reddit.com/r/Canning/comments/1bbmcoa/worried_we_messed_up_jam_batch_for_partysafety/
- https://www.youtube.com/watch?v=oSd2aS7sWQo
- https://tastecooking.com/freezer-makes-best-jam-recipe/
- https://extension.umn.edu/preserving-and-preparing/low-sugar-alternatives-jams-and-jellies
- https://utia.tennessee.edu/humphrey/wp-content/uploads/sites/121/2020/05/Low-or-No-Sugar-in-Jams-Jellies-and-Preserves.pdf

