This site is supported by our readers. We may earn a commission, at no cost to you, if you purchase through links.
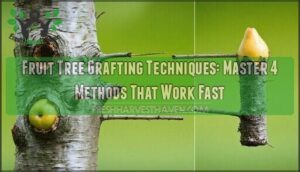
Success depends on selecting compatible materials, timing your cuts correctly, and maintaining proper care during the healing process.
Cleft grafting works well for beginners, while bark grafting excels in spring when sap rises.
Whip and tongue grafting requires matching diameters, and bud grafting suits stone fruits perfectly.
Each method transforms separate plants into productive trees that combine desired fruit characteristics with strong root systems.
The secret lies in understanding which technique matches your specific tree variety and growing conditions.
Table Of Contents
- Key Takeaways
- Grafting Basics Explained
- Selecting Rootstock
- Choosing Scion Wood
- Grafting Techniques
- Preparing for Grafting
- Post-Grafting Care
- Common Grafting Mistakes
- Frequently Asked Questions (FAQs)
- What is the most successful grafting technique?
- What month do you graft fruit trees?
- What are the 5 requirements for successful grafting?
- How to graft fruit trees step by step?
- Which fruit trees can you graft together?
- What are the 3 most common grafting methods?
- What are the 5 grafting techniques?
- How long does it take for grafts to heal?
- Can grafted trees grow in containers successfully?
- How does grafting affect tree lifespan?
- Conclusion
Key Takeaways
- You’ll master four proven grafting techniques by selecting compatible rootstock and scion wood, then aligning their cambium layers for successful fusion
- Choose your grafting method based on tree size and timing – cleft grafting works for beginners, bark grafting suits spring conditions, whip and tongue requires matching diameters, and bud grafting excels with stone fruits
- Success depends on proper preparation including sharp sterilized tools, healthy dormant scion wood collected in late winter, and creating clean cuts that maximize cambium contact between parts
- You’ll need consistent aftercare for 4-6 weeks including proper watering, secure grafting tape, protection from pests and diseases, and monitoring for callus formation at the graft union
Grafting Basics Explained
Grafting joins two plants into one by connecting a rootstock and scion at their cambium layers.
You’ll control tree size through rootstock selection while the scion determines what fruit you’ll harvest.
Combining Rootstock and Scion
Grafting works by joining two separate trees into one plant. The rootstock forms the bottom half while the scion becomes the top portion. Together, they create a single tree with combined benefits.
Compatibility Factors matter for success:
- Rootstock and scion must share genetic influence from the same plant family
- Growth habit should match between both parts
- Disease transfer risks increase with poor graft compatibility
The graft union depends on cambium alignment for proper healing and union strength. Successful fruit production also relies on effective pollen transfer.
Importance of Cambium Layer
This green tissue acts like the tree’s lifeline.
You must align the cambium layers of both rootstock and scion for successful fusion.
When properly matched, these living cells create callus formation that bridges the two pieces.
This cambium alignment enables nutrient exchange between parts, ensuring graft healing and a strong graft union.
Determining Tree Height and Fruit Type
Your grafting success hinges on understanding how rootstock controls tree size while scion determines fruit characteristics.
This partnership shapes your orchard’s future through careful selection of compatible components.
Rootstock Impact on Your Trees:
- Dwarfing Rootstocks like M.9 keep apple trees under 8 feet, perfect for small yards but requiring permanent staking
- Semi-dwarf options such as M.26 produce 13-21 foot trees that balance manageable size with strong production
- Scion Influence determines exact fruit variety, flavor, and harvest timing regardless of rootstock choice
- Genetic Consistency through clonal rootstocks guarantees predictable tree vigor and fruiting patterns across your orchard
Selecting Rootstock
Your rootstock choice determines whether you’ll have a towering 30-foot tree or a manageable 8-foot dwarf that fits perfectly in your backyard.
Pick your rootstock like choosing a home’s foundation—it sets the size limits for everything built on top.
Like grafting at the wrong season—timing your choice perfectly determines whether your project takes root or fails
The right rootstock also controls disease resistance, soil tolerance, and how quickly your grafted tree starts producing fruit, which can be considered a key aspect of tree management, including soil tolerance.
Choosing Compatible Rootstock
Your success depends on matching rootstock compatibility with your scion variety.
Apples graft best to apple rootstock, while stone fruits like peaches work within the Prunus genus.
You can’t mix families – apples won’t bond with cherry rootstock.
Check your climate adaptation needs and soil requirements before selecting.
Disease resistance varies by rootstock type, so choose varieties that handle your local conditions and desired tree vigor.
Clonal Rootstock and Size Control
Clonal rootstock provides genetic consistency that you won’t get from seedling varieties.
Unlike unpredictable seedlings, these vegetatively propagated rootstocks deliver uniform size and early fruiting every time.
Dwarfing rootstocks keep your dwarf fruit trees manageable at 8 feet, while semi-dwarf options reach 13-21 feet.
Remember that smaller rootstocks need staking support since reduced roots can’t anchor larger trees effectively.
Selecting the right variety involves considering USDA hardiness zones, which is crucial for successful fruit growing and ensuring the trees thrive in their USDA hardiness zone with the right rootstock support.
Popular Rootstocks for Apple Trees
M.9 dwarf rootstocks create apple trees just 35-45% of standard size, perfect for tight spaces.
These clonal rootstock options like G.41 and Bud.9 need permanent staking but resist diseases better than seedling types.
Semi-dwarf choices such as M.26 produce medium-sized trees around 45-55% standard height.
Watch for suckering issues with certain varieties requiring annual removal to maintain healthy growth.
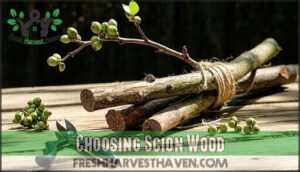
Choosing Scion Wood
Your scion wood choice makes or breaks your grafting success. You’ll need healthy, dormant wood from the exact fruit variety you want to grow.
Selecting Healthy Scion Wood
Healthy scion wood starts with selecting branches from disease-free trees during dormancy.
Look for pencil-thick wood (0.25-0.5 inches diameter) with plump, well-developed buds.
These buds should show no signs of damage or disease.
Choose wood that’s 6-8 inches long from last year’s growth.
Proper scion selection means identifying the exact variety you want since this determines your fruit type and quality.
You can also purchase quality grafting material online if needed.
Collecting and Storing Scion Wood
Timing matters when collecting scion wood during the dormant season.
Cut one-year-old shoots with a scion diameter of pencil thickness from healthy trees in late winter.
Bundle and label each variety immediately to avoid mix-ups.
Wrap in damp paper towels, seal in plastic bags, and refrigerate at 32-40°F.
Proper moisture control prevents drying while avoiding mold.
Storage duration shouldn’t exceed three months for best results.
For superior results, make certain you’re collecting scionwood during its period of dormancy to ensure dormant season collection is done correctly for best results.
Preparing Scion Wood for Grafting
Before the magic happens, you’ll need to prepare your scion wood like a surgeon preps for operation.
Start by cutting your dormant season scion wood into 4-6 inch sections, ensuring each piece has 2-3 healthy buds. Make clean cuts just below and above buds using sharp, sterilized pruners.
Choose scion diameter between 0.25-0.5 inches for best results.
Disease prevention starts here—inspect each cutting carefully. For specialized tasks, consider using scion wood pruners for ideal results, ensuring disease prevention is a priority.
Grafting Techniques
You’ll master four proven grafting methods that turn two plants into one thriving fruit tree.
Each technique suits different tree sizes and situations, giving you the skills to graft successfully every time.
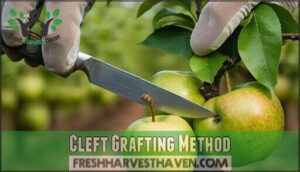
Cleft Grafting Method
When you’re tackling cleft grafting, you’ll need Cleft Grafting Tools and a sharp eye for Diameter Compatibility.
Slice the rootstock down the middle, then shape your scion into a neat wedge. Fit it snugly in the split.
Cleft Grafting Timing matters—late winter is best. Wrap everything for Post-Graft Protection.
Selecting the right grafting tools matters for success. This grafting method works well for fruit tree grafting beginners.
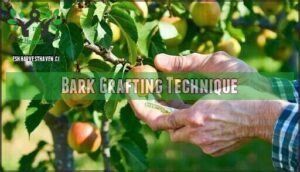
Bark Grafting Technique
During early spring, when the sap’s rising, bark grafting shines.
Choose rootstock with bark thick enough to peel back cleanly. Cut a slit, then insert your scion at the right depth for good cambium contact.
Secure the graft tightly with tape. For post-graft protection, cover with wax or wrap.
This fruit tree grafting method revives old trees fast.
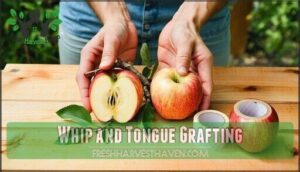
Whip and Tongue Grafting
Perfect whip and tongue grafting requires matching scion and rootstock diameters.
You’ll make interlocking cuts that create maximum cambium alignment—the green layer that guarantees grafting success.
Cut diagonal slashes on both pieces, then create tongue slots for secure fitting.
This grafting technique offers nearly 100% success rates when performed during ideal timing in late winter.
Secure grafts with parafilm tape.
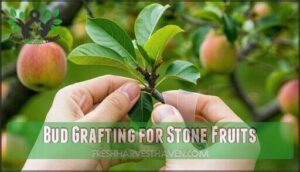
Bud Grafting for Stone Fruits
T-bud method works best for stone fruits like peaches and cherries.
You’ll cut a T-shape in your rootstock’s bark during late summer when it’s "slipping" easily. Select healthy budwood from one-year shoots, avoiding tender tips.
Insert the shield-shaped bud into your T-cut, then wrap tightly with budding tape. This grafting technique maximizes scion wood use since you only need one bud per graft.
Success rates exceed 80% with proper budding timing and stonefruit compatibility matching. It’s important to verify stonefruit compatibility to avoid graft failure.
Preparing for Grafting
Before you start grafting, you’ll need to prepare your rootstock and gather the right tools for success.
Proper preparation creates the ideal conditions for your graft to take hold and thrive.
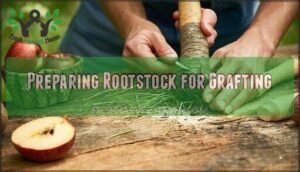
Preparing Rootstock for Grafting
Proper rootstock preparation sets the stage for successful grafting techniques.
Start by cutting your rootstock to 6-12 inches tall, making a clean cut just above a bud.
Remove any damaged bark or side branches that could interfere with the grafting process.
The cambium layer must be visible and healthy for superior graft healing.
Verify your grafting tools are sharp and sterile.
Choose rootstock that matches your scion diameter for better cambium alignment during the procedure.
Creating a Grafting Environment
Once your rootstock stands ready, focus on setting up the right grafting environment. Success depends on controlling key factors that promote healing and prevent infection.
Your grafting environment needs these conditions:
- Clean workspace – Sterilize all surfaces and tools with rubbing alcohol to prevent contamination
- Stable temperature – Maintain 65-75°F for ideal healing process and cambium fusion
- Proper humidity – Keep moisture levels around 80-90% using plastic covers or misting systems
Plant sanitation matters most during this stage. Environmental conditions directly impact graft success rates, so prepare your nursery setup carefully before starting any grafting techniques. Understanding pruning techniques is also vital for maintaining healthy trees after grafting.
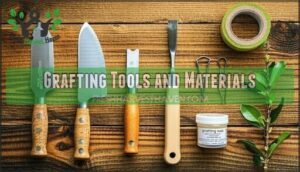
Grafting Tools and Materials
Success starts with sharp grafting knives featuring single-bevel blades for clean cuts.
You’ll need grafting tape or parafilm for securing unions, plus grafting wax to seal wounds.
Grafting chisel helps with cleft cuts, while securing clips hold everything tight.
Healing paste protects exposed areas.
Quality grafting tools and materials make the difference between thriving grafts and failed attempts.
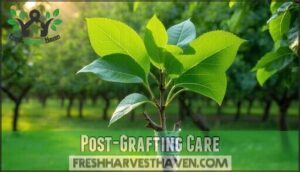
Post-Grafting Care
Your grafted tree needs proper care to establish a strong union and thrive. The next few months are critical for monitoring water, nutrients, pests, and growth patterns.
Watering and Fertilizing Grafted Trees
After setting up your grafting site, you’ll need to maintain proper tree hydration and nutrient levels.
Grafted trees require careful water schedules and specific fertilizer types to support nutrient uptake during the healing process.
Keep soil moisture consistent but not waterlogged to guarantee grafting success.
- Monitor soil moisture weekly using your finger test – stick it two inches deep into the soil around the base
- Apply balanced 10-10-10 fertilizer monthly during growing season, avoiding high-nitrogen blends that push excessive growth
- Water deeply once or twice weekly rather than frequent shallow watering to encourage strong root development
- Reduce fertilizer applications by half during the first year to prevent overstimulation of the healing graft union
Monitoring for Pests and Diseases
After proper watering and fertilizing, you’ll need to watch for threats that could derail your grafting success.
Check your trees weekly for aphid colonies, especially around graft unions where wounds attract pests.
Look for bacterial spots on leaves and fungal infections near soil level, as root rot shows up as yellowing foliage above ground.
Early pest control and disease management protect your investment better than reactive treatments.
Pruning and Training Grafted Trees
Beyond watching for pests and diseases, your grafted trees need proper tree pruning and branch training to develop strong structure.
Tree shaping during the first few growing seasons sets the foundation for healthy fruit production and graft healing.
- Remove suckers below the graft union to prevent rootstock from overtaking your scion
- Establish central leader by selecting one main trunk and removing competing branches
- Create scaffold branches spaced 6-8 inches apart with wide crotch angles for tree support
- Practice fruit thinning in heavy crop years to prevent branch breakage and improve fruit quality
Common Grafting Mistakes
Even experienced grafters make costly mistakes that kill their trees. You’ll avoid graft failure by learning these three critical errors that waste time, money, and perfectly good scion wood.
Incompatible Scion and Rootstock
Choosing incompatible scion and rootstock combinations leads to graft rejection and tree failure.
Species barriers prevent proper fusion when you cross different plant families.
Toxin transfer from quince rootstock can poison pear scions, while genetic distance affects grafting compatibility rates.
Stick to proven rootstock compatibility combinations within the same genus for reliable plant compatibility and avoid costly fruit tree compatibility mistakes.
Incorrect Grafting Technique
Even seasoned grafters stumble when rushing through cuts or skipping critical steps.
Sloppy knife work creates jagged edges that prevent proper cambium mismatch, leading to graft failure.
You’ll damage your scion if cuts aren’t clean and precise.
Rootstock issues multiply when you force misaligned pieces together.
Take time with whip and tongue grafting—those interlocking cuts need perfect alignment for success, to avoid cambium mismatch.
Poor Aftercare and Graft Failure
Graft failure often happens after you walk away from your work.
Without proper postgrafting care, your perfect technique means nothing.
Tree stress from temperature swings kills more grafts than bad cuts.
Keep grafting tape secure for 6-8 weeks to prevent healing issues.
Water consistently but don’t flood the roots.
Watch for scion rejection signs like wilting or browning bark.
Callus formation needs steady moisture and protection from wind damage.
Proper disease prevention methods are vital to guarantee the long-term health of the grafted tree with proper care and steady moisture to prevent scion rejection.
Frequently Asked Questions (FAQs)
What is the most successful grafting technique?
Ever wondered which grafting method delivers the highest success rates?
You’ll find whip and tongue grafting achieves nearly 100% success under ideal conditions because it maximizes cambium contact between scion and rootstock, creating the strongest possible union.
What month do you graft fruit trees?
You’ll graft fruit trees during late winter or early spring, typically February through March.
This dormant season timing allows trees to heal properly before new growth starts, maximizing your grafting success rates.
What are the 5 requirements for successful grafting?
You’ll need compatible plant species, healthy scion wood, proper cambium alignment, secure wrapping with grafting tape, and ideal timing during dormancy for successful grafting results.
How to graft fruit trees step by step?
Ready to join two trees into one powerhouse?
First, collect healthy scion wood during dormancy and store it cool.
Make matching cuts on both scion and rootstock, align their cambium layers precisely, then secure tightly with grafting tape.
Which fruit trees can you graft together?
You can graft trees within the same botanical family together.
Apple varieties graft to apple rootstocks, stone fruits like peaches, plums, and cherries work within the Prunus genus.
But don’t mix families.
What are the 3 most common grafting methods?
Masterful methods make grafting manageable.
You’ll use three primary techniques: whip and tongue grafting for similar-sized branches, cleft grafting for larger rootstocks, and bark grafting for smaller diameters.
Each method suits different situations, making grafting accessible in various contexts.
What are the 5 grafting techniques?
You’ll master five key grafting techniques: whip and tongue for matching diameters,
cleft grafting for thick rootstocks, bark grafting for mature trees, side grafting for horizontal attachment, and bud grafting for stone fruits.
These techniques include whip and tongue for matching diameters, which is crucial for a successful graft.
How long does it take for grafts to heal?
Picture fresh green tissue slowly knitting together like nature’s own healing process.
Your grafts typically heal within 4-6 weeks when temperatures stay consistently warm.
You’ll see callus formation bridging the connection as cambium layers fuse together permanently.
Can grafted trees grow in containers successfully?
Yes, you can successfully grow grafted trees in containers.
Choose dwarf rootstocks like M.9 or M.27 for apples, which naturally limit size.
You’ll need large containers, proper drainage, and regular watering for healthy growth.
How does grafting affect tree lifespan?
Grafting typically extends tree lifespan compared to ungrafted trees. You’ll get stronger disease resistance from rootstock while maintaining fruit quality from scion wood, creating more durable trees.
Conclusion
Unlike complex propagation methods that require months to establish, mastering these four fruit tree grafting techniques gives you productive trees in just one growing season.
You’ve learned cleft grafting for beginners, bark grafting for spring timing, whip and tongue for matched diameters, and bud grafting for stone fruits.
Each method connects your chosen variety with strong rootstock through precise cambium alignment. Success comes from selecting compatible materials, timing cuts correctly, and providing proper aftercare.
These proven fruit tree grafting techniques transform separate plants into thriving trees that deliver both desired fruit characteristics and resilient root systems for years ahead.
- https://en.wikipedia.org/wiki/Grafting
- https://www.lsuagcenter.com/profiles/lblack/articles/page1738592860223
- https://orchardpeople.com/grafting-fruit-trees/
- https://gardeningtheme.com/theme/how-to-choose-a-rootstock-for-a-fruit-tree
- https://www.colorado.edu/cumuseum/sites/default/files/attached-files/why_do_we_graft.pdf


