This site is supported by our readers. We may earn a commission, at no cost to you, if you purchase through links.
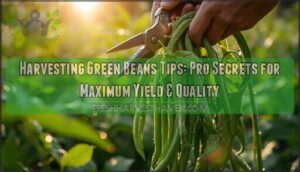
Pick them early morning when they’re crisp and full of moisture. Use clean garden shears or scissors to cut the stem – never yank or pull, which damages the plant.
Check your beans daily once they start forming because they grow fast. Harvest every 2-3 days to keep plants producing.
Look for bright green color and pods that snap crisply when bent. If seeds inside are visible through the pod, you’ve waited too long.
These harvesting green beans tips are just the beginning – timing, technique, and post-harvest handling can make or break your garden’s success.
Table Of Contents
- Key Takeaways
- Green Bean Harvest Timing
- Choosing Harvest Tools
- Harvesting Techniques
- Post Harvest Handling
- Storage and Preservation
- Extending Harvest Season
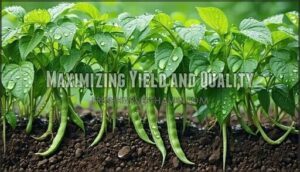
- Maximizing Yield and Quality
- Common Harvest Issues
- Harvesting Tips and Tricks
- Preserving Nutritional Value
- Frequently Asked Questions (FAQs)
- When should you harvest green beans?
- How do you harvest green beans?
- How do you know if green beans are ready for harvest?
- What tools do you need to harvest green beans?
- How do you pick green beans?
- How do you cut a green bean stem?
- How to harvest green beans so they keep producing?
- How do I know my green beans are ready to pick?
- What do you do with fresh green beans after you pick them?
- Can you harvest green beans more than once?
- Conclusion
Key Takeaways
- Pick at the right time – You’ll get the best beans when they’re pencil-thick, 4-6 inches long, and snap crisply when bent, typically 50-60 days after planting.
- Harvest frequently – You should check your plants every 2-3 days and pick regularly to keep them producing more beans throughout the season.
- Use proper technique – You’ll protect your plants by grasping the stem firmly and using clean shears or scissors to cut rather than yanking or pulling the pods.
- Handle carefully after harvest – You should wash beans gently, dry them completely, and store them in perforated bags in the refrigerator at 37-45°F to maintain freshness for up to a week.
Green Bean Harvest Timing
You’ll know your green beans are ready when they’re firm, smooth, and about as thick as a pencil – typically 50-60 days after planting.
Check daily once they reach 3-4 inches long, because the window between perfect tenderness and tough, overripe beans can close faster than you’d expect, especially during the critical period when they become tender.
Harvest window closes fast – check daily when beans hit pencil thickness.
Optimal Harvest Time
Timing is everything when harvesting green beans. You’ll know your beans are ready when they reach the perfect sweet spot of tenderness and flavor.
Watch for these harvest readiness signs:
- Bean size matches a pencil’s diameter – not too thick, not too thin
- Pod firmness feels crisp when you gently squeeze it between your fingers
- Seed visibility shows small bumps inside pods without obvious bulging
The tenderness peak occurs 50-60 days after planting. Perform the snap test – ripe pods break cleanly when bent. Green bean size should be 4-6 inches long with consistent color. Check bean pod maturity every 2-3 days for ideal harvest timing.
Factors Affecting Harvest Time
Several factors shift your green beans’ harvesting timing beyond the standard 50-60 day window.
Weather conditions like heat waves accelerate bean pod maturity, while cool spells slow growth.
Your chosen bean variety matters too—some mature faster than others.
Soil temperature, consistent watering practices, and your fertilization schedule directly impact green bean size development.
Sunlight exposure also affects how quickly pods reach that perfect pencil-thick diameter for picking.
Monitoring Growth
Watching your plants closely makes all the difference between tough, stringy beans and tender, flavorful ones. Check your green bean plants every 2-3 days during peak growing season to catch harvest cues at the perfect moment.
Smart gardeners know that consistent monitoring beats guesswork every time.
Perfect timing turns good harvests into great ones.
Your harvest timing depends on several growth factors working together. Soil pH affects nutrient uptake, while watering consistency and weed control influence pod development. Crop rotation and companion planting also impact harvest readiness by supporting healthier plants.
Look for these key harvest readiness signs:
- Pods snap cleanly when bent, indicating peak tenderness
- Bean size matches a pencil’s diameter at 4-6 inches long
- Seeds inside are barely visible but not bulging through the pod
Regular harvest frequency every few days keeps plants producing more pods. This monitoring approach guarantees you’re harvesting green beans at their absolute best quality.
Choosing Harvest Tools
Having the right tools makes green bean harvesting faster and protects your plants from damage. You’ll need sharp cutting tools and proper containers to handle your harvest efficiently.
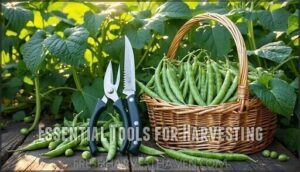
Essential Tools for Harvesting
Three essential harvesting tools make all the difference in your bean patch. Sharp garden shears or cutting scissors provide clean cuts without crushing stems. Choose harvest knives with proper shear sharpness for thick vines.
A sturdy basket with breathable basket material prevents bruising during collection. Look for tools with ergonomic grips to reduce hand strain during extended sessions.
Proper maintenance guarantees optimal blade performance. Remember sanitizing tools between plants prevents disease spread, though machine harvesting suits larger operations.
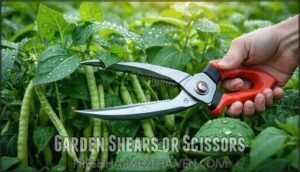
Garden Shears or Scissors
Selecting the right cutting tool transforms your harvesting experience from frustrating to smooth. Sharp garden shears outperform basic scissors for green bean harvesting due to their superior leverage and blade types designed for plant stems.
Quality harvesting techniques start with proper tool selection:
- Ergonomic handles that fit comfortably in your grip during extended picking sessions
- Clean cuts through stems without crushing or tearing plant tissue
- Spring-loaded mechanisms that reduce hand fatigue while maintaining precision
- Sanitized cutting surfaces that prevent disease spread between plants
Tool maintenance keeps your cutting scissors performing well season after season. Pruning shears often feature a durable spring mechanism to aid in repetitive cutting. Preventing damage to bean plants means choosing bypass pruners over anvil-style tools, ensuring harvesting tips lead to continued production throughout your growing season.
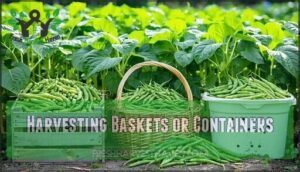
Harvesting Baskets or Containers
Your harvesting baskets and containers can make or break your green bean quality. Choose sturdy harvest bins with vented options to promote airflow and prevent moisture buildup.
Bean crates work perfectly for larger harvests, while shallow storage baskets prevent crushing delicate pods underneath.
Material selection matters—avoid metal containers that heat up in sunlight. Focus on capacity considerations by selecting containers you can comfortably carry when full.
Durable materials are essential for ensuring longevity in your harvesting tools. Container sanitation prevents disease spread, so wash baskets between uses.
For bruising prevention, line hard containers with soft cloth and avoid overpacking. These simple harvesting containers will keep your beans fresh from garden to kitchen.
Harvesting Techniques
Proper harvesting technique makes the difference between a bountiful harvest and damaged plants that stop producing.
You’ll want to master the gentle art of picking beans while keeping your plants healthy and productive for weeks to come.
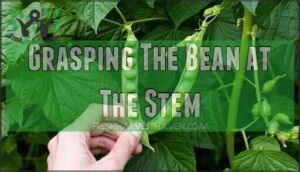
Grasping The Bean at The Stem
Mastering the Firm Stem Grip is your first step toward harvesting green beans like a pro.
Position your thumb and forefinger about half an inch above where the bean connects to the plant. Apply gentle pressure—enough control without crushing delicate stems or nearby flowers.
Use Two-Hand Stability by supporting the plant with your other hand. This Consistent Technique protects your harvest and guarantees Bottom-Up Visibility for superior harvesting techniques throughout your green bean harvest.
Proper tools like quality cutting shears can aid in a clean harvest.
Snapping or Cutting The Bean
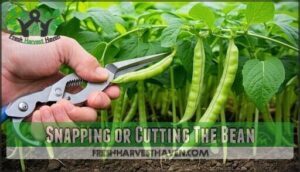
Once you’ve secured your grip, you’ve got two solid options for harvesting green beans: snapping or cutting.
For snapping, bend the pod sharply at the stem until you hear that satisfying clean break.
If you prefer cutting, sharp scissors or hand pruners deliver precise results every time.
High-quality tools like harvesting shears can improve the process.
Both hand techniques work well, but cutting offers better tool choice for thicker stems and prevents stem damage.
Either way, you’ll maintain plant stability while mastering these proven harvest tips.
Minimizing Damage to The Vine
Once you’ve mastered the snapping and cutting methods, protecting your vines becomes your next priority. Gentle harvesting keeps plants producing all season long. Think of your bean plants like delicate dance partners – they need steady support to perform their best.
Use two hands to stabilize the plant during harvest. Supporting vines prevents uprooting and maintains plant health throughout the growing season.
- Hold the main stem firmly while removing pods to distribute stress across the plant structure
- Work methodically from bottom to top for better visibility and reduced vine damage
Proper tool selection and pruning techniques guarantee your harvesting green beans efforts don’t harm future production. Avoid damage by never yanking or twisting pods forcefully.
Post Harvest Handling
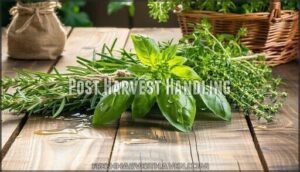
Once you’ve harvested your green beans, proper handling makes all the difference between crisp, fresh vegetables and wilted disappointments.
You’ll need to wash, sort, and store them correctly to maintain peak quality and extend their shelf life.
Washing and Drying The Beans
Once you’ve gathered your green beans, give them a quick rinse under cold running water. Gently scrub each pod with your fingers to remove dirt and debris—think of it like giving them a mini spa treatment.
| Washing Methods | Drying Techniques | Quality Maintenance |
|---|---|---|
| Cold water rinse | Paper towel pat-dry | Check for damage |
| Gentle finger scrub | Salad spinner method | Remove excess moisture |
| Multiple rinses if needed | Air dry briefly | Prevent mold growth |
Pat them dry completely with clean towels or use a salad spinner for efficient drying techniques. Contamination prevention starts with thorough residue removal. Never skip the drying step—wet beans turn mushy fast and develop mold in cool storage. Proper washing and drying keeps your harvest’s freshness intact for refrigerator storage.
Removing Unwanted Parts
Once your beans are clean, it’s time for precise trimming. This step turns rough harvest into kitchen-ready vegetables.
Stem Removal comes first – snap off where pods attached to plants. Pull any strings along seams, then break tough blossom end tips. Cut away damaged pods and diseased sections completely. Don’t forget leaf clipping if any leaves stuck to pods.
Removing unwanted parts involves these key steps:
- Snap stem ends cleanly without crushing pods
- Pull fibrous strings running along pod seams
- Break off tough, chewy blossom ends
- Cut away any brown or soft spots completely
- Remove attached leaves or plant debris thoroughly
Storage Containers
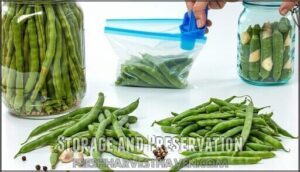
Smart storage containers keep your green beans crisp and fresh. Choose shallow containers to prevent bruising and guarantee good airflow.
Vented bags work perfectly for refrigerator storage, while airtight containers suit freezing needs.
| Storage Method | Best Container Type |
|---|---|
| Refrigerator | Vented plastic bags |
| Freezer | Airtight freezer bags |
| Short-term | Shallow harvest baskets |
| Humidity control | Perforated containers |
| Sanitized storage | Clean mason jars |
Storage and Preservation
Once you’ve harvested your green beans, proper storage becomes your key to enjoying that fresh garden taste for weeks or months to come.
You’ll need to act quickly since fresh beans lose quality fast at room temperature.
Refrigerating for Short-Term Storage
After washing your freshly picked beans, proper refrigeration keeps them crisp for up to a week.
Your refrigerator’s crisper drawer provides the ideal temperature and humidity control needed for storing green beans.
Here’s how to maintain peak freshness:
- Use perforated bags to allow airflow while preventing moisture loss
- Store at 37-45°F to slow deterioration and preserve texture
- Keep away from ethylene-producing fruits like apples and bananas
Green beans show ethylene sensitivity, so separate storage prevents premature aging.
This short-term storage method preserves your harvest’s quality and extends storage duration effectively, ensuring your beans remain fresh by using the right storage techniques.
Freezing or Canning Options
While refrigerating works for a week, freezing and canning extend your harvest for months. Both food preservation methods require different approaches.
Blanching methods involve boiling beans 2-3 minutes, then plunging into ice water. This stops enzymes that cause deterioration. Freezer storage maintains quality for 8-10 months when beans are properly blanched and sealed in airtight containers.
Canning safety demands pressure canning at 240°F since green beans are low-acid vegetables. Standard boiling won’t kill botulism spores. To guarantee safety, it’s vital to follow procedures for preventing foodborne botulism.
| Method | Storage Time | Best For |
|---|---|---|
| Freezing | 8-10 months | Fresh taste |
| Canning | 12 months | Shelf storage |
| Pickling beans | 6 months | Tangy flavor |
| Drying alternatives | 1 year | Compact storage |
| Refrigeration | 1 week | Immediate use |
Choose based on your space and preferences for preserving beans.
Dehydrating or Drying Methods
When your green bean harvest overflows your fresh eating capacity, dehydrating offers an excellent preservation method for longterm preservation.
This drying technique transforms your crisp pods into lightweight, nutrient-dense storage treasures.
Dehydration Temperature: Set your dehydrator to 125°F for ideal results
Drying Time: Allow 8-10 hours until beans become leathery and shrunken
Storage Conditions: Use airtight containers in cool, dark spaces
Nutritional Impact: Retains most vitamins while concentrating flavors substantially
Before dehydrating, blanch beans for 2-3 minutes, then ice-bathe them.
Cut into uniform pieces for even drying.
Properly dried beans should be brittle—no moisture when squeezed.
For rehydration methods, soak in warm water 30 minutes before cooking.
Unlike shelling beans where seeds rattle in pods, your dehydrated green beans stay flexible until completely moisture-free.
Extending Harvest Season
You can stretch your bean harvest from early summer into fall with a few smart strategies.
Successive plantings every two to three weeks guarantee fresh pods when earlier plants finish producing, while proper plant protection keeps your green bean factory running longer, utilizing successive plantings to extend the harvest season.
Successive Plantings for Continuous Yield
Beyond storage, maintaining your harvest flow requires strategic planning. Staggered planting every two to three weeks guarantees you won’t face a bean shortage mid-season. This continuous supply approach prevents overwhelming harvests while extending your growing window.
Smart variety selection and planting intervals create overlapping production cycles. Each successive planting matures as the previous one winds down, delivering continuous yield through fall.
| Planting Schedule | Days to Harvest | Peak Production Period |
|---|---|---|
| Early Spring | 50-60 days | Mid-Summer |
| Late Spring | 50-60 days | Late Summer |
| Early Summer | 50-60 days | Early Fall |
| Mid-Summer | 50-60 days | Mid-Fall |
| Late Summer | 50-60 days | Late Fall |
This extended harvest strategy maximizes garden productivity while guaranteeing fresh beans throughout the season.
Protecting Plants From Pests
Successful succession planting means nothing if pests destroy your harvest.
Effective pest identification prevents major crop damage before it starts. Here’s your protection strategy:
- Scout regularly: Check plants weekly for aphids, beetles, and other common pests that target bean foliage.
- Deploy natural predators: Encourage ladybugs and lacewings while using companion plants like marigolds for natural pest control.
- Apply organic pesticides: Use preventative measures like neem oil treatments when crop monitoring reveals early pest activity.
Employing Row Covers or Trellises
Beyond pest control, row covers and trellises transform your harvest potential.
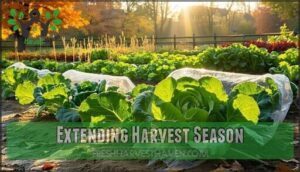
Row covers raise temperatures 2-8°F, extending your season by weeks while providing pest protection. Trellis designs boost yields through improved airflow and easier picking.
Here’s your setup guide:
| Tool | Benefits |
|---|---|
| Row Covers | Temperature boost, pest barrier |
| Pole Trellises | Vertical growth, space efficiency |
| Wire Supports | Bean plant support, durability |
| Floating Covers | Easy installation, reusable |
These harvesting techniques maximize your extended season success.
Maximizing Yield and Quality
You’ll harvest more beans and better-quality pods when you focus on three key areas that directly impact your plant’s performance.
Smart soil preparation, proper watering, and weed control work together to create the ideal growing conditions your bean plants need to thrive.
Proper Fertilization and Soil Preparation
Foundation matters when growing productive green beans. Start with a soil test to check pH levels (6.0-7.0 range) and nutrient balance before planting season arrives.
Transform your garden bed with these soil preparation essentials:
- Add compost for improved drainage and organic matter
- Apply balanced fertilizers like 10-10-10 sparingly since beans fix nitrogen
- Implement weed control strategies to reduce nutrient competition
- Make certain proper watering practices support healthy root development
To improve soil structure, consider using cover crops.
Maintaining Consistent Moisture Levels
Think of soil moisture like a savings account—you want consistent deposits, not boom-and-bust cycles.
Check watering frequency daily during hot spells, ensuring soil drainage prevents waterlogged roots.
Apply mulch benefits to retain moisture and regulate temperature.
Consider drip irrigation methods for precise delivery.
Monitor humidity impact on evaporation rates, adjusting accordingly for ideal irrigation systems and drainage methods success.
Controlling Weeds and Competing Plants
Three key strategies eliminate weeds and competing plants that steal your beans’ nutrients.
Start with weed identification and manual removal before planting. Apply thick mulch around plants using organic materials like straw or shredded leaves.
Practice competitive planting with companion crops like marigolds that naturally suppress weeds. Herbicide use should be your last resort.
Consistent weed control through these mulching methods keeps your green beans thriving without unnecessary competition for water and nutrients.
Common Harvest Issues
Even experienced gardeners face challenges that can reduce their green bean harvest quality and quantity.
You’ll encounter three main issues that require quick identification and proper treatment to protect your crop.
Dealing With Insect Infestations
When identifying pests early, you’ll catch beetles and aphids before they destroy your harvest.
Use organic control methods like insecticidal soaps or introduce beneficial insects such as ladybugs for natural pest prevention.
Crop rotation breaks insect infestation cycles effectively.
These strategies keep your bean plants healthy and productive throughout the growing season.
Identifying and Treating Fungal Diseases
While bugs can damage your plants, Fungal Identification starts with spotting yellowing leaves, brown spots, or white powdery growth.
Disease Prevention includes proper spacing and avoiding overhead watering. Selecting planting sites carefully can also help.
Organic Treatments like neem oil work well, while Chemical Controls offer stronger options. Choose Resistant Varieties when possible.
Regular plant inspection catches problems early, making treating fungal diseases much easier than waiting until harvest time.
Preventing Mechanical Damage
Why worry about crushing your harvest when gentle handling prevents most damage?
Use sharp clean tools for careful snapping instead of yanking pods. Choose appropriate container selection and avoid overfilling to prevent bruising.
Proper tools help you avoid overgrown pods that tear vines. This damage control approach protects both beans and plants for continued production.
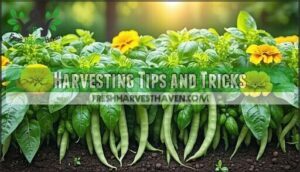
Harvesting Tips and Tricks
You’ll get better harvests by choosing the right variety for your climate and growing season.
Smart planting timing and companion plants can boost your bean production while keeping pests away naturally.
Choosing The Right Variety
Choosing the right bean variety sets you up for harvest success.
Smart seed selection means considering your garden’s unique conditions and your harvesting goals.
Your variety choice impacts everything from pod size to picking frequency:
- Bush vs. Pole: Bush beans offer compact growth; pole beans climb and produce longer
- Disease Resistance: Select varieties that resist common local problems
- Climate Suitability: Match varieties to your growing season length
- Pod Color: Green, purple, or yellow options affect harvest timing
Bean size and growth habits determine your harvesting schedule and technique.
Planting at Optimal Times
Timing your bean planting correctly makes all the difference between a struggling garden and a thriving harvest.
Wait until soil temperature consistently reaches 60°F before starting your seeds—cold soil leads to poor germination and weak plants.
Check your area’s frost dates and plan accordingly, since beans can’t tolerate even light frost.
Successive plantings every two weeks extend your growing season, giving you fresh beans all summer long.
Choose varieties suited to your sunlight exposure and climate for best results.
Using Companion Planting
Beyond timing, companion planting transforms your bean patch into a powerhouse team.
Strategic plant partnerships boost yields through natural Pest Deterrents and Nutrient Synergy. Your garden becomes more productive with smart Space Optimization.
Here’s your winning lineup:
- Soil Friends – Carrots and radishes improve drainage while attracting beneficial insects
- Growth Enhancers – Marigolds repel bean beetles through natural Pollinator Attraction
- Plant Partners – Corn provides Growth Support for climbing varieties
- Companion Crops – Squash creates living mulch, suppressing weeds naturally
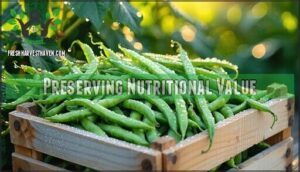
Preserving Nutritional Value
You’ve worked hard to grow healthy green beans, but proper handling after harvest determines how much nutrition you’ll actually get from your crop.
The way you store, prepare, and cook your freshly picked beans can either preserve their valuable vitamins and minerals or cause significant nutrient loss.
Proper Storage and Handling Techniques
Your beans’ quality depends on proper freshness preservation right after harvest.
Wash them gently, then dry completely to prevent spoilage.
Use airflow containers or perforated bags for refrigerator storage—they need breathing room.
Cool storage at 37-45°F maintains crispness for up to two weeks.
To maintain ideal humidity, consider monitoring with a hygrometer.
Choose storage containers that allow air circulation while protecting from moisture loss.
Cooking Methods That Preserve Nutrients
Steaming benefits shine when you cook fresh green beans for just 3-5 minutes.
This gentle method locks in vitamins while keeping that satisfying crunch.
Microwaving concerns fade when you use minimal water—just a tablespoon does the trick.
Blanching effects work wonders for nutrient retention, especially if you plunge beans into ice water afterward.
Roasting impact varies, but quick high-heat roasting preserves more nutrients than long, slow cooking.
These cooking methods help you maximize nutritional value without sacrificing flavor in your nutrient-packed dishes.
Incorporating Green Beans Into Diets
Fresh green beans pack incredible Nutritional Benefits that support your Weight Management goals.
These versatile vegetables boost Dietary Fiber intake while adding vibrant flavor to meals.
Smart Recipe Ideas maximize their nutritional value:
- Toss fresh green beans into grain bowls for satisfying crunch and nutrients.
- Steam lightly and add to stir-fries, preserving vitamins while enhancing taste.
- Incorporate into Meal Planning by batch-cooking for quick weekday additions.
Perfect harvesting timing guarantees peak nutrition in every bite.
Frequently Asked Questions (FAQs)
When should you harvest green beans?
Timing’s everything – harvest too early and you’ll miss the magic moment.
Pick your green beans when pods reach 4-6 inches long, snap crisply when bent, and seeds inside are barely visible but not bulging.
How do you harvest green beans?
Grasp the pod firmly near the stem and snap it off with a gentle downward motion.
Use two hands—one to steady the plant, one to harvest—preventing damage to the vine while ensuring clean breaks.
How do you know if green beans are ready for harvest?
You’ll know green beans are ready when pods snap crisply, measure pencil-width, and feel firm but tender. Seeds inside should be barely visible without bulging the pod.
What tools do you need to harvest green beans?
You’ll need sharp garden shears or scissors for clean cuts, a sturdy harvest basket to prevent bruising, and clean hands.
Some gardeners prefer using their fingers to snap pods directly from the plant.
How do you pick green beans?
Perfect technique beats brute force when harvesting these garden treasures.
Grasp the stem firmly with one hand while supporting the plant with the other, then snap or cut pods at pencil thickness using clean shears for ideal results.
How do you cut a green bean stem?
Hold the stem firmly and use sharp garden shears or scissors to make a clean cut right at the connection point.
This prevents plant damage and disease spread while keeping your beans fresh.
How to harvest green beans so they keep producing?
Don’t put all your eggs in one basket—harvest every 1-2 days when pods are 3-4 inches long. Pick regularly to keep plants producing more beans throughout the season.
How do I know my green beans are ready to pick?
Your green beans are ready when they’re pencil-thick, firm, and snap cleanly when bent. Pick them at 3-4 inches long before seeds bulge visibly inside the pods.
What do you do with fresh green beans after you pick them?
After picking, immediately cool your fresh beans to preserve quality. Refrigerate them in perforated bags for up to a week, or blanch and freeze for longer storage.
Can you harvest green beans more than once?
Ironically, while most vegetables give you just one shot at harvest, you’ll actually pick green beans multiple times throughout the growing season.
Regular harvesting every few days keeps your plants producing fresh pods for weeks, turning one planting into a continuous feast.
Conclusion
Rome wasn’t built in a day, and neither is your perfect green bean harvest.
These harvesting green beans tips will transform your garden from good to great.
You’ve learned when to pick, how to handle, and ways to store your beans properly.
Now you can enjoy crisp, tender beans all season long while keeping your plants producing at peak levels.

