This site is supported by our readers. We may earn a commission, at no cost to you, if you purchase through links.
Most gardeners lose 30-40% of their pumpkin harvest to premature rot, and the culprit isn’t disease—it’s timing. Harvesting pumpkins for storage demands precision: pick too early and the rind won’t harden properly; wait too long and frost damage destroys months of work. The difference between a pumpkin that lasts until spring and one that collapses into mush by Thanksgiving often comes down to a single week in early fall.
Fortunately, your pumpkins telegraph their readiness through reliable visual and tactile cues that take the guesswork out of harvest day. Once you recognize these maturity signals and follow proven curing protocols, you’ll transform fragile garden produce into shelf-stable food that keeps for six months or longer.
Table Of Contents
- Key Takeaways
- When to Harvest Pumpkins for Storage
- Essential Tools and Harvesting Techniques
- How to Cure Pumpkins for Longevity
- Best Storage Conditions for Pumpkins
- Long-Term Pumpkin Preservation Methods
- Frequently Asked Questions (FAQs)
- How do you store pumpkins after harvesting?
- When should you pick pumpkins off the vine?
- How do you keep pumpkins from rotting after harvest?
- How do you clean pumpkins for storage?
- What happens if you leave pumpkins on the vine too long?
- How long will pumpkins last after being picked?
- How to store Pumpkins after they are harvested?
- How do you store a cured pumpkin?
- How long do Pumpkins last after harvest?
- Do pumpkins need to be stored long-term?
- Conclusion
Key Takeaways
- Harvest pumpkins when the rind resists thumbnail pressure, displays uniform color without green patches, and the stem begins drying—timing this window correctly prevents both premature rot from under-ripe fruit and frost damage from waiting too long.
- Cure your harvested pumpkins for 7-14 days at 80-85°F with 60% humidity or lower to harden the rind and create a protective barrier that extends storage life from weeks to six months.
- Store cured pumpkins at 50-55°F with 60-70% humidity in a dark, well-ventilated space, placing them in single layers with 1-2 inches between each fruit to prevent moisture buildup and rot.
- Leave 1-2 inches of stem attached when cutting pumpkins from the vine using sharp, sanitized tools, and handle fruit by gripping the shoulders rather than the stem to avoid bruising and skin damage that creates entry points for decay.
When to Harvest Pumpkins for Storage
Timing your pumpkin harvest correctly makes the difference between fruit that lasts months and fruit that rots within weeks. You’ll need to watch for several physical signs that tell you when your pumpkins have reached full maturity and are ready to store.
Check out our guide on harvesting fall fruits successfully to learn how these timing principles apply across your entire autumn garden.
Let’s look at the key indicators that signal it’s time to cut your pumpkins from the vine.
Following best fall harvest practices helps ensure you’re harvesting at peak ripeness, when the skin has hardened and the stem begins to dry.
Identifying Full Color and Maturity
You’ll know your pumpkin’s ready when it develops the deep orange or tan shade characteristic of your pumpkin variety. Look for uniform color development across the fruit with minimal green mottling on the rind. The skin hardness increases at maturity—tap the surface and listen for a hollow sound.
The same signs of ripeness also apply when you’re growing winter squash varieties like butternut or acorn in your garden.
These maturity signs guide proper harvest timing, which varies by days to harvest depending on variety, ensuring your fruit is ready for curing pumpkins successfully.
Checking Rind Hardness
Once your pumpkin shows full color, press your thumbnail firmly into the rind. A mature pumpkin won’t dent or puncture easily—that’s your signal the skin has hardened enough for long-term storing pumpkins.
These rind hardness tests and skin evaluation methods serve as reliable maturity indicators across any pumpkin variety. Perform fruit firmness and rind integrity checks on multiple spots to verify uniform readiness before harvest timing.
Monitoring Vine and Stem Condition
After you confirm rind hardness, turn your attention to vine health and stem care—both signal harvest readiness. Healthy pumpkin vines start wilting around 90 to 120 days to harvest, while the stem should remain firm and greenish near the fruit.
A sturdy stem attachment protects rind quality during postharvest handling, so check that at least four inches stay intact when you cut the pumpkin harvest free.
Avoiding Frost and Cold Damage
Once your stems check out, watch nighttime lows closely—harvest timing makes the difference between successful cold storage and frost damage.
For the best results, aim to harvest pumpkins for long storage just before the first frost hits your area.
Bring in your pumpkin harvest before temperatures regularly dip into the 40s, and always keep winter squash above 32°F to prevent freeze damage to flesh and rind.
Temperature control protects months of frost protection effort during those critical final weeks.
Essential Tools and Harvesting Techniques
You don’t need fancy equipment to harvest pumpkins successfully, but choosing the right tools makes a real difference in protecting your crop. The way you cut, handle, and transport pumpkins determines whether they’ll store for months or rot within weeks.
These four techniques will help you bring your harvest from vine to storage without damage.
Choosing The Right Cutting Tools
Your harvest success begins with the right blade in hand. Clean, sharp tools make all the difference between a pumpkin that lasts months and one that rots within weeks.
Once you’ve selected your best pumpkins, consider saving seeds from heirloom varieties to grow those same incredible flavors year after year.
Essential cutting implements for pumpkin harvesting:
- Use a sharp harvest knife with comfortable grip to reduce hand strain during larger pumpkins.
- Choose pruning shears for precise stem cuts while vines remain attached.
- Select pumpkin saws for clean cuts that minimize rind damage.
- Employ carving tools only after harvest for delicate trimming purposes.
- Sanitize all blades before use to prevent introducing surface pathogens.
Proper cutting tool maintenance protects your crop investment from field to storage.
Proper Stem Handling and Cutting
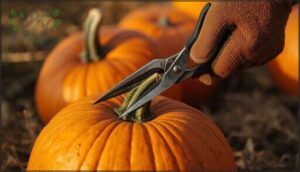
A clean cut determines how long your pumpkin lasts. Use sharp pruning shears to leave a 1- to 2-inch stem stump, preventing decay entry points. Never tear or pry—gentle blade pressure avoids cracking the rind.
After cutting, inspect the stem area for discoloration or softening. Keep the cut surface dry and dirt-free to minimize rot during curing squash and storage.
Preventing Bruising and Skin Damage
Gentle handling protects rind integrity during pumpkin harvesting. Padded gloves shield the skin when you lift from the fruit’s shoulders—never the stem.
Soft surfaces like cardboard prevent dragging-related scratches, while cushioning materials such as straw guard against contact bruises during storing pumpkins.
These damage control steps preserve the outer barrier, ensuring your cured squash stays fresh for months without decay or moisture loss.
Safe Transport From Garden to Storage
Balance and load size matter in harvest logistics. Use clean, sturdy containers with grips to carry pumpkins from the garden, reducing dropped fruit during pumpkin harvesting. Transport during dry conditions to prevent mud adherence that compromises fruit protection.
Move pumpkins in small, manageable loads—inspect each for cracks or soft spots before loading. Proper garden transport and postharvest handling safeguard your storage preparation investment.
How to Cure Pumpkins for Longevity
You’ve harvested your pumpkins with care, but the work isn’t finished yet. Curing is the essential step that transforms a freshly picked pumpkin into one that will last for months without rotting or shriveling.
Curing is the essential step that transforms a freshly picked pumpkin into one that lasts months without rotting
Here’s how to set up the right conditions and complete the curing process successfully.
Setting Up The Curing Environment
You’ll want to set up your curing room in a clean, well-ventilated space away from direct sunlight. Proper airflow management prevents moisture buildup that can lead to rot during the curing process.
Place pumpkins in a single layer with stems intact, leaving space between each fruit to allow gentle air circulation around all surfaces. This postharvest handling and storage approach ensures even drying without cracking.
Ideal Temperature and Humidity for Curing
Temperature control between 80 and 85 degrees Fahrenheit creates the warm environment your pumpkins need for proper rind hardening during cure. Humidity management at 60% or lower prevents mold while allowing the skin to toughen effectively.
Your postharvest handling and storage setup should maintain:
- Warm air circulation without direct heat sources
- Stable humidity levels monitored with a hygrometer
- Consistent overnight temperatures above 60 degrees
- Gentle airflow that doesn’t dry rinds too quickly
Duration and Signs of Successful Curing
Once you’ve set the right conditions, the curing process takes 7 to 14 days to complete rind hardening. Watch for color uniformity across the skin and a firm surface that resists thumbnail pressure.
Stem drying signals proper rind formation—your pumpkin should produce a hollow sound when tapped. These changes mean you’re ready for storing pumpkins successfully through the months ahead.
Benefits of The Curing Process
Now you understand why the curing squash step matters so much for successful pumpkin storage. Rind hardening through moisture reduction creates a protective barrier that boosts shelf stability for months. Here’s what you gain:
- Tougher skin resists bruising and rot
- Sugar concentration improves flavor enhancement
- Lower surface moisture speeds uniform drying
- Reduced internal moisture activity slows microbial growth
- Sealed surfaces prevent secondary infections
These changes make pumpkin harvesting and storing pumpkins worth the wait.
Best Storage Conditions for Pumpkins
Once you’ve cured your pumpkins properly, the next step is setting up the right storage environment to keep them fresh for months. The conditions you create—from temperature and humidity to airflow—will determine whether your harvest lasts through winter or spoils within weeks.
Here’s what you need to know about storing pumpkins to extend their shelf life.
Ideal Storage Temperatures and Humidity
Keep your pumpkin storage environment between 50 and 55 degrees Fahrenheit with 60–70% relative humidity for maximum shelf life. Temperatures above 60°F speed up deterioration, while those below 50°F risk chill injury to the fruit.
Maintain consistent humidity control and stable temperature conditions—fluctuations promote condensation, mold growth, and moisture management problems that shorten storage duration for winter squash storage success.
Suitable Storage Locations
Once you’ve dialed in temperature and humidity management, choose a sheltered, dark spot with stable climate control for your pumpkin storage. Insulated garages and dry pantries beat basement alternatives prone to dampness and temperature swings.
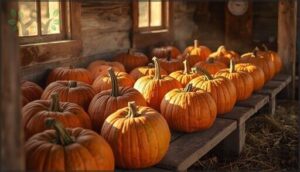
Arrange your harvest on storage shelves or cardboard off the ground—this prevents moisture wicking and boosts shelf life optimization for winter squash storage. Avoid refrigerator storage, which invites chill damage.
Air Circulation and Pumpkin Placement
Proper airflow management protects your pumpkin storage investment by preventing moisture buildup that accelerates rot. Space each pumpkin at least 1–2 inches apart on slatted racks to enable horizontal and vertical ventilation systems around every rind.
Avoid stacking or placing fruit directly on damp surfaces during postharvest handling and storage. This storage layout ensures ambient air circulates freely, supporting extended shelf life in your curing environments.
Regular Inspection and Handling Tips
Inspect pumpkins daily for the first two weeks after harvest to catch color shifts or rind softness before rot spreads. Separate damaged pumpkins immediately to protect the rest of your curing squash.
Always grip fruit by the stem end during postharvest handling and storage—this handling technique minimizes skin stress. Wear clean, dry gloves when moving your harvest to prevent pathogen transfer.
Long-Term Pumpkin Preservation Methods
You can extend your pumpkin harvest well beyond traditional storage by using proven preservation methods. Freezing, dehydrating, and seed storage allow you to enjoy your pumpkins for months or even years after harvest.
The following techniques will help you preserve pumpkins in different forms based on your needs and available equipment.
Freezing Pumpkin Puree and Cubes
Freezing extends your harvest into year-round enjoyment. Cool puree to room temperature before packing it into freezer-safe containers, leaving half an inch of headspace for expansion.
For cubes, blanch uniform one-inch pieces for two to three minutes to preserve quality, then freeze on a tray before bagging.
Both methods maintain nutrients for six months when stored at 0°F or below.
Dehydrating and Freeze-Drying Pumpkin
Dehydration methods and freeze drying transform fresh pumpkin into shelf-stable ingredients for food preservation and storage. Slice your harvested pumpkin into uniform pieces between 1/8 and 1/4 inch thick, then dry to below 10% moisture.
- Use opaque, airtight storage containers to protect dehydrated slices from light and humidity
- Grind dried pieces into pumpkin powder for simple freezer storage alternatives
- Rehydration tips: soak freeze-dried cubes in hot water for 15 to 30 minutes
- Freeze drying retains more nutrients than conventional dehydration methods
Storing Pumpkin Seeds for Future Use
Saving seeds from your harvest extends pumpkin cultivation and care year after year. Rinse seeds thoroughly using seed cleaning methods that remove all pulp, then air-dry them in a single layer until completely dry.
Store dried seeds in storage container options like airtight jars with moisture control techniques such as silica gel packets.
Test seed viability testing annually by germinating 5 to 10 seeds to confirm readiness for next season’s planting.
Preventing Common Storage Issues
Moisture control and storage sanitation prevent most pumpkin storage problems. Maintain temperature monitoring at 50–55°F with humidity regulation between 50–70% to slow decay in your winter squash storage area.
Inspect storing pumpkins weekly for soft spots or mold, removing damaged fruit immediately. Good air circulation combined with proper harvest timing and curing practices ensures your food storage and preservation efforts succeed, while basic pest management keeps rodents away from stored produce.
Frequently Asked Questions (FAQs)
How do you store pumpkins after harvesting?
After harvesting pumpkins, cure them in a warm, dry space for seven to fourteen days.
Then, store in cool conditions with moderate humidity control and good air circulation to extend pumpkin shelf life.
When should you pick pumpkins off the vine?
You should pick pumpkins when the rind resists thumbnail pressure, the fruit displays full uniform color without green patches, and the vine and stem near the pumpkin begin drying and turning brown.
How do you keep pumpkins from rotting after harvest?
Cure your harvested pumpkins in a dry, sunny location for seven to fourteen days to harden the skin.
Then store them at 50–60°F with moderate humidity and good ventilation to prevent rot.
How do you clean pumpkins for storage?
Rinse your pumpkins with clean water and a soft brush to remove soil without scratching the rind. Dry them thoroughly in a warm, well-ventilated area before curing. This gentle handling prevents storage problems down the road.
What happens if you leave pumpkins on the vine too long?
Like an uninvited guest, an overripe pumpkin won’t leave quietly—prolonged exposure invites fruit decay, vine deterioration, and storage loss from splitting, pests, and moisture damage that ruins your harvest timing efforts.
How long will pumpkins last after being picked?
Properly handled pumpkins usually last two to six months after picking. Storage temperature around 50–55°F with moderate humidity extends fruit longevity. Inspect stored pumpkins every week or two to catch spoilage early.
How to store Pumpkins after they are harvested?
After harvesting and storing pumpkins, keep them at 50 to 55 degrees Fahrenheit with 50 to 70 percent humidity. Place fruit in single layers with space between for air circulation, ensuring pumpkin shelf life extends two to three months.
Proper storage conditions are vital for maintaining the quality of the pumpkins.
How do you store a cured pumpkin?
You’ve likely heard that cool, dry places work best—but cured pumpkins actually need moderate humidity control around 60-70% and stable temperatures between 50-55°F on elevated, breathable storage containers to extend pumpkin shelf life.
How long do Pumpkins last after harvest?
When stored properly at 50 to 60°F with moderate humidity, whole cured pumpkins usually last two to six months. Carved or damaged fruit deteriorates within days to weeks, while refrigerated cut pieces remain fresh just three to five days.
To boost the lifespan of pumpkins, it’s vital to grasp the importance of proper pumpkin storage techniques.
Do pumpkins need to be stored long-term?
You don’t necessarily need long-term pumpkin storage, but it extends your harvest from weeks to several months.
Proper curing and cool conditions between 50-55°F preserve quality and prolong your pumpkin shelf life considerably.
Conclusion
A pumpkin that survives until spring is a small triumph over entropy—proof that you understood the signals your plants sent and acted decisively.
Harvesting pumpkins for storage isn’t guesswork once you’ve learned to read rind hardness, stem condition, and color. Combine careful timing with proper curing, and you’ll turn October’s harvest into February’s pie filling.
The difference between rot and resilience lies entirely in your hands.
- https://postharvest.ucdavis.edu/produce-facts-sheets/pumpkin-winter-squash
- https://mwveguide.org/
- https://vegetablegrowersnews.com/news/pumpkin-and-winter-squash-harvest-and-storage/
- https://catalog.extension.oregonstate.edu/ec1632
- https://www.umass.edu/agriculture-food-environment/vegetable/fact-sheets/pumpkin-winter-squash-harvest-curing-storage

