This site is supported by our readers. We may earn a commission, at no cost to you, if you purchase through links.
Most gardeners don’t realize they’re spending ten times more money than necessary on vegetable transplants. A six-pack of tomato seedlings costs $4 to $6 at the nursery, but a $3 packet of seeds grows fifty plants.
Starting your own vegetables from seed unlocks this economy while giving you access to hundreds of heirloom and specialty varieties you’ll never find at local garden centers. The process demands attention to timing, lighting, and moisture levels, but mastering these seed starting tips for vegetables transforms your growing season.
You’ll harvest weeks earlier than neighbors buying transplants, and your seedlings will develop stronger root systems because they’ve never experienced transplant shock from commercial growing operations.
Table Of Contents
- Key Takeaways
- Key Benefits of Starting Vegetables From Seed
- Choosing Vegetable Seeds and Supplies
- Essential Seed Starting Environment Tips
- Step-by-Step Seed Sowing and Care
- Transplanting and Hardening Off Seedlings
- Top 9 Tools for Successful Seed Starting
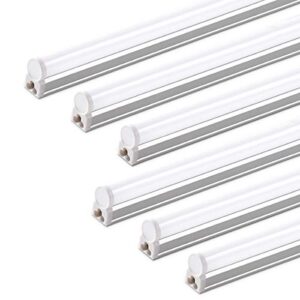
- 1. LVWIT LED Shop Light Fixture
- 2. Barrina Led Shop Light Fixture
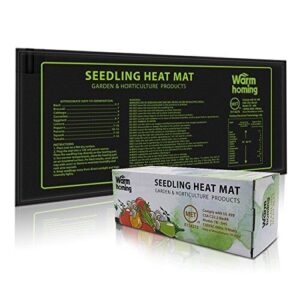
- 3. Seedling Heat Mat For Plants
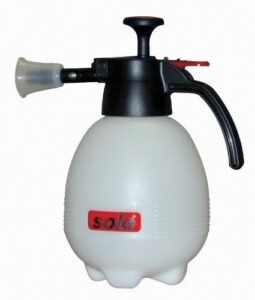
- 4. Portable Garden Pressure Sprayer Tool
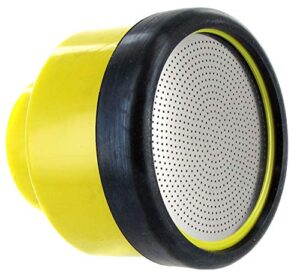
- 5. Dramm Lemonhead Hose End Sprayer
- 6. High Performance Grow Light Fixture
- 7. Full Spectrum Led Grow Light
- 8. Flexible Garden Tub Trug
- 9. Surge Protector Timer Outlet Strip
- Frequently Asked Questions (FAQs)
- What is the best way to start vegetables from seeds?
- Does soaking seeds in hydrogen peroxide help germination?
- How to successfully germinate vegetable seeds?
- Which vegetables should not be planted next to each other?
- Is it better to germinate seeds in soil or paper towel?
- What is the best method for starting seeds?
- Can I reuse seeds from store-bought vegetables?
- What temperature kills seeds during storage?
- How long do different vegetable seeds stay viable?
- Can I start seeds in regular potting soil?
- Conclusion
Key Takeaways
- Starting seeds indoors costs pennies per plant compared to $4–6 nursery transplants, unlocking access to hundreds of heirloom varieties unavailable locally, while delivering harvests two to four weeks earlier than store-bought starts.
- Successful germination requires sterile seed starting mix, 14–16 hours of full-spectrum light positioned 2–4 inches above seedlings, consistent 70–75°F soil temperature, and bottom watering to prevent damping off fungal diseases.
- Hardening off over 7–14 days by gradually increasing outdoor exposure prevents transplant shock, while proper timing based on your last frost date and soil temperatures of 60–70°F ensures seedlings transition successfully to the garden.
- Essential tools include affordable LED grow lights delivering 4,000+ lumens at 5,000K spectrum, seedling heat mats that raise soil temperature 10–20°F, and automated timer outlets that eliminate daily light-cycle management.
Key Benefits of Starting Vegetables From Seed
Starting your own seeds changes everything about how you garden. You’ll gain access to hundreds of varieties that never show up at nurseries, save serious money, and harvest weeks earlier than your neighbors.
Before you sow those seeds indoors, check out these spring gardening tips for beginners to make sure your soil and setup are dialed in.
Starting your own seeds unlocks hundreds of varieties, saves serious money, and delivers harvests weeks ahead of transplants
These four advantages make seed starting one of the smartest moves you can make for your vegetable garden.
Greater Variety and Plant Choice
Seed selection offers a wide range of options most nurseries can’t match. You’ll find hundreds of heirloom varieties and modern hybrids in seed catalogs—bush or pole beans, compact or sprawling tomatoes, peppers in every color and heat level.
This plant diversity fosters smart crop rotation and garden planning. Starting from seed lets you customize flavor profiles, storage qualities, and textures that transplants rarely offer.
Cost Savings Compared to Transplants
Beyond variety, your wallet benefits immediately. A single seed packet runs two to five dollars and yields twenty to five hundred plants—dropping per-plant cost to pennies. Transplants from nurseries average two to five dollars each. Your break-even point arrives after just six to twelve plants.
Financial savings through seed starting:
- Seed costs stay minimal—one packet replaces dozens of nursery purchases
- Budget planning improves when startup expenses total under fifty dollars
- Resource efficiency increases with reusable trays and homemade potting mix
- Economic benefits compound across seasons as you save and reuse seeds
Earlier Harvests and Season Extension
Growing your own transplants shifts harvest timing into your control. Starting seeds indoors 4 to 6 weeks before the last frost in Ashburn, Virginia, puts healthy plants outside earlier, shaving two to four weeks off the time to the first harvest for cool-season crops like lettuce and kale.
Season Extension Gardening Methods
| Strategy | Temperature Gain | Harvest Advantage |
|---|---|---|
| Low tunnels or hoop houses | 6 to 12°F on cool nights | 2 to 4 weeks earlier spring harvest |
| High tunnels | Stable warming microclimate | 2 to 4 weeks earlier first harvest |
| Portable cold frames | Above-freezing daytime temps | 4 to 8 week extension |
Succession planting strategies every 7 to 14 days maintain continuous harvests through early summer. Frost protection with row covers lets you transplant hardened seedlings into protected beds another week or two earlier. Winter gardening and early harvest tips combine when you pair indoor seed starting with outdoor season extension structures—your growing season stretches both directions while yields multiply. Simple methods like cloches and row covers can substantially boost harvests for those interested in learning.
Healthier, More Resilient Seedlings
When you start your own transplants, you control every factor that shapes plant health from day one. Your seedlings develop stronger root systems and better pest resistance than store-bought starts.
Seed vigor shows in:
- Dark green, uniform foliage with sturdy 2 to 4 millimeter stems
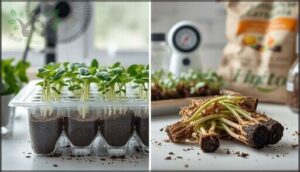
- White, fibrous roots that hold soil together when lifted
- Quick recovery from handling without wilting or yellowing
Proper seed starting techniques, seedling nutrition, and soil quality produce transplants that shrug off common diseases. Advances in now play a key role in accurately evaluating seedling health.
Choosing Vegetable Seeds and Supplies
Getting started with seeds means making smart choices upfront. You’ll need to pick varieties that match your climate and goals, then gather the right supplies to support them.
Let’s walk through what matters most when selecting seeds and setting up your growing space.
Selecting The Right Seed Varieties
Choosing the right varieties sets the tone for your entire season. Match seed selection to your Ashburn climate by prioritizing heat-tolerant picks for summer highs above 85°F and cool-season crops for 60-70°F windows. Disease resistance and growth habits matter as much as flavor—compact types fit containers while bush cucumbers optimize narrow rows.
| Selection Factor | What to Look For |
|---|---|
| Climate Tolerance | Heat/drought ratings for 85°F+ summers |
| Disease Resistance | Fusarium, blight, mildew protection |
| Growth Habits | Bush types, determinate forms, compact varieties |
Check maturity dates against your last frost, and choose varieties with documented local performance data for reliable germination and seed viability across your vegetable seeds collection.
Assessing Seed Quality and Viability
Quality seeds begin with visible clues. Inspect for uniform color and intact coats—shriveled or discolored seeds signal poor seed storage or low seed viability.
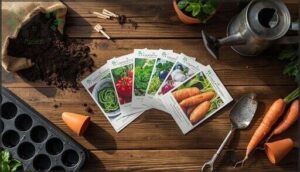
Germination rates printed on packets confirm seed quality, but you can verify with a simple paper towel test. Seed testing reveals genetic purity and actual performance before you commit trays to seed starting.
Fresh seeds germinate faster, establishing healthier seedlings for successful seed selection and germination.
Best Seed Starting Mixes and Containers
A high-quality seed starting mix delivers fine texture and moisture retention without compacting. Pair one part coconut coir or peat moss with one part perlite for ideal root development and water management.
Choose sterile mixes to prevent damping off during indoor seed starting. Use containers with drainage holes—plastic seed trays or biodegradable pots—to support healthy seedlings and simplify your container gardening setup.
Sourcing Seeds Locally and Online
You’ll find vegetable seeds through three main channels, each with distinct advantages for your seed starting success. Local nurseries stock regional varieties adapted to your frost dates and soil conditions. Online retailers offer broader selection and clear germination rates with customer reviews to guide your seed selection. Community seed swaps let you trade open-pollinated types proven in nearby gardens.
Consider these factors when sourcing:
- Seed quality indicators: Look for packaging dates, germination rates, and proper seed storage details on each seed packet
- Climate adaptation: Regional varieties perform better because they’re bred for your growing season length
- Vendor reputation: Online reviews reveal which suppliers deliver viable vegetable seeds consistently
- Sustainability: Local sourcing reduces shipping distance and backs gardening supplies providers who understand your area
Fresh seeds germinate faster and produce healthier transplants for your garden.
Essential Seed Starting Environment Tips
Seeds won’t thrive just anywhere. You need to replicate the environmental factors they’d find in nature—light, warmth, moisture, and air movement—but with more precision and control.
Getting these environmental factors right from the start sets your seedlings up for strong, healthy growth.
Setting Up Ideal Lighting for Seedlings
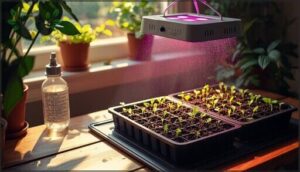
Without proper light, your seedlings will stretch and weaken. For indoor seed starting, position LED options or full-spectrum grow lights 2 to 4 inches above trays. Blue wavelengths (around 450 nm) keep stems compact; red wavelengths (660 nm) drive photosynthesis. Aim for 14 to 16 hours of lighting intensity daily using a timer.
Rotate trays every few days for uniform growth.
| Light Type | Best Distance From Seedlings |
|---|---|
| Fluorescent | 2–4 inches above foliage |
| LED Grow Light | 12–24 inches (check output) |
| Natural Window | Rotate trays often; supplement |
Managing Temperature and Humidity
Stable warmth and moisture are the twin engines of seed germination. Keep soil temps between 65 and 75°F using a heat mat, and aim for 70 to 90 percent humidity under a dome until sprouts appear. Then dial it back to 40 to 60 percent to toughen stems and prevent damping off.
- Use a heat mat to raise soil temperature 5 to 10°F for faster, even germination.
- Cover trays with a humidity dome during germination, then remove gradually.
- Monitor with a hygrometer placed at plant height to track humidity levels accurately.
- Maintain room temps around 68 to 72°F and avoid sudden swings that stress seedlings.
Importance of Good Airflow
Air circulation strengthens your seedlings like a gentle gym workout. Run a low-speed fan near your trays for two to four hours each day to toughen stems and drop humidity around leaves by 10 to 20 percent. That simple step cuts fungal pressure and builds stockier plants ready for real-world weather.
| Airflow Benefit | Why It Matters |
|---|---|
| Stem strengthening | Gentle movement triggers thicker, upright growth |
| Fungal prevention | Lower leaf humidity blocks damping off and mildew |
| Gas exchange | Fresh air removes ethylene buildup in crowded trays |
Watering Techniques for Healthy Growth
Strong airflow builds resilience, but water keeps those seedlings alive. Bottom water your trays to deliver moisture directly to the potting mix without wetting leaves—this promotes root development and cuts fungal risk.
Check moisture depth daily; the top half-inch should feel barely damp. A steady moisture schedule using room-temperature, chlorine-free water quality paired with light mulch retention prevents stress and produces sturdy transplants ready for your garden.
Step-by-Step Seed Sowing and Care
You’ve got your environment set up, your supplies at the ready. Now comes the moment that matters most: actually getting those seeds in the soil and keeping them alive.
The techniques you use in these early days will determine whether you harvest baskets of vegetables or learn some hard lessons about what not to do.
When to Start Different Vegetable Seeds
Timing makes all the difference in seed starting. Cool-season crops like kale and broccoli need 6 to 8 weeks indoors before your last spring frost.
Warm-season vegetables demand more patience—start tomatoes 6 to 8 weeks early, peppers 8 to 10 weeks. Use a seed starting calendar to track varieties. Plan succession planting for continuous harvests throughout the growing season.
Sowing at Correct Depth and Spacing
Once you’ve got your timing down, depth and spacing seal the deal. Plant small seeds at 2 to 3 times their diameter—lettuce sits near the surface, while beans go 1 to 2 inches deep. Follow your seed packet’s planting guides for variety-specific rules.
Proper seed bed prep prevents uneven germination and wasted effort.
- Space carrot seeds 1 to 2 inches apart for strong root development
- Use a depth gauge or dowel to make certain uniform planting depth
- Tiny seeds like celery need just a fine soil layer on top
- Avoid overcrowding—it reduces light and invites disease pressure
Labeling and Organizing Seed Trays
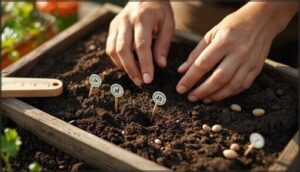
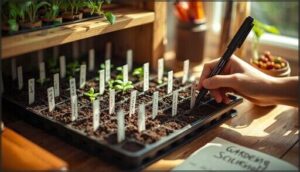
Clear labels save you from planting guesswork. Write crop name, variety, and sowing date on waterproof markers or plastic stakes—ink smears ruin your data tracking.
Group seed trays by family on shelves so you spot problems fast. Keep a simple log noting germination dates and watering tweaks.
Replace damaged labels immediately; label maintenance prevents costly mix-ups during your busiest seed starting weeks.
Preventing Damping Off and Common Issues
Damping off kills seedlings within days of germination. Use a sterile mix and clean containers to block soil-borne fungi at the source.
Bottom watering keeps foliage dry while air circulation—even a small fan—prevents stagnant moisture. Seedling hygiene matters: discard infected trays fast, never reuse old potting mix, and water only when the top inch feels dry to the touch.
Transplanting and Hardening Off Seedlings
Your seedlings won’t survive outdoors until they’ve been properly prepared. Moving them too early or skipping the hardening-off process can undo weeks of careful work.
Here’s how to move your plants safely from indoor trays to the garden bed.
Signs Seedlings Are Ready to Transplant
Your seedlings are ready when they show at least two true leaves and a sturdy, upright stem. Check stem vigor by gently touching the plant—it should stand firm.
Healthy root health appears as white roots circling the pot, while vibrant leaf color signals strong plant growth. Before you transplant seedlings, confirm these signs to make sure proper seedling care and successful hardening off.
How to Harden Off for Outdoor Success
Hardening off is your bridge to the garden. Start by placing seedlings outside for one hour on a calm day, then increase exposure by an hour daily.
Use wind shielding like mesh or fleece to protect fragile stems. Sun acclimation begins with filtered light, avoiding harsh afternoon rays.
Gradual exposure over 7–14 days strengthens plants for outdoor gardening success before frost dates pass.
Minimizing Transplant Shock
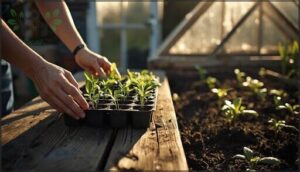
Transplanting doesn’t have to mean stress reduction. Keep the root ball intact during the move—this single step prevents drying and speeds establishment.
Water gently after planting to settle soil around roots. Choose mild weather for outdoor transplanting, and guarantee soil acclimation by matching texture between containers.
Proper hardening off combined with careful seedling care minimizes shock, so your vegetable seeds move smoothly from tray to garden.
Timing Outdoor Planting for Best Results
Your frost date planning sets the foundation for success. Use a seed starting calendar matched to your hardiness zones, then monitor soil temperature—aim for 60 to 70°F for warm-season crops.
Weather forecasting helps you identify ideal transplant windows, while microclimate analysis reveals sheltered spots for season extension gardening. Proper timing ensures strong seed germination and steady growth from day one.
Top 9 Tools for Successful Seed Starting
The right tools make seed starting simpler and more successful. You don’t need expensive equipment, but a few key items will improve germination rates and seedling health.
Here are nine reliable tools that simplify the process from sowing to transplant.
1. LVWIT LED Shop Light Fixture
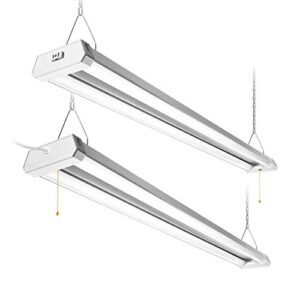
Affordable light makes all the difference when you’re growing indoors. The LVWIT 4FT fixture delivers 4200 lumens at a bright 5000K daylight spectrum—exactly what seedlings need to stay compact and vigorous.
You’ll appreciate the linkable design if you’re lighting multiple trays. It hangs easily with included chain and plug. At 42 watts, it’s energy efficient for extended daily use. The integrated LEDs aren’t replaceable, but the low price and solid output make this a practical choice for home growers working on a budget.
| Best For | Home growers and hobbyists looking for affordable, energy-efficient lighting to support seedlings and indoor plants without breaking the bank. |
|---|---|
| Power Type | Electric LED |
| Primary Use | Workshop Lighting |
| Installation | Hanging Chain |
| Material | Metal/LED |
| Weight | 7.08 lbs |
| Key Benefit | Bright workspace illumination |
| Additional Features |
|
- Bright 4200-lumen output with 5000K daylight spectrum promotes healthy, compact plant growth
- Linkable design lets you expand your setup easily across multiple growing trays
- Energy-efficient at 42W with simple plug-and-play installation using included chain
- LEDs aren’t replaceable, so you’ll need to buy a new fixture when they eventually burn out
- Lightweight metal construction may not hold up as well as heavier-duty shop lights
- Some users report the actual brightness feels lower than the 4200-lumen spec suggests
2. Barrina Led Shop Light Fixture
For longer runs or bigger setups, the Barrina delivers 2200 lumens at 6500K in a slim, linkable design. You can snap up to eight units together on a single circuit—perfect when you’re outgrowing a single shelf.
At just 20 watts per fixture, it sips power while flooding trays with crisp, blue-white light. The aluminum housing stays cool, and installation takes minutes with the included snap joints.
If you’re expanding your operation or need wall-to-wall coverage, this fixture scales without breaking the bank.
| Best For | Growers who need bright, energy-efficient lighting across larger spaces or multiple shelves and want the flexibility to link fixtures together. |
|---|---|
| Power Type | Electric LED |
| Primary Use | General Lighting |
| Installation | Plug-and-Play |
| Material | Aluminum/Polycarbonate |
| Weight | Not specified |
| Key Benefit | Energy-efficient lighting |
| Additional Features |
|
- Super bright 2200-lumen output with minimal 20W power draw keeps energy costs low
- Linkable design lets you connect up to 8 units together for seamless coverage
- Quick plug-and-play setup with snap joints—no complicated wiring required
- Packaging sometimes arrives damaged, which can affect the condition of the fixture
- Won’t work with motion sensors without shortening the product’s lifespan
- Adapter wire can be short, so you might need an extension cord depending on your setup
3. Seedling Heat Mat For Plants
Light alone won’t crack tough seeds like peppers or tomatoes—they need bottom warmth. A seedling heat mat lifts soil temperature 10 to 20°F above room air, cutting germination time in half for heat-loving crops.
This 18.5″ × 8.5″ model draws just 15 watts and features waterproof construction to handle humid trays safely. Place it under your seed tray, plug it in, and watch stubborn seeds wake up. Once seedlings emerge and roots establish, you can pull the mat and repurpose it for your next sowing.
| Best For | Gardeners starting heat-loving seeds like peppers, tomatoes, or eggplants indoors who need faster, more reliable germination. |
|---|---|
| Power Type | Electric Heat Mat |
| Primary Use | Seed Germination |
| Installation | Flat Placement |
| Material | Waterproof Fabric |
| Weight | Lightweight |
| Key Benefit | Improved germination rate |
| Additional Features |
|
- Cuts germination time in half for warm-season crops by raising soil temperature 10–20°F
- Waterproof design handles moisture from seed trays without safety issues
- Low 15-watt draw makes it cheap to run all season long
- Small 18.5″ × 8.5″ footprint limits you to one or two standard trays at a time
- Stiff construction makes storage awkward between growing seasons
- No thermostat included—you’ll need to monitor temperatures manually or buy a separate controller
4. Portable Garden Pressure Sprayer Tool
Once your seedlings emerge, gentle watering becomes critical. A portable pressure sprayer lets you mist delicate leaves without washing away soil or snapping fragile stems.
The SOLO 418-2L holds one liter, weighs just one pound, and features adjustable nozzle modes—fine mist for tender cotyledons, jet spray for saturating larger trays. Lock the trigger to reduce hand fatigue during long sessions.
The leak-proof HDPE body resists garden chemicals, and drift guards keep spray exactly where you aim it.
| Best For | Gardeners who need precise, controlled watering for delicate seedlings and young plants without damaging fragile stems or washing away soil. |
|---|---|
| Power Type | Manual Pump |
| Primary Use | Plant Spraying |
| Installation | Handheld |
| Material | HDPE Plastic |
| Weight | 1 lb |
| Key Benefit | Versatile spraying |
| Additional Features |
|
- Adjustable nozzle switches from fine mist to jet spray, so you can handle everything from tender seedlings to saturating larger trays
- Lock-on trigger reduces hand fatigue during long watering sessions, and the one-pound weight makes it easy to carry around the garden
- Drift guards and leak-proof HDPE construction keep spray exactly where you aim it while resisting garden chemicals
- Heavier than some users expect due to the heavy-duty plastic reservoir, especially when filled
- Spray distance and pressure may be limited compared to larger professional models
- Durability can be inconsistent—some users need replacement parts, though most report long-lasting performance
5. Dramm Lemonhead Hose End Sprayer
As seed trays multiply, you’ll need a tool that connects to your hose for faster, broader coverage. The Dramm Lemonhead converts any standard garden hose into a multifaceted spray tool with patterns ranging from fine mist to wide fan.
Its lightweight aluminum and plastic construction won’t tire your wrist. The adjustable control lever switches patterns instantly—no detaching required—and the leak-resistant connection fits standard threads.
The corrosion-resistant finish manages common fertilizers and minerals without degrading.
| Best For | Gardeners managing multiple seed trays or larger growing areas who need versatile spray patterns and lightweight, comfortable operation during extended watering sessions. |
|---|---|
| Power Type | Manual Hose-End |
| Primary Use | Plant Watering |
| Installation | Hose Attachment |
| Material | Plastic |
| Weight | Lightweight |
| Key Benefit | Easy garden watering |
| Additional Features |
|
- Multiple spray patterns (fine mist to wide fan) adjust instantly with one-hand lever control
- Lightweight aluminum and plastic design reduces hand fatigue during long use
- Corrosion-resistant finish handles fertilizers and mineral-rich water without breaking down
- 50 PSI pressure limit may restrict performance with low-pressure water sources
- Plastic components may not match the longevity of all-metal alternatives
- Standard hose connection only—no quick-connect compatibility mentioned
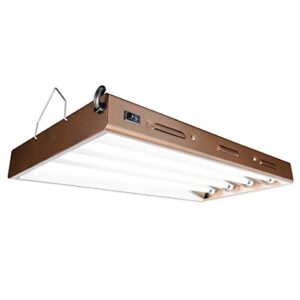
6. High Performance Grow Light Fixture
When natural light falls short, you’ll need a fixture that delivers consistent, uniform coverage across your entire seed tray setup. This four-tube T5 system pumps out up to 8,000 lumens through faceted aluminum reflectors that distribute light evenly, eliminating hot spots and shadowed corners.
The daisy-chain design lets you run multiple fixtures from a single outlet—critical when you’re scaling up production. Its textured steel housing dissipates heat efficiently, and the 10-foot cord gives you flexible placement options on benches or racks.
| Best For | Indoor growers who need reliable, high-output lighting for seed starting, vegetable production, or year-round growing in spaces where natural light isn’t cutting it. |
|---|---|
| Power Type | Electric T5 |
| Primary Use | Indoor Growing |
| Installation | Hanging/Vertical |
| Material | Alloy Steel/Aluminum |
| Weight | Heavy duty |
| Key Benefit | High lumen output |
| Additional Features |
|
- Delivers 8,000 lumens with reflectors that spread light evenly across trays, so nothing gets left in the shadows
- Daisy-chain feature lets you link multiple units without overloading outlets—huge time-saver when you’re expanding
- Hangs vertically or overhead, giving you flexibility whether you’re working with shelves, benches, or tight spaces
- Generates noticeable heat, so you’ll need decent airflow or ventilation to keep temps in check
- Some users report the ballast can fail earlier than expected, which means potential replacement costs
- Weighs enough that you’ll probably want a second pair of hands for installation
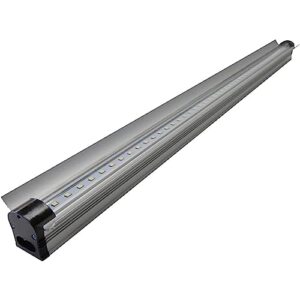
7. Full Spectrum Led Grow Light
You’ll want a fixture that covers the blue and red wavelengths plants actually use. This 48-watt strip light delivers 6400K full spectrum output through 96 HPF LEDs, targeting the 380 to 800 nanometer range your seedlings need for vigorous growth.
The linkable design lets you connect up to eight units on one power cord—essential when you’re running multiple trays. Self-cooling technology keeps heat output minimal, and the aluminum housing withstands daily greenhouse use. At 50,000 hours, it’ll outlast most fluorescent setups.
| Best For | Home growers and greenhouse operators who need reliable supplemental lighting for seedlings, microgreens, or small-to-medium plant setups. |
|---|---|
| Power Type | Electric LED |
| Primary Use | Plant Growing |
| Installation | Linkable Mount |
| Material | Aluminum |
| Weight | 1.3 lbs |
| Key Benefit | Minimal heat generation |
| Additional Features |
|
- Links up to 8 units on a single cord, making multi-tray setups simple and reducing outlet clutter
- Self-cooling tech keeps heat minimal so you can place lights closer to plants without burning them
- 50,000-hour lifespan means you won’t be replacing bulbs every season like with CFLs
- Some users report durability issues with internal connectors failing earlier than expected
- 90-degree beam width may leave gaps in coverage for wider growing areas
- Light intensity works for seedlings but may not be strong enough once plants mature
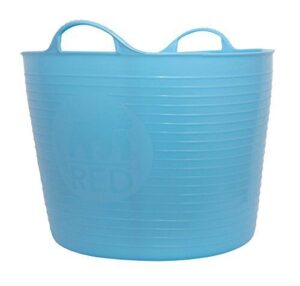
8. Flexible Garden Tub Trug
Mixing potting soil gets messy fast, and you need a container that won’t crack when you’re hauling forty pounds of damp medium. This 38-liter polyethylene tub flexes under load but won’t split in cold weather.
The reinforced grips and rolled rim let you grip firmly while pouring or transporting soil across the garden. Use it to blend your seed-starting mix, carry transplants to the hardening-off area, or collect debris during tray prep. It nests flat for storage between batches.
| Best For | Gardeners who need a durable, flexible container for mixing soil, hauling plants, and collecting debris without worrying about cracks or breaks. |
|---|---|
| Power Type | No Power |
| Primary Use | Multi-Purpose Storage |
| Installation | Freestanding |
| Material | Plastic |
| Weight | 1.1 lbs |
| Key Benefit | Extreme durability |
| Additional Features |
|
- Reinforced handles and flexible sides make it easy to pour, carry, and grip even when loaded with heavy soil
- Frost-proof and UV-resistant material holds up in all weather conditions without cracking
- Versatile design works for mixing potting soil, transporting plants, collecting weeds, and storing gardening supplies
- Pricier than standard plastic buckets or containers
- Lighter colors can show dirt and stains more easily over time
- Some users find the branding (gorilla logo) stamped on the side unappealing
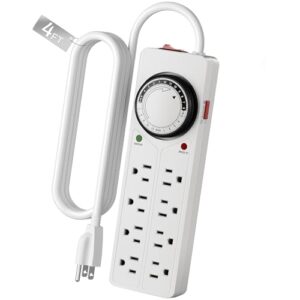
9. Surge Protector Timer Outlet Strip
Automating light cycles removes the daily reminder to flip switches, especially when you’re managing multiple seed trays. This eight-outlet surge protector gives you four timer-controlled outlets and four always-on outlets, so grow lights cycle on schedule while heat mats stay powered continuously.
The dial uses 15-minute increments for precise scheduling. The six-foot cord reaches distant outlets without daisy-chaining extensions. A resettable circuit breaker protects against overloads, and illuminated indicators show which outlets are active during each adjustment.
| Best For | Seed starters and indoor gardeners who need to automate grow light schedules while keeping heat mats or fans running continuously. |
|---|---|
| Power Type | Electric Timer |
| Primary Use | Device Control |
| Installation | Mountable |
| Material | Plastic |
| Weight | Lightweight |
| Key Benefit | Scheduled outlet control |
| Additional Features |
|
- Four timer-controlled outlets let you automate light cycles in 15-minute increments while four always-on outlets handle heat mats or other continuous-run equipment
- Built-in surge protection (800V) and circuit breaker safeguard seedling setups and expensive grow lights from power spikes
- Indicator lights and override switch make it easy to see what’s running and manually control timer outlets when needed
- Timer mechanism produces a soft ticking or buzzing noise that some users find noticeable in quiet spaces
- All four timer outlets operate on the same schedule, so you can’t run different timing cycles for multiple trays
- Design changes over time mean replacement parts or additional units may not match your current model exactly
Frequently Asked Questions (FAQs)
What is the best way to start vegetables from seeds?
Most gardeners complicate seed starting, but success comes from simplicity.
Use sterile seed starting mix, provide 14 to 16 hours of bright light daily, keep soil consistently moist, and maintain temperatures between 70 to 75 degrees Fahrenheit.
Does soaking seeds in hydrogen peroxide help germination?
A 3 percent hydrogen peroxide soak can speed germination by softening tough seed coats and reducing surface pathogens. Soak seeds 5 to 20 minutes, then rinse thoroughly before planting.
How to successfully germinate vegetable seeds?
You’ll see sprouts in three to fourteen days if you keep soil between 65 and 75°F, maintain even moisture, and provide bright light immediately after emergence.
Which vegetables should not be planted next to each other?
Pairing the wrong crops side by side is a recipe for absolute disaster.
Tomatoes and dill, beans and onions, or carrots near dill will stunt growth, invite pests, and drastically reduce your harvest.
Is it better to germinate seeds in soil or paper towel?
Soil germination produces sturdier seedlings with stronger roots and natural nutrients.
Paper towels offer faster visibility and space efficiency but require careful transplanting.
For vegetables, soil usually wins for resilience and simplicity.
What is the best method for starting seeds?
The winning approach involves sowing seeds directly in sterile seed starting mix with 12 to 16 hours of light daily, bottom watering to prevent damping off, and maintaining 70 to 75 degrees Fahrenheit.
Can I reuse seeds from store-bought vegetables?
You can, but results vary. Store-bought vegetables often come from hybrid varieties that won’t produce true-to-type plants.
Germination rates are usually lower than certified seed packets, and fruit quality can differ substantially.
What temperature kills seeds during storage?
Extreme heat above 95°F (35°C) damages seed embryos and destroys germination potential within weeks.
Sustained exposure to temperatures over 70°F (21°C) gradually reduces viability. Keep seeds cool and dry for longevity.
How long do different vegetable seeds stay viable?
Most vegetable seeds remain viable for one to four years when stored properly. Beans, corn, and lettuce often last three to four years, while onion and parsnip seeds decline faster.
Can I start seeds in regular potting soil?
Regular potting soil can work but lacks ideal drainage for germination. Mix in perlite or vermiculite to improve aeration.
Seed starting mix prevents damping off and promotes stronger root development in young seedlings.
Conclusion
You might worry that seed starting tips for vegetables sound complicated, but they’re not. Once you’ve grown your first tray of seedlings, the process becomes second nature.
Your initial investment in lights and heat mats pays for itself within two seasons. More importantly, you’ll never again settle for the limited varieties at garden centers. Next spring, you’ll be the neighbor with thriving transplants weeks before anyone else plants.
- https://www.gardeningknowhow.com/garden-how-to/soil-fertilizers/vermiculite-growing-medium.htm
- https://gardenplanner.almanac.com/
- https://garden.org/nga/zipzone/
- https://www.johnnyseeds.com/tools-supplies/seed-starting-supplies/trays-domes-and-flats/leakproof-trays-100-count-9515.html?cgid=trays-domes-and-flats

