This site is supported by our readers. We may earn a commission, at no cost to you, if you purchase through links.
Remove dead foliage, but leave some for beneficial insects.
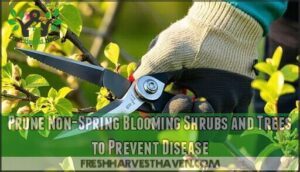
Prune non-spring blooming shrubs and trees while they’re dormant.
Test your soil every three years and amend with compost.
Plant cool-season crops like spinach and peas.
Clean and sharpen your tools, set up irrigation systems, and prepare bird feeders for returning migrants.
Don’t forget to divide perennials before new growth appears and reseed any patchy lawn areas.
The timing of these tasks depends on your specific zone and frost dates.
Table Of Contents
- Key Takeaways
- Prepare Garden for Spring
- Clean Up Garden Space
- Garden Maintenance Essentials
- Soil and Plant Care
- Conduct a Soil Test Every Three Years to Assess Fertility and PH
- Amend Soil With Organic Matter Like Compost or Manure
- Plant Cool Season Crops Like Spinach, Radish, Peas, and Lettuce
- Gradually Transition Indoor Plants to Outdoor Conditions After Last Frost
- Harden Off Indoor Seedlings for Transplanting Outdoors
- Garden Tools and Wildlife Preparation
- Frequently Asked Questions (FAQs)
- What is the gardening 3 year rule?
- When should I start preparing my garden for spring?
- When to start spring garden clean up?
- How to take care of your garden in spring?
- What is the rule of 3 in gardening?
- When should I start spring garden clean up?
- What is a Spring Gardening checklist?
- Why is it important to use a garden checklist?
- Do you need a garden checklist after a long winter?
- How frequently should garden maintenance be done?
- Conclusion
Key Takeaways
- Start early and work with your zone – Begin spring prep when soil becomes workable (usually 40-50°F) rather than following calendar dates, and know your last frost date to time plantings correctly.
- Clean up strategically while protecting beneficial insects – Remove debris from main pathways and beds, but leave some dead plant material in quiet corners to shelter overwintering beneficial insects that’ll help with pest control.
- Test and amend your soil every three years – Conduct soil tests to check pH and nutrient levels, then add 2-3 inches of compost or aged manure to improve soil structure and fertility.
- Prepare tools and support systems before you need them – Clean and sharpen garden tools, set up irrigation systems, install plant stakes for peonies before growth begins, and prepare bird feeders for migrating species.
Prepare Garden for Spring
Spring brings fresh possibilities to your garden, but success depends on proper preparation.
Before you can plant new flowers or vegetables, you’ll need to assess winter damage, understand your growing zone, and create a solid plan for the season ahead.
Assess Winter Damage and Growth
After winter’s harsh grip loosens, begin your spring garden maintenance checklist by conducting thorough winterkill assessment on perennials and spring bloomers.
Spring awakens possibilities—assess, plan, and prepare for your garden’s fresh start.
Inspect for frost heaves that push plants from soil, requiring gentle repositioning. Examine growth bud inspection on trees and shrubs to determine viability for upcoming seasons.
Check structural integrity of garden features damaged by snow loads.
While clearing debris, leave some cover for beneficial pest overwintering insects that support garden health. Consider also applying mulch strategically for plant protection.
Determine Garden Zone and Last Frost Date
After evaluating winter damage, you need to determine your garden zone and last frost date to create an effective spring garden checklist. Your USDA hardiness zone tells you which plants survive your winters, while your last frost date determines when it’s safe to plant tender crops outdoors.
Use the USDA’s interactive Plant Hardiness Map or your local extension office to find your zone. Frost Prediction tools like the Old Farmer’s Almanac provide last frost dates based on 30-year averages. Remember that Microclimate Impact matters—areas near buildings or water may have different timing than your broader region.
Your garden zone and Regional Variations affect your Planting Calendar:
- Zone 3-5: Last frost typically occurs mid-to-late May
- Zone 6-7: Expect last frost in mid-to-late April
- Zone 8-9: Last frost usually happens in early-to-mid March
- Zone 10-11: Frost rarely occurs, extending growing seasons
- Microclimates: Protected spots may be 1-2 weeks ahead of Zone Hardiness predictions
This spring garden maintenance checklist foundation guarantees proper timing for all subsequent planting decisions.
Review Previous Year’s Notes and Garden Planner
Last year’s garden journal holds the key to this season’s success. Review what thrived and what struggled—note which varieties excelled and which pest problems emerged. This analysis shapes your spring garden maintenance checklist and improves your garden planning decisions.
Your garden journal should include specific observations about microclimate mapping, crop rotation patterns, and seed organization systems that worked. Document planting schedule adjustments and note garden structures that need repairs or replacement.
| Review Category | Questions to Ask |
|---|---|
| Plant Performance | Which varieties thrived in your microclimate? |
| Pest Management | What pest problems occurred and when? |
| Crop Rotation | Which bed rotations worked effectively? |
| Garden Structures | What repairs or improvements are needed? |
Use your garden planner to refine timing, adjust your gardening checklist, and plan structural improvements. This systematic review transforms last year’s experiences into actionable insights for better spring garden maintenance.
Plan What to Grow and Potential Building Projects
Now you’re ready to map out your garden’s future. After reviewing what worked last year, it’s time to envision new possibilities and practical improvements for the growing season ahead.
Start your spring garden planning by considering these key areas:
- Crop rotation strategies to maintain soil health and prevent pest buildup
- Vertical gardens and raised beds for maximizing growing space
- Water features like rain gardens or irrigation systems for efficient watering
- Garden structures such as trellises, arbors, or storage solutions
Map sunny spots for your vegetable garden prep and identify shadier areas perfect for pollinators. Consider garden building projects that’ll enhance both function and beauty—perhaps a greenhouse for season extension or pathways that improve garden flow.
Your spring garden checklist should balance ambitious dreams with realistic timelines. Budget for materials and prioritize projects that’ll have the biggest impact on your garden’s productivity and enjoyment.
Clean Up Garden Space
After winter’s harsh grip loosens, your garden needs a thorough inspection to assess what survived and what needs attention.
Start by walking through your vegetable garden, flower beds, and around trees to identify winter damage.
Then systematically remove debris while being mindful of beneficial insects that may still be sheltering in plant material.
Inspect Vegetable Garden, Flower Beds, and Trees for Damage
Your spring garden maintenance starts with a thorough inspection. Look for winter damage assessment indicators like cracked bark or broken branches on trees. Check flower beds for pest infestation signs and disease identification markers.
Focus on these key areas:
- Structural Integrity Check – Examine tree limbs for splits or weakness
- Wildlife Habitat Impact – Note areas where animals may have caused damage
- Root Zone Assessment – Check for frost heave around plant bases
This spring garden cleanup step guarantees your garden checklist addresses problems before they worsen.
Remove Dead Leaves and Stalks, Leaving Some for Overwintering Insects
Why struggle with complete garden cleanup when leaving some debris benefits your space? Strategic spring garden cleanup means clearing pathways and main beds while preserving beneficial insects’ winter homes.
This approach supports wildlife support while managing composting debris naturally. You’ll create insect habitats that encourage beneficial insects to stick around for pest control. The remaining stalks and dead leaves decompose gradually, enriching your soil without extra work.
| Remove | Leave Behind |
|---|---|
| Dead leaves from walkways | Leaf piles in quiet corners |
| Diseased plant material | Healthy stalks for insect habitats |
| Debris blocking new growth | Natural mulch layers |
Focus your spring garden maintenance on high-visibility areas first, then tackle tucked-away spots later in the season.
Prune Trees and Shrubs During Their Winter Dormancy
With winter’s grip loosening, dormancy pruning benefits become clear as you tackle this essential spring gardening checklist task.
Late winter offers the ideal pruning timing guide when trees and shrubs remain dormant but buds haven’t swelled yet.
Focus on these essential shrub pruning techniques:
- Remove dead, diseased, or crossing branches using clean, sharp bypass pruners
- Thin overcrowded areas to improve air circulation and light penetration
- Shape non-spring blooming shrubs before active growth resumes.
Proper tree pruning methods during dormancy minimize stress while promoting vigorous spring growth. Remember to also address winter weeds and pests to maintain garden health.
Check Plants for Frost Heave and Gently Push Them Back Into The Ground
After pruning, inspect your garden for frost heave damage. Freezing and thawing cycles push plants upward, exposing roots to drying air and potential damage. Check perennials, bulbs, and newly planted specimens for displacement.
Heave Prevention steps:
- Gently press displaced plants back to proper replanting depth without compacting soil
- Apply fresh winter mulch around repositioned plants for root damage protection
- Monitor soil thawing progress and repeat as needed throughout early spring
This frost heave maintenance keeps your spring garden maintenance checklist progressing smoothly.
Garden Maintenance Essentials
With winter behind you, it’s time to tackle essential maintenance tasks that’ll set your garden up for a thriving growing season.
These core activities focus on plant health, structural support, and preparing your outdoor space for the months ahead.
Prune Non-Spring Blooming Shrubs and Trees to Prevent Disease
Why wait until spring’s peak to tackle this vital task? Pruning techniques for non-spring blooming shrubs and trees work best during late winter or early spring dormancy.
This pruning timing guide prevents disease prevention issues while promoting healthy growth. You’ll need clean, sharp tools—pruners for small branches, loppers for thicker ones, and saws for larger limbs.
Tool maintenance guarantees clean cuts that heal properly. Selecting the right pruning shear models can greatly improve your pruning efficiency.
Focus on shrub identification to avoid pruning shrubs spring bloomers incorrectly. Make angled cuts above outward-facing buds to encourage proper wound treatment and prevent water accumulation.
Address winter damage by removing dead, diseased, or crossing branches first, then shape as needed.
Remove Damaged or Diseased Tree Limbs and Branches
After pruning shrubs spring season, you’ll need to address damaged tree limbs and branches. Disease identification starts with spotting cracked, discolored, or decaying branches that threaten tree health.
Disease Identification reveals winter damage through visual inspection. Look for:
- Broken or split branches from ice and snow weight
- Discolored bark indicating fungal infections or pest damage
- Dead or dying limbs with brittle wood and no new growth.
Pruning techniques require sharp, clean tools for healthy cuts. Cut close to the trunk collar—never leave stubs that invite disease. Safety precautions include wearing gloves and eye protection when working overhead.
Tool maintenance keeps pruning shears sharp for clean cuts that heal properly. Wound treatment isn’t usually necessary—trees heal naturally when cut correctly. Remove weak limbs to redirect energy toward strong growth.
Regular monitoring during pruning shrubs spring work helps identify pest activity early. Proper removal of damaged branches prevents disease spread to healthy wood, improving overall tree structure and longevity.
Reseed Patchy or Damaged Areas of The Lawn
Damaged lawn areas need immediate attention for Lawn Patching success. Start with Soil Preparation by removing debris and loosening compacted earth.
Choose appropriate Seed Selection for your climate and existing grass type. Apply seeds evenly, then maintain a consistent Watering Schedule to guarantee germination.
| Task | Timing | Key Focus |
|---|---|---|
| Lawn Patch Repair | Early spring | Remove debris, loosen soil |
| Seed Type Selection | Before planting | Match existing grass variety |
| Reseed Patchy Areas | Frost-free days | Even distribution, light coverage |
| Weed Control | Post-germination | Prevent competition for nutrients |
Divide Perennials Before Spring Growth
Since division timing is essential for perennial success, you’ll want to tackle this task when soil becomes workable and daytime temperatures reach 45-50°F.
Early spring division allows plants to establish roots before supporting new foliage, preventing the 30% bloom reduction that comes with late division. Consistent watering and fertilization are vital for growth.
Division timing guide for ideal root health:
- Water plants the day before to ease digging and reduce stress
- Use sharp, sterilized tools to make clean cuts and prevent disease
- Divide mature clumps into 2-5 sections with healthy roots and crowns
- Maintain proper replanting depth at the original soil level
- Provide consistent post-division care with thorough watering and mulching
This plant division process rejuvenates aging perennials, improves bloom impact by 20-40%, and enhances your spring garden maintenance checklist. Focus on summer-blooming varieties like black-eyed Susans and hostas for best spring planting results.
Set Up Support Stakes for Plants Like Peonies
After dividing your perennials, staking peonies becomes your next priority in the spring garden maintenance checklist. Install peony support types before stems emerge to prevent damage and drooping blooms. Staking timing matters—early installation protects developing shoots.
You’ll find various peony support types: ring stakes, bamboo poles, metal frames, or DIY stake options using twiggy branches. Alternative supports like tomato cages work effectively too. Consider plant spacing when choosing supports to make certain adequate room for growth.
Add stakes around the peony crown, positioning them 6 inches from the base. For climbing varieties, install a trellis system early. Ring supports work best for herbaceous peonies, while tree peonies need sturdy individual stakes.
Proper support prevents stem breakage during heavy blooms and maintains garden aesthetics throughout the growing season.
Soil and Plant Care
Your soil forms the foundation of your garden’s success, and spring is the perfect time to give it the attention it deserves.
By testing your soil and adding proper amendments, you’ll create the ideal environment for healthy plants to flourish throughout the growing season.
Conduct a Soil Test Every Three Years to Assess Fertility and PH
Regular soil testing every three years keeps your garden thriving by revealing critical information about nutrient levels and pH balance.
Your soil test is your garden’s report card—don’t skip this vital health check.
This simple practice prevents costly mistakes and helps your plants get exactly what they need.
Here’s what makes soil testing essential:
- Prevents nutrient imbalances: Testing identifies deficiencies before they reduce yields by up to 30%
- Saves money: A $15-30 test can prevent over $100 in unnecessary amendments annually
- Guides smart decisions: Results show exactly which nutrients your soil needs
Collect samples from multiple garden spots for accuracy.
Send them to your state extension office or use DIY soil tests for quick results.
Professional labs provide detailed reports on pH levels, nutrient deficiencies, and organic matter content.
Test results guide soil pH adjustment and reveal nutrient deficiency signs, helping you interpret soil results effectively for superior soil health.
Amend Soil With Organic Matter Like Compost or Manure
Now that you’ve tested your soil, it’s time to give it the nutrients it craves. Adding organic matter like compost or manure transforms your garden’s soil structure and boosts nutrient availability.
Spread 2-3 inches of your chosen organic amendments over beds, then work them into the top 6-8 inches of soil. This soil preparation garden technique improves drainage while increasing moisture retention.
You can also find garden compost solutions to enhance your soil.
| Amendment Type | Primary Benefits | Best Applications |
|---|---|---|
| Compost | Balanced nutrients, improved soil health | Vegetable gardens, flower beds |
| Aged Manure | High nitrogen content, organic matter | Heavy feeders like tomatoes |
| Leaf Mold | Soil conditioning, moisture retention | Perennial borders, trees |
These organic amendments address nutrient deficiencies while supporting beneficial microorganisms that keep your plants thriving throughout the growing season.
Plant Cool Season Crops Like Spinach, Radish, Peas, and Lettuce
Optimal timing matters when planting cool-season crops like spinach, radish, peas, and lettuce.
Check soil preparation—40°F soil temperature signals readiness.
Variety selection affects your spring garden maintenance success.
Use companion planting strategies for natural pest control while practicing succession planting for continuous harvests.
These frost-tolerant vegetables anchor your spring gardening checklist, delivering fresh greens throughout planting season spring.
Gradually Transition Indoor Plants to Outdoor Conditions After Last Frost
Success with relocating plants outdoors depends on following the acclimation process to prevent shock.
- Start in shade, allowing gradual sunlight exposure
- Maintain consistent watering schedule for hydration
- Monitor temperature control and bring sensitive plants inside during cold snaps
- Watch for pest prevention needs as plants adjust
Your relocating plants will thrive with patience during spring garden maintenance checklist tasks.
Harden Off Indoor Seedlings for Transplanting Outdoors
Moving your indoor seedlings outdoors requires gradual acclimation to prevent shock and guarantee healthy transplants. This hardening off seedlings process strengthens plants against outdoor conditions like wind, temperature fluctuations, and direct sunlight exposure.
Follow these seedling hardening steps over 7-10 days:
- Start Small: Place seedlings outside for 1-2 hours in a sheltered, shaded location on mild days above 45°F.
- Increase Daily: Add one hour of outdoor time each day while gradually introducing more direct sunlight and gentle wind.
- Monitor Watering: Adjust your watering schedule to water less frequently but don’t let soil dry completely.
- Provide Protection: Use wind protection and temperature control by bringing plants inside during harsh weather or cold nights.
This gradual acclimation process prepares seedlings for permanent outdoor living. Some gardeners even utilize winter sowing techniques to bypass the need for indoor starting altogether.
Garden Tools and Wildlife Preparation
Getting your tools and wildlife stations ready now sets you up for months of successful gardening ahead.
You’ll want to clean and organize your equipment while preparing feeders and water sources that support both your plants and the beneficial creatures that help your garden thrive.
This preparation is crucial as it includes cleaning and organizing your equipment.
Clean and Sharpen Garden Tools
Now that your soil and plants are properly cared for, your garden tools deserve the same attention. Sharp, clean equipment makes every gardening task more efficient and protects your plants from disease.
Start with tool cleaning methods: wash tools with warm, soapy water, then sanitize pruning shears with rubbing alcohol. For sharpening techniques, use a whetstone or mill file on blades, maintaining the original angle. Rust prevention requires applying mineral oil to metal parts after cleaning.
A complete sharpening kit guarantees superior tool performance.
| Tool Type | Maintenance Task |
|---|---|
| Pruning Shears | Sanitize, sharpen, oil hinges |
| Shovels | Remove soil, check for cracks |
| Hoes | Sharpen garden tools blade edges |
| Rakes | Tighten loose tines, clean debris |
| Hand Tools | Inspect handle maintenance needs |
Your garden tool checklist should include checking handles for splits and storing garden equipment in dry spaces for superior tool storage.
Set Up Garden Hoses, Rain Barrels, and Ensure Gutters Are Clear
With your tools cleaned and sharpened, you’re ready to tackle hose maintenance and rainwater harvesting setup.
Inspect garden hoses for cracks or damaged connections, position rain barrels under downspouts, and clear gutters for proper drainage.
Smart water conservation starts with efficient irrigation systems that’ll serve your garden all season long.
- Check hose washers and connections for winter damage
- Position rain barrels to capture spring runoff effectively
- Clear gutters and downspouts for smooth water flow
Clean and Set Up Bird Feeders and Birdbaths
Now that your irrigation system’s ready, clean bird feeders and birdbaths become your next priority. Start by scrubbing feeders with hot soapy water to eliminate mold and bacteria—proper feeder hygiene prevents disease spread among wild things. Position feeders away from windows but visible from indoor viewing spots.
For birdbaths, choose stable bath placement in partially shaded areas. Clean thoroughly with a pressure washer if available, then refill with fresh water. A reliable water source attracts more species than food alone.
Consider bird-friendly design elements like multiple perch sizes and seed varieties. Don’t forget winterizing baths with heating elements for year-round use. Add this essential step to your garden checklist alongside nesting boxes maintenance.
| Feeder Type | Cleaning Method | Seed Recommendation |
|---|---|---|
| Tube Feeder | Bottle brush + bleach solution | Sunflower seeds |
| Platform Feeder | Scrub pad + warm soapy water | Mixed seed blend |
| Suet Feeder | Wire brush + degreaser | High-energy suet cakes |
| Nectar Feeder | Pipe cleaner + vinegar rinse | Sugar water solution |
| Thistle Feeder | Toothbrush + hot water | Nyjer seed |
Prepare Oriole and Hummingbird Feeders for Arriving Migrations
Get ahead of spring migration timing by preparing your bird feeders now.
For hummingbird feeders, mix a 4:1 water-to-sugar solution without red dye. Create your oriole nectar recipe using a 6:1 ratio plus grape jelly and orange halves.
Proper hummingbird feeder placement matters—hang them in shaded areas with nearby perches for attracting more birds.
- Feeder cleaning routine: Wash weekly with hot water and mild soap to prevent mold
- Strategic positioning: Place feeders 5-10 feet high near natural cover for protection
Order Bird Netting to Protect Berry Bushes Later in The Summer
While your feeders welcome spring migrants, berry protection timing becomes your next consideration.
Order UV-resistant netting with quarter-inch mesh now for summer installation. This netting material choice addresses bird safety concerns while protecting your harvest.
Install after pollination to avoid interfering with fruit development. Consider alternative deterrents like reflective tape or decoy owls if netting seems impractical.
Proper berry bush care means planning ahead—store netting properly between seasons for maximum durability and effectiveness.
Frequently Asked Questions (FAQs)
What is the gardening 3 year rule?
The gardening 3-year rule suggests you’ll conduct a soil test every three years to assess fertility and pH levels, keeping your garden’s foundation healthy and thriving.
When should I start preparing my garden for spring?
Start your spring garden prep in late winter.
Check for winter damage, test soil, and plan your layout.
Begin cleanup when you see natural signs like bulb shoots emerging, not just calendar dates, and focus on complete concepts like these to ensure a successful garden preparation.
When to start spring garden clean up?
Wait for natural signs rather than calendar dates. When soil crumbles in your hand instead of forming muddy clumps, you’re ready to begin cleanup without compacting wet earth.
How to take care of your garden in spring?
Clean up debris, test soil, and add compost. Prune non-spring bloomers before buds break. Plant cool-season vegetables and divide perennials. Mulch beds and prepare tools for the growing season ahead.
What is the rule of 3 in gardening?
The rule of 3 in gardening suggests planting in odd-numbered groups, typically three plants of the same variety, to create natural-looking arrangements that are more visually appealing than even-numbered groupings.
When should I start spring garden clean up?
After last winter’s harsh freeze damaged your neighbor’s prized rose bushes, you’re wondering about timing.
Don’t rush—observe natural signs like soil thawing and new growth emerging rather than calendar dates to start cleanup properly.
What is a Spring Gardening checklist?
A spring gardening checklist helps you organize essential tasks like soil preparation, pruning, planting, and pest control. You’ll systematically tackle cleanup, amendments, and seasonal plantings for garden success.
Why is it important to use a garden checklist?
Funny how you’ll remember to water your plants but forget vital garden tasks.
A checklist guarantees you complete essential spring preparations at the right time, preventing costly mistakes and maximizing your garden’s potential.
Do you need a garden checklist after a long winter?
After months of dormancy, you’ll need that checklist to tackle winter damage, soil amendments, pruning schedules, and planting timelines. It prevents overwhelm and guarantees you don’t miss critical spring tasks.
How frequently should garden maintenance be done?
You’ll need weekly maintenance during active growing season, monthly checks in fall and winter, and daily attention during critical periods like planting and harvest times.
Conclusion
Following this spring garden maintenance checklist will absolutely transform your outdoor space from winter’s aftermath into a thriving paradise.
You’ve covered everything from evaluating damage to preparing tools and wildlife habitats.
Remember to work with your zone’s timing rather than against it.
Each task builds on the next, creating momentum for the growing season ahead.
Stay consistent with these practices, and you’ll enjoy a healthier, more productive garden all year long.
- https://www.thespruce.com/spring-cleaning-for-lawns-and-landscaping-2132780
- https://southernlivingplants.com/planting-care/spring-gardening-checklist/
- https://www.westwoodgardens.com/blog/the-ultimate-spring-pruning-guide
- https://libguides.nybg.org/vegetablegarden
- https://bonnieplants.com/blogs/garden-fundamentals/prep-soil-now-for-next-season

