This site is supported by our readers. We may earn a commission, at no cost to you, if you purchase through links.

Start with water propagation—cut healthy stems, strip lower leaves, and place in water until roots develop.
Soil propagation works similarly but uses moist potting mix instead.
Division splits established plants at the roots, perfect for chives and oregano.
Layering bends stems to soil while still attached to the parent plant.
Seed starting gives you the most plants but takes patience.
Each method has its sweet spot depending on the herb type and your timeline.
Some herbs root faster than others, and knowing which technique works best for your favorites can save weeks of waiting.
Table Of Contents
- Key Takeaways
- Herb Propagation Basics
- How to Propagate Herbs
- Propagation Methods Compared
- Caring for Propagated Herbs
- Advanced Propagation Techniques
- Frequently Asked Questions (FAQs)
- How to propagate herbs?
- How do you propagate a herb cutting?
- Is propagating herbs from cuttings a good idea?
- How long does it take to propagate herbs?
- How do you propagate creeping herbs?
- How do you propagate woody herbs?
- What herbs can be propagated from cuttings?
- Can herbs be rooted in water?
- Do herbs regrow after cutting?
- How to propagate herbs in soil?
- Conclusion
Key Takeaways
- You’ll save money and multiply your herb collection by turning one plant into dozens using simple water or soil propagation methods that work with most common herbs, like basil, mint, and rosemary.
- Water propagation delivers the fastest results – just cut 4-6 inch healthy stems, strip lower leaves, and place them in clean water for 1-2 weeks until roots develop, changing the water every few days.
- Soil propagation prevents transplant shock by letting roots develop directly in their permanent growing medium, though it takes longer (4-8 weeks) than water methods.
- You’ll need sharp, clean tools and proper timing – take cuttings in the morning when plants are hydrated, use sterilized scissors, and choose healthy stems with visible leaf nodes for the best success rates.
Herb Propagation Basics
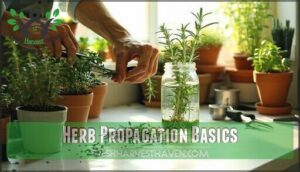
Growing your own herbs from cuttings turns one plant into dozens, saving you money while keeping your kitchen stocked year-round.
You’ll need just a few basic tools and the right technique to transform healthy stems into thriving new plants, which will help you save money.
Benefits of Herb Propagation
Through all seasons and settings, herb propagation reveals your garden’s full potential.
This sustainable gardening practice delivers remarkable cost savings while boosting your herb conservation efforts.
You’ll transform one plant into dozens, creating an endless supply for your kitchen.
Here’s what you’ll gain:
- Environmental benefits – Reduce packaging waste from store-bought herbs
- Increased yield – Turn single plants into thriving herb colonies
- Plant propagation mastery – Develop skills that work across your entire garden
- Grow herbs from cuttings – Skip the seed-starting hassle entirely
These herb propagation methods put you in control of your harvest timeline and variety selection.
Choosing Healthy Herbs for Propagation
Perfect Herb Selection starts with spotting vigorous growth and disease-free foliage.
Strong stems and clean leaves are your propagation gold—skip anything that looks tired or diseased.
You’ll want stems that bend without snapping—that’s your sweet spot for Stem Quality.
Healthy Leaf Structure means no yellowing, spots, or wilting that’ll sabotage your Root Development dreams.
| Plant Health Indicators | What to Look For | Red Flags to Avoid |
|---|---|---|
| Softwood stems | Flexible, green growth | Brittle, woody sections |
| Leaf Structure | Vibrant color, firm texture | Yellow spots, drooping |
| Overall vigor | New growth emerging | Stunted, sparse foliage |
| Disease signs | Clean, unblemished surface | Mold, pest damage |
Preparing Cuttings for Propagation
Once you’ve picked your parent plants, timing matters for successful herb propagation.
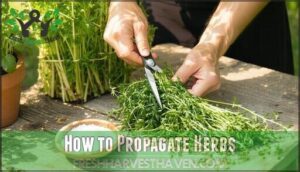
Take cuttings in the morning when stems are fully hydrated, using sharp cutting tools sterilized with rubbing alcohol.
Select 4-6 inch stems with healthy leaf nodes, making clean cuts just below a node.
Strip leaves from the bottom 2 inches of each cutting to prevent rot and encourage rooting.
This process ensures that you have the best chance of successful herb propagation, considering the importance of healthy leaf nodes.
Tools and Materials Needed
Once you’ve got your cuttings ready, gathering the right equipment makes all the difference between propagation success and plant casualties.
You don’t need fancy gear, just a few basics that’ll set your stem cuttings up for victory.
- Sharp tools like clean scissors or pruning shears for precise cuts
- Rooting hormone powder to boost root development
- Small pots with drainage holes for your soilless medium
- Plant labels to track varieties and cutting dates
- Cutting tools disinfected with rubbing alcohol between plants
Using a rooting hormone can substantially improve the chances of successful herb propagation.
How to Propagate Herbs
You’ll master herb propagation once you understand the fundamentals. Successful plant propagation methods depend on proper Herb Selection, sharp Cutting Tools, and ideal Propagation Timing. Root Development happens faster when you match each herb’s needs to the right technique.
Here’s your propagation game plan:
- Take 4-6 inch stem cuttings from healthy, disease-free plants
- Cut just below a node where leaves emerge
- Remove bottom leaves to prevent rot
- Use rooting hormone for stubborn varieties
- Maintain consistent Soil Quality and moisture
Morning’s the sweet spot for taking cuttings—plants are fully hydrated and stress-free. Sharp, clean tools prevent crushing stems and introducing pathogens that’ll sabotage your propagation efforts. Understanding the herb cutting process is vital for achieving high success rates in plant propagation, which relies on the right technique and timing to ensure high success rates.
Propagation Methods Compared
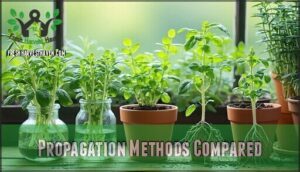
You’ll discover that each propagation method has its own strengths, and choosing the right one depends on your herb type and growing conditions.
Let’s compare water propagation, soil techniques, division, layering, and rooting hormones so you can pick the best approach for your garden.
Water Propagation Methods
Water propagation transforms your herb garden into a rooting powerhouse. Simply cut 6-8 inch stem cuttings below leaf nodes, strip lower leaves for node removal, and submerge in clean water.
Turn one herb plant into dozens with just water and sharp scissors—your kitchen will never run out.
Change water every few days for ideal water quality and humidity control. Most herbs develop roots within 1-2 weeks, with root emergence visible through glass containers.
Skip rooting hormone—water does the magic naturally. For successful herb propagation, consider using proper rooting methods to increase your chances of healthy plant growth.
Soil Propagation Techniques
Soil propagation offers direct root development in your herb’s permanent growing medium.
You’ll skip the transplant shock that sometimes occurs with water-rooted cuttings, giving your plants a head start.
- Soil Preparation: Mix equal parts peat-free compost and sand for ideal drainage and aeration
- Cutting Tools: Use sharp, sterilized pruning shears to make clean angled cuts that promote faster rooting
- Humidity Control: Cover cuttings with plastic wrap or domes to maintain moisture around the soilless potting mix
For optimal results, understanding herb propagation methods is vital for a successful harvest.
Division and Layering Methods
Division feels like performing surgery on your herb garden—but don’t worry, your plants will thank you. This method works best for clumping herbs that naturally multiply through underground root systems.
| Division Method | Best Herbs |
|---|---|
| Root Separation | Chives, lemon balm |
| Stem Division | Mint, oregano |
| Plant Segmenting | Bee balm, tarragon |
| Node Cutting | Thyme, marjoram |
Layering Techniques let stems root while still attached to the parent plant. Simply bend a flexible stem to the ground, cover with soil, and wait for root development. This natural plant division method works great for trailing herbs like rosemary and mint.
Rooting Hormone Application
Rooting hormones pack synthetic auxins like IBA that kickstart root development in your cuttings.
Dip only the cut end into hormone powder, creating an even coating. Poke holes in your propagation medium before inserting treated cuttings to prevent hormone loss.
This simple step doubles your success rate when you propagate herbs from cuttings, turning slow rooters into champions. Understanding the role of hormone powder products is essential for effective herb propagation, using hormone powder.
Caring for Propagated Herbs
Once your herb cuttings develop healthy roots, they’re ready for the next phase of care that’ll determine their long-term success.
You’ll need to master a few key techniques to transform those fragile baby plants into thriving additions to your garden, which will help you achieve long-term success with your thriving garden.
Transplanting Rooted Cuttings
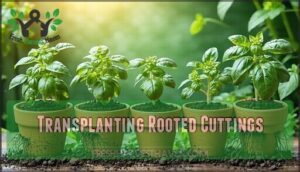
Ready to make the move? Once your cuttings show healthy root development, it’s time for cutting transplant into their permanent home.
Choose well-draining potting soil for successful soil acclimation. Gently remove water-rooted herbs and plant at the same depth.
Skip rooting hormone at this stage—your roots are already established. Begin plant hardening gradually before garden relocation outdoors.
Watering and Fertilization Techniques
Once your cuttings develop roots, proper Water Management becomes your ticket to thriving herbs.
During herb propagation, you’re the plant’s lifeline—too much water drowns roots, too little leaves them gasping. Think of it like Goldilocks: just right is what wins.
Effective watering techniques often rely on having the right watering can tools.
- Monitor Soil Moisture daily using the finger test—stick it an inch deep into soil
- Maintain Humidity Control around 60-70% for ideal root development and growth
- Apply diluted fertilizer every 2-3 weeks once roots establish, avoiding nutrient burn
- Ensure proper drainage to prevent waterlogged conditions that cause root rot
- Balance watering frequency with environmental factors like temperature and air circulation
Monitoring for Pests and Diseases
Young herbs face invisible threats that can derail your propagation success.
Watch for aphids clustering on tender stems and fungal infections appearing as brown spots on leaves.
Root rot shows up as black, mushy roots in waterlogged soil.
Check your plants weekly for bacterial spots or unusual discoloration, and practice quick pest control and disease prevention to keep your herb gardening tips working smoothly.
Hardening Off New Plants
Before baby herbs face the great outdoors, they need acclimation techniques that’ll prevent shock.
Start your plant hardening process by placing containers outside during warm afternoons, giving them partial sun protection while avoiding harsh wind exposure.
Gradually increase outdoor transplant time over seven days—this herb propagation step guarantees your cuttings develop the strength they need after root development reaches proper cutting length requirements.
Proper herb garden maintenance is vital for the long-term health of your plants, ensuring they receive the care needed for optimal growth and plant hardening.
Advanced Propagation Techniques
Once you’ve mastered basic propagation methods, you’ll want to tackle trickier herbs that don’t root easily or need special treatment.
These advanced techniques help you propagate stubborn varieties and solve common problems that leave even experienced gardeners scratching their heads, which can be achieved by using special treatment.
Using Rooting Hormones for Success
Although rooting hormones aren’t absolutely necessary for herb propagation, they’re your secret weapon for cutting success and enhanced root development.
These growth enhancement products contain auxins that trigger rapid root stimulation, turning your plant cloning efforts into a sure thing.
Simply dip your cutting’s base into hormone powder or gel before planting—this hormone application boosts rooting rates dramatically, especially for stubborn woody herbs.
Understanding the benefits of herb cutting propagation is vital for achieving superior results with rooting hormones.
Alternative Methods for Slow-Growing Herbs
When rooting hormone doesn’t cut it for stubborn herbs, try herb layering for woody specimens like rosemary.
Bend flexible stems to soil while attached to the parent plant.
For softwood varieties struggling with stem cutting, root division works wonders on clumping herbs.
Node planting offers another slow growth fix—bury stem sections containing nodes directly in soil for gradual propagation success.
Propagation Tips for Specific Herbs
Different herbs need different approaches to tap into their propagation potential.
Basil propagation thrives in water, while rosemary cuttings prefer soil. Mint rooting happens fast in water, but thyme division works better by splitting established clumps. Sage layering lets stems root while still attached to the parent plant.
- Basil Propagation: Place 4-inch cuttings in water, change every 2 days, roots appear in 1-2 weeks
- Rosemary Cuttings: Use semi-hardwood stems in well-draining soil mix, keep consistently moist but not soggy
- Thyme Division: Split mature clumps in spring, ensuring each section has roots and healthy shoots attached
Troubleshooting Common Propagation Issues
When your cuttings won’t cooperate, don’t panic—most issues have simple fixes.
Root rot from overwatering kills more herbs than neglect, so check for mushy, black stems.
Yellowing leaves often signal nutrient deficiency or poor drainage.
Stunted growth usually means insufficient light or cramped roots.
Pest infestation and fungal diseases spread quickly, so isolate affected plants immediately and treat with appropriate solutions.
Frequently Asked Questions (FAQs)
How to propagate herbs?
Want to multiply your favorite herbs without spending a dime?
Take 4-6 inch cuttings from healthy stems, remove bottom leaves, then root them in water or moist soil for 1-2 months, to multiply your favorite herbs.
How do you propagate a herb cutting?
Take a 4-6 inch cutting from healthy new growth, remove bottom leaves, then place in water or moist soil.
Keep humid and wait patiently for roots to develop over several weeks.
Is propagating herbs from cuttings a good idea?
Yes, propagating herbs from cuttings is brilliant.
You’ll save money, expand your garden freely, and get genetically identical plants.
It’s surprisingly easy with water or soil methods, though patience is key.
How long does it take to propagate herbs?
Root development typically takes 1-3 weeks for water propagation and 4-8 weeks for soil propagation. You’ll see faster results with soft-stemmed herbs like basil compared to woody varieties like rosemary.
How do you propagate creeping herbs?
Don’t let their low-growing nature fool you – creeping herbs are propagation champions! Use layering by pinning stems to soil while attached, or take tip cuttings for water rooting.
How do you propagate woody herbs?
Woody herbs like rosemary, thyme, and sage root best in soil rather than water.
Cut 4-6 inch stems below nodes, strip lower leaves, and plant in well-draining potting mix.
Keep moist and wait patiently—roots develop slowly underground, which is a complete process.
What herbs can be propagated from cuttings?
Picture vibrant green stems reaching toward sunlight, ready to multiply your herb collection.
You can propagate most herbs from cuttings, including basil, mint, rosemary, thyme, oregano, sage, lavender, and lemon balm through simple water or soil methods.
Can herbs be rooted in water?
Yes, you can absolutely root herbs in water.
Soft-stemmed herbs like basil, mint, lemon balm, and oregano thrive in water, often developing roots within 1-3 weeks.
It’s nature’s simplest propagation trick.
Do herbs regrow after cutting?
Most herbs bounce back beautifully after cutting, especially perennials like basil, mint, and rosemary. You’ll actually encourage bushier growth by harvesting regularly, creating a win-win cycle of fresh herbs.
How to propagate herbs in soil?
Take cuttings from healthy stems, strip lower leaves, and insert into well-draining potting mix. Keep soil moist, provide indirect light, and maintain humidity for successful rooting.
Conclusion
Surprisingly, the theory that herb propagation requires green thumbs proves false—you’ll succeed with basic technique and patience.
Mastering how to propagate herbs transforms expensive grocery store purchases into endless free plants.
Whether you choose water propagation for quick results or division for established clumps, each method delivers reliable growth when you follow proper timing and care.
Your kitchen windowsill becomes a renewable herb factory, saving money while ensuring fresh flavors year-round.
- https://organicgardeningcollective.com/the-ultimate-guide-to-herb-propagation-mastering-herb-propagation-techniques/
- https://www.thespruce.com/winter-herb-propagation-tips-8773152
- https://preparednessmama.com/propagate-herbs-from-cuttings/
- https://homesteadingfamily.com/a-guide-to-propagating-herbs/
- https://www.rareseeds.com/requestcat/catalog

