This site is supported by our readers. We may earn a commission, at no cost to you, if you purchase through links.

A poorly pruned apple tree can drop 40% of its fruit before harvest—not from disease or drought, but from branches too crowded to let sunlight reach the developing fruit. That single cut you skipped last February costs you in August.
Pruning isn’t just maintenance; it’s the difference between a tree that produces and one that merely survives.
Get the timing wrong, and you’re fighting sap loss and disease entry points. Get it right, and your trees reward you with cleaner structure, better yields, and wood you can actually reach.
These fruit tree pruning techniques will walk you through every cut, season, and tool you need.
Table Of Contents
- Key Takeaways
- Why Prune Fruit Trees
- When to Prune Fruit Trees
- Top 4 Pruning Tools
- Step-by-Step Pruning Method
- Training Systems for Fruit Trees
- Species-Specific Pruning Tips
- Common Pruning Mistakes
- Frequently Asked Questions (FAQs)
- What is the proper way to prune fruit trees?
- What month should you prune your fruit trees?
- How do you prune a fruit tree?
- Why should you prune a fruit tree?
- Should you cut off a fruit tree?
- When should I prune a fruit tree?
- How do you prune a landscape tree?
- Should you prune a tree?
- Should you prune your fruit trees?
- What are the best ways to prune a tree?
- Conclusion
Key Takeaways
- Prune in late winter while your tree is dormant — that’s when cuts heal the fastest and disease has the least chance to sneak in.
- Crowded branches block sunlight from reaching developing fruit, so thinning your canopy directly drives bigger yields and better quality.
- Always remove dead, diseased, or crossing wood first, and sanitize your tools between cuts so you don’t spread problems from tree to tree.
- Never take more than one-third of the tree at once — spread heavy pruning across two or three seasons to avoid shocking the tree and losing a year’s harvest.
Why Prune Fruit Trees
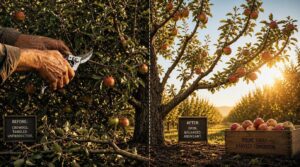
Pruning isn’t just about keeping your tree looking tidy—it’s how you take real control of your harvest. Every cut you make shapes how your tree grows, how much fruit it produces, and how long it stays healthy.
If you’re just starting out, this guide to fruit tree pruning for beginners walks you through exactly when and where to cut.
Here’s why regular pruning makes such a difference.
Improve Light Penetration and Airflow
Think of your canopy like a room with no windows — without light, nothing thrives.
Better light penetration and air circulation depend on smart canopy management from the start.
Implementing targeted defoliation practice can substantially improve lower canopy light exposure.
- Use thinning cuts to open vertical air channels near the trunk
- Apply leaf removal strategies on lower, shaded branches
- Practice branch angle optimization to reduce self-shading
- Create light gaps through sunlit zone balancing across scaffold layers
Increase Fruit Size and Quality
Better light penetration does more than improve airflow — it directly boosts fruit size. When you combine canopy management with balanced fertilization and optimized irrigation, individual fruits grow larger and taste better. Strategic thinning focuses the tree’s energy on fewer fruits.
| Practice | What It Does | Result |
|---|---|---|
| Thinning cuts | Removes crowded fruiting wood | Larger individual fruit |
| Heading cuts | Redirects growth energy | Stronger fruiting buds |
| Pollinator management | Improves fruit set uniformity | Consistent sizing |
| Balanced fertilization | Promotes cell expansion | Firmer, sweeter flesh |
| Postharvest handling | Preserves size and quality | Better marketable weight |
Fruit quality and size starts with decisions you make during pruning season.
Reduce Disease and Pest Pressure
Pruning does double duty — it grows better fruit and fights off problems before they start. When you remove dead, diseased, or damaged branches, you cut off the hiding spots where fungi and insects overwinter.
Pruning grows better fruit and starves fungi and insects of the dead wood they hide in
Regular canopy scouting helps you catch trouble early.
- Sanitize tools between cuts using a sanitizing solution to stop disease from spreading
- Plant resistant varieties to naturally reduce pest and disease pressure
- Practice weed management and remove debris to eliminate pest habitat
Strengthen Structure and Branch Angles
Strong branches start with wide angle joints — aim for 40 to 70 degrees at each crotch angle. Narrow crotches split under heavy fruit or wind.
Crotch angle management through early training protects your tree for years.
Whether you use a central leader, open center, or modified central leader, structural load balancing and wind resistance pruning keep your scaffold solid.
Branch collar healing seals cuts fast when heading cuts land right.
Keep Fruiting Wood Productive and Reachable
Keeping your fruiting wood within reach makes harvest day far less complicated. Without a clear access corridor design and proper scaffold balance, you’ll spend more time hunting fruit than picking it.
- Keep fruit wood height under 1.5 meters for easy ground-level harvest
- Practice renewal scheduling every 3–4 years to refresh older spurs
- Use spur distribution along well-lit outer branches for consistent yields
- Improve light penetration optimization by maintaining 40% open canopy
- Rotate pruning for new wood versus old wood fruiting to sustain production
When to Prune Fruit Trees
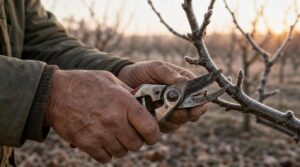
Timing is everything regarding pruning fruit trees. Cut too early, too late, or at the wrong point in the growing season, and you can undo a full year of progress.
Here’s what you need to know about when to make your move.
Dormant Pruning in Late Winter
Late winter is your best window for dormant season pruning strategies. Trees are fully leafless, so spotting weak or crossing branches is simple.
Sap Flow Reduction during dormancy means less bleeding from cuts, and Branch Collar Healing kicks in faster in spring.
| Timing Factor | Why It Matters |
|---|---|
| Cold slows pathogens | Pruning Wound Sanitization is more effective |
| Leafless canopy | Winter Sunlight Capture improves post-prune |
Clean cuts now drive Post-Prune Nutrient Allocation straight to productive wood.
Early Spring Timing Before Bud Break
Once your trees have logged enough Chill Hours and temperatures hold between 5–10°C for several days, Bud Swell Timing becomes your signal. Early Light Cues confirm dormancy is ending. Coordinate cuts with your Weather Forecast to catch the ideal window before buds open.
Your early spring checklist:
- Watch for visible bud swell
- Check Temperature Thresholds in your forecast
- Make clean cuts before green tips emerge
Summer Pruning for Vigorous Trees
Summer is when vigorous trees can get away from you fast. Once fruit sets — usually by late July — step in and thin out the most aggressive shoots.
If you’re unsure where to start, these garden pruning and training basics can help you build a simple, stress-free routine before summer growth takes off.
This keeps Carbohydrate Allocation focused on ripening fruit, not leafy canopy. It also helps with Heat Stress Management and Sunburn Mitigation by letting air move freely without stripping the tree bare.
| Summer Pruning Goal | Why It Matters |
|---|---|
| Growth Vigor Balance | Slows canopy expansion on fast-growing trees |
| Pest Habitat Disruption | Open canopy reduces harborage for insects |
Post-harvest Pruning in Cold Climates
After harvest, your cold climate orchard enters a vulnerable window. Wait until after the first hard freeze before cutting — this helps sap flow control and reduces winter injury risk.
- crossing branches on dry, calm days
- frost forecasts before scheduling cuts
- Keep wounds small for faster winter wound healing
- orchard floor hygiene by clearing all debris
- dormant season pruning strategies over rushing cuts
Timing by Climate and Freeze Risk
Your climate sets the rules. In warm zones like Southern California, early spring pruning runs from January to February. In colder regions, dormancy lingers longer, so regional pruning windows shift accordingly.
Use frost forecast integration and microclimate mapping to avoid cutting during vulnerable bud break transitions. A solid bud hardiness index reading guides temperature‑triggered pruning decisions before freezing temperatures damage exposed tissue.
When to Avoid Pruning During Flowering
Flowering is the wrong time to reach for your pruners. Cuts made during bloom trigger Hormonal Disruption, create Pest Entry Risk through open wounds, and cause serious Carbohydrate Drain right when the tree needs every ounce of energy. Avoid pruning when you see active flowers to prevent Flower Bud Loss and Weather Vulnerability.
- Skip pruning during peak bloom entirely
- Watch for Flower Bud Loss on stone fruits with one-year-old wood
- Resume dormant season pruning strategies after petals drop
- Plan seasonal timing for pruning around early spring bud break
Top 4 Pruning Tools
Having the right tools makes pruning faster, cleaner, and safer for your trees. You don’t need a full shed’s worth of equipment — just a few solid picks that handle different branch sizes.
Here are the four tools worth having on hand before you start.
1. Kynup Stainless Steel Pruning Shears
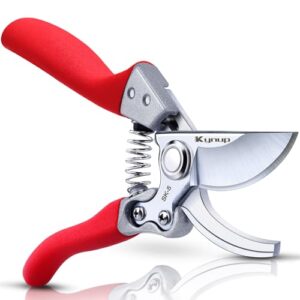
The Kynup Stainless Steel Pruning Shears handle the detailed work that bigger tools can’t touch. Built from SK-5 carbon steel, the blades stay sharp through long pruning sessions and resist rust from sap and moisture.
At just 8.5 oz, they won’t tire your hand during extended work. They cut branches up to 1 inch cleanly, making them ideal for roses, young fruit tree shoots, and crowded spurs.
The one-button safety lock keeps blades secure between cuts.
| Best For | Home gardeners and hobbyists who need a lightweight, precise tool for trimming roses, hedges, bonsai, and small ornamental shrubs. |
|---|---|
| Material | SK-5 carbon steel / aluminum alloy |
| Weight | 8.5 oz (241 g) |
| Safety Lock | One-button lock/unlock |
| Grip Type | Silicone-matte ergonomic |
| Primary Use | Branch pruning |
| Warranty | None specified |
| Additional Features |
|
- SK-5 steel blades stay sharp and hold up well against rust and sap
- At 8.5 oz, it’s light enough for long sessions without wearing out your hand
- Comes with a spare spring, so you’re not buying a whole new pair when one wears out
- The safety latch can feel stiff and fiddly, especially when you’re switching back and forth quickly
- The wider grip may feel awkward if you have smaller hands
- Not built for anything over 1 inch — push it past that and you risk jamming or damaging the blades
2. Colwelt Light Duty Bypass Loppers
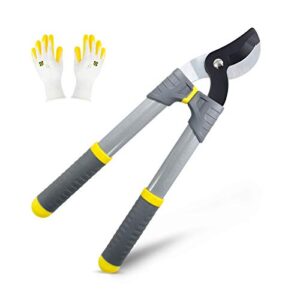
When detailed work is done, you need a tool that grips bigger branches just as cleanly. The Colwelt Light Duty Bypass Loppers give you that reach.
At 17 inches long and just 1.6 lb, they won’t weigh you down during a long pruning session.
The hardened carbon-steel blades cut branches up to 1.25 inches without crushing the wood.
Shock-absorbing grips reduce wrist strain, so you can work longer without fatigue.
They’re built for backyard fruit trees, not heavy commercial use.
| Best For | Home gardeners and casual pruners who want a lightweight, easy-to-handle lopper for trimming small trees, shrubs, and roses without the bulk of heavy-duty tools. |
|---|---|
| Material | Carbon steel / steel handles |
| Weight | 1.6 lb (0.73 kg) |
| Safety Lock | Not specified |
| Grip Type | Ergonomic steel handles |
| Primary Use | Branch pruning |
| Warranty | None specified |
| Additional Features |
|
- At 17 inches and 1.6 lb, it’s easy to carry around the yard for long sessions without wearing out your arms.
- Hardened carbon-steel blades make clean cuts on branches up to 1.25 inches, which covers most backyard pruning jobs.
- Shock-absorbing grips take the sting out of repetitive cutting — great if your wrists or hands give you trouble.
- It’ll struggle with anything thicker than 1.25 inches, so it’s not the right pick for heavy-duty work.
- Some users have noticed the blades lose their edge faster than expected, especially on thinner stems.
- The materials feel a bit budget-grade, so it may not hold up well under frequent, intensive use over time.
3. Amazon Basics Aviation Straight Cut Snips
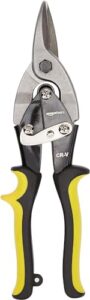
Sometimes a branch isn’t the problem — it’s the metal support, ductwork flashing, or wire tie wrapped around it. That’s where the Amazon Basics Aviation Straight Cut Snips earn their spot in your kit.
The chrome-vanadium blade cuts cleanly through up to 18-gauge steel and 22-gauge stainless without chewing up the material. Serrated edges grip the metal so it won’t slip mid-cut.
The rubberized dual-color handle stays secure even with sweaty hands, and the safety latch locks the blades shut between uses.
| Best For | Anyone doing light metalwork, HVAC jobs, or workshop tasks who needs a reliable pair of snips for straight cuts on thin steel, aluminum, or stainless. |
|---|---|
| Material | Chrome-vanadium steel / stainless housing |
| Weight | Not specified |
| Safety Lock | One-handed auto-release latch |
| Grip Type | Rubberized dual-color |
| Primary Use | Metal sheet cutting |
| Warranty | 1-year limited |
| Additional Features |
|
- Chrome-vanadium blade handles up to 18-gauge steel with clean, serrated cuts that don’t slip
- Rubberized grip stays comfortable and secure, even with sweaty hands
- Safety latch locks the blades shut so it’s safe to toss in a toolbox without worry
- Straight-cut only, so you’re out of luck if you need angled or curved cuts
- Not built for anything thicker than 18-gauge — hardened or heavy-gauge materials are a no-go
- Blade may need occasional sharpening or lubrication if you’re using it heavily over time
4. VNIMTI Round Garden Shovel with D Handle
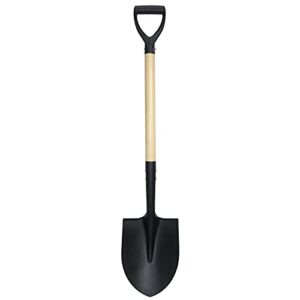
Once the cutting is done, you’ll want a reliable shovel for clearing root zones and moving soil around pruned trees. The VNIMTI Round Garden Shovel with D Handle weighs just 3.3 pounds, so it won’t wear you out during a long pruning session.
Its cold-rolled steel blade pushes through compacted soil without bending, and the D-shaped wooden handle gives you a firm grip from multiple angles.
At 41 inches long, it’s compact enough to store in your trunk.
| Best For | Gardeners, campers, and older or shorter users who need a lightweight, versatile shovel that handles everything from digging to snow removal without taking up much space. |
|---|---|
| Material | Cold-rolled steel / wood handle |
| Weight | 3.3 lb (1.5 kg) |
| Safety Lock | Not applicable |
| Grip Type | D-shaped wooden handle |
| Primary Use | Digging and edging |
| Warranty | None specified |
| Additional Features |
|
- At just 3.3 lbs, it’s easy to use for long stretches without wearing out your arms
- Cold-rolled steel blade holds up well in compacted or rocky soil
- Compact enough to toss in your trunk for emergencies or campsite work
- The 41-inch length can feel too short if you’re tall and need more leverage
- The wooden handle needs some upkeep — moisture can cause damage over time
- The blade edge may dull with heavy use and need occasional sharpening
Step-by-Step Pruning Method
Pruning a fruit tree isn’t complicated, but the order you do things matters more than most people realize. Work through each step with intention, and you’ll avoid the most common mistakes before they happen.
Here’s the sequence that keeps your trees healthy, productive, and easy to manage.
Inspect Tree Health and Structure First

Before you make a single cut, walk the tree like a detective. Start with root flare inspection at the base—soil shouldn’t bury the trunk. Move up for trunk crack detection, then check branch union strength at each fork.
| Area | What to Check | Warning Sign |
|---|---|---|
| Root Zone | Flare visibility, drainage | Buried flare, pooling water |
| Trunk | Cracks, hollow sounds | Soft spots, bark staining |
| Canopy | Canopy chlorosis check, density | Yellow leaves, dead tips |
Site soil compaction near driveways also threatens root health—don’t overlook it.
Remove Dead, Diseased, and Damaged Wood
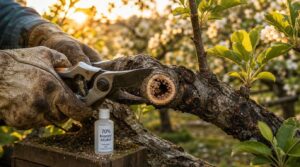
Once you’ve inspected the tree, target dead diseased or damaged branches first—they’re your tree’s biggest liability. Disease Identification is straightforward: dead wood shows no green tissue, while diseased wood often displays cankers or discoloration. Use bypass pruning shears with gloves and safety glasses, follow Collar Cut Precision to avoid stubs, and apply the Three-Cut Technique on larger limbs.
Follow these Sanitation Protocols and Disposal Management steps:
- Sterilize blades with 70% alcohol before each cut
- Make clean cuts just outside the branch collar
- Use the three-cut method on limbs over 1.5 inches
- Bag diseased material separately for Disposal Management
- Keep pruning tools sanitation consistent between trees
Cut Out Crossing and Crowded Branches
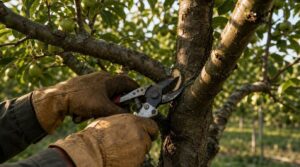
Two branches fighting for the same space will never both win. Start your Crossing Branch Detection by looking for rubbing branches and vertical branches angling inward toward the crowded center.
Your branch removal strategy is simple: always cut the smaller or weaker one back to the branch collar using Clean Collar Cuts. This Crowded Scaffold Thinning improves Load Distribution Assessment across remaining limbs immediately.
Thin Canopy for Sunlight and Airflow
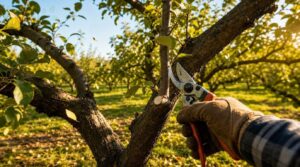
Think of your canopy like a window — too many layers and no light gets through. Water Sprout Removal and Rootstock Sucker Control are your first priorities.
Then focus on Upper Canopy Light by thinning dense growth in the top third. Better air circulation improves Leaf Drying Speed after rain, and targeted branch thinning keeps your canopy management working season after season.
Balance Fruiting Wood With New Growth
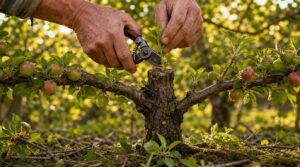
Your tree can’t fruit well from exhausted old wood alone — balance is everything. Getting your Fruiting Wood Ratio right means keeping productive spurs while encouraging fresh shoots through the Shoot Thinning Method.
- Apply heading cuts to stimulate lateral branching for future fruiting wood
- Use Vertical Growth Suppression to redirect energy toward horizontal spurs
- Practice Renewal Pruning Timing after harvest to swap old wood for new
- Follow a Spur Spacing Strategy — keep spurs 4–6 inches apart
- Use thinning cuts to open light without disrupting overall structure
fruit production and tree vigor through fruit tree growth regulation through pruning keeps wood age between 2–5 years, sustaining your yield season after season.
Clean Up Pruned Debris After Finishing
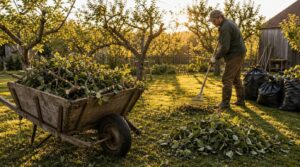
Once your cuts are done, your Debris Collection Strategy matters more than most people think. Start from the outer edges and work inward, using a wheelbarrow for bulky branches. Separate diseased wood for Safe Disposal Options — bag it, don’t compost it.
A solid Moisture Management approach means spreading wet clippings to dry.
Finish with a Final Yard Presentation walkthrough to catch anything missed.
Training Systems for Fruit Trees

How you shape your tree from the start determines everything—how much sun it gets, how easy it is to harvest, and how long it stays productive. There’s no single right answer, because different species thrive under different structures.
Here are the main training systems worth knowing.
Central Leader Structure for Apples and Pears
central leader system — one dominant trunk with tiered branch placement spreading outward in layers.
Your leader selection criteria should prioritize the strongest upright shoot.
Keep scaffold branches at a 45–60 degree angle for angle optimization and fruit load balancing.
Monitor trunk health each season, removing competing leaders before they split your tree’s structure.
Open-center Vase for Stone Fruits
Stone fruits like peach and plum thrive with an open center vase — three to four scaffold branches radiating outward, leaving the canopy core open.
- Keep fruiting wood within one to two meters for Harvest Accessibility Planning
- Use wide branch angles for strong Canopy Geometry Design
- Apply Seasonal Vase Adjustments after harvest to restore airflow and light
Modified Central Leader for Mixed Species
When your orchard holds more than one species, a single leader system won’t cut it. The modified central leader solves this by developing 3 to 5 vertical leaders, using Leader Spacing Strategies and Vigor Balance Techniques to balance energy across different species.
This approach provides Canopy Light Uniformity, Cross-Species Compatibility, and Storm Load Distribution — making it a smart Modified central leader pruning approach for mixed plantings.
Espalier for Compact Spaces
When space is tight, espalier turns a bare wall into productive fruiting wood. This Space‑Saving Pattern trains trees flat against a Wall Wire Layout—wires spaced 12–18 inches apart with soft ties holding each branch in place.
Top Space‑Saving Patterns to try:
- Horizontal cordon tiers
- Stepover borders (18–24 inches tall)
- Fan or palmette spreads
- Single Vertical Cordon Design
Light Balance Techniques keep every spur productive in space‑efficient orcharding with espalier.
Drop-crotching to Reduce Height Safely
When a tree grows too tall to harvest safely, drop crotching brings it back down without gutting its structure. Cut back to a lateral branch at least one-third the diameter of the limb you’re removing — that’s your Crotch Angle Optimization in action.
Time it during dormancy for smart Seasonal Sap Management, use sharp tools following your Tool Sharpening Protocol, and apply Wound Healing Strategies as needed.
Track results with Height Reduction Monitoring each season.
Managing Scaffold Branch Spacing and Strength
Scaffold branches carry everything your tree produces, so getting their spacing and strength right is non‑negotiable. Aim for vertical scaffold spacing of 18–24 inches apart, and keep each limb’s attachment angle between 45 and 60 degrees for solid load distribution balance.
- Check scaffold joint reinforcement annually for cracks or splits.
- Make sure no single branch bears more than 25–30% of total weight.
- Apply thinning cuts to maintain weight bearing optimization across the canopy.
Species-Specific Pruning Tips
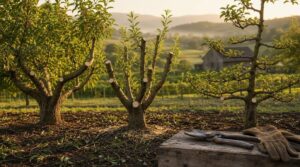
Not every fruit tree follows the same playbook, and that’s where a lot of growers go wrong. What works for your apple tree won’t always translate to your peach or cherry.
Here’s what you need to know for each species.
Apple Tree Pruning and Scaffold Spacing
Apple trees reward you with bigger, cleaner fruit when scaffold branches are properly spaced and balanced.
Use these Scaffold Spacing Metrics as your step-by-step guide:
| Pruning Factor | Guideline |
|---|---|
| Leader‑to‑Scaffold Ratio | Scaffold diameter ≤ half the leader’s |
| Branch Spacing | 2–5 inches vertically apart |
| Rootstock‑Driven Spacing | Dwarf: 8–12 ft; Standard: 16–30 ft |
| Water Sprout Control | Remove year‑round with thinning cuts |
| Seasonal Scaffold Adjustment | Reassess angles annually at dormancy |
Pear Tree Central Leader Shaping
Pear trees thrive when you commit early to a central leader. Your goal is one dominant upright trunk with scaffold branches radiating outward at 45–60 degree angles.
- Apply your Notching Schedule to shoots 6–12 inches long
- Use the Disbudding Technique to eliminate competing leaders
- Maintain proper Scaffold Angle with Support Clip Usage
- Practice Leader Height Control through annual heading cuts
- Clear crossing wood with seasonal timing for pruning
Peach and Plum Open-center Pruning
Peaches and plums thrive when light reaches every branch — and the open-center vase shape delivers exactly that.
Vase Shape Maintenance and Canopy Airflow Management go hand in hand, improving Fruit Exposure Timing.
Remove the central leader early, then select 3 to 5 scaffolds at 60 to 75-degree angles for Scaffold Angle Optimization.
Clear Pruning Waste Disposal keeps disease away.
Cherry and Apricot Training Choices
Stone fruits like cherry trees and apricots respond differently to training systems. Apricots do well with open-center pruning — Vase Shape Benefits include better light reach and Frost Resilience Techniques that protect buds in cold snaps.
Cherries often keep a Modified Leader Adaptation for added height support. Either way, Scaffold Spacing Strategies and Harvest Accessibility Design keep fruit within easy reach.
Young Tree Pruning Versus Mature Trees
Training young trees and older ones calls for different hands entirely.
- Growth Stage Strategies — young trees grow fast; redirect that energy early with light cuts every one to two years.
- Branch Union Development — new unions form quickly, so correct angles now before wood hardens.
- Healing Rate Differences — younger trees close wounds faster due to active cambial growth.
- Pruning Intensity Guidelines — never remove more than one-third annually, especially on mature trees with slower recovery.
- Risk Management Factors — large cuts on older wood invite decay, so plan each cut carefully.
Regional Adjustments for Warm and Cold Zones
Where you garden shapes how you prune.
In warm zones, keep scaffold density lighter and use rootstock vigor control to prevent excessive flush growth.
In cold zones, frost-resilient training and dormant season pruning strategies protect new wood from late freezes.
Set up microclimate windbreaks, coordinate irrigation timing with bud stages, and adjust seasonal timing for pruning to match your local conditions.
Common Pruning Mistakes
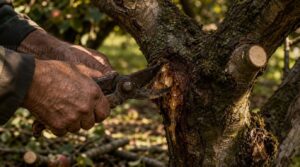
Even experienced gardeners slip up when pruning, and a few repeated mistakes can quietly work against everything you’re trying to build. Some errors show up right away, while others damage the tree slowly over seasons.
Here are the most common ones worth knowing before you make your next cut.
Removing More Than One-third at Once
Taking out more than one-third of your tree at once is one of the fastest ways to set back years of progress. Heavy cuts trigger canopy stress, drain carbohydrate depletion reserves, and slow callus healing on every wound. Sunscald risk rises on exposed limbs, and yield reduction often follows into next season.
Spread major reduction cuts across two or three years instead.
Leaving Stubs Instead of Collar Cuts
Every stub you leave behind is an open invitation for disease. Stub disease risk is real — dead wood cracks, dries out, and harbors fungi before you know it.
Instead, make collar cuts just outside the branch collar. This speeds up the callus formation process and wound healing speed dramatically.
Sharp, clean tools with proper pruning cut identification make all the difference here.
Topping The Tree’s Main Leader
Topping the central leader might seem like a quick fix for a tall tree, but it triggers hormonal redistribution that floods the cut zone with weak water sprouts. This structural weakening makes your tree vulnerable to wind damage.
Instead, use targeted heading cuts during dormant season pruning. Sprout management after topping adds ongoing work — growth regulator alternatives, proper pruning techniques, and cut types preserve long-term structure far better.
Using Dull or Dirty Tools
Dull blades and dirty tools are a hidden threat to your trees. Poor pruning tool sanitation spreads fire blight and canker from one cut to the next.
Blade sharpness directly affects cut quality — jagged edges invite fungal infection and slow healing. Keep your essential pruning tools and safety practices tight:
- Sharpen blades regularly to reduce injury risk and improve clean cuts
- Wipe off sap and debris after every tree
- Disinfect with a 1:9 bleach solution for proper tool disinfection
- Store pruning equipment dry to prevent rust and disease transmission
Pruning During Active Flowering or Growth
Pruning during active flowering triggers a hormone shift that redirects energy away from fruit set. Your tree can’t do both at once.
| Mistake | Why It Matters |
|---|---|
| Cutting during bloom | Removes bud retention opportunities |
| Heading cuts in growth | Forces poor growth allocation |
| Skipping wound sanitization | Spreads pathogens fast |
| Ignoring bloom light management | Reduces fruit quality |
| Mistiming cuts relative to bud break | Stunts next season’s wood |
Ignoring Whorls, Suckers, and Water Sprouts
Whorls, suckers, and water sprouts quietly drain your tree’s energy all season long.
Left unchecked, they cause real problems:
- Nutrient Drain — suckers near the graft union steal resources from fruiting wood.
- Light Blockage — upright water sprouts shade inner branches, cutting yield.
- Structural Weakness — whorls create crowded unions prone to disease proliferation.
Remove them early. Your step-by-step guide to pruning techniques and cut types isn’t complete without it.
Frequently Asked Questions (FAQs)
What is the proper way to prune fruit trees?
Think of pruning like giving your tree a focused tune-up. Cut at 45°–60° angles, sanitize tools between cuts, and remove dead wood first to keep energy flowing where it counts.
What month should you prune your fruit trees?
For most trees, January and February hit the sweet spot. Dormancy keeps stress low and wounds heal fast. Timing pruning during dormancy sets up stronger growth when spring arrives.
How do you prune a fruit tree?
Start with a full inspection. Remove dead, diseased, and crossing branches first.
Then thin the canopy, balance fruiting wood, and clean up debris. Sharp tools and clean cuts make every step count.
Why should you prune a fruit tree?
Pruning keeps your tree healthy, productive, and safe to harvest. It helps control tree height, promote root growth, and encourage new growth — while cutting disease risk and boosting fruit quality.
Should you cut off a fruit tree?
Yes — but only dead, diseased, or damaged wood.
Strategic pruning cuts protect tree health, support root system health, and strengthen structure. Removal improves economic viability and reduces disease pressure across your orchard.
When should I prune a fruit tree?
Prune during dormancy, ideally 2–4 weeks before bud swell timing in late winter. Your seasonal pruning schedule depends on regional climate calendar and freeze risk assessment — never cut during active flowering.
How do you prune a landscape tree?
pruning a landscape tree is just "chop and hope"? Not quite.
Inspect first, then remove dead wood, shape the canopy, and dispose of debris — done right, your tree thrives safely.
Should you prune a tree?
You should prune a tree. Regular pruning strengthens wind resistance, improves fruit marketability, and boosts labor efficiency at harvest. It’s one of the highest-impact practices for long-term economic return.
Should you prune your fruit trees?
Absolutely — don’t let sleeping dogs lie regarding your trees.
Pruning delivers real economic benefits at home garden scale, supporting tree longevity, organic disease management, and better fruit yield year after year.
What are the best ways to prune a tree?
Start with a solid branch selection criteria: remove dead or crossing wood first. Then apply the right cut angle technique at 45°–60° above a healthy bud for clean wound healing.
Conclusion
Every branch you remove is a quiet decision—one that shapes next August’s harvest before the tree even wakes from winter.
You’re not just cutting wood; you’re redirecting the tree’s energy toward fruit worth picking. These fruit tree pruning techniques give you that control, cut by cut, season by season.
Skip the right branches now, and your tree won’t just survive the year—it’ll show you exactly what it was always capable of growing.
- https://extension.uga.edu/publications/detail.html?number=C1087&title=home-fruit-orchard-pruning-techniques
- https://agroecology.ucsc.edu/documents/for-the-fruit-grower/summer-pruning.pdf
- https://extension.colostate.edu/topic-areas/yard-garden/training-and-pruning-fruit-trees-7-003/
- https://nymag.com/strategist/article/best-garden-shears-pruners-hedge-trimmers.html