This site is supported by our readers. We may earn a commission, at no cost to you, if you purchase through links.

This "cut and come again" method keeps your plant producing fresh leaves for months instead of giving you just one harvest. Use clean, sharp pruning shears to make precise cuts about an inch above the soil line.
You’ll want to harvest regularly—about every 7-10 days during peak growing season—to encourage continuous growth.
Pick leaves in the morning when they’re crisp and full of moisture. The younger leaves taste sweeter, while older ones can get tough and bitter.
There’s actually a science to timing that most gardeners miss completely, which involves understanding when to harvest to get the best flavor, and it is related to the cut and come again method, the peak growing season, and the importance of precise cuts to maintain plant health.
Table Of Contents
- Key Takeaways
- Harvesting Kale Leaves
- Kale Harvesting Techniques
- Post Harvest Storage Tips
- Kale Plant Care and Protection
- Harvesting Kale Seeds
- Frequently Asked Questions (FAQs)
- How to pick out good kale?
- Will kale come back after bolting?
- How long can kale stay in the ground?
- How do you harvest Kale leaves?
- How do you pick Kale if it keeps growing?
- When should I Harvest Kale?
- Should Kale be harvested from the bottom up?
- How do you harvest Russian kale?
- How do you store Kale after harvesting?
- How many times can I harvest kale?
- Conclusion
Key Takeaways
- Harvest outer leaves first – You’ll keep your kale plants producing for months by cutting the largest outer leaves while leaving the central growing point untouched, using the "cut and come again" method.
- Time your harvests right – You should pick kale leaves when they are 6-8 inches long, harvesting every 7-10 days during peak growing season and preferably in the morning when leaves are crisp and full of moisture.
- Use proper tools and technique – You’ll get the best results with clean, sharp pruning shears or scissors, making precise cuts about an inch above the soil line to prevent disease and promote healthy regrowth.
- Store correctly for maximum freshness – You can extend your kale’s shelf life by washing leaves in cold water, drying them thoroughly, and storing them in your refrigerator’s crisper drawer in perforated bags or containers with paper towels.
Harvesting Kale Leaves
You’ll get the most flavorful kale by harvesting leaves at the right time using proper techniques.
The key is knowing when your plants are ready and using the correct tools to avoid damaging your crop.
Optimal Harvest Timing
You’ll typically want to harvest kale when leaves reach hand-size, around 6-12 inches long.
Hand-sized leaves at 6-12 inches deliver the perfect balance of flavor and nutrition.
Leaf maturity determines when to harvest kale, with baby leaves ready in 20-30 days and full-size leaves taking 50-95 days.
Ideal size depends on your intended use:
- Baby kale leaves for tender salads
- Hand-sized leaves for cooking and smoothies
- Mature 10-12 inch leaves for hearty dishes
- Post-frost leaves for enhanced sweetness
Frequency matters—harvest outer leaves regularly to promote continuous growth throughout the kale harvest time.
To maintain plant productivity, avoid cutting the terminal bud.
Harvesting Methods and Tools
You’ll need sharp, clean tools for efficient kale harvesting techniques.
Bypass pruners or garden snips work best, cutting stems cleanly without damaging plants.
Tool sanitation prevents disease spread between plants—wipe blades with alcohol before each use.
Ergonomic tools reduce hand strain during frequent harvesting sessions.
Method comparison shows pruners are 40% faster than hand-picking for large gardens, though automation options remain limited for home growers.
To encourage regrowth, it’s best to use gradual harvesting methods with sharp, clean tools and efficient kale harvesting techniques for frequent harvesting sessions and to prevent disease spread.
Factors Affecting Harvest Duration
Several factors influence how long your kale harvesting session takes, from plant maturity to your own gardening experience.
Weather conditions can slow you down, while harvesting frequency affects leaf quantity available. Your kale harvesting tips knowledge speeds up the process substantially.
Extending the season with simple season extenders can also influence harvest duration.
- Plant maturity – Younger plants yield fewer leaves per harvest
- Weather conditions – Rain or frost makes harvesting kale leaves trickier
- Harvesting frequency – Weekly picking versus monthly affects leaf quantity
- Gardener experience – Seasoned hands know how to pick kale efficiently
- Kale plant harvesting setup – Organized tools save precious time
Kale Harvesting Techniques
You’ll need the right tools and technique to harvest kale efficiently without damaging your plants.
Sharp pruning shears or clean kitchen scissors work better than tearing leaves by hand, which can stress the plant and create entry points for disease.
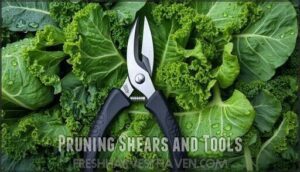
Pruning Shears and Tools
Sharp pruning shears make clean cuts that heal quickly, preventing disease entry points.
Sharp tools are your kale plants’ best friend for healthy, continuous harvests.
Clean your tools with rubbing alcohol between plants to avoid spreading pathogens. Ergonomic designs reduce hand fatigue during extended harvesting sessions.
Regular scissor maintenance keeps blades functioning smoothly. Alternative tools like kitchen shears work well for small gardens, though dedicated garden shears offer better precision for kale harvesting tips.
Lightweight tools can help reduce fatigue, so consider ergonomic design importance for longer use, emphasizing the need for ergonomic design and clean cuts to prevent disease entry points and ensure sharp pruning shears are effective.
Harvesting Leaf Size and Quality
Your harvest timing affects both taste and texture dramatically.
Palm-sized leaves deliver the best kale harvest balance, while baby leaves at 25-30 days offer tender sweetness for salads.
Mature leaves provide higher nutritional content but require cooking.
- Leaf Size Impact: Hand-sized leaves (50-95 days) optimize flavor and nutrition
- Optimal Leaf Stage: Baby kale stays tender; mature leaves develop tougher texture
- Harvesting Frequency: Remove outer leaves regularly for sustained quality yields
Avoiding Plant Damage
When you’ve selected quality leaves, handle your kale plants like delicate treasures.
Make clean cuts with sharp tools to prevent disease entry points.
Gentle handling protects tender growth points and neighboring leaves.
Avoid harvesting during wet conditions, which spreads disease.
This proper kale harvesting approach guarantees your best kale harvest continues producing healthy leaves throughout the season, ensuring a healthy leaves production.
Post Harvest Storage Tips
Once you’ve harvested your kale leaves, proper storage becomes essential for maintaining their nutritional value and crisp texture.
You’ll want to wash, dry, and store them correctly to extend their shelf life and prevent wilting.
Washing and Drying Leaves
Proper washing methods start with cold water to remove dirt and debris from your fresh kale harvest.
Gently swirl leaves in a large bowl, then rinse under running water.
Pat dry with clean towels or use a salad spinner for efficient drying techniques.
To maximize flavor, consider the optimal harvest time in the cool morning.
This step prevents contamination risks and prepares leaves for storage after harvesting using basic equipment options.
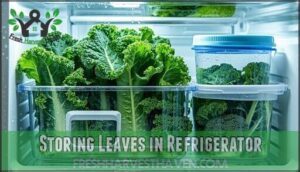
Storing Leaves in Refrigerator
After washing, place kale in your refrigerator’s crisper drawer for ideal temperature and humidity control.
Store leaves in airtight containers or perforated plastic bags to prevent wilting while maintaining breathability.
This harvesting kale guide recommends keeping fresh kale harvest at 32-36°F with high humidity. Consider crisper drawer options to optimize storage.
Different container types affect storage duration – vacuum-sealed bags extend freshness up to three weeks. Your kale harvesting methods pay off when you follow the best harvesting method with proper refrigeration, using the right storage duration techniques.
Maintaining Leaf Freshness
Once kale’s properly stored, you’ll want to maximize its shelf life through smart humidity control and storage methods.
Keep harvested leaves in perforated bags or containers with paper towels to absorb excess moisture.
Your best harvesting method pays off when you maintain ideal refrigerator conditions around 32-36°F.
Check leaves regularly, removing any yellowing ones that could affect the bunch, to keep your kale leaf harvest crisp for up to ten days, using this kale harvesting guide approach.
Kale Plant Care and Protection
Protecting your kale plants from environmental stressors and threats guarantees they’ll keep producing those tender leaves you’re after.
You’ll want to shield them from harsh weather, watch for common pests like aphids and cabbage worms, and maintain consistent watering to prevent stress that makes plants vulnerable to problems.
Shielding From Cold Weather
Winter’s chill shouldn’t stop your kale harvesting season.
Row covers provide excellent frost protection, extending your cutting kale for harvest window by several weeks.
Apply mulch around plants to insulate roots and retain soil warmth.
Cold frames create perfect microclimates for mature kale harvesting and harvesting baby kale.
Row covers are essential for kale protection.
Choose cold-hardy variety selection to maximize your home garden kale production through freezing temperatures.
Monitoring for Pests and Diseases
Since early detection can make or break your organic kale harvest, inspect leaves weekly during kale harvesting season for telltale signs of trouble.
Look for shot-hole damage from flea beetles, aphid clusters on leaf undersides, and dark spots indicating fungal issues.
Disease prevention starts with recognizing symptoms early—yellowing leaves, wilting, or unusual growth patterns signal problems.
Use organic solutions like neem oil for pest identification and control.
Sticky traps help monitor flying pests during mature kale harvesting periods, utilizing neem oil for effective management.
Proper Watering Practices
Proper watering makes or breaks your kale harvest success.
Check soil moisture regularly—stick your finger two inches deep to gauge watering frequency needs.
Best practice involves deep, infrequent watering rather than light daily sprinkles.
Overwatering signs include yellowing leaves and root rot, while underwatering effects show as wilted, bitter leaves.
Water quality matters too; filtered water supports sustainable kale harvesting.
During organic kale harvest season, maintain consistent moisture for mature kale harvesting excellence.
Harvesting Kale Seeds
If you’re planning to save seeds for next year’s garden, you’ll need to let your kale plants bolt and flower instead of harvesting the leaves.
This process takes patience since kale must complete its full growing cycle, which can take up to two years for some varieties to produce viable seeds.
Allowing Plants to Flower
After ensuring your kale plants receive proper care and protection, you can shift focus to seed production.
Flowering Benefits include creating opportunities for sustainable kale harvesting through Seed Saving, though this evaluation reveals important trade-offs.
When you allow plants to flower, the outcome dramatically changes leaf flavor and texture.
This course of action extends Plant Lifespan but reduces edible harvest quality.
Pollinator Attraction becomes the best secondary benefit during this flowering phase.
- Allow 2-3 plants to bolt naturally in late spring or early summer
- Expect bitter, tough leaves once flowering begins – harvest stops here
- Flowers attract beneficial insects like bees and butterflies to your garden
- Seed production takes 3-4 months from initial flower formation
- Choose your healthiest, most productive plants for seed collection
Cutting Seed Stalks and Pods
Once kale flowers mature, you’ll need to master seed stalk removal for the best outcome. Watch for pods that turn brown and feel papery – that’s your cue.
Cut stalks at their base using clean pruning shears, then hang them upside down in a dry, ventilated area. This cutting technique impact guarantees maximum seed saving potential while preventing bolting issues in future crops.
Your evaluation of pod maturity signs determines the course of action. Compare relative benefits of timing – harvest too early and seeds won’t be viable, too late and you’ll lose them to wind dispersal.
| Stage | Pod Appearance | Action Required |
|---|---|---|
| Early | Green, plump pods | Wait for maturity |
| Ready | Brown, papery pods | Cut stalks immediately |
| Overripe | Split pods, scattered seeds | Collect remaining seeds |
| Processing | Dried stalks | Thresh pods for seeds |
Kale Varieties and Growth Patterns
Different Kale Types exhibit distinct Growth Stages that respond uniquely to Climate Impact.
Curly varieties mature in 50-70 days, while Lacinato kale handles heat better than most types.
Red Russian offers the best cold tolerance for extended harvests.
Siberian kale represents the superlative choice for harsh winters, outperforming other varieties in comparison studies.
Your adjective usage when describing plant characteristics helps determine ideal harvest timing.
Consider preserving genetic diversity by saving kale seeds from open-pollinated plants to maintain genetic diversity and ensure a successful harvest.
Frequently Asked Questions (FAQs)
How to pick out good kale?
Look for dark green leaves that feel firm and crisp, not wilted or yellowing.
You’ll want bunches with sturdy stems and leaves that spring back when gently pressed, avoiding any with brown spots or slimy texture.
Will kale come back after bolting?
Once kale throws in the towel and bolts, it’s basically game over for those tender leaves you’re after.
The plant shifts all its energy into producing flowers and seeds, making the remaining leaves bitter and tough as leather boots.
How long can kale stay in the ground?
You can keep kale in the ground for months, even through winter in zones 7- Cold-hardy varieties survive freezing temperatures, becoming sweeter after frost hits them.
How do you harvest Kale leaves?
Here’s a surprising fact: you can harvest kale leaves up to 5 times per growing season.
Cut outer leaves first, leaving the center intact.
Use sharp scissors, taking leaves when they’re 6-8 inches long.
Harvest in the morning for crispest texture.
How do you pick Kale if it keeps growing?
You’ll harvest kale leaves continuously by picking outer leaves first, leaving the central growing point intact. This "cut-and-come-again" method keeps plants producing for months, giving you fresh leaves weekly.
When should I Harvest Kale?
Crisp, cool mornings signal prime picking time.
You’ll want to harvest kale leaves when they’re tender, about 2-3 inches long, typically 55-75 days after planting.
Pick outer leaves first, leaving inner growth intact for continuous harvests.
Should Kale be harvested from the bottom up?
Yes, you’ll want to harvest kale from the bottom up, starting with the oldest, largest outer leaves.
This method keeps the plant’s growing center intact, allowing it to continue producing fresh leaves throughout the season for multiple harvests.
How do you harvest Russian kale?
Looking to tap into Russian kale’s full potential?
Cut outer leaves first, leaving the center intact.
Use clean scissors or a sharp knife to slice stems about an inch from the base.
This method keeps your plant producing fresh greens for weeks, and by following it, you can ensure your Russian kale remains productive, providing you with a continuous supply of healthy leaves.
How do you store Kale after harvesting?
Rinse harvested kale thoroughly, removing debris and damaged leaves.
Dry completely using paper towels or salad spinner.
Store in refrigerator crisper drawer wrapped in damp paper towels inside plastic bag for maximum freshness.
How many times can I harvest kale?
You can harvest kale multiple times throughout the growing season, typically 4-6 harvests from a single plant.
Cut outer leaves first, leaving the center intact so it keeps producing fresh growth continuously.
Conclusion
Fresh kale leaves glisten with morning dew as you walk through your garden, scissors in hand, ready to harvest nature’s green treasure.
Mastering the best way to harvest kale transforms your gardening experience from a one-time event into months of continuous bounty.
You’ll discover that timing, technique, and proper storage work together to maximize both flavor and nutrition.
Remember to cut outer leaves first, harvest regularly during peak growing season, and store properly to maintain freshness.
With these expert techniques, your kale plants will reward you with tender, flavorful leaves throughout the growing season, providing you with a growing season of delicious kale.
- https://www.thespruce.com/when-to-harvest-kale-8646525
- https://www.youtube.com/watch?v=xbW46DUAfZo
- https://www.housedigest.com/1430204/best-time-day-harvest-kale-cool-morning-tiktok-hack-garden/
- https://www.theproducenerd.com/2018/07/kale-harvesting-packing/
- https://www.ufseeds.com/kale-seed-to-harvest.html

