This site is supported by our readers. We may earn a commission, at no cost to you, if you purchase through links.
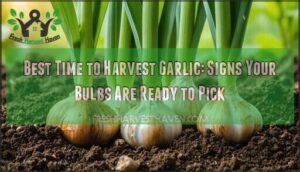
Usually, this falls in mid to late summer, about 8-10 months after planting.
Pull your bulbs too soon and you’ll get tiny, unhappy cloves; wait too long and the papery skins split, leaving your garlic exposed.
Local weather, variety, and planting schedule can shift timing a bit, but these leaf signs rarely steer you wrong.
Curious about perfect curing and storage? There’s a trick or two up ahead, related to the best time to ensure your garlic lasts.
Table Of Contents
- Key Takeaways
- Garlic Harvest Timing
- Identifying Maturity Signs
- Harvest Readiness Checks
- Harvesting Techniques
- Post Harvest Care
- Harvesting Different Varieties
- Common Harvest Mistakes
- Garlic Curing Process
- Storing Harvested Garlic
- Preserving Garlic Quality
- Frequently Asked Questions (FAQs)
- Is it better to harvest garlic too early or too late?
- Is it possible to leave garlic in the ground too long?
- How long do you leave garlic to dry after harvesting?
- How do you know when garlic is ready to harvest?
- Can you pick garlic too early?
- When do you harvest garlic in California?
- When should garlic be harvested?
- When should garlic be planted?
- How long do Garlic plants last before harvesting?
- What month is garlic usually ready?
- Conclusion
Key Takeaways
- Watch for the sweet spot when lower leaves turn brown but 5-6 green leaves remain on top—this signals your bulbs have reached peak size and developed protective wrappers for storage.
- You’ll harvest too early if fewer than half the leaves have browned (resulting in small, underdeveloped cloves) or too late if most leaves have died back (causing split bulbs and poor storage).
- Test bulb readiness by gently feeling for firmness through the soil—mature garlic should feel solid like a tennis ball, not soft or squishy.
- Handle your harvest gently by loosening soil first with a garden fork, then lifting bulbs carefully without pulling by the stems to prevent bruising that shortens storage life.
Garlic Harvest Timing
Timing your garlic harvest correctly means the difference between plump, well-wrapped bulbs and disappointing, poorly stored garlic that won’t last through winter.
You’ll need to watch for specific leaf changes and bulb development signs that occur during a narrow window in mid-summer, typically when about half the leaves have turned brown from the bottom up, which is a critical sign for garlic harvest.
Fall Planting Schedule
When you plant garlic in fall, timing matters more than you might think.
Plant your cloves 4-6 weeks before your first hard frost, typically September through November.
This soil preparation window allows roots to establish before winter dormancy kicks in.
Choose your variety selection wisely, plant at 2-inch planting depth, and add mulch for mulching benefits against harsh weather conditions.
Spring Harvest Signs
Spring brings clear signals when your garlic reaches harvest readiness.
Look for early yellowing that starts with the bottom leaves and works upward – this natural progression indicates mature garlic development.
Soil moisture levels become important now; reduce watering as leaves begin browning to prevent premature harvesting issues.
Different variety maturation rates mean your hardneck types may show signs before softnecks.
Climate influence affects garlic harvest time substantially, so watch your specific plants rather than following rigid calendar dates for ideal harvest timing.
Weather Impact on Harvest
Weather conditions directly affect when your garlic reaches harvest readiness.
Mother Nature doesn’t follow gardening calendars, so you’ll need to adapt your timing accordingly.
Here’s how weather impacts your harvest schedule:
- Rainy season delays maturity by keeping soil moisture high, while drought effects can accelerate bulb development
- Temperature swings stress plants, potentially triggering early harvest signals even when bulbs aren’t fully mature
- Humidity impact creates fungal risks, requiring earlier picking to prevent rot
Monitor rainfall patterns and temperature fluctuations.
A dry spell with ideal soil moisture creates perfect harvesting conditions.
For extending the growing season, consider using cold frames and hotbeds.
Identifying Maturity Signs
You’ll know your garlic is ready when the leaves start their color-changing dance from green to yellow and brown, beginning at the bottom and working upward.
Nature’s countdown timer reveals harvest readiness through that telltale bottom-up browning pattern.
The key is catching that sweet spot when about half the leaves have turned brown while the upper ones stay green—this timing guarantees your bulbs have maximum flavor and storage life.
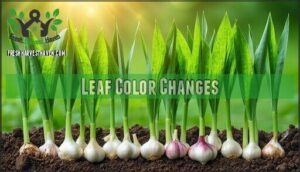
Leaf Color Changes
Your garlic leaves reveal their harvest window through distinct yellowing patterns.
Watch as leaf color change starts from the bottom up – this natural yellowing and browning signals maturity, not nitrogen deficiency.
When you spot harvesting garlic readiness, about half your leaves should be brown while maintaining your green leaf count above.
Different varieties show variety variation in timing, so monitor each type separately for ideal harvest time.
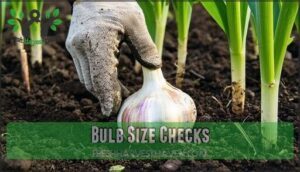
Bulb Size Checks
Testing your bulbs’ ideal size helps determine perfect harvest timing.
Carefully dig around a sample bulb without fully removing it from soil.
When firm cloves fill their papery skins completely, you’ve hit the sweet spot.
Variety impact and soil fertility affect growth rate, so check different plants.
Well-developed bulbs feel solid when gently squeezed, confirming garlic maturity signs for best harvesting garlic.
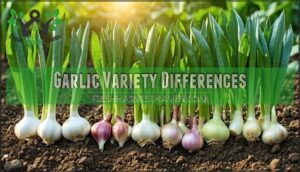
Garlic Variety Differences
Your garden’s garlic varieties mature on different schedules, making variety knowledge vital for perfect timing.
Hardneck varieties typically finish first in cooler climates, while softneck types need extra weeks. Regional differences also affect when each type reaches peak readiness.
Different varieties signal harvest readiness uniquely:
- Early bloomers: Asiatic and Turban varieties mature fastest, often ready by late spring
- Mid-season champions: Rocambole and Artichoke types follow in early summer
- Late finishers: Silverskin varieties take longest, maturing in mid to late summer
Monitoring each variety separately guarantees the best harvest timing.
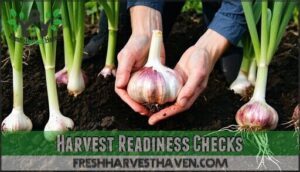
Harvest Readiness Checks
Before you harvest your garlic, you’ll need to perform three essential readiness checks to guarantee perfect timing.
These simple tests will help you determine if your bulbs have reached peak maturity and are ready for digging.
Leaf Death Percentage
Think of leaf death percentage as nature’s countdown timer for when to harvest garlic.
Your optimal percentage sits between 50-75% brown leaves, starting from the bottom.
This harvest timing indicator creates the perfect harvest window – too few dead leaves means immature bulbs, while too many signals declining storage implications.
Variety impact matters here: hardneck varieties typically show clearer progression than softneck types.
Environmental factors like rainfall can accelerate leaf death, so focus on the bottom-up browning pattern rather than total count.
This maturity indicator guarantees your harvest readiness checks hit the sweet spot for maximum storage life.
Bulb Firmness Test
After evaluating leaf browning patterns, your hands become the most reliable tools for determining harvest readiness. Feel each bulb through gentle pressure – mature garlic should resist compression like a tennis ball, not give way like overripe fruit.
Here’s your systematic bulb firmness test approach:
- Bulb Squeeze Test – Apply light pressure around the bulb’s widest point; healthy garlic maintains its shape
- Clove Separation Check – Press gently where cloves meet; they shouldn’t shift or feel loose inside
- Soft Spots Detection – Run fingertips over the entire surface, checking for mushy areas that signal decay
- Size and Firmness correlation – Larger bulbs need extra firmness evaluation since they’re more prone to hollow centers
- Harvest Timing Impact assessment – Test multiple bulbs since individual plants mature at different rates
These harvesting tips prevent disappointment during storage. Soft bulbs won’t cure properly, regardless of perfect leaf browning. Your bulb size checks should reveal well-filled cloves that feel substantial. Remember, harvesting techniques rely heavily on touch – trust your fingers over calendar dates for ideal harvest readiness checks.
Protective Paper Layer Check
After testing bulb firmness, examine the protective paper layers that wrap your garlic bulbs. Wrapper integrity serves as a reliable harvest indicator for timing your garlic harvest. Each green leaf above ground creates one protective wrapper below – think of them as nature’s storage containers.
- Layer count should reach 3-5 wrappers for ideal storage impact
- Intact layers provide pest protection and prevent moisture loss
- Damaged or missing wrappers signal premature harvest timing
- Harvesting tips suggest checking multiple bulbs since maturity indicators vary
This protective paper layer check helps you avoid common harvesting mistakes that compromise bulb quality.
Harvesting Techniques
Once you’ve confirmed your garlic is ready for harvest, proper technique makes all the difference between perfect bulbs and damaged ones.
You’ll want to loosen the soil carefully around each bulb before lifting to avoid bruising or breaking the delicate wrapper layers that protect your garlic during storage, using a method that preserves the delicate nature of the garlic.
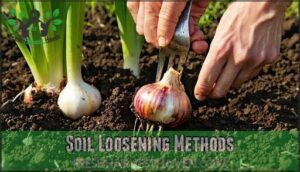
Soil Loosening Methods
Once your bulbs are ready, proper soil loosening methods prevent damage during garlic harvest. Choose your approach based on soil conditions and available tools.
Wait for dry weather before starting – moist soil clings to bulbs and makes extraction difficult. Position your tool 2-4 inches away from each plant to avoid nicking the bulbs.
| Tool | Best Soil Type |
|---|---|
| Garden fork | Heavy clay or compacted soil |
| Hand trowel | Light, sandy soil |
| Spade | Mixed or loamy soil |
Fork vs trowel selection depends on your soil type and garden setup. Garden forks work better in dense soil, while hand cultivators excel in raised beds. Spade alternatives like broad-tined forks reduce bulb damage compared to narrow tools. Consider purchasing a quality garden tool for the best results.
Insert your chosen tool at an angle, then gently lift upward. This technique loosens soil around the entire root system without applying direct pressure to delicate bulbs. Damage prevention starts with patience – rushing leads to bruised or split garlic that won’t store well.
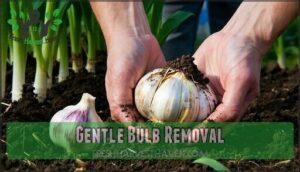
Gentle Bulb Removal
Once you’ve completed soil loosening methods, it’s time for gentle bulb removal using proper harvest techniques.
Your lifting bulbs approach determines storage success.
- Position your tool directly beneath each bulb’s center
- Lift straight up with steady pressure, supporting the bulb
- Never pull garlic by stems or leaves during removal
- Place harvested bulbs in shade immediately after lifting
Proper grip and tool selection prevent bruising that shortens storage life.
Specialized tools like bulb lifting devices can aid in this process.
Handle each bulb like you’re cradling a butterfly’s wing.
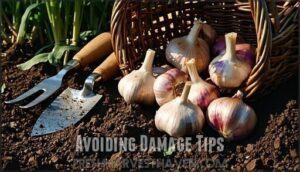
Avoiding Damage Tips
Most gardeners rush through harvest day, but Handle Gently should be your mantra. You’ll want to Loosen Soil around each bulb before attempting removal. Proper Tools like garden forks prevent the heartbreak of snapped stems and bruised bulbs.
Your garlic harvest success starts with gentle hands and proper tools—rushing leads to bruised bulbs that won’t store well.
Lift Carefully by supporting the bulb’s base—never yank by the leaves. This Avoid Bruising approach keeps your garlic storage-ready. Harvesting too early or harvesting too late both increase damage risk, so timing matters.
These harvest techniques and avoiding damage tips guarantee your harvesting efforts pay off with perfectly preserved bulbs.
Post Harvest Care
Once you’ve harvested your garlic, proper post-harvest care determines how long your bulbs will last and how good they’ll taste.
The key steps are drying, curing, and storing your garlic correctly to prevent spoilage and maintain quality.
Drying and Curing Process
Once you’ve harvested your garlic, proper drying and curing transforms raw bulbs into storage-ready treasures.
Follow these essential steps for successful garlic curing:
- Airflow Needs – Place bulbs in well-ventilated areas with good air circulation
- Temperature Effects – Maintain 60-70°F for ideal curing effects
- Humidity Control – Keep below 60% to prevent mold prevention issues
This curing duration takes 2-4 weeks, allowing outer wrappers to dry completely while preserving flavor for long-term storage impact.
Storage Location Tips
After proper curing, finding the right storage spot becomes your garlic’s lifeline.
Choose a cool, dry place with ideal airflow—aim for 60-65°F with good air circulation. Basements and pantries with proper ventilation work perfectly.
| Storage Factor | Ideal Condition | Avoid |
|---|---|---|
| Temperature | 60-65°F stable | Refrigerators, hot areas |
| Humidity | 40-60% controlled | Damp basements, kitchens |
| Light exposure | Dark spaces | Direct sunlight, bright rooms |
| Container | Mesh bags, breathable | Plastic bags, sealed containers |
Temperature stability prevents sprouting while humidity control stops mold.
Skip plastic—it traps moisture and kills your bulbs fast.
Handling Damaged Bulbs
Don’t toss those bruised bulbs just yet. Damaged cloves need immediate use since they won’t survive storage alongside healthy ones.
Check each bulb for soft spots, cuts, or sprouting—these won’t keep.
Transform flawed garlic into culinary gold. Dehydration options preserve damaged bulbs for months.
Consider pesto potential with fresh bruised cloves, or create infused oils for cooking. These alternatives prevent waste while maximizing your harvest.
Composting waste works for severely damaged pieces, but most imperfect bulbs still offer kitchen value.
Don’t let minor flaws fool you—damaged garlic often tastes just as good when used right away.
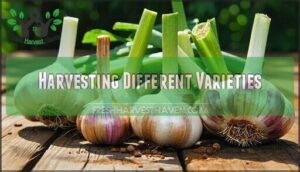
Harvesting Different Varieties
Different garlic types mature on their own timeline, so you’ll need to watch each variety separately for harvest cues.
While hardneck varieties typically finish first in mid-summer, softneck types take longer and some early birds like Asiatic garlic might surprise you by being ready weeks ahead of schedule.
Hardneck Garlic Timing
After proper curing and storage setup, hardneck garlic requires specific timing awareness. You’ll know it’s ready when 40% of leaves turn brown from bottom up. Scape removal done 3-4 weeks earlier kickstarts final bulb development.
Cold hardiness makes hardneck varieties perfect for northern climates, but regional differences affect harvest timing—warmer areas harvest earlier than cooler zones.
- Watch for bottom leaves browning while upper ones stay green
- Check bulb firmness by gently feeling through soil
- Monitor variety maturation as some ripen weeks apart
- Consider planting depth impact on development speed
- Test-dig one bulb to assess maturity progress
Softneck Garlic Timing
Unlike hardneck varieties, softneck garlic takes longer to reach maturity.
Climate Influence and Regional Variations affect your harvest timing indicators – warmer areas harvest earlier than cooler zones.
Watch for leaf color changes starting from bottom leaves turning brown while upper leaves stay green.
Check bulb development for Optimal Firmness and well-formed cloves.
Braiding Readiness occurs when stems remain flexible, perfect for Storage Impact longevity.
Asiatic and Turban Varieties
Early maturity makes Asiatic and Turban varieties your first garlic harvest timing reward.
You’ll spot harvest timing indicators when lower leaves brown while upper ones stay green.
Their climate influence creates shorter growing seasons, so watch closely.
Scape development happens quickly, and flavor profiles deliver mild heat.
Storage differences mean these Asiatic and Turban varieties require immediate attention once garlic maturity indicators appear.
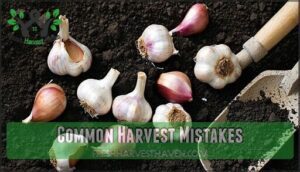
Common Harvest Mistakes
Even experienced gardeners can stumble when timing their garlic harvest, leading to disappointing results and storage problems.
You’ll want to avoid three critical mistakes that can turn months of careful growing into a frustrating loss.
Harvesting Too Early
Jumping the gun on harvest robs your garden of its full potential.
Immature bulb size means you’ll get cloves 20-40% smaller than waiting would deliver.
Your harvest timing signals matter more than impatience.
Consider what early harvest costs you:
- Weak flavor profile that disappoints in every dish
- Reduced storage life cutting your supply short by months
- Missed wrapper growth leaving cloves vulnerable to rot
- Increased spoilage risk wasting your season’s work
Green leaf importance can’t be overstated—each one protects your bulbs during storage.
Harvesting Too Late
Delaying your garlic harvest creates serious problems.
When you wait beyond 50% leaf browning, bulbs start splitting apart and losing protective wrappers. This leads to clove separation, reduced storage life, and increased pest vulnerability.
Late-harvested bulbs show flavor changes and become unsuitable for long-term storage. Like other crops, weather impacts ripening and should be considered.
| Problem | Impact | Timeline |
|---|---|---|
| Bulb splitting | Wrapper loss, exposed cloves | 1-2 weeks past peak |
| Clove separation | Individual cloves break apart | 2-3 weeks late |
| Pest vulnerability | Increased insect/disease risk | Immediate exposure |
| Flavor changes | Loss of pungency, altered taste | 10+ days past ideal |
| Storage suitability | 3-6 month shelf life reduction | Progressive decline |
Monitor harvest timing signals carefully – your hard work deserves better than spoiled garlic.
Improper Handling Techniques
Bruising bulbs ruins your garlic harvest. Yanking stalks instead of loosening soil first causes damage.
Never wash garlic after digging—moisture leads to rot. Avoid sun exposure during the drying and curing process; cure in shade instead.
Skip plastic bags for storage since they trap humidity. Handle gently to prevent damaged cloves and guarantee proper post harvest care.
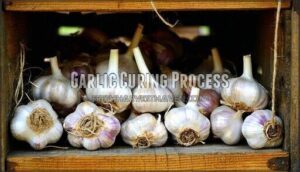
Garlic Curing Process
Once you’ve harvested your garlic, proper curing transforms those fresh bulbs into the long-lasting storage gems you’re after.
You’ll need to manage three key factors during this critical 2-4 week process: air circulation, temperature, and humidity levels.
Air Circulation Importance
Proper air circulation transforms your garlic harvest from potential disaster to storage success.
You’ll prevent mold growth and rot reduction while ensuring even drying across all bulbs.
Think of airflow as your garlic’s best friend—it whisks away moisture that invites trouble.
Hang bundles in breezy spots or use mesh racks for ideal pest deterrent and temperature regulation during curing, which helps in rot reduction and ensures even drying.
Temperature Control Tips
Getting the right curing temperatures keeps your garlic from turning into a science experiment gone wrong. Ideal temperatures between 60-80°F create perfect conditions for proper moisture removal without damaging the bulbs.
Temperature monitoring prevents costly mistakes that ruin months of garden work. To achieve this, consider the following:
- Maintain steady temperatures – fluctuations cause condensation and spoilage
- Avoid basements or attics where temperature swings are common
- Use a thermometer to track conditions during the 2-3 week curing period
To guarantee proper humidity, consider using perforated plastic bags for airflow.
Humidity Level Considerations
While high humidity can ruin your curing process, finding that sweet spot between 45-60% humidity level considerations makes all the difference.
Wet climates and humid harvesting conditions challenge mold prevention during curing humidity control.
Monitor your storage conditions closely—storing garlic in damp spaces invites trouble.
Proper storage humidity protects your garlic storage investment long-term.
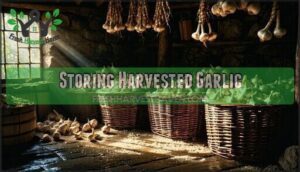
Storing Harvested Garlic
After all your careful harvesting and curing work, proper storage keeps your garlic fresh for months. You’ll need a cool, dry spot with good airflow to prevent sprouting and rot.
Cool Dry Place Requirements
After curing, your garlic needs the right storage location to maintain quality. Ideal Temperature around 60°F prevents sprouting while Temperature Control extends shelf life. Darkness Importance can’t be overstated—light degrades flavor compounds.
- Choose spaces with consistent Airflow Needs** like pantries or unheated rooms
- Use breathable Storage Containers** such as mesh bags or woven baskets
- Maintain Ideal Humidity below 60% through proper Humidity Control** methods
Avoiding Moisture Traps
Moisture traps spell disaster for stored garlic bulbs. Never wash harvested garlic—dirt protects better than water damages.
Skip sealed containers that create humidity buildup. Proper Airflow prevents condensation while maintaining Bulb Wrapper Integrity.
Your Curing Environment needs breathable conditions, not airtight Storage Containers. Regular Inspection Frequency catches moisture problems early.
Following harvest timing best practices includes smart moisture control strategies that keep bulbs firm and flavorful.
Using Mesh or Paper Bags
Choosing the right bag material makes all the difference for your garlic harvest. Paper and mesh bags allow air to circulate freely, preventing moisture buildup that leads to mold and spoilage.
Here’s what works best for proper storage:
- Mesh bags – Reusable and durable with excellent airflow considerations
- Paper bags – Budget-friendly option that breathes well and controls humidity
- Proper bag size – Choose bags that aren’t overcrowded to maximize air circulation
Consider reusable mesh options for storing your harvest. Skip plastic bags completely – they trap moisture like a greenhouse, turning your beautiful bulbs into mushy disappointments.
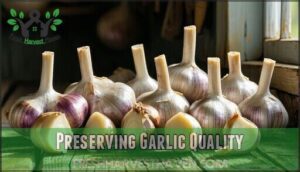
Preserving Garlic Quality
Proper harvesting and handling techniques directly impact your garlic’s storage life and flavor quality.
You’ll maximize shelf life by timing the harvest correctly and following proven preservation methods that prevent spoilage while maintaining the bulb’s natural protective layers, which is crucial for storage life.
Preventing Spoilage Tips
Protect your garlic harvest from spoilage by skipping the wash—water invites rot.
Handle bulbs like fragile eggs; bruising opens doors to decay.
Proper drying in shade with airflow prevents moisture buildup. Avoiding sun exposure protects delicate skins.
Damaged bulbs need immediate use since they won’t store well. Gentle handling throughout preserves your storage investment and maximizes shelf life.
Maintaining Flavor and Aroma
Harvest garlic at the perfect moment, and you’ll lock in those precious sulfur compounds that give your bulbs their signature punch. Enzyme activity slows dramatically during proper curing, preserving those flavor-packed oils that make your garlic worth growing.
Your variety selection affects how these compounds develop—hardneck varieties often pack more intensity than their softneck cousins.
Follow these storage conditions for maximum flavor preservation:
- Temperature control – Keep cured bulbs between 60-65°F to maintain sulfur compounds
- Air circulation – Guarantee proper ventilation prevents moisture buildup that degrades flavor
- Light protection – Store in darkness to prevent enzyme breakdown and bitter tastes
The curing impact on garlic flavor can’t be overstated—those first few weeks after your harvest period determine whether you’ll have bland, papery bulbs or aromatic treasures that’ll make your kitchen sing. Consistent monitoring helps prevent spoilage, but mulch layers provide insulation for longer-term storage.
Extending Shelf Life Techniques
Optimal curing for 2-3 weeks at 68-80°F with proper air circulation maximizes your garlic shelf life.
Store cured bulbs in cool, dry locations using storage methods like mesh bags.
Regular checks help catch spoilage early.
Different variety selection affects storage conditions—hardneck typically stores 4-6 months, softneck up to 8 months when properly handled.
Frequently Asked Questions (FAQs)
Is it better to harvest garlic too early or too late?
Surprisingly, 50% of home gardeners harvest their garlic too late, reducing storage life substantially.
You’re better off harvesting slightly early rather than late.
Early harvest means firmer bulbs with tighter wrappers, while late harvest risks splitting cloves and shorter storage duration.
Is it possible to leave garlic in the ground too long?
Yes, you’ll damage your garlic if you wait too long.
Once all leaves turn brown, cloves separate and storage quality plummets.
Harvest when half the leaves are brown to preserve those protective paper wrappers.
How long do you leave garlic to dry after harvesting?
Carefully cure your freshly-dug garlic for three to four weeks in a warm, well-ventilated area with good airflow. You’ll know it’s properly dried when the outer papery skins rustle.
How do you know when garlic is ready to harvest?
Watch for lower leaves turning yellow and brown from the bottom up.
Harvest when about half the leaves have died back while upper leaves stay green.
Each green leaf equals one protective wrapper around your bulb.
Can you pick garlic too early?
Picking garlic too early means you’ll get smaller bulbs with underdeveloped cloves that won’t store well. Wait until half the leaves turn brown for ideal size and storage quality.
When do you harvest garlic in California?
California’s warm climate allows garlic harvest from late May through mid-July. You’ll harvest when half the leaves turn brown while upper leaves stay green, ensuring proper bulb development.
When should garlic be harvested?
Harvest happens when half your garlic’s leaves turn brown from bottom up, while upper leaves stay green – this timing preserves protective wrappers for storage.
When should garlic be planted?
Plant garlic in fall, about 4-6 weeks before your first hard frost. You’ll want soil temperatures around 40-50°F for proper root development before winter dormancy sets in.
How long do Garlic plants last before harvesting?
Garlic plants typically grow for 8-10 months from planting to harvest. You’ll plant in fall and harvest the following summer when leaves begin yellowing and dying back from bottom up.
What month is garlic usually ready?
When the chips are down, you’ll typically harvest garlic in June or July when about half the leaves turn brown.
Timing depends on your variety and climate—southern regions harvest earlier while northern areas wait until late summer.
Conclusion
Timing garlic harvest correctly is like conducting an orchestra—each leaf plays its part in the symphony of ripeness.
When you’ve mastered reading those telltale signs, you’ll consistently pull perfect bulbs that cure beautifully and store for months.
The best time to harvest garlic isn’t guesswork; it’s a skill you’ll refine with each growing season.
Trust your observations, handle gently, and you’ll enjoy homegrown garlic’s superior flavor year-round.
- https://journals.ashs.org/hortsci/downloadpdf/view/journals/hortsci/9/3/article-p223.pdf
- https://www.epicgardening.com/healthy-bulbs/
- https://www.gardeningknowhow.com/ornamental/bulbs/bgen/bulb-health-guide-how-to-tell-if-a-bulb-is-healthy.htm
- https://mendhamgardencenter.com/blog/checking-the-health-of-stored-plant-bulbs/
- https://www.researchgate.net/publication/233247668_Relatedness_of_Bulb_Firmness_to_Other_Attributes_of_New_Mexico_Onion_Entries

