This site is supported by our readers. We may earn a commission, at no cost to you, if you purchase through links.
This usually happens 90-120 days after planting, though new potatoes can be harvested earlier when they’re golf ball-sized with tender skins. Watch for that telltale foliage dieback spreading across your plants like autumn’s arrival.
The timing varies by variety, but these reliable signs of when to harvest potatoes never lie. **But there’s more to getting this timing just right.
Table Of Contents
- Key Takeaways
- Key Signs Potatoes Are Ready to Harvest
- Harvest Timing for Different Potato Types
- Common Mistakes to Avoid When Harvesting
- Best Tools and Techniques for Potato Harvest
- Post-Harvest Care and Storage Tips
- Frequently Asked Questions (FAQs)
- How do I know when my potatoes are ready to dig up?
- What do potato plants look like when ready to pick?
- How do you know when potatoes are ready to smash?
- Can you leave potatoes in the ground too long?
- How do you know if a potato is ready to harvest?
- When to harvest potatoes?
- How do you know if a potato is ready to dig?
- Should you harvest potatoes too early or too late?
- How do you know if a potato is mature?
- How do you know if a potato plant is ready?
- Conclusion
Key Takeaways
- You’ll know it’s harvest time when your potato plant’s leaves turn yellow and brown, then die back naturally—this foliage dieback signals the tubers have finished growing underground.
- Test potato maturity by gently rubbing the skin with your thumb—if it doesn’t scrub off easily, you’ve got mature spuds ready for harvest.
- Don’t harvest too early or too late—early harvesting gives you tiny, watery potatoes, while waiting too long leads to oversized, starchy tubers prone to rot.
- Use gentle digging techniques with a spading fork instead of a shovel to avoid bruising your potatoes, and handle them carefully during transport to prevent damage.
Key Signs Potatoes Are Ready to Harvest
You’ll know your potatoes are ready when the plant’s leaves start turning brown and papery, then begin falling over like they’re waving a white flag of surrender.
The skin test is your best friend here—gently rub a potato’s skin with your thumb, and if it doesn’t scrub off easily, you’ve got mature spuds ready for harvest.
Leaf Color and Foliage Dieback
Your potato plants’ leaves are nature’s green traffic light turning yellow. When foliage health shifts from vibrant green to brown and papery, you’re witnessing plant senescence—the natural aging process that signals harvest time.
Watch for these leaf signs:
- Pale, yellowing leaves that can’t photosynthesize anymore
- Brown, crispy foliage dieback patterns spreading across plants
- Leaves drooping toward the ground like tired dancers
- Color change happening 90-120 days to maturity
These dieback patterns mean your harvesting potatoes window is opening.
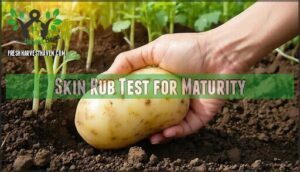
Skin Rub Test for Maturity
Giving your potatoes the good ol’ rub test is like checking if they’re wearing their grown-up pants. If the skin thickness holds firm and doesn’t peel away easily, your tuber readiness is spot-on.
This simple rub test method tells you maturity signs better than counting days to maturity alone. When skins stay intact under gentle pressure, harvest time has arrived for most potato varieties.
Understanding the proper harvest time is vital for a successful yield.
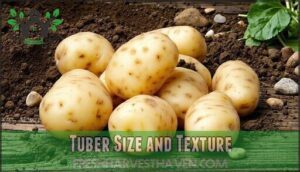
Tuber Size and Texture
When tuber growth reaches harvest maturity, you’ll notice significant texture change and skin thickness development. Gently brush soil away to check root development – mature potatoes feel firm with thicker skins that won’t easily scratch.
New potato varieties show thin, papery skins around 50-55 days to maturity, while storage types need fuller development for proper harvest time.
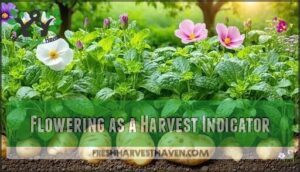
Flowering as a Harvest Indicator
Watching your potato plants bloom signals new potatoes are forming underground, though not all varieties flower reliably. Here’s what flowering tells you about your potato harvest timing:
- Flower Color varies by variety but indicates active tuber development
- Petal Drop marks when baby potatoes reach harvestable size
- Bloom Timing occurs 7-8 weeks after planting for new potatoes
- Seed Formation follows flowering but isn’t necessary for potato growth
- Floral Abundance doesn’t guarantee larger yields – focus on plant health instead
Understanding the proper harvest techniques is essential for maximizing your potato yield.
Harvest Timing for Different Potato Types
Not all potato varieties march to the same drumbeat at harvest time, and knowing your potato’s personality can save you from digging up disappointment. You’ll want to match your harvesting schedule to whether you’re growing early-season speedsters that mature in 55-70 days, patient mid-season varieties that need 70-90 days, or the marathon runners that take a full growing season to reach their peak.
Early, Mid, and Late Season Varieties
Timing your potato harvest depends on variety selection and maturity rates. Early potatoes like Yukon Gold mature in 55-70 days, perfect for seasonal planting and quick new potatoes. Mid-season varieties need 70-90 days, while late-season types require 90-120 days for ideal yield optimization.
Choose your potato varieties wisely for successful crop rotation and harvesting potatoes at peak quality. Understanding the potato maturity rates is vital for a successful harvest.
New Potatoes Vs. Storage Potatoes
You’ve got two main potato harvest windows to work with. New potatoes are your summer treat – ready 7-8 weeks after planting with tender, thin skins perfect for immediate eating. Storage potato varieties need the full growing season, developing thick skins ideal for long-term storage through winter months.
New Potato Benefits vs Storage Potato Varieties:
- Fresh new potatoes melt in your mouth with buttery sweetness you can’t store
- Storage potatoes reward your patience with months of hearty meals ahead
- Harvest timing flexibility lets you enjoy both tender treats and winter staples
- Crop yield comparison shows storage varieties produce more pounds per plant
- Maturity factors determine whether you’re eating tonight or storing for spring
Container Vs. Garden Bed Potatoes
Container soil dynamics and bed preparation differ markedly between growing mediums. Garden beds usually deliver higher potato yield through deeper root expansion, while container gardening offers greater space efficiency. Harvesting potatoes from containers proves easier—just tip them over onto tarps.
| Growing Method | Harvest Timing | Potato Yield |
|---|---|---|
| Container gardening | Same timeline, easier access | 5-6 potatoes per seed |
| Garden beds | Standard timing, requires digging | Higher overall weight yield |
| Raised beds | Best soil control | Ideal drainage benefits |
| In-ground plots | Traditional method | Maximum tuber development |
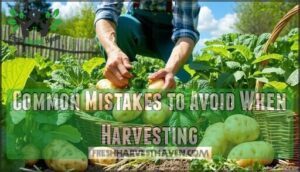
Common Mistakes to Avoid When Harvesting
Even experienced gardeners can turn a perfect potato harvest into a frustrating mess with a few common blunders. You’ll want to dodge these classic mistakes that can leave you with damaged spuds, green potatoes, or a disappointing yield that makes all your hard work feel wasted.
Harvesting Too Early or Late
Between rushing too early and waiting too long, potato harvest timing can make or break your crop yield. Early harvesting gives you tiny baby potatoes with paper-thin skins that bruise easily, while harvest delays lead to oversized, starchy tubers prone to rot.
Watch for maturity signs like dying foliage—they’re your best friend for perfect timing despite seasonal variations. Understanding proper harvest timing techniques is essential for maximizing crop quality and yield.
Identifying and Avoiding Green Potatoes
Green Potato Risks shouldn’t scare you, but they demand respect. Green potatoes contain solanine, a natural toxin that causes nausea and headaches.
Here’s your safety checklist:
- Check potato skin color during harvest – any green tint means trouble
- Store harvested potatoes in darkness to prevent solanine formation
- Cut away green portions completely before cooking
- When in doubt, toss them out – your health beats saving a few spuds
**Harvest safety means knowing these toxicity levels matter.
Preventing Bruising and Damage
Once you’ve spotted those green potatoes, protecting your harvest from bruising becomes your next priority. Handle each potato like you’re holding a fresh egg – gentle movements prevent those unsightly brown spots that ruin potato storage.
Use proper harvest tools with rounded edges, and never toss potatoes into containers. Your potato plants worked hard all season, so treat new potatoes with respect during harvesting potatoes to guarantee maximum crop protection.
Best Tools and Techniques for Potato Harvest
You’ll want the right tools and a gentle approach to bring your potato harvest home without any bruises or battle scars.
The key is working smart, not hard—using a spading fork instead of a shovel keeps you from accidentally slicing through your precious spuds like they’re vegetables for dinner.
Choosing The Right Harvest Tools
Having the right tools makes harvesting potatoes feel less like archaeology and more like treasure hunting. You’ll want equipment that won’t bruise your precious spuds while making the job easier on your back.
- Garden Forks – Perfect for loosening soil around potato plants without damaging tubers
- Harvest Rakes – Great for gently sifting through dirt to find hidden storage potatoes
- Soil Screens – Help separate potatoes from clods and debris efficiently
- Digging Bars – Useful for breaking up compacted soil before harvesting potatoes
Tool Maintenance – Keep tools clean and sharp for smooth potato grow season success. Understanding garden fork types is essential for effective potato harvesting.
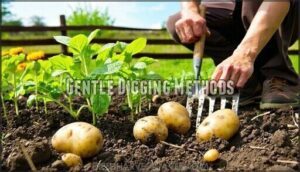
Gentle Digging Methods
Start by loosening soil around potato plants with gentle dig tools like a spading fork. Work slowly outward from the main stem, keeping digging techniques shallow to protect roots.
**Don’t rush—potato tubers hide in unexpected spots.
** Use proper soil preparation by clearing debris first.
When you harvest potatoes, think treasure hunt rather than excavation project. Your potato bin will thank you.
Safe Handling and Transport
Once you’ve unearthed your potatoes with gentle handling, transport becomes key. Don’t toss them into your potato bin like rocks—they bruise easily. Handle storage potatoes carefully since damaged ones develop solanine and spoil faster.
Use shallow containers to prevent crushing lower layers. Keep harvest logistics simple: carry small loads, avoid dropping, and shield from direct sunlight during transport to maintain quality.
Effective potato harvest tools, such as those used for potato digging equipment, can greatly aid in the harvesting process.
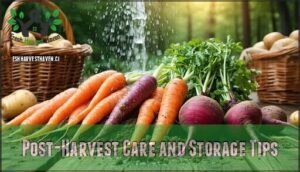
Post-Harvest Care and Storage Tips
You’ve struck gold with your harvest, but don’t toss those spuds straight into storage like they’re rocks in a wheelbarrow.
Proper curing and storage can turn your hard-earned potato bounty into months of delicious meals, while skipping these steps might leave you with a bin of disappointment by winter.
Curing Potatoes for Long-Term Storage
After harvest, potatoes need proper curing methods to thicken their skins for long-term storage. This process prevents moisture loss and protects against potato diseases.
Place storage potatoes in a cool, dark spot with humidity control around 85-90% for one to two weeks. Temperature management between 50-60°F creates ideal conditions, transforming fresh-dug tubers into shelf-stable storage champions.
Effective potato storage also relies on using proper curing equipment to maintain ideal conditions.
Ideal Storage Conditions and Containers
After curing, your storage potatoes need cool dry storage between 45-50°F with proper ventilation systems and humidity control around 85-95%. Choose breathable containers like mesh bags or cardboard boxes—never plastic bags that trap moisture. Temperature monitoring prevents sprouting, while good container selection protects against potato diseases. Think root cellar vibes for happy spuds.
Effective fruit storage methods are essential for maintaining the quality of your harvested produce.
Preparing Soil for Next Year’s Crop
Once you’ve dug up those storage potatoes, your soil needs some TLC for next year’s growing season. Conduct soil testing to check pH and nutrients, then add organic matter like compost.
Practice crop rotation—avoid planting seed potatoes in the same spot for three years. Consider cover cropping or fertilizer application to rebuild soil health before your next potato adventure.
Frequently Asked Questions (FAQs)
How do I know when my potatoes are ready to dig up?
Like buried treasure waiting to be discovered, your potatoes whisper they’re ready when leaves turn brown and papery, falling over dramatically.
You’ll also spot flowering if your variety blooms—that’s nature’s dinner bell ringing.
What do potato plants look like when ready to pick?
You’ll spot droopy, yellowing leaves that look like they’re giving up on life. The foliage turns brown and papery, then flops over dramatically – that’s your potato plant waving goodbye.
How do you know when potatoes are ready to smash?
Perfect potatoes present perfectly pliable skin when you press them gently – they’ll yield slightly under pressure.
You’ll know they’re ready when the flesh feels tender but not mushy, and the skin moves easily when rubbed.
Can you leave potatoes in the ground too long?
Yes, you can leave potatoes in the ground too long. They’ll start rotting, attract pests, or get damaged by freezing temperatures. Harvest before winter hits for best results.
How do you know if a potato is ready to harvest?
Think of checking a cake with a toothpick—your potato plant’s dying foliage acts like nature’s timer.
You’ll know potatoes are ready when leaves turn brown and papery, signaling the tubers have finished growing underground.
When to harvest potatoes?
You’ll know it’s harvest time when your potato plant’s leaves turn yellow and die back, usually 70-120 days after planting depending on variety.
How do you know if a potato is ready to dig?
Most potatoes mature in 90-120 days, but you’ll know they’re ready when the leaves turn brown and papery, falling toward the ground, signaling the plant’s finished growing.
Should you harvest potatoes too early or too late?
Timing matters more than you’d think. Harvest too early and you’ll get tiny, watery spuds that won’t store well.
Wait too long and they’ll become tough, bitter, or start sprouting underground.
How do you know if a potato is mature?
Check your spuds by gently digging around the base. Mature potatoes have thick skins that won’t rub off easily when you scratch them with your fingernail.
How do you know if a potato plant is ready?
Ironically, your potato plant will practically scream when it’s ready by doing the opposite of what healthy plants do. Watch for yellowing, browning leaves that droop and fall over—that’s your cue to harvest.
Conclusion
Picture yourself standing in your garden, golden autumn light filtering through dying potato vines that tell the story of a season well spent. Reading the signs when to harvest potatoes becomes second nature once you’ve learned nature’s language—from yellowing leaves to that satisfying skin-test confirmation.
You’ve got the tools, timing, and techniques to bring home a perfect harvest that’ll fill your pantry for months ahead. Trust these indicators, and you’ll never miss that sweet spot again.
- https://resprout.com/when-to-harvest-potatoes-6-signs-theyre-ready/
- https://harvesttotable.com/harvesting-potatoes-signs-of-maturity/
- https://www.groworganic.com/blogs/articles/perfect-timing-for-potato-harvest
- https://ninnescahmade.com/when-to-harvest-potato/
- https://crop.zone/en/effect/was-nuetzt-schalenfestigkeit-bei-kartoffeln-2/


