This site is supported by our readers. We may earn a commission, at no cost to you, if you purchase through links.
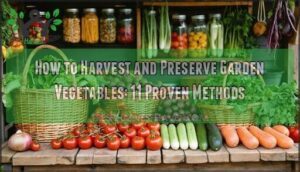
 Preserving harvest for winter means you’re turning summer’s hard work into cozy meals when the frost bites.
You’ll want to freeze, can, dehydrate, or store your bounty in cool, dark places. Clean and prep your veggies, choose the best method for each crop, and always keep safety in mind—nobody wants a science experiment gone wrong in the pantry.
Root veggies like potatoes and carrots love humidity, while dried herbs just need a jar and a little patience. With the right steps, you’ll have shelves full of flavor.
There’s more to learn about making your harvest last, so let’s dig deeper into the best method for each crop.
Table Of Contents
- Key Takeaways
- Planning Harvest Preservation
- Freezing and Dehydrating
- Canning and Fermenting
- Storing Root Vegetables
- Optimal Storage Environments
- Frequently Asked Questions (FAQs)
- How do you preserve a harvest?
- What are the best winter food storage crops?
- Do you need to freeze produce for a long winter?
- How do you keep produce fresh in the fridge?
- How do you store cabbage in the winter?
- What can you store in the fall?
- How to preserve produce for winter?
- How did pioneers store food for winter?
- How to preserve potatoes after harvesting for winter?
- Should you wash your harvest before preserving?
- Conclusion
Key Takeaways
- Pick only the freshest, firm produce and sort out any damaged pieces before storing.
- Clean, trim, and dry your harvest thoroughly to prevent spoilage and keep everything safe.
- Choose the right preservation method—freeze, can, dehydrate, or store in cool, dark places—based on each crop’s needs.
- Regularly check your stored food for signs of spoilage and keep storage areas at the right temperature and humidity.
Planning Harvest Preservation
Your harvest won’t last through winter without proper planning from the start.
Success depends on choosing the right produce, cleaning it correctly, picking the best preservation method, and following food safety guidelines.
Choosing Fresh Produce
Zeroing in on the freshest produce sets you up for successful winter food storage. Your eyes and hands are your best tools for produce selection—look for firm, heavy fruits and vegetables with vibrant colors that signal peak ripeness and nutrient density.
Firm, vibrant produce is your best pick—trust your senses to find freshness and flavor at its peak.
Focus on these freshness checks for quality control:
- Skin inspection: Choose unblemished surfaces without soft spots or wrinkles
- Color depth: Deep, rich hues indicate higher antioxidant content and proper harvest timing
- Texture test: Crisp snap beans and firm root vegetables store longest
- Weight check: Heavy produce means good moisture content and freshness
- Separation strategy: Keep ethylene producers like apples away from sensitive crops
Prioritize local sourcing during peak season when crop inspection reveals prime maturity for preserving harvest success.
Cleaning and Preparing Produce
When preserving harvest begins, proper crop cleaning sets the foundation for successful storage.
Start with thorough produce washing to remove dirt and bacteria that cause spoilage.
Essential cleaning steps:
- Sort – Remove damaged pieces first to prevent contamination from spreading
- Wash – Rinse under cool water, scrubbing gently for effective sanitizing produce
- Trim – Cut away stems, leaves, or blemishes using proper peeling methods
Dry completely before storage.
Vegetable trimming and fruit sorting now prevent headaches later.
This harvest preparation step protects your winter food supply from premature decay.
Selecting Preservation Methods
Once your produce is cleaned and prepped, choosing the right preservation tools becomes your next move.
Freezing retains up to 90% of nutrients and works great for most vegetables after blanching. Dehydrating concentrates flavors while saving storage space—perfect for herbs and tomatoes.
Water bath canning suits high-acid foods like tomatoes and fruits, while pressure canning handles low-acid vegetables safely. Fermenting creates probiotics and extends shelf life naturally.
Consider your storage space, time commitment, and desired shelf life when making these food preservation techniques choices.
Ensuring Food Safety
After choosing your preservation methods, your harvest’s safety depends on proper Food Handling techniques.
Smart Hygiene Practices protect your family from foodborne illness:
- Wash hands and scrub produce thoroughly before handling
- Separate raw items to prevent Cross Contamination
- Maintain proper temperatures for Safe Storage
- Use sterile equipment for canning and fermentation
- Monitor storage conditions regularly for Spoilage Prevention
Understanding proper harvesting methods is vital for maintaining food quality.
These food safety fundamentals guarantee your preserved harvest stays delicious all winter long.
Freezing and Dehydrating
When you’ve got more produce than your family can eat fresh, freezing and dehydrating become your best friends for preserving that garden bounty.
These methods lock in nutrients and flavors while giving you shelf-stable ingredients that’ll last through winter’s lean months, making freezing and dehydrating essential techniques.
Freezing Techniques and Benefits

The freezer becomes your best ally when you’re preserving peak-season produce. Freezing food effectively locks in nutrients and flavor for months ahead.
Quick blanching vegetables before flash freezing maintains their vibrant color and crisp texture, while this technique prevents berries from forming one giant frozen clump. You’ll love freezing herbs in ice cube trays with oil—they’re perfect for tossing into winter soups.
Frozen storage works brilliantly when you follow proper techniques. Understanding herb preservation methods is essential for maximizing the shelf life of your harvest.
Dehydrating Methods and Equipment

You’ll find success with various dehydrator types and food dryers that make dehydrating food straightforward. Modern electric units maintain consistent temperatures while drying produce efficiently.
Here’s your equipment breakdown:
- Electric dehydrators with adjustable thermostats handle most jobs perfectly
- Drying trays with mesh screens accommodate sticky fruits and drying herbs
- Oven drying works for small batches using low heat settings
- Solar dryers provide eco-friendly options for sunny climates
- Freeze dryers preserve maximum nutrients but require bigger investment
Dehydration times vary from 8-24 hours depending on produce thickness and moisture content. Food dehydration targets specific moisture levels—fruits need 10-20%, vegetables require 5-10%.
Vacuum sealing your dried goods extends shelf life substantially. Start with basic equipment and upgrade as your dehydrating skills develop. Understanding electric dehydrator options is vital for efficient food preservation.
Blanching and Packaging

Blanching and packaging work hand-in-hand to preserve your harvest’s peak quality. This essential step locks in vibrant colors, essential nutrients, and fresh flavors while deactivating enzymes that cause spoilage. Time it right—overcooking turns crisp vegetables into mushy disappointments.
After blanching, plunge produce into ice water baths to halt the cooking process immediately. Pat everything completely dry before selecting proper food packaging materials.
Vacuum sealing creates airtight storage that prevents freezer burn and extends shelf life substantially. Effective food preservation relies on using proper vacuum sealer techniques to maintain freshness.
- Flash freezing individual pieces prevents clumping and makes portioning easier later
- Label packages with blanching dates and contents for organized frozen storage
- Leave minimal headspace in containers to reduce air exposure and maintain quality
Canning and Fermenting

When you’ve got bushels of fresh produce, canning and fermenting turn your harvest bounty into shelf-stable treasures that’ll last through the coldest months.
These time-tested methods also preserve your food’s nutrition and create tangy pickles, rich jams, and probiotic-packed vegetables that actually taste better than what you started with.
Water Bath Canning
Why struggle with spoiled summer abundance when water bath canning preserves your harvest safely? This method works perfectly for high-acid foods with proper acid levels.
Start by sterilization of canning jars in boiling water. Follow tested canning recipes exactly, ensuring proper headspace and sealing techniques. Add canning salt for flavor enhancement. Submerge filled jars completely during processing.
This reliable food preservation method keeps your canned vegetables and preserving tomatoes fresh for months. For successful canning, it’s essential to use proper canning jar equipment.
bacteria
safety
airtight preservation
shelf life
Pressure Canning
When you’re preserving low-acid foods like green beans, corn, or meat, pressure canning becomes your best friend for safe food preservation.
This method uses steam pressure to reach temperatures that destroy harmful bacteria, ensuring your canning safety meets proper standards.
Your success depends on three key factors:
- Pressure Gauges: Test accuracy annually and maintain proper readings throughout canning times
- Altitude Adjustment: Increase pressure based on your elevation to guarantee safe processing temperatures
- Jar Sterilization: Use hot, clean jars with new lids for reliable sealing
Quality canning equipment makes all the difference.
Follow tested canning recipes exactly—there’s no room for guesswork when safety’s on the line.
With proper technique, you’ll master this preservation method.
Fermenting and Pickling
Two ancient preservation methods can transform your harvest into tangy treasures that’ll last months. Fermenting food uses salt brine solutions (3-5% salt) to create beneficial bacteria, while pickling vegetables relies on vinegar’s acidity for quick preservation.
Fermenting and pickling add tangy, vibrant flavors to veggies, turning your harvest into crave-worthy, long-lasting culinary delights.
For sauerkraut making, shred cabbage and massage with salt until juices flow. Pack tightly in jars, keeping vegetables submerged under brine. Kimchi recipes follow similar fermentation methods but add spices and garlic.
Pickling tips include maintaining proper acid levels (pH below 4.6) and using fresh produce. Traditional vegetable fermentation takes 7-21 days at room temperature, developing complex salty, sour flavors naturally.
Understanding canning safety guidelines is essential for successful preservation. Food fermentation weights keep everything safely submerged, preventing mold while beneficial bacteria work their magic.
Curing and Smoking
When you’re ready to elevate your curing meat game, smoking food transforms ordinary harvests into winter treasures.
The curing process begins with salt curing, which draws moisture from proteins while curing salts guarantee safety.
Smoking meat and curing fish require careful temperature control—hot smoking cooks while cold smoking preserves.
Choose woods like maple or hickory for rich smoke flavor.
This meat preservation method creates shelf-stable foods that’ll keep you well-fed through winter’s chill.
Storing Root Vegetables
Root vegetables store best when you keep them cold, dark, and properly humid throughout winter months.
You’ll need to prepare each type differently, from trimming leafy tops to creating the right moisture conditions for long-term storage success.
Potato Storage and Care

Potatoes store beautifully for months when you follow proper potato storage techniques.
Choose the right potato varieties and store them in dark storage areas around 40°F with proper humidity control. Cool temperatures prevent sprouting while darkness stops greening.
Brush off dirt without washing, then use paper sacks for winter storage and root cellar storage conditions. Proper vegetable storage tips are essential for maintaining the quality of your harvest.
- Weekly inspection prevents one bad potato from spoiling your entire stash – catching problems early saves your vegetable storage investment
Carrot and Beet Storage

Once your potatoes are tucked away, turn your attention to carrot and beet storage.
Trim Carrot Tops to about an inch, brush off excess dirt, and pack both carrots and beets in damp sand for winter storage.
Root Cellars work wonders for root vegetable storage, helping with Humidity Control.
Sand Packing keeps everything crisp.
Check your stash often—nothing ruins root cellar storage faster than a sneaky rotten beet, which can affect the Root Cellars and require careful Sand Packing.
Parsnip and Turnip Storage

Regarding parsnip storage and turnip storage, handle your roots with care. After harvesting in cool weather, trim tops to an inch and skip washing—just brush off dirt.
For exceptional root vegetable storage, pack them in damp sand or sawdust in lidless crates. Tuck them away in dark locations like a root cellar or cool storage area.
This sand packing method helps with humidity control and prevents shriveling. Remember, don’t crowd your crops, and keep carrots away from turnips.
- Check your cold storage solutions weekly for soft spots.
Maintaining Humidity and Temperature

Think of root cellars as veggie hotels—comfort’s key.
For exceptional storage conditions, aim for temperature control between 32–40°F and humidity levels at 90–95%.
Cooling methods like a basement or root cellar work best. Damp sand or sawdust nails humidity requirements, keeping veggies crisp without inviting rot.
Climate management matters, so check for spoilage weekly, and don’t cram containers. Good humidity management and temperature management mean fewer wilted carrots and more winter crunch.
Optimal Storage Environments

After sorting out root vegetables, let’s talk about how you can create ideal storage environments for your whole harvest. The trick is balancing temperature control, humidity levels, and air circulation.
If you’ve ever found a sad, shriveled carrot in the back of the fridge, you know how quickly things go downhill without the right setup. Root cellars and cold storage areas are perfect for keeping veggies fresh, with temperatures between 32–40°F and humidity hovering around 90%. Squash likes it warmer, about 50°F in a cool, dry spot.
Use storage containers that breathe—baskets or mesh bins—to keep airflow steady and mold away. Keep your produce in cool dark places to slow down spoilage. If you’re short on space, drying is a smart way to extend shelf life.
- Maintain steady temperature control for all produce
- Use damp sand for humidity control with root veggies
- Choose breathable storage containers for air circulation
- Store in cool dark places to reduce spoilage
Frequently Asked Questions (FAQs)
How do you preserve a harvest?
Picture baskets overflowing with fresh veggies—now, to keep them tasty, you’ll dry, freeze, pickle, or can them.
Store root crops in damp sand, keep fruits away from ethylene, and check weekly for sneaky spoilage, to ensure that your fresh veggies remain in good condition.
What are the best winter food storage crops?
You’ll get the most mileage from root veggies like carrots, potatoes, beets, and parsnips.
Cabbage, squash, apples, and onions also store well.
These crops can handle cold, keep their flavor, and last for months.
Do you need to freeze produce for a long winter?
You don’t have to freeze every carrot like it’s the last one on Earth.
Root veggies, squash, and apples last months in cool, dark spots.
Freezing’s handy for berries or greens, but storage tricks work wonders too.
How do you keep produce fresh in the fridge?
Keep produce fresh by storing it in the fridge’s crisper drawer, using paper towels to soak up extra moisture.
Don’t crowd items, and keep ethylene-producing fruits apart.
Check weekly for spoilage—no one likes mystery mush.
How do you store cabbage in the winter?
Imagine pulling up a whole cabbage, roots and all—sounds odd, right?
But replanting it in moist soil inside a bucket or bag, then stashing it somewhere cool and dark, keeps it crisp for months.
What can you store in the fall?
You can stash apples, pears, potatoes, carrots, beets, squash, onions, and garlic in the fall.
Just store each in a cool, dark spot, and you’ll have a pantry that’s ready for winter’s surprises.
How to preserve produce for winter?
About 52% of households use water bath canning for high-acid foods.
You can dry, pickle, or freeze veggies and fruits, wrap apples in newspaper, and store root crops in sand—just check weekly for spoilage.
How did pioneers store food for winter?
You’d dry beans and corn, bury root veggies in sand or sawdust, hang onions and garlic, and store apples in cool cellars.
Pioneers relied on nature’s tricks, a good cellar, and a watchful eye.
How to preserve potatoes after harvesting for winter?
After harvesting, let your potatoes sit in the sun to toughen their skins.
Brush off any dirt, then store them in paper sacks in a cool, dark spot around 40°F.
Don’t wash them—they’ll spoil faster!
Should you wash your harvest before preserving?
Don’t rush to wash your harvest right away—extra moisture can invite rot.
Brush off dirt instead, and only wash produce before eating or cooking.
Think of it as keeping veggies cozy until they’re ready to shine.
Conclusion
Like a squirrel stashing nuts, you’re ready to master preserving harvest for winter.
You’ve learned how to pick, prep, and store everything from juicy tomatoes to stubborn carrots.
Freezing, canning, and dehydrating each have their place, so choose what fits your kitchen best.
Don’t forget to keep things clean and safe—no one wants a surprise science project.
With these steps, you’ll have flavorful meals all season, even when the garden sleeps under snow.