This site is supported by our readers. We may earn a commission, at no cost to you, if you purchase through links.
 If you want to know how to harvest and dry herbs for winter, start by picking your herbs in the morning, after the dew dries but before the sun gets hot.
Snip leaves before the plants flower for the best flavor. Toss any damaged leaves.
Gather small bunches and hang them upside down in a dark, breezy spot—think of it as giving your herbs a spa day. You can also use a dehydrator or oven for faster results.
Store your dried herbs in airtight containers away from light. Label and date them. There’s more to storing and using dried herbs than meets the eye.
Table Of Contents
- Key Takeaways
- Harvesting Herbs Basics
- How to Dry Herbs
- Air Drying Methods
- Storing Dried Herbs
- Benefits of Dried Herbs
- Frequently Asked Questions (FAQs)
- How do you dry herbs for winter?
- What herbs should be cut back for winter?
- How to preserve fresh herbs for the winter?
- When should you harvest herbs for drying?
- How do you prepare herbs for winter?
- When should you stop harvesting herbs?
- How do you dry herbs after harvesting?
- How do you harvest herbs?
- How to dry herbs?
- How to harvest herbs for the winter?
- Conclusion
Key Takeaways
- Pick your herbs in the morning after the dew dries but before the sun gets hot, and snip them just before they flower for peak flavor.
- Dry herbs by hanging small bundles upside down in a dark, airy spot or use a dehydrator or low oven if you want it done faster.
- Store dried herbs in airtight containers, keep them away from light, and always label and date each jar.
- Make sure to remove any damaged or moldy leaves, and choose sturdy, healthy stems for the best results all winter.
Harvesting Herbs Basics
You’ll want to gather your herbs at the right moment to lock in the best flavors and oils.
Use sharp scissors or pruners to snip healthy leaves and stems, making sure they’re dry and fresh.
Choosing The Right Time to Harvest
Watching your herbs is key—peak flavor happens when leaves look full and healthy, just before the plant flowers.
Sun, rain, and even your zip code can shift the harvest window, so get to know your region’s patterns.
Aim for a day when weather is dry. This preserves essential oils, making drying herbs work smarter for winter herbs.
Preparing Herbs for Harvest
A thriving herb garden starts with solid soil preparation.
Make sure your herbs get enough sunlight exposure and check watering needs—don’t let roots dry out or drown.
Address pest control early, because hungry bugs don’t take holidays.
Choose sharp, clean tools for harvesting herbs.
With these basics, you’re set for drying herbs and preserving herbs for winter herbs success.
Harvesting Herbs in The Morning
When you’re ready for harvesting herbs, aim for early morning once the dew dries. This is when Morning Potency peaks and essential oils are most concentrated.
Harvest herbs after the morning dew dries to capture their richest oils and boldest flavors.
You’ll capture the best flavor preservation and avoid Dew Effects that risk mold while drying fresh herbs.
- Best flavor in culinary herbs
- Ideal harvest for quality
- Moisture-free, safer drying
- Drying herbs indoors lasts longer
- Herbs ready for quick use
Harvesting Herbs Before They Flower
Once you’ve picked your herbs in the morning, grab them before they flower for top Peak Flavor and Potency Preservation.
Buds zap Essential Oils, which affects Herb Quality. Early snips mean Stimulating Growth for more harvests.
To maintain tool hygiene, remember to sterilize harvesting tools before each use.
This trick sets you up for better herb storage, herb drying techniques, and smoother drying fresh herbs.
Check this out:
| Benefit | Herb Quality | Potency Preservation |
|---|---|---|
| Peak Flavor | Yes | Absolutely |
| Better Storage | Fresher Tastes | Longer Life |
| Easy Drying | Keeps Aroma | Less Loss |
| More Harvests | Stimulates Growth | Healthier Plants |
| Consistent Uses | Every Season | Kitchen Ready |
How to Dry Herbs
Drying herbs keeps their flavor strong and lets you use them all winter. You can use simple methods like air drying, a dehydrator, or your oven for best results.
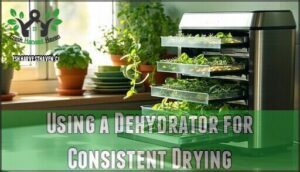
Using a Dehydrator for Consistent Drying
After you’ve gathered your herbs, using a dehydrator is one of the most reliable herb drying techniques.
Set the dehydrator temperature between 95–115°F. Spread herbs in a single layer for even drying and better flavor retention.
Drying time averages 1–4 hours. This method keeps moisture content low, preserves garden herbs, and prevents mold, unlike drying herbs outdoors.
You can find a herb dehydrator to assist with this process and ensure better flavor retention.
Drying Herbs in The Oven for Faster Drying
Drying herbs in the oven is quick and simple. Set your oven temperature between 95°F and 110°F for best flavor retention.
Spread herbs in a single layer on parchment, checking every 15-20 minutes to prevent burning. This drying technique is great for preserving garden herbs and drying herbs for tea when drying herbs outdoors isn’t possible.
Maintaining flavor and aroma is key during this process.
- Low oven temperature prevents burning
- Short drying time (1-4 hours)
- Even herb placement guarantees quality
Hanging Herbs Upside Down for Air Drying
Tie your homegrown herbs into small bundles—this Ideal Bundle Size keeps airflow steady and prevents mold.
Hanging Location Matters; choose a dry, dark spot with good Airflow Requirements to avoid stem breakage and speed up Drying Timeframes.
This method works well for preserving garden herbs, especially the best herbs to dry for tea or cooking, ensuring you’re preserving fresh herbs effectively.
Drying Herbs in The Microwave for Quick Drying
If hanging herbs upside down isn’t your style, try quick microwave drying. It’s a handy winter preparation trick.
Here’s how:
- Wash and pat herbs dry.
- Place herbs between paper towels for even Herb placement.
- Set Microwave wattage low, start with 30 seconds.
- Moisture check after each Drying duration.
- Monitor for Herb safety—avoid burning.
Air Drying Methods
Air drying is a simple way to preserve herbs for winter use.
You’ll need to choose herbs with low moisture, keep them in small bundles, and make sure air can move around them to prevent mold.
Choosing Herbs With Lower Moisture Content
Once you’ve picked your drying technique, focus on herb variety selection for Herb Drying Ease and Mold Prevention.
Choose herbs like thyme, rosemary, oregano, sage, and lavender.
Their low moisture speeds up drying time and helps with Essential Oil Retention.
These herbs dry faster, store better for winter storage, and are less likely to spoil, making storing dried herbs simpler.
Binding Small Batches of Herbs for Air Drying
Once you’ve chosen herbs with lower moisture content, focus on binding small batches for air drying.
Here’s how to get it right:
- Keep Herb Bundle Size small for better airflow and preventing stem rot.
- Use twine or rubberbands—twine gives a classic touch, rubberbands adjust as herbs shrink.
- Hanging location matters; pick a dry, shaded spot for ideal bundle density.
The instructions provided are designed to help you air dry your herbs effectively, ensuring the best results from your efforts.
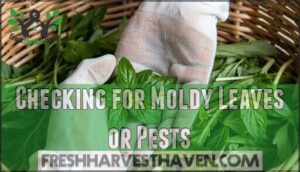
Checking for Moldy Leaves or Pests
Once you’ve bundled your herbs, take a close look at each leaf. Mold identification is key—spot any fuzzy spots or odd colors, and remove those leaves.
Leaf inspection also helps with pest prevention. For safe handling, wear gloves if you’re working with medicinal herbs.
Organic solutions, like rinsing gently, can keep pests away. Only dry healthy leaves for using dried herbs later.
To avoid issues with moisture and humidity, make certain good air circulation is maintained.
Ensuring Good Air Circulation
After checking for moldy leaves or pests, focus on Spacing your bundles.
Good air flow is key for drying medicinal herbs. Avoiding Overcrowding helps prevent trapped moisture.
Use a small fan for gentle Fan Usage if the room feels stuffy.
Watch Humidity Control—too much moisture can ruin your harvest.
Choose open containers, not sealed jars, until the herbs are fully dry.
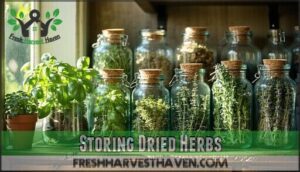
Storing Dried Herbs
Once your herbs are fully dry, you need to store them in airtight containers to keep them fresh.
Place the containers in a cool, dark spot to protect the herbs from light and moisture.
Using Airtight Containers for Storage
A good airtight container keeps your dried herbs fresh and extends their shelf life.
After Harvest and drying techniques, choose containers that protect against humidity and light exposure.
For food preservation and home preservation, consider:
- Glass jars for clear visibility and sturdy Container Material
- Tight-fitting lids for Humidity Control
- Right Container Size for your herbs
- Opaque options for extending herb season
To maintain freshness, you might explore various container options for the best herb preservation methods and find the perfect container size that suits your needs, ensuring humidity control.
Storing Dried Herbs in a Cool, Dark Place
After you’ve picked the right container types, focus on where you store your dried herbs.
Keep them in a cool, dark place to protect against light exposure and humidity. This helps with food preservation and extends shelf life.
Ideal conditions mean less moisture, so herbs from your harvest keep their flavor. These drying techniques help with home and seasonal food preservation.
Using Glass Jars or Plastic Baggies for Storage
Choosing between glass jars and plastic baggies for storing dried herbs is like picking the right tool for a job.
Consider these points:
- Glass vs. Plastic: Glass jars provide a stronger airtight seal.
- Container Size Matters: Smaller jars reduce air space.
- Light Exposure Effects: Dark glass protects herbs from light.
- Shelf Life Differences: Glass extends shelf life, plastic suits short-term storage. Many people prefer glass for their dried herb storage, as it provides a stronger seal for preservation.
Labeling and Dating Stored Herbs
Once your herbs are tucked into glass jars or plastic baggies, don’t skip labeling.
Labeling Importance can’t be overstated—write the herb’s name and harvest date using waterproof Label Materials.
Dating Methods help track Shelf Life and keep your food preservation on point.
For accurate information, jot down details clearly, and remember that these harvest tips boost your seasonal food preservation and culinary skills, which are crucial for accurate information.
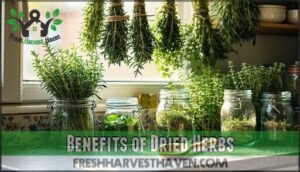
Benefits of Dried Herbs
When you dry herbs, you keep their flavors and use them long after the growing season ends.
Dried herbs work well in cooking, baking, and tea, and they can be stored for months with little loss of quality.
Preserving The Harvest for Year-Round Use
When winter rolls in, you’ll appreciate having your harvest preserved for year-round use.
Try these food preservation methods to extend your culinary skills and enjoy seasonal eating:
- Herb Freezing or drying for soups and stews.
- Herb Vinegars, Herbal Oils, or Salt Curing for flavor boosts.
- Grind into Herb Powders for easy seasoning—classic harvest tips for every home cook.
To maximize flavor, consider harvesting before flowering for the best results in your culinary skills.
Using Dried Herbs in Cooking, Baking, and Tea
At the center of seasonal cooking, dried herbs bring farmfresh ingredients to your table all year.
Adjust Cooking Herb Quantities—use about one-third dried to fresh. Explore Baking Herb Substitutions for richer Herb Flavor Profiles.
Try Tea Blending Ideas with mint or chamomile. Good Dried Herb Storage keeps flavors strong, letting you celebrate food and culinary traditions long after the harvest ends, and enjoy farmfresh ingredients.
Giving Dried Herbs as a Thoughtful Gift
Wrap up your harvest by sharing Seasonal Herb Gifts with friends.
Try Herb Gift Ideas like Personalized Herb Blends or small Herb Gift Baskets.
Use simple Packaging Dried Herbs in glass jars or paper bags.
Add recipe cards for easy food inspiration.
Giving dried herbs shows you care about preservation, gardening, and sharing fresh flavors all winter long.
Replacing Dried Herbs Every Couple of Years
After gifting dried herbs, keep your own stash in top shape by swapping out old batches every couple of years.
Herb potency fades and flavor degradation sets in, especially if storage impact isn’t managed.
For maximum freshness and cost effectiveness, label jars with harvest dates.
Regular replacement guarantees your seasonal preservation efforts deliver the best taste and benefits when drying herbs for optimal use.
Frequently Asked Questions (FAQs)
How do you dry herbs for winter?
Think of your herbs as treasure you’re saving for later.
Snip healthy stems, wash and dry them, then hang bundles upside down in a cool, airy spot.
Once crisp, crumble leaves and store them in airtight jars.
What herbs should be cut back for winter?
You’ll want to cut back perennial herbs like sage, thyme, oregano, and mint before winter.
Trim them to a few inches above the ground.
This helps prevent damage, encourages healthy spring growth, and keeps your garden tidy.
How to preserve fresh herbs for the winter?
Ever wish you could bottle that garden-fresh flavor for winter stews?
Snip healthy herbs, rinse and pat dry, then freeze in ice cube trays with water or oil.
Or air-dry bunches in a cool, dark spot.
When should you harvest herbs for drying?
Harvest herbs for drying in the morning after the dew dries but before the sun gets too hot.
Snip them just before they flower for peak flavor.
Avoid picking wet herbs to prevent mold during drying.
How do you prepare herbs for winter?
Some say prepping herbs for winter is tricky, but it’s as simple as washing, patting dry, and removing tough stems.
Bundle or lay leaves flat, dry them out of sunlight, then store in airtight jars.
When should you stop harvesting herbs?
You should stop picking herbs about a month before the first expected frost.
This pause lets plants store energy for winter, keeps roots healthy, and gives you the best flavor before cold weather sets in, which is a crucial step to ensure healthy roots and optimal flavor.
How do you dry herbs after harvesting?
Think of your herbs like laundry on a breezy line—tie small bunches together, hang them upside down in a dry, airy spot out of sunlight.
Let them dry for about one to two weeks, which allows for complete drying without losing their potency.
How do you harvest herbs?
Snip stems in the morning after dew dries, using clean scissors.
Cut just above a leaf node to encourage regrowth.
Gather healthy leaves, avoiding any damaged or yellow ones.
Handle herbs gently to keep their oils and flavors intact.
How to dry herbs?
Worried it’s tricky?
Dry herbs by tying small bundles and hanging them upside down in a warm, airy spot.
Keep out of direct sun.
Once crisp, crumble leaves and store in airtight jars for winter cooking.
How to harvest herbs for the winter?
Pick herbs in the morning after the dew dries.
Use sharp scissors to cut healthy stems just above a leaf node. Gather only what you need.
Avoid wet leaves to prevent mold. Harvest before the plants flower.
Reorganizing the text to group related concepts together improves readability.
Conclusion
Imagine your kitchen bursting with jars of herbs that could fill a whole spice shop.
Learning how to harvest and dry herbs for winter means you’ll always have flavor at hand.
Pick herbs at the right time, dry them with care, and store them well.
Use airtight containers and keep them away from light. Label each jar.
With these steps, you keep your herbs fresh, ready for cooking, tea, or gifts all winter long.
- https://docs.google.com/forms/d/1GAQr3Kn1cURCVHUA82hAga1Wv8DCH0IuqDLRUrOpN7M/viewform?ts=63f4f653&entry.1515682415=https://www.merriam-webster.com/dictionary%2Fharvest
- https://premium.britannica.com/mw-unabridged/?utm_source=mw&utm_medium=inline-def&utm_campaign=evergreen
- https://www.pumpkinpatchesandmore.org/GApumpkins.php
- https://www.pickyourownchristmastree.org/GAxmastrees.php

