This site is supported by our readers. We may earn a commission, at no cost to you, if you purchase through links.
Most seedlings fail indoors not from neglect, but from the wrong light. Growers water carefully, use quality soil, and keep temperatures steady—then watch their seedlings stretch pale and weak toward a window that simply can’t deliver what they need.
Indoor seed starting light requirements aren’t complicated, but they are precise. Seeds respond to specific wavelengths, intensities, and durations. Get those three variables right, and germination rates climb, stems stay compact, and transplant shock drops a lot.
The good news: modern grow lights and a little science make this entirely manageable. What follows is a stage-by-stage breakdown of exactly what your seedlings need—and how to deliver it.
Table Of Contents
- Key Takeaways
- Indoor Seed Starting Light Requirements by Growth Stage
- How Many Hours of Light Seedlings Need Daily
- Best Grow Light Intensity and Spectrum for Seedlings
- Choosing Grow Lights for Indoor Seed Starting
- Step-by-Step Grow Light Setup for Healthy Seedlings
- Frequently Asked Questions (FAQs)
- What are some common mistakes when starting seeds indoors?
- Can seedlings get enough light on an indoor windowsill?
- Can seedlings get too much LED light?
- Can I start seeds indoors without a grow light?
- What kind of light do I need to start seeds indoors?
- When starting seeds indoors, do they need sunlight?
- Is it better to germinate seeds in the dark or in the light?
- How much light is needed for seed germination?
- Can grow lights replace natural sunlight completely?
- How much electricity do grow lights consume?
- Conclusion
Key Takeaways
- Most seedling failures trace back to inadequate light intensity and spectrum, not neglect — a windowsill simply can’t deliver the 25,000–35,000 lux young plants need to stay compact and healthy.
- Match your light schedule to the growth stage: 14–16 hours of full-spectrum light daily, paired with a mandatory 8–10 hour dark period that drives metabolic reset, not just rest.
- PPFD should climb gradually from 100–200 μmol/m²/s at germination to 400–500 μmol/m²/s at transplant stage — sudden jumps cause light shock that sets seedlings back.
- Full-spectrum LEDs are the practical gold standard: they consume 50–70% less energy than HID alternatives, last 50,000–100,000 hours, and automatically balance the blue/red wavelengths that keep stems sturdy and growth on schedule.
Indoor Seed Starting Light Requirements by Growth Stage
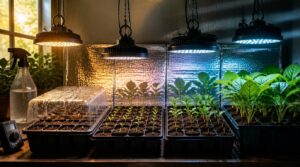
Seedlings don’t have a single light requirement — what they need shifts as they grow, and matching your setup to each stage makes a real difference.
Understanding how sunlight needs shift from seedling to mature herb can help you fine-tune your setup at every stage of growth.
From the moment a seed cracks open to the point your transplants are ready for the garden, the intensity, duration, and spectrum of light all play a role. Here’s how those needs break down at each stage of development.
Germination Light Needs
Not every seed wants light to wake up. Positively photoblastic seeds — lettuce, for example — need light exposure at the soil surface to trigger germination, while negatively photoblastic types sprout best in darkness.
Your phytochrome system is the switch: red light near 660nm activates it, far-red reverses it. This process is driven by hormone biosynthesis changes that influence embryo growth. Keep soil damp; dry surfaces stress seeds under any light.
First True Leaves
Once cotyledons have done their job, true leaves take over. These carry chlorophyll a and b, a full vascular system, and your plant’s actual species identity — serrated edges, lobed shapes, the works.
Watch for these signs of healthy true leaf development:
- Deep, even green color
- Serrated or species-specific leaf edges
- Firm, upright posture
- Visible leaf veining
- Steady daily size increase
Insufficient light here causes etiolation — pale, stretched growth that’s difficult to correct.
Cool-Season Seedlings
Cool-season crops like lettuce, spinach, and radish thrive between 60–65°F and prefer 14–16 hours of light daily. Keep humidity around 60–70% to prevent leaf edge curling, and soil lightly moist to avoid damping off.
Blue-spectrum LEDs support compact stem development here. Gentle airflow strengthens stems without drying them out — a small fan on low works well.
Warm-Season Seedlings
Tomatoes, peppers, and cucumbers need soil temperatures of 75–85°F to germinate reliably. A heated mat delivers that warmth directly to the root zone.
Use a humidity dome early on, but vent it once sprouts appear to prevent damping off. Pair full-spectrum LED grow lights with 14–16 hours of daily light, and keep nights above 60°F.
Signs Seedlings Need More Light
Stretched, pale, and leaning — your seedlings are talking. Leggy seedlings with elongated stems signal classic etiolation, where plants stretch desperately toward insufficient light.
Stems feel soft rather than firm, and new leaves emerge pale green instead of deep, vibrant color — chlorotic growth you can’t ignore. If lower leaves stay small while tops reach upward, increase your light intensity immediately.
How Many Hours of Light Seedlings Need Daily
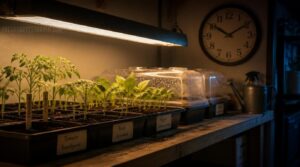
Getting the light schedule right is one of the most controllable factors in your seed-starting setup. Seedlings don’t just need brightness — they need the right number of hours, broken up correctly between light and dark. Here’s what that daily rhythm should actually look like.
14–16 Hour Photoperiod
Most seedlings hit their stride with a 14–16 hour photoperiod. That window gives leaves enough light duration to drive steady photosynthesis without overworking young tissue.
Set your digital timers to:
- 14 hours for cool-season crops like lettuce
- 15–16 hours for warm-season seedlings like peppers
- 16 hours when optimizing day extension for fast-growing greens
Species-specific light cycles matter — lettuce isn’t tomatoes.
8–10 Hours Darkness
Darkness isn’t downtime — it’s active work. During the 8–10 hour dark period, seedlings complete metabolic respiration, reset their circadian rhythms, and stabilize their internal photoperiodism response.
Darkness is not rest for seedlings — it is when they breathe, reset, and prepare to grow
| Crop Type | Dark Period |
|---|---|
| Cool-season crops | 10 hours |
| Warm-season crops | 8–9 hours |
Cutting rest short triggers physiological stress. Your light duration gains mean nothing if the dark side of the light cycle gets shortchanged.
Using Digital Timers
A digital timer removes the guesswork entirely. Plug your grow light in, program your 14–16 hour on window, and let the microcontroller handle it — accurate to within a second.
Look for models with battery backup, so a brief power interruption doesn’t reset your photoperiod. Match the timer’s relay rating to your light’s wattage. Scheduling automation means consistent light cycles, every day, without you touching a switch.
Avoiding Excessive Light
Too much light is a real threat — more daily hours don’t equal better seedlings.
- Raise fixtures 12–24 inches above trays
- Add light diffusers to scatter hotspots
- Watch for bleaching signs on leaf surfaces
- Keep intensity below 3,000 lumens per square meter
Leaf tip burn and pale, bleached patches on leaf surfaces signal photoinhibition. Raise the fixture or dim it immediately.
Long-Day Vegetable Needs
Lettuce and spinach aren’t passive about light — they’re long-day crops that require at least 12 hours of daily illumination to develop properly without stalling.
| Crop | Minimum Daily Light |
|---|---|
| Lettuce | 12–14 hours |
| Spinach | 14–16 hours |
Run full-spectrum light and target a DLI of 10 to keep these leafy greens compact, vigorous, and transplant-ready on schedule.
Best Grow Light Intensity and Spectrum for Seedlings
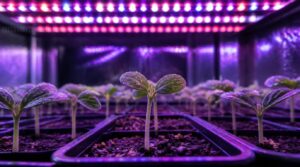
Getting the intensity and spectrum right is where most indoor growers either set their seedlings up for success — or quietly hold them back. It’s not just about having a light on; it’s about delivering the right kind of light at the right strength. Here’s what you need to know about each factor.
PPFD for Seedlings
Photon density is what actually drives seedling growth. PPFD — photosynthetically active radiation measured at canopy level — reveals your true light delivery. Raise intensity gradually through each stage:
- Germination: 100–200 μmol/m²/s
- Cotyledons unfold: 200–300 μmol/m²/s
- First true leaves: 300–400 μmol/m²/s
- Pre-transplant: 400–500 μmol/m²/s
- Map tray uniformity to hit 85–95%
Sudden jumps cause light shock. Always calibrate your meter at canopy level.
DLI Targets
PPFD tells you the rate of light delivery — but Daily Light Total amount (DLI) tells you the total dose. Think of it as the difference between flow rate and total volume.
Germination needs a DLI of 5–7 mol/m²/day. First true leaves push that toward 8–10. Warm-season seedlings demand 10–12; cool-season types stay comfortable lower. Exceed your target and leaf burn follows.
Lumens and Lux Basics
DLI measures your total light dose — but lumens and lux tell you what’s actually reaching your seedlings. Lumens measure total light output; lux measures what lands on a specific surface. The formula is simple: lux equals lumens divided by area in square meters.
Spread the same lumens across a wider tray, and lux drops. Target 25,000–35,000 lux at canopy level for healthy development.
Full-Spectrum Daylight LEDs
Once you’ve nailed your lux targets, the light quality matters as much as the quantity. Full-spectrum daylight LEDs emit continuously from 400–700nm, closing the wavelength gaps that standard LEDs leave behind.
That smooth spectral power distribution helps with balanced seedling development without favoring one growth response over another. Look for 90+ CRI and flicker-free operation — your plants and your eyes will thank you.
Blue and Red Light Balance
Spectrum ratio optimization shapes how your seedlings develop at the cellular level. Blue light (400–500nm) triggers photomorphogenic growth responses — compact stems, defined leaves, controlled shoot architecture. Red spectrum (600–700nm) drives chlorophyll content development and red light biomass accumulation.
Aim for this balance:
- 60% blue, 40% red during early germination
- Gradually increase red as true leaves emerge
- Avoid blue-only setups — blue light etiolation causes pale, stunted growth
Full-spectrum LEDs handle light wavelength coverage automatically.
Choosing Grow Lights for Indoor Seed Starting
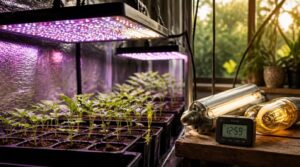
Not all grow lights are created equal, and the type you choose will shape your seedlings’ success more than almost any other decision. Each option comes with its own trade-offs in intensity, cost, and practicality. Here’s a breakdown of the main grow light types worth considering for indoor seed starting.
LED Grow Lights
LED grow lights are the closest thing to a precision instrument you’ll find in the seed-starting world. They consume 50–70% less energy than HID alternatives while delivering exactly the spectrum your seedlings need, when they need it.
That’s why full-spectrum LEDs have become the standard for serious indoor growers. Blue wavelengths (440–470 nm) keep stems compact, while red light around 620–660 nm helps with leaf expansion — and quality fixtures balance both automatically. Premium chips like the Samsung LM301H EVO push photon efficacy above 3.1 µmol/J, meaning almost no energy is wasted as heat.
COB-style LEDs penetrate deeper into the canopy, reducing hotspots across your tray. Pair a dimmable driver with smart timer controls, and managing your photoperiod becomes incredibly easy.
T5 Fluorescent Lights
T5 fluorescent tubes punch above their weight for seed starting. Their 5/8-inch diameter lets you pack fixtures tightly, delivering uniform coverage across a 24×48-inch tray with just 2–4 tubes.
The phosphor-coated interior converts UV into balanced visible light — solid spectral coverage without specialized chips. Electronic ballasts keep flicker low and efficiency high, hitting 90–105 lumens per watt with minimal heat stress on young seedlings.
HID Lighting Systems
HID systems are built for scale — when you’re running commercial trays and need raw intensity that T5s simply can’t match. The arc discharge inside each bulb ignites through a high-voltage pulse from the igniter, then ballast regulation keeps current stable to prevent overdrive.
Metal halide lamps lean blue-white for early growth; high-pressure sodium runs warm amber. Both require ventilation — heat output is serious. Position fixtures 24–36 inches above seedlings, and expect longer warm-up cycles before full light intensity stabilizes.
Energy Efficiency
Electricity adds up fast when artificial lighting runs 14–16 hours daily. That’s why energy efficiency matters from day one.
Modern LED grow lights consume 50–70% less power than fluorescent or HID systems for equivalent light intensity. Full-spectrum models with solid thermal management stay cooler, which means less heat to offset and lower room cooling loads overall. Look for ENERGY STAR certified fixtures — they meet verified efficiency and reliability standards that uncertified alternatives often skip.
A few habits sharpen your setup further:
- Programmable timer automation eliminates unnecessary hours and matches light cycles precisely to plant needs
- Reflective surfaces around trays can boost light utilization by up to 20%, reducing how hard your fixture works
- Keeping lenses clean maintains output without drawing extra wattage
Run leaner, not harder.
Cost and Lifespan
Think of grow lights as a long-term investment, not a purchase. LED grow lights last 50,000–100,000 hours — roughly 5–10 years — while fluorescent T5 tubes need replacing every 12–18 months due to lumen depreciation.
Poor thermal management can cut that lifespan by 30%. Premium LEDs often carry 3–5 year warranties, making the higher upfront cost far easier to justify over time.
Step-by-Step Grow Light Setup for Healthy Seedlings
Getting your grow light positioned correctly makes the difference between seedlings that thrive and ones that just survive. The setup process isn’t complicated, but each step builds on the last — get one thing off, and the rest suffers. Here’s exactly what to do, from hanging your light to keeping your plants in balance.
Light Height and Distance
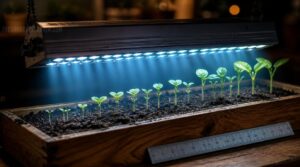
Where you mount your light matters more than most beginners expect. Start 2–4 inches above soil during germination, then raise to 6–12 inches as true leaves emerge.
Key height checkpoints:
- Germination: 2–4 inches
- First true leaves: 4–6 inches
- Established seedlings: 6–12 inches
- Mature transplants: 12+ inches
Stay consistent — the inverse square law means doubling your distance cuts intensity by 75%.
Tray Rotation
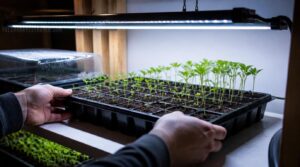
Even with perfect height, one side of your tray catches more light than the other. Rotating trays 90 degrees regularly fixes that — equalizing microclimates, reducing shadows from dense planting, and promoting uniform vigor across every cell.
Do it every day or two. In automated setups, servo-driven turning stations handle this precisely without disturbing roots or substrate. Manual rotation works fine — just stay consistent.
Preventing Leggy Seedlings
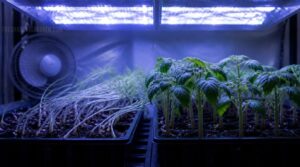
Rotation alone won’t save seedlings that aren’t getting enough intensity. Leggy growth — long, weak stems stretching toward the light — signals a deficit, not a watering problem.
Blue spectrum light (400–500nm) keeps stems compact. A light diffuser softens harsh hotspots. A gentle fan strengthens cell walls through mechanical stress. Catch the problem early: rapid height adjustment downward, combined with airflow, reverses stretch within days.
Adjusting Light as Plants Grow
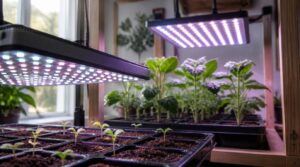
Once leggy stems are under control, your next job is keeping pace with the plant.
Start lights 2–4 inches above soil, then raise to 6–12 inches as true leaves expand. Monitor PPFD — scale from 100–250 up to 300–450 μmol m⁻²s⁻¹ for warm-season crops. Watch leaf tips; scorched edges mean drop the fixture immediately. Growth stages change fast. Your light setup should too.
Balancing Light, Water, Temperature
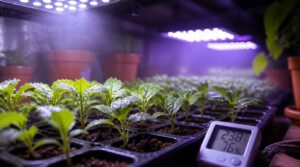
Light, water, and temperature don’t operate independently — they pull on each other constantly. Crank up your LED grow lights without adjusting watering frequency, and seedlings lose moisture faster than roots can replace it.
Keep humidity around 60–70% to support transpiration. Use room-temperature water to prevent thermal shock. Together, these three variables either boost ideal light conditions or quietly undermine everything you’ve built.
Frequently Asked Questions (FAQs)
What are some common mistakes when starting seeds indoors?
Think of seedlings like new employees: they fail not from lack of effort but from poor conditions and inconsistency. Improper light distance, neglecting tray rotation, and inconsistent light schedules quietly cause leggy seedlings and stunted growth before you notice.
Can seedlings get enough light on an indoor windowsill?
Rarely. Most windowsills — even south-facing ones — deliver far less intensity than seedlings need, especially in early spring. Expect leggy, weak stems without supplemental grow lighting.
Can seedlings get too much LED light?
Yes — too much LED light can torch seedlings overnight. Watch for leaf burn, bleached patches, or coppery leaves. Light stress spikes transpiration fast, wilting plants despite wet soil.
Can I start seeds indoors without a grow light?
You can, but your odds depend heavily on what you’re growing. Leaf lettuce and cilantro tolerate modest window light, while tomatoes and peppers struggle without supplemental intensity.
What kind of light do I need to start seeds indoors?
Full-spectrum LED or fluorescent lights (5000K–6500K) work best. Position them 2–4 inches above seedlings and run them 14–16 hours daily to deliver the blue wavelengths that keep stems compact and growth vigorous.
When starting seeds indoors, do they need sunlight?
Seeds don’t need sunlight to germinate — darkness actually suits most varieties better. Once sprouts emerge, though, bright artificial light becomes non-negotiable. Window light won’t cut it; LED grow lights deliver the consistent intensity seedlings need.
Is it better to germinate seeds in the dark or in the light?
Most seeds germinate better in the dark — light can activate photoreceptors too early, stalling the whole process. Even so, positively photoblastic seeds like certain begonias need a direct light signal to release dormancy and sprout.
How much light is needed for seed germination?
Most seeds germinate best in complete darkness — warmth and moisture do the work. Light can actually delay sprouting in some species. Once cotyledons emerge, switch to 12–16 hours of daily light immediately to prevent etiolation.
Can grow lights replace natural sunlight completely?
Not quite — but closer than you’d think. Modern full-spectrum LEDs deliver the red and blue wavelengths that drive photosynthesis, enabling year-round growth indoors, even when the sun can’t cooperate.
How much electricity do grow lights consume?
A 30–50 watt LED running 14 hours daily consumes roughly 42–70 kWh — adding about $15–25 per month to your electric bill at average rates. That’s a manageable cost for consistent indoor cultivation.
Conclusion
Think of yourself as a telegraph operator: every signal you send must count. Your seedlings aren’t guessing—they’re responding to exact wavelengths, measured durations, and calibrated intensity.
Nail your indoor seed starting light requirements by stage, and the difference shows fast. Compact stems. True leaves on schedule. Transplants that hit the garden ready to perform.
Light isn’t one variable among many. It’s the variable everything else depends on. Get it right first.
- https://www.johnson.k-state.edu/programs/lawn-garden/agent-articles-fact-sheets-and-more/agent-articles/vegetables/lighting_options_for_Seeds.html
- https://www.gardeners.com/blogs/techniques-tools-articles/grow-lights-basics-9614
- https://www.gorillagrowtent.com/blogs/news/best-led-grow-lights-for-starting-seeds
- https://homesteadandchill.com/using-grow-lights
- https://www.prairieroadorganic.co/blogs/garden-gate-at-prairie-road/how-to-really-light-up-those-plant-starts