This site is supported by our readers. We may earn a commission, at no cost to you, if you purchase through links.
A milk jug left outside in January sounds like trash. Cut a hinge into it, though, and it becomes a working greenhouse that survives snow, freeze, and thaw without cracking.
That’s the trick behind winter sowing: repurposed containers create their own microclimates, protecting seeds until nature decides it’s time to germinate. But not every container earns its place in the garden. Drainage, ventilation, headspace, and material all determine whether your seedlings thrive or rot.
Getting your seed starting trays for winter sowing right from the start saves you from soggy failures come March. Here’s how to prep them properly, container by container, cut by cut.
Table Of Contents
- Key Takeaways
- Choose Winter Sowing Tray Types
- Prepare Trays for Outdoor Sowing
- Sow Seeds and Manage Moisture
- Top 10 Winter Sowing Starter Items
- 1. Bootstrap Farmer Heavy Duty Trays
- 2. Bootstrap Farmer Seed Starter Trays
- 3. Jiffy Seed Starting Tray Kit
- 4. Miracle Gro Indoor Potting Mix Seed Starting
- 5. GrowEase Self Watering Seed Starter Kit
- 6. Metal Bouquet Style Flower Supports
- 7. SunBlaster Mini Greenhouse Seedling Kit
- 8. CowPots plantable round starter pots
- 9. Brut Organic Composted Cow Manure
- 10. Gardzen Seed Starter Plug Trays
- Transplant Seedlings in Spring
- Frequently Asked Questions (FAQs)
- Can you use seed trays for winter sowing?
- What can I use instead of milk jugs for winter sowing?
- What temperature triggers seed germination during winter sowing?
- Can winter sowing work in warm climate regions?
- Where should grow lights be positioned above seedlings?
- Which seeds work best for newspaper pot containers?
- Conclusion
Key Takeaways
- Every winter sowing container, whether a milk jug, salad tub, or soda bottle, needs drainage holes, ventilation slits, and about four inches of headspace to prevent soggy, fungal-prone seedlings.
- Freeze-thaw cycles aren’t a threat to your seedlings—they’re the natural stratification trigger that breaks seed dormancy once temperatures swing between 1–7°C.
- Bottom watering and staged, gradual venting protect fragile seedlings from stem collapse and transplant shock better than overhead watering or abrupt lid removal.
- Biodegradable options like CowPots and newspaper pots let you skip transplanting altogether by planting the whole container directly in soil, cutting root disturbance and feeding the surrounding earth as they decompose.
Choose Winter Sowing Tray Types
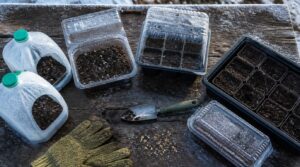
Winter sowing works because you’re building a mini greenhouse, and the container you pick determines how well it holds moisture, heat, and structure through freezing temperatures.
Milk jugs and clear storage totes both work well, but if you’re weighing containers against other approaches, this guide to starting seeds indoors during winter breaks down when each method makes sense.
Some options cost nothing beyond what’s already in your recycling bin, while others are engineered specifically for germination success.
Here’s how five popular tray types stack up against each other.
Milk Jug Mini Greenhouses
Grab a gallon milk jug and you’ve got the workhorse of winter sowing: cut it with Jug Hinge Construction at the base, punch drainage holes, crack the cap for venting.
Translucent Plastic Benefits mean shortwave light penetrates while wind can’t touch tender seedlings, driving Microclimate Heat Retention that stretches your germination window through frost. You can also use these setups for hardening off transplants before they’re moved to their permanent garden locations.
Sanitize jugs between seasons—this upcycled gardening staple thrives on circular reuse.
Clear Salad Container Trays
If you’ve saved takeout salad containers, you already own ready-made seed starting containers. Their transparent lids let sunlight through, while PET material durability experiences freeze-thaw cycles better than flimsier plastics.
Punch drainage holes in the base—these food storage containers weren’t built for it—and check the resin code before recycling old ones. Polypropylene versions add extra heat resistance if you’re placing trays near a warm windowsill.
Soda Bottle Seed Trays
Two-liter bottles convert into functional seed starting containers once you cut them horizontally, creating a base and lid that nest for humidity control.
- Drill drainage holes near the base
- Cut small vents for airflow
- Rinse thoroughly to remove residue
Clear plastic offers strong light transmission, and reusing bottles repeatedly makes this one of the cheapest upcycled container options for winter sowing microclimates.
Professional 1020 Trays
Once soda bottles start feeling like a science fair project, upgrading to professional 1020 trays streamlines everything. Their thermoformed construction delivers consistent wall thickness across the standard 10.94-by-21.44-inch footprint, while BPA-free plastic withstands repeated outdoor exposure.
Custom cell inserts—20, 36, or 72-cell configurations—let you match density to species. When the season ends, nesting storage efficiency keeps your stack compact until next winter’s germination push begins.
Soil Blocks and Paper Pots
Skipping containers entirely, soil blocks press moistened growing medium into self-supporting cubes, triggering air pruning that reduces root circling.
DIY newsprint pots offer similar root disturbance reduction and compostable waste disposal, decomposing within weeks.
Both suit winter sowing through modular planting advantages and efficient moisture wicking, letting you drop blocks or pots directly into garden soil come spring.
Prepare Trays for Outdoor Sowing
Once you’ve settled on a container, the real work of turning it into a functional mini-greenhouse begins. Every jug, tray, or bottle needs a handful of physical modifications before it can safely sit outside through freezing temperatures and thaw cycles. Here’s exactly what your container needs before you fill it with soil and seeds.
Add Drainage Holes
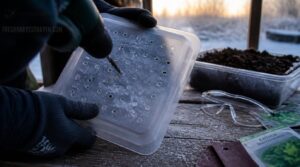
Without proper drainage, your winter sowing containers become ice-bound swamps that rot roots before spring even arrives.
Drill 1/4 to 1/2 inch holes, spacing them every 4-6 inches across the base. Wear safety glasses, secure the container, and start with a pilot hole to prevent cracking. Deburr edges with sandpaper—this prevents root injury and stops soil escape. Skimping here means soggy, suffocated seedlings.
Cut Ventilation Openings
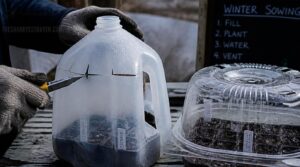
Slice several 1-inch slits into the lid or upper walls of your upcycled containers, positioning them just below the dome for airflow regulation. This microclimate creation prevents damping-off by controlling air exchange and humidity levels—trapped moisture breeds fungal disease fast.
For milk jugs, cut a three-sided flap; for salad containers, puncture existing seams.
Consistent ventilation for seedlings keeps winter sowing containers from turning into stagnant, fungal-friendly terrariums.
Leave Four-inch Headspace
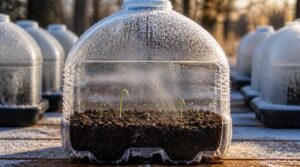
Four inches of headspace is your winter sowing containers’ insurance policy against a soggy, moldy mess.
This gap between soil and lid drives airflow, moisture regulation, and mold prevention while buffering soil settling.
- Reduces surface humidity buildup
- Prevents seedling crowding early on
- Limits condensation drip-back
- Helps create a microclimate
- Aids ventilation for seedlings
Skimp here, and seedling management gets messy fast.
Add Deep Potting Mix
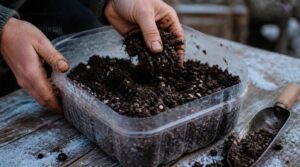
Roots don’t care what container they’re in—they care about what’s around them. Fill your winter sowing containers with a deep, well-aerated mix: peat or coir base, perlite for drainage, compost for gentle nutrients. Pre-wet to 60-70% saturation before sowing.
Aim for 3-4 inches of soil depth, keeping the mix friable to prevent compaction as roots establish through freeze-thaw cycles.
Label Trays Before Freezing

Label before you freeze, or you’ll spend March guessing which jug holds kale. Write variety name, sowing date, and tray position directly on lids using freezer-safe labels or cold-rated permanent marker—standard ink fades and smudges through freeze-thaw cycles.
Place labels on lid tops, away from moisture seams. A simple freezer log tracks contents across your winter sowing containers, keeping seed germination timelines organized when trays start looking identical under frost.
Sow Seeds and Manage Moisture
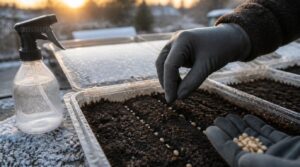
With your trays drilled, vented, and filled, the real work of germination begins. Getting seeds into the ground is only half the equation, since moisture and airflow decide whether they actually sprout. Here’s what you need to get right once those containers head outside.
Use Damp Seed-starting Mix
Grab a handful of pre-moistened mix and squeeze: it should hold together, then crumble under light pressure, like a wrung-out sponge. This texture prevents soil crusting and gives seeds immediate moisture contact for uniform germination.
Mix in perlite or vermiculite to improve drainage additives without waterlogging roots. Skipping this step invites damping-off and stalls your seedling success before it starts.
Sow at Packet Depth
Once your mix is prepped, sow at packet depth—roughly one to two times the seed’s diameter for lettuce or basil, deeper for beans and sunflowers. This depth optimizes capillary moisture movement while preventing surface crusting.
Firm the soil gently afterward; uneven depth across winter sowing containers causes inconsistent germination timing. Adjust slightly for coated seeds, since coatings alter effective depth.
Bottom Water When Possible
Once seeds settle at proper depth, protect that placement by watering from below whenever your container design allows it.
Set trays in a shallow tray of water and let capillary action draw moisture upward, keeping seed placement stable while preventing surface crusting and stem collapse.
This method beats overhead pouring, which disturbs shallow-sown seeds and speeds soil surface drying between freeze-thaw cycles.
Vent to Prevent Damping-off
Bottom watering stabilizes moisture from below, but stagnant air above the soil invites damping-off just as easily. Cut vent openings on opposite sides of your container to create cross airflow, releasing trapped humidity before condensation forms on interior walls.
Open vents wider during warm daytime hours, then narrow them at night. This airflow management keeps fungal pathogens from gaining a foothold around fragile seedling stems.
Monitor Freeze-thaw Cycles
Every freeze-thaw spell reshapes your winter sowing containers in small, cumulative ways worth tracking. Use a soil thermometer for temperature tracking, check for detecting material cracks along mold lines, and inspect drainage performance so perched water doesn’t refreeze into ice blocks.
Photograph trays each week—documenting tray changes reveals warping trends before they compromise your microclimate and doom fragile winter sowing seeds.
Top 10 Winter Sowing Starter Items
Once you’ve mastered the DIY approach, you might want gear that takes some guesswork out of the process. The right tools can save you time, cut down on failed germination, and make the whole winter sowing routine feel less like trial and error.
Here are ten products worth adding to your setup.
1. Bootstrap Farmer Heavy Duty Trays
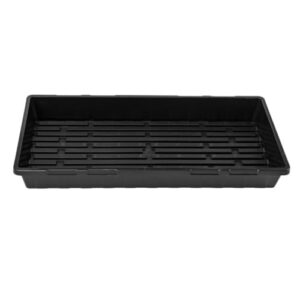
Sitting through repeated freeze-thaw cycles takes a toll on flimsy plastic, which is exactly why Bootstrap Farmer heavy duty trays earn their keep. Built from 1.8-2.0mm polypropylene with a solid, no-hole base, they support over 50 lbs of soggy soil without buckling at the corners.
Pair them with a reinforced frame for hydroponic fodder or wheatgrass setups, and you’re bottom-watering with confidence. They fit standard 1020 racks and stack efficiently, giving you a reusable foundation that outlasts single-season milk jugs by years.
| Best For | growers running microgreens, fodder, or wheatgrass operations who need durable, reusable trays for bottom-watering and hydroponic setups. |
|---|---|
| Material | Polypropylene |
| BPA-Free | Yes |
| Reusable | Yes |
| Stackable | Yes |
| Indoor Use | Yes |
| Seed Starting Use | Yes |
| Additional Features |
|
- Thick 1.8-2.0mm polypropylene construction holds up to over 50 lbs without buckling
- Stackable, reusable design fits standard 1020 racks and cuts down on waste
- Food-safe, BPA-free material with a reinforced frame for long-term durability
- No drainage holes means top-watering can cause runoff issues
- Requires bottom-watering or hydroponic methods rather than traditional watering
- Color availability may vary depending on the order
2. Bootstrap Farmer Seed Starter Trays
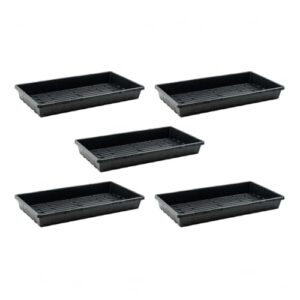
Scaling density matters when winter-sowing multiple varieties, and Bootstrap Farmer’s 32 and 50-cell trays deliver exactly that. The 50-cell configuration packs more plugs per square foot, while 32-cell setups pair with 2.5-inch inserts for easier transplant handling.
Injection-molded polypropylene resists cracking through repeated freezes, and reinforced corners prevent warping when you’re hauling saturated trays. Add a humidity dome for germination control, and you’ve built a modular system that nests within standard 1020 flats without sacrificing bench space.
| Best For | growers who need a heavy-duty, reusable tray for microgreens, seedling starts, and bottom-watering setups where durability matters more than upfront cost. |
|---|---|
| Material | Polypropylene |
| BPA-Free | Yes |
| Reusable | Yes |
| Stackable | Yes |
| Indoor Use | Yes |
| Seed Starting Use | Yes |
| Additional Features |
|
- Extra-thick 2.0mm polypropylene construction stands up to repeated use and heavy, wet soil loads
- Solid, no-hole bottom doubles as a water reservoir for bottom watering systems
- Stackable design and compatibility with standard 1020 inserts make storage and organization easy
- Higher initial price point compared to standard retail trays
- No built-in drainage holes means water management has to be done manually
- Some shipments have arrived damaged due to insufficient packaging
3. Jiffy Seed Starting Tray Kit
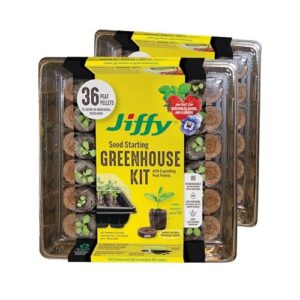
Novices benefit most from all-in-one simplicity, and Jiffy’s kit delivers exactly that: a hinged clear-lid greenhouse base paired with 36 peat pellets that expand to 36mm diameter once hydrated.
Each pellet forms an individual root pocket, minimizing transplant shock when you move seedlings into soil. The dome traps humidity while limiting condensation drip onto foliage. Included plant markers keep your varieties labeled through freeze-thaw cycles, and the modular tray accepts replacement pellets, letting you reuse the base across multiple winter sowing seasons.
| Best For | This kit is best for beginner gardeners who want a simple, all-in-one setup for starting vegetables, herbs, and flowers indoors. |
|---|---|
| Material | Plastic |
| BPA-Free | Not specified |
| Reusable | Yes |
| Stackable | Not specified |
| Indoor Use | Yes |
| Seed Starting Use | Yes |
| Additional Features |
|
- Complete kit includes peat pellets, trays, and humidity domes for easy setup
- Compact size fits neatly on windowsills or shelves
- Durable plastic trays are designed for multi-season reuse
- Peat pellets require manual water activation before use
- Each tray is limited to just 36 cells, restricting growing capacity
- Dimensions are best suited for small indoor spaces rather than large-scale starts
4. Miracle Gro Indoor Potting Mix Seed Starting
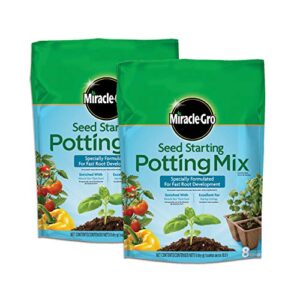
Fine texture separates this mix from garden soil substitutes, letting root hairs penetrate without resistance while resisting compaction that suffocates germinating seeds.
Formulated without compost or bark, it sidesteps fungus gnat habitats that plague damp winter setups. Two 8-quart bags cover multiple 1020 trays, with embedded plant food sustaining seedlings through their first three weeks—no fertilizer needed yet.
Pre-wet thoroughly before filling containers, since dry mix repels water unevenly, and keep trays shaded until germination completes.
| Best For | Indoor gardeners and seed-starters who want a ready-to-use, low-mess mix for germinating vegetables, flowers, herbs, and cuttings in trays or small containers. |
|---|---|
| Material | N/A (soil mix) |
| BPA-Free | Not specified |
| Reusable | No |
| Stackable | Not specified |
| Indoor Use | Yes |
| Seed Starting Use | Yes |
| Additional Features |
|
- Lightweight, fine texture prevents soil compaction so root hairs grow freely
- Compost- and bark-free formula helps avoid fungus gnat problems
- Built-in plant food supports strong root development without early fertilizing
- Often arrives dry and needs thorough pre-wetting before use
- Must be kept out of direct sunlight until seeds germinate
- Costs more than many comparable seed-starting mixes
5. GrowEase Self Watering Seed Starter Kit
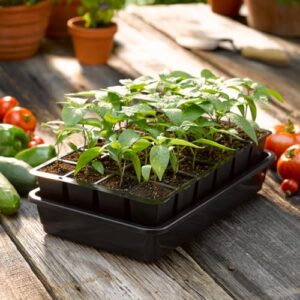
Winter sowing outdoors doesn’t mean you can’t automate moisture control—the GrowEase kit brings capillary mat technology to the cold frame. Its 24-cell tray draws water from a 10-cup reservoir, delivering steady hydration without daily checks.
Built from BPA-free recycled plastic, all components are dishwasher-safe, simplifying sterilization between sowings. The germination dome traps humidity for faster sprouting.
One caveat: monitor early-stage seedlings closely, since capillary wicking can oversaturate small root systems before they’ve established enough mass to regulate their own uptake.
| Best For | beginner gardeners or winter sowers who want reliable, low-maintenance moisture control without daily watering checks. |
|---|---|
| Material | Recycled plastic |
| BPA-Free | Yes |
| Reusable | Yes |
| Stackable | Not specified |
| Indoor Use | Yes |
| Seed Starting Use | Yes |
| Additional Features |
|
- Self-watering capillary system keeps soil consistently moist with minimal effort
- Durable, dishwasher-safe, BPA-free recycled plastic construction supports repeated seasonal use
- Germination dome retains humidity for faster, more reliable sprouting
- Capillary mat can oversaturate young seedlings before their root systems are established
- Mat itself must be washed by hand, adding an extra cleaning step
- Larger cell size means moisture levels need closer monitoring for small sprouts
6. Metal Bouquet Style Flower Supports
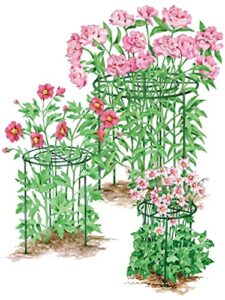
Once your trays are germinating, those peony and dahlia seedlings will eventually need staking, and this is where metal bouquet style stakes earn their spot in your shed. Curved arms welded to a central spine cradle stems up to ½ inch thick, preventing flop without girdling growth.
Look for powder coated or galvanized steel finishes, which resist rust through freeze-thaw cycles better than bare metal. Taller 24–36 inch models include cross braces, critical for wind resistance once transplants mature into top-heavy bloomers.
| Best For | gardeners with small patio or backyard flower beds who want a simple, no-tool way to keep younger, lighter-blooming peonies looking tidy as they grow. |
|---|---|
| Material | Steel |
| BPA-Free | Not specified |
| Reusable | Yes |
| Stackable | Not specified |
| Indoor Use | No |
| Seed Starting Use | No |
| Additional Features |
|
- Concentric ring design cradles stems in a natural bouquet shape while letting them grow through the frame
- Smooth coated steel construction with a three-leg base offers durability and steady support
- Sets up and breaks down in seconds with no tools required
- Legs can bend if pushed into hard or compacted soil
- May not be tall enough for large or mature peony varieties
- Top ring can pop loose if the support gets bumped or knocked
7. SunBlaster Mini Greenhouse Seedling Kit
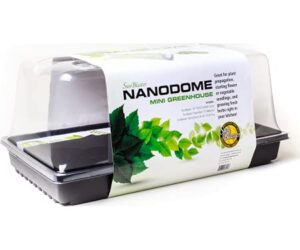
Once outdoor stakes are handling your mature bloomers, indoor starts need their own controlled environment, and that’s where the SunBlaster Mini Greenhouse Kit comes in. It pairs an 18-inch T5HO 6400K light with a NanoTech reflector, a 7-inch vented NanoDome, and a double-thick 10×20 tray weighing just 1.5 pounds.
Expect strong germination rates in tight spaces, though watch for condensation drips and dome durability issues. Cold rooms may still need a supplemental heat mat.
| Best For | gardeners with limited indoor space who want to start seeds, cuttings, or microgreens with strong germination rates. |
|---|---|
| Material | Plastic |
| BPA-Free | Not specified |
| Reusable | Yes |
| Stackable | Not specified |
| Indoor Use | Yes |
| Seed Starting Use | Yes |
| Additional Features |
|
- 18-inch T5HO 6400K lighting with a NanoTech reflector helps distribute light evenly for healthy growth
- Compact, lightweight design (just 1.5 pounds) fits easily into small indoor setups
- Double-thick 10×20 tray and vented NanoDome support high germination rates for seeds and cuttings
- Condensation can drip outside the tray, which may create mess or water issues nearby
- Plastic dome thickness and durability have been reported as inconsistent
- Cold climates may require an additional heat mat for proper temperature control
8. CowPots plantable round starter pots
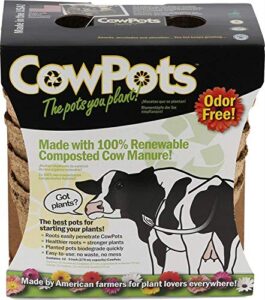
Not every container needs a light rig behind it—sometimes the smartest move is skipping plastic altogether. CowPots are pressed from composted dairy manure, giving you a 100% biodegradable pot roughly 3 inches in diameter that roots penetrate directly, cutting transplant shock.
Bury the whole pot at planting time; walls break down within weeks, feeding the surrounding soil. Greenhouse life runs about 12 weeks, so they’re built for the transplant window, not long-term storage.
| Best For | gardeners and seed starters who want an easy, low-stress way to transplant seedlings without disturbing their roots. |
|---|---|
| Material | N/A (fiber pot) |
| BPA-Free | Not specified |
| Reusable | No |
| Stackable | Not specified |
| Indoor Use | Yes |
| Seed Starting Use | Yes |
| Additional Features |
|
- Roots grow right through the pot, so transplanting causes little to no shock to the plant
- Made from composted manure, the pot breaks down and feeds the soil instead of creating waste
- Sturdy enough to hold wet soil through the whole seed-starting stage before you plant
- Needs regular watering to stay in good shape while seedlings are growing
- Can crack or split if you pack in too much soil
- Thinner walls mean it’s not meant for rough handling or heavy-duty garden use
9. Brut Organic Composted Cow Manure
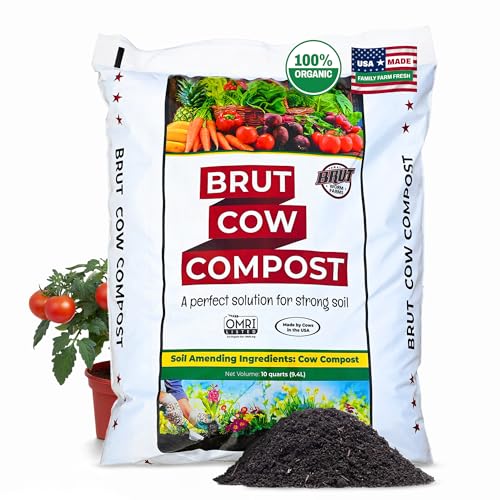
Pairing biodegradable pots with the right growing medium matters just as much as the container itself. Brut Worm Farms’ composted cow manure delivers nitrogen, calcium, and iron in a finely sifted, odor-free formula, OMRI listed for organic setups. Mix it into your seed-starting media to boost water retention and microbial activity without risking root burn.
Expect occasional clumps or small debris—normal for a pure, additive-free product. Mix it with existing soil rather than using it alone, and your seedlings get steady mineral supply through the whole germination window.
| Best For | organic gardeners and seed-starters who want a nutrient-rich, additive-free soil amendment for vegetables, flowers, lawns, and indoor houseplants. |
|---|---|
| Material | N/A (compost) |
| BPA-Free | Not specified |
| Reusable | No |
| Stackable | Not specified |
| Indoor Use | Yes |
| Seed Starting Use | Yes |
| Additional Features |
|
- OMRI listed and 100% pure composted cow manure, ideal for certified organic gardening
- Odor-free, finely sifted formula that’s easy to apply and won’t burn plants
- Rich in nitrogen, calcium, and iron to boost soil health and microbial activity
- May contain occasional small rocks or debris
- Some material can arrive in clumps that need to be broken up by hand
- Not meant to be used alone—best mixed with existing soil as a supplement
10. Gardzen Seed Starter Plug Trays
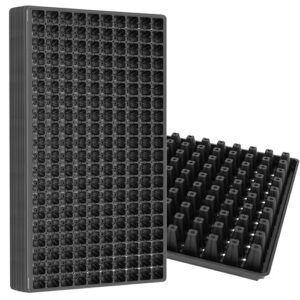
Ten to forty cells per insert, clear plastic construction, and a snap-on humidity dome make Gardzen kits a solid turnkey option for winter sowing setups you’ll reuse for years. The vented dome regulates humidity without removing the lid, cutting damping-off risk while letting you monitor germination at a glance.
Bottom-drainage cells prevent waterlogging, and rigid inserts allow clean seedling removal without root disturbance—ideal for basil, lettuce, or flower starts you’re transplanting come spring. Sanitize between cycles, and these trays earn their keep season after season.
| Best For | Home gardeners and hobbyists starting basil, lettuce, or flower seedlings who want a reusable, low-fuss setup for winter sowing or seasonal transplanting. |
|---|---|
| Material | Plastic |
| BPA-Free | Not specified |
| Reusable | Yes |
| Stackable | Not specified |
| Indoor Use | Yes |
| Seed Starting Use | Yes |
| Additional Features |
|
- Snap-on vented humidity dome regulates moisture and reduces damping-off risk while letting you check germination progress easily
- Bottom-drainage cells prevent waterlogging and support healthy root development
- Rigid inserts allow for clean, low-stress seedling removal, minimizing root disturbance during transplanting
- Flexible range of 10 to 40 cells per insert may require extra planning to match your specific seed-starting needs
- Requires sanitizing between uses to stay effective over multiple growing seasons
- Clear plastic construction may be less durable than sturdier opaque alternatives over time
Transplant Seedlings in Spring
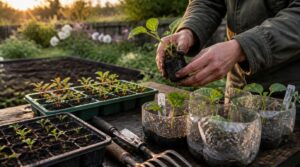
Once your winter-sown containers weather their last freeze-thaw cycle, spring transplanting becomes the payoff for months of patience.
Your seedlings will signal readiness through specific, observable cues, and your handling technique needs to match each tray type you chose back in step one.
Here’s exactly what to watch for and how to move your seedlings into the garden without setting them back.
Watch for True Leaves
Cotyledons never tell the whole story—true leaves do.
Identifying leaf morphology matters most here: watch for the second set, darker green and serrated, replacing the rounded seed leaves as photosynthetic shift timing kicks in.
- Confirms transplant readiness cues
- Signals root expansion underway
- Marks the start of feeding
Most vegetables develop these within one to four weeks, so daily checks during seed starting protect your germination rates and overall seedling health.
Open Trays Gradually
Yanking the lid off cold-acclimated seedlings shocks their stems, so widen ventilation hole placement gradually instead—doubling openings over three to five days before full removal.
This staged air exchange balance prevents transplant stress while your winter sowing containers shift from humid microclimate to open air, strengthening seedling airflow control and thermal regulation before you handle the roots directly.
Separate Crowded Seedlings Carefully
Crowded seedlings compete for root space, stunting growth if left too long. Once you spot two true leaves and tangled roots in your plug tray, it’s time to act.
- Lift by the root ball, never the stem
- Cut clumps apart with clean scissors
- Work with damp seed-starting mix
- Water deeply to ease transplant shock
Watch for drooping leaves afterward—an early sign of stress needing extra shade.
Plant Biodegradable Pots Directly
Why remove a pot when the roots have already grown through it?
Once roots have grown through a biodegradable pot, there’s no need to remove it before planting
CowPots and similar fiber containers plant straight into garden soil, where material degradation timing runs 2–6 weeks depending on moisture. This eliminates transplant shock entirely while boosting soil microbial activity. The pot’s porosity allows roots to penetrate walls naturally, and as it breaks down, it releases nitrogen and phosphorus—feeding seedlings during establishment.
Reuse Durable Trays Seasonally
Five seasons of freeze-thaw cycles, and your trays should still perform like new—that’s the payoff of choosing durable plastic construction.
Rinse with water, scrub with a soft-bristle brush, then sanitize using a 1:9 bleach solution before air-drying in shade. Store stacked flat, off concrete, labeled by year.
This cuts per-season material waste roughly 60%, offsetting your initial investment while scaling winter sowing reliably.
Frequently Asked Questions (FAQs)
Can you use seed trays for winter sowing?
Standard 1020 seed trays work fine outdoors if paired with a clear dome for thermal protection, but upcycled alternatives like milk jugs and soda bottles often outperform them, offering better microclimate stability and light transmission for reliable germination through freeze-thaw cycles.
What can I use instead of milk jugs for winter sowing?
Your greenhouse options are practically endless: soda bottle trays, salad container hacks, deli tubs, plastic shoeboxes, CowPots, ice cream buckets, and takeout containers all work beautifully, provided you drill drainage holes and vent tops for proper airflow.
What temperature triggers seed germination during winter sowing?
Your seeds break dormancy once diurnal temperature swings push readings between 1–7°C, satisfying cold stratification needs.
This moisture-temperature interaction triggers germination thermal thresholds gradually, meaning outdoor germination happens naturally as winter sowing containers warm through late-season freeze-thaw cycles.
Can winter sowing work in warm climate regions?
Winter doesn’t cancel itself just because your thermostat rarely dips below 50°F. Timing adjustments matter more than latitude: shift sowing later, filter harsh sun, water carefully to prevent rot, and transplant early before summer heat stresses tender seedlings.
Where should grow lights be positioned above seedlings?
For best light distance, position LED grow lights 6 to 12 inches above your seedling trays’ canopy, adjusting height gradually as plants grow.
This uniform coverage prevents seedling elongation while supporting germination methods that keep your indoor gardening setup thriving and light-efficient.
Which seeds work best for newspaper pot containers?
Not every seed dreams of a plastic prison.
Lettuce germination speed, basil’s light-soil needs, and spinach’s moisture demands suit newspaper pots perfectly—while pepper root depth and petunia’s fine texture still work, given attentive compostable planting care.
Conclusion
Cut the vents, drill the holes, label the lids—each gesture builds a microclimate that outlasts frost. Well-prepped seed starting trays for winter sowing turn scrap plastic into a nursery that thrives on neglect, rewarding you each March with sturdy seedlings instead of soggy stems.
Freeze-thaw cycles aren’t obstacles; they’re your germination trigger, doing the stratification work for you. Trust the process, and by spring you’ll have proof that recycled containers make surprisingly reliable garden partners.
- https://www.rbg.ca/winter-sowing-part-one
- https://joegardener.com/podcast/130-winter-sowing
- https://carpathen.com/products/seed-starter-tray-seed-starting-tray-with-humidity-dome-and-80-peat-pots-for-seedlings-plant-germination-trays-plant-starter-kit-and-base-mini-greenhouse-germination-kit-carpathen
- https://www.midwestgardengal.com/winter-sowing-the-best-little-greenhouse-in-your-backyard
- https://www.shiftingroots.com/privacy-policy/