This site is supported by our readers. We may earn a commission, at no cost to you, if you purchase through links.
Seedlings die from watering more often than from drought. A heavy-handed pour collapses tender stems, drowns roots, and invites damping-off fungus before you even notice a problem. Dry mix, by contrast, gives you a warning sign: wilting you can catch and fix.
That gap between too much and too little is narrower than most gardeners expect, especially in shallow seed trays with limited soil volume. Get it right, and you’ll see even, vigorous sprouting within days.
Learning how to water seedlings in seed trays means mastering bottom watering, gentle misting, and a schedule that bends with the weather, not against it. Here’s exactly how to do it, step by step.
Table Of Contents
Key Takeaways
- Overwatering is the leading cause of seedling loss, so always aim for damp—not saturated—soil and ensure trays drain well.
- Bottom watering and gentle misting keep seedlings hydrated without disturbing roots or washing seeds away.
- Check moisture every one to two days with your finger or a soil meter, adjusting for heat and humidity to prevent drought or waterlogging.
- Use room-temperature, dechlorinated water and avoid wetting foliage to protect seedlings from shock, disease, and damping-off.
Prepare Seed Trays Before Watering
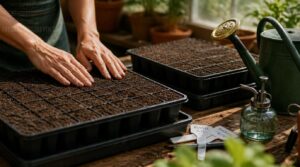
Good watering starts before you ever pick up a can or tray. A few small setup steps can make the difference between even germination and a patchy mess. Here’s what to check before you add any water.
If you’re still deciding what to plant, browsing this list of easy-to-grow vegetables for beginners can help you pick varieties that forgive the occasional watering slip-up.
Pre-Moisten Seed Starting Mix
Before a single seed touches the tray, your mix needs a proper drink. Pre-wetting the seed starting mix prevents dry pockets that repel water later.
Use warm water for even hydration, working it through until texture feels damp, not muddy.
- Add warm water gradually
- Mix thoroughly by hand
- Check for clumping
- Test moisture depth
- Adjust dryness spots
Uniform dampness sets seedlings up for success.
Aim for a wet sand consistency when pre‑wetting the mix, as described in the wet sand consistency guide.
Check Drainage Holes
Once your mix is damp, flip the tray over and check every hole. Best hole size runs ¼–½ inch—smaller clog fast, larger lose soil.
Space holes evenly; a grid pattern prevents pooling. Clear debris with a brush to avoid waterlogged soil.
Confirming seed tray drainage now stops excess moisture issues before they start, whatever the container material.
Use Room-Temperature Water
Drainage sorted, the next detail is temperature. Fill your watering can with water between 68–72°F—straight from a room-temp tap or jug works fine.
Cold water triggers thermal shock, stressing roots and slowing germination. Room-temperature water helps:
- Uniform imbibition rates
- Root zone consistency
- Soil temperature regulation
- Metabolic stability
- Reduced seedling stress
Avoid Saturated Soil
Once temperature’s dialed in, moisture level matters just as much. Soggy mix invites root oxygen deprivation, root rot, and shifts soil redox potential toward anaerobic byproduct odors.
| Saturated Soil | Properly Damp Soil |
|---|---|
| Blocks oxygen to roots | Allows airflow |
| Slows nutrient uptake | Helps steady uptake |
| Breeds anaerobic microbes | Balances microbial community |
| Smells sour | Smells earthy |
Watch drainage holes closely and monitor soil moisture daily.
Level The Tray Surface
If one corner sits low, water pools there and starves the opposite end. Grab a spirit level to spot high-low pockets, then adjust with wooden shims.
- Even coverage means every seedling gets a fair start
- No thirsty corners left behind
- No drowned roots in the low spots
- No warped trays undoing your work
Substrate settling happens, so recheck often.
A quick finger test or moisture meter reading, paired with these signs of overwatering to watch for in summer gardens, keeps you from misreading settled substrate as dryness.
Water Seedlings From Below
Bottom watering is the gentlest way to hydrate delicate seedlings. It lets roots draw up exactly what they need, without disturbing the surface. Here’s how to do it in five simple steps.
Fill Reservoir Tray
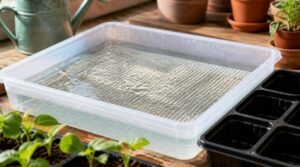
A good reservoir tray is the engine behind bottom watering. Choose one 2–3 inches deep, made from BPA-free polypropylene, sized to match your seedling trays.
| Feature | Ideal Spec | Why It Matters |
|---|---|---|
| Depth | 2–3 in | Helps capillary action |
| Material | BPA-free polypropylene | Safe, durable |
| Cleaning | Monthly | Prevents algae growth |
Add a capillary mat for even water absorption before soaking.
Add Half-Inch Water
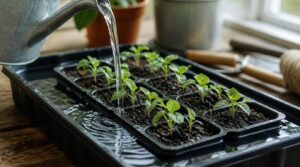
Once your reservoir tray is set, pour water until it reaches about half an inch deep—enough to trigger even hydration without pooling.
- Fine mixes soak fast, needing little more
- Coarse blends may need slightly more
- Peat media demands strict dosing
- Dry pockets vanish with steady depth
- Watering technique stays gentle, controlled
Measuring water depth this way keeps your seedlings’ moisture level consistent and predictable.
Soak for 15–30 Minutes
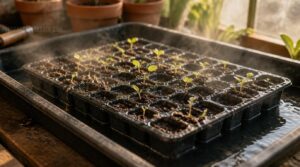
Patience matters here. Let the tray sit for 15 to 30 minutes, giving capillary action time to pull water upward through the mix.
Fifteen minutes hydrates the surface; thirty reaches deeper roots. Don’t go longer—soggy mix invites oxygen deprivation and souring. This window delivers uniform moisture distribution without waterlogging, so every seed gets an even drink through bottom soaking.
Watch Mix Darken
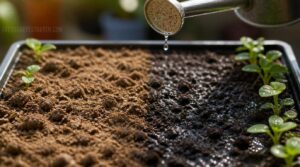
Color tells the story here. As capillary action pulls water upward, the mix shifts from pale to a uniform dark tone, confirming moisture reached bottom layers, not just the surface.
Check every corner of the tray. Pale patches mean dry pockets remain—extend soaking. A consistent, saturated appearance signals even hydration, so you won’t need the finger test until the next watering cycle.
Drain Excess Water
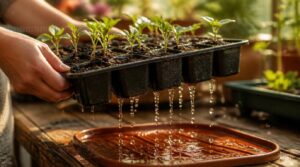
Once the mix darkens fully, lift the tray and let gravity finish the job. Excess water must fully drain away through the drainage holes within 30 minutes, preventing waterlogged soil and root rot.
Good drainage habits matter:
- Check drainage holes stay unclogged
- Add perlite for better aeration
- Use a drainage mat underneath
- Prevent silt buildup over time
Mist Newly Sown Seeds Gently
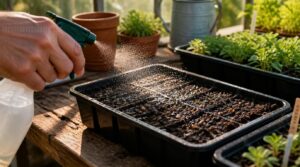
Freshly sown seeds need a gentler touch than a full soak. Bottom watering works great once roots form, but at this stage, a light misting keeps things safe. Here’s how to mist the right way without disturbing your seeds.
Use a Fine Spray Bottle
When misting newly sown seeds, reach for a fine mist spray bottle with a nozzle sized for 10 to 50 micron particles. This ensures a gentle spray that won’t dislodge seeds.
Opt for BPA-free materials and a trigger design that minimizes fatigue. Rinse the nozzle regularly to prevent mineral buildup and keep your misting technique precise and consistent.
Keep Surface Evenly Damp
Uniform gentle dampness matters more than how often you spray. Mist in light, overlapping passes until the surface shows a consistent, slightly darker tone—that color change signals even moisture, not puddling.
Watch for pooling in corners; it disrupts capillary action and invites crusting elsewhere. Keep passes light and steady, and let the tray’s surface breathe evenly, so evaporation doesn’t create dry patches beside soggy ones.
Avoid Washing Seeds Away
Even a gentle mist can shift tiny seeds if you’re too heavy-handed. Hold the spray bottle at an angle, not straight down, and let droplets settle rather than strike.
If you’re top watering instead, switch to a watering can with a fine rose so pressure stays low. A level tray surface also helps water spread evenly instead of pooling and pushing seeds off course.
Cover Trays for Humidity
Once seeds are sown, a plastic lid traps rising moisture and creates a mini greenhouse effect around the tray.
- Fogged domes beading with condensation
- Dark, evenly moist mix underneath
- Warm, still air cradling tender sprouts
- Seeds settled snug, undisturbed by drafts
Choose a dome sized for your seed type, and check vents for airflow control. Sanitize reusable covers between batches to prevent disease carryover.
Remove Domes After Sprouting
Once most seeds have popped through the surface, it’s time to let the dome go. Humidity change timing matters here—pull it too soon and stems stay soft; wait too long and you risk mold.
If growth looks uneven, try staggered dome removal. Increased ventilation for seedlings strengthens stems and prevents etiolation, easing the shift toward hardening off and future transplant readiness.
Water Seedlings on The Right Schedule
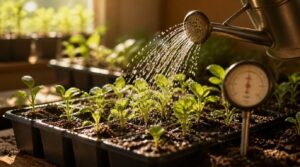
Timing matters just as much as technique for healthy seedlings. Water too often or too rarely, and you’ll undo all your careful misting work. Here’s how to find the right rhythm for your trays.
Check Every 1–2 Days
Consistency beats frequency guesswork. Check seed trays every 1–2 days to catch drought stress before it stalls growth.
Heat waves speed up moisture loss, so shorten intervals when temperatures climb. Rapid seedling growth demands closer monitoring too. Humidity swings affect how fast soil dries, so let local conditions guide your watering frequency.
Consistent checks keep moisture levels even, supporting healthy seedling care throughout.
Use The Finger Test
Your finger is the best moisture meter you own. Press it ½–1 inch into the mix; if that depth feels dry, water now.
This simple check beats guessing and prevents both soggy roots and crispy seedlings. For extra precision, a soil moisture meter confirms what your fingertip already tells you, keeping your watering schedule honest and consistent.
Adjust for Heat
Heat speeds up evaporation, plain and simple. Hot days pull moisture from your trays fast, so your once-reliable schedule needs a rethink.
- Check twice daily in high heat
- Water early morning to reduce evaporative loss
- Watch for heat stress wilting despite damp soil
- Increase watering frequency as temperatures climb
Daily watering becomes standard practice once temperatures spike, keeping consistent moisture levels intact through peak afternoon heat.
Adjust for Humidity
Humid air acts like a sponge that’s already full, so soil stays damp longer and roots stay happier.
Track this with a hygrometer placed away from vents or domes, watching for readings above 70%. High humidity slows transpiration, cutting watering frequency.
Watch the dew point, too — condensation on tray surfaces invites fungal trouble. Balance moisture retention with airflow to protect your seedlings’ microclimate.
Water in The Morning
Timing matters as much as technique. Watering seedlings in the morning mimics your own hydration routine — just as a glass of water at sunrise sharpens cognitive clarity and jumpstarts digestion, morning watering gives seedlings hours of light to absorb moisture before evening.
Morning watering helps:
- Steady metabolic activity
- Consistent moisture uptake
- Lower fungal risk overnight
Prevent Overwatering and Underwatering
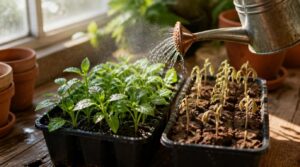
Watering seedlings is a balancing act, and both too much and too little can hurt them. Your seedlings will show clear signs when something’s off, so you just need to know what to look for. Here’s what to watch for, and how to fix it fast.
Signs of Soggy Soil
If water pools on the surface long after watering, your mix is holding too much. Look for a darkened, saturated appearance, a swampy odor from anaerobic decay, or moss and algae forming.
Roots turn slimy, seedlings wilt from oxygen deprivation, and nutrient leaching sets in. Left unchecked, this invites root rot and damping-off.
Signs of Dry Seedlings
Too little water tells a different story. Stems lose their stiffness and bend easily, while leaves curl inward instead of drooping down.
You’ll spot a powdery soil crust that flakes when touched, roots losing vigor, and pale, brittle growth. New leaves emerge small, and overall growth stalls—clear stress signals that shouldn’t be ignored.
Stop Standing Water
Dry seedlings stress fast, but standing water kills faster. Puddles pooling on the surface signal poor drainage capabilities or flat, ungraded trays.
Fix it with:
- Perforated tray bottoms for runoff
- A slight grade, roughly 2% slope
- Raised stands for airflow underneath
- Bottom watering instead of overhead soaking
Waterlogged soil suffocates roots and invites rot—drain within 10 minutes, always.
Reduce Damping-Off Risk
Standing water sets the stage for damping-off, a fungal disease that topples seedlings overnight. Start with sterile seed starting mix and good airflow between trays to keep humidity down.
Hold temperatures between 65–75°F, avoid crowding seedlings, and favor bottom watering over overhead soaking. Check daily for wilting or discolored stems—early removal of infected seedlings protects their neighbors and stops the spread before it takes hold.
Keep Foliage Dry
Wet leaves invite trouble, since damp foliage sets up perfect conditions for fungal leaf spot and mildew. Fix it with:
- Bottom or careful top watering—skip overhead soaking
- Morning watering so leaves dry by evening
- A small fan for steady airflow
Good ventilation, humidity management, and dry seedling foliage together prevent disease and keep damping-off from taking hold.
Choose Safe Seedling Water Methods
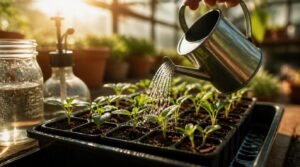
Not all water is created equal for your seedlings. The source and delivery method can make a real difference in root health and growth. Here are five safe, reliable ways to get water where it needs to go.
Dechlorinate Tap Water
Tap water isn’t always seedling-safe straight from the faucet. Free chlorine evaporates if you let water sit uncovered 60–90 minutes; chloramine lingers and needs filtration or neutralizers instead.
| Disinfectant | Best Removal Method |
|---|---|
| Chlorine | Aeration (wide container) |
| Chloramine | Carbon filter or neutralizer |
Check your utility’s water report first, then choose your method accordingly.
Use Filtered Water
If aeration and neutralizers feel like extra steps, a filtered water pitcher solves chlorine removal automatically. Activated carbon filters strip chlorine and chloramine in one pass, easing chlorine root stress on tender seedlings.
Filtered or distilled water also helps mineral buildup prevention, keeping soil surfaces free of crusty deposits. Just confirm your filter meets recognized water quality standards for reliable contaminant removal efficiency.
Try Capillary Mats
Capillary mats take bottom watering a step further, wicking moisture up through soil capillarity with zero daily effort.
- Never worry during weekend trips
- Trust roots get steady hydration
- Skip guilt over missed watering days
Set up a shallow reservoir setup, place trays on the mat, and let passive irrigation maintain a consistent moisture level. Prevent algae by avoiding stagnant water and drying mats between uses.
Use Drip Irrigation
Scaling up beyond a few trays?
Drip irrigation delivers water straight to each cell through low-pressure emitters, cutting waste while keeping a consistent moisture level.
A pressure regulator protects emitters from uneven flow, and filtration prevents clogging. You can even integrate fertigation, feeding seedlings as you water.
Test uniformity occasionally—watch for dry pockets—and adjust your irrigation schedule as trays mature.
Final Watering Before Transplanting
Think of that last drink as a handshake between old soil and new. Water just before lifting seedlings, aiming for ideal moisture depth of two inches, damp like a wrung sponge.
Water seedlings just before transplanting like a handshake between old soil and new, damp as a wrung sponge
This enhances soil contact, cushions roots, and prevents root shock.
Skip standing water, though—too much invites anaerobic conditions right when transplant timing matters most for healthy root development.
Frequently Asked Questions (FAQs)
How long can seedlings go without water?
Young seedlings under two weeks old often wilt within 24 hours without water, especially in warm, bright conditions. Established seedlings tolerate 2–5 days, depending on temperature, humidity, and media type.
Watch for drooping leaves and dry, cracked soil surfaces as early wilting signs.
Can I use a soil-moisture meter instead of guessing?
Yes—a moisture meter beats guesswork. Capacitance probes read soil moisture content directly, checking root depth accurately.
Calibrate for your mix, rinse probes after use to avoid corrosion, and you’ll track consistent moisture levels matching real seedling needs.
What causes uneven germination across the same tray?
Not every seed reads the same memo. Substrate moisture pockets, temperature gradient effects, and seed vigor variation all create patchy emergence—some cells sprint, others stall from poor oxygen diffusion or cooler microclimate tray edges.
Is tap water safe if left to sit overnight?
Tap water left overnight can lose chlorine protection and support microbial growth, especially in warm rooms. If left uncovered, dust and bacteria may contaminate it. For seedling safety, use fresh, dechlorinated, room-temperature water for watering.
Conclusion
Nearly 70% of seedling losses come from overwatering, not drought. Mastering how to water seedlings in seed trays means you’re steering clear of this hidden pitfall.
Let your trays guide you: darkened soil signals moisture, drooping leaves warn of thirst. Use bottom watering, misting, and careful scheduling as your tools.
Every tray becomes a small test, each sprout a signpost. Water right, and you’ll see uniform growth—roots strong, stems upright, and the promise of a healthy garden ahead.