This site is supported by our readers. We may earn a commission, at no cost to you, if you purchase through links.

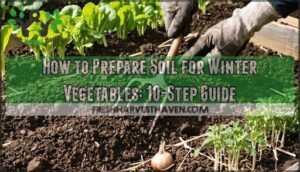
Most gardeners treat the first hard freeze as an ending. It’s not—it’s the most important deadline of your growing year.
What you do in the six weeks before the ground locks up determines how healthy your beds emerge in spring, how well your perennials root through winter, and whether pest pressure waits for you on the other side.
Winter garden’s dormant season prep isn’t cleanup; it’s foundation work.
Harvest timing, soil amendments, drainage fixes, tool storage—each task has a window, and those windows close fast.
Miss them, and spring hands you a bigger problem than you bargained for.
Table Of Contents
- Key Takeaways
- Start Before The Ground Freezes
- Assess Beds, Soil, and Exposure
- Harvest and Clear Remaining Crops
- Prune Perennials With Purpose
- Build Healthier Beds for Winter
- Mulch and Cover Bare Soil
- Protect Herbs, Shrubs, and Containers
- Winterize Water, Tools, and Supports
- Monitor The Garden Through Dormancy
- Frequently Asked Questions (FAQs)
- Is October too early to cut back perennials?
- Do dormant plants need to be watered in winter?
- What are winter gardening guidelines?
- What is winter gardening?
- Should you prepare your garden beds for winter?
- How to prepare garden soil for winter?
- How do you prepare a garden for winter?
- How do I succeed in winter gardening?
- How do I protect garden structures from snow?
- Can I add amendments to frozen soil?
- Conclusion
Key Takeaways
- Your first frost date isn’t a finish line—count back two to four weeks and use that window to amend soil, improve drainage, and get mulch down before the ground locks up.
- What you leave standing matters as much as what you cut: hollow stems from Joe Pye Weed and Monarda, shelter solitary bees all winter, while diseased foliage bagged now means fewer pathogens waiting for you in spring.
- Containers and tender herbs lose root protection fast once temps drop below 37°F, so move pots to sheltered spots early, insulate walls with bubble wrap, and bring basil in before it collapses.
- A dormant garden still needs monthly attention—check mulch depth, scout for overwintering pests, water during mild spells above 40°F, and keep notes so spring recovery has a clear starting point.
Start Before The Ground Freezes
Winter prep isn’t something you want to rush once the ground turns hard. The weeks between late October and early November give you a real working window — before soil freezes and options narrow.
Miss that window and you’ll be waiting months — here’s everything you need to know about spring gardening in cold climates so you’re ready the moment the ground thaws.
Here’s where to focus your time and energy first.
Timing Prep Around First Frost Dates
Your frost date forecast isn’t a deadline — it’s a starting gun. Most gardeners wait too long, then scramble.
Your frost date isn’t a deadline — it’s a starting gun most gardeners miss
Instead, pull up your local average first frost date and count back two to four weeks. That’s your real planning window.
Use that buffer for pre-frost irrigation, soil temperature monitoring, and getting protective cover timing right before a cold snap catches you off guard.
Consider top off fruiting plants 30 days before the first frost to increase harvest.
Late Fall Windows by Hardiness Zone
Zone-specific timing shapes your whole hardiness calendar.
In zones 3 and 4, your frost window closes by September, so your regional task schedule compresses quickly.
Zone 5 lasts until mid-October; zones 6 and 7 stretch into November.
Zones 8 and 9 can run a winter garden preparation checklist well into December.
Know your zone, and you’ll never feel rushed again.
Adding a winter rye cover crop can protect soil from erosion during the dormant season.
Signs Plants Have Entered Dormancy
Once your zone’s timing is locked in, watch the plants themselves. Leaf color change is the clearest signal — when green fades to yellow, orange, or red, chlorophyll is breaking down and dormancy is underway.
Growth cessation follows quickly, then stem hardening, bud abscission, and a noticeable root activity drop.
These shifts, usually within one to three weeks of color change, confirm your winter garden preparation checklist should begin now.
Prioritizing Tasks Before Soil Freezes
Once plants show those dormancy signals, your window to work the soil is narrowing fast. Order your tasks by what soil freezing will make impossible:
- Test pH and work in compost or lime now — frozen ground locks amendments out until spring
- Improve drainage in low spots before ice forms and compresses root zones
- Lay mulch for root zone insulation after your frost forecast planning confirms hard freezes are coming
Assess Beds, Soil, and Exposure

Before you mulch a single bed or move a single pot, take a walk through your garden with fresh eyes.
You’re looking for problem spots — low areas that hold water, exposed corners that catch wind, and plants that’ll need a little extra help come January.
These four checkpoints will give you a clear picture of what your garden actually needs this winter.
Checking Drainage, Slopes, and Low Spots
Water pooling in the wrong place can quietly rot crowns all winter. After a rainstorm, watch your beds — if low spots still hold water six hours later, that’s a drainage problem worth fixing now.
Soil Moisture Mapping helps you pinpoint those trouble zones. Use Slope Measurement Tools to confirm a 1.5 to 3 percent grade away from plant bases.
Swale Design Basics and Drainage Tile Installation can redirect runoff before soil compaction worsens.
Noting Wind, Sun, and Snow Patterns
Before winter sets in, spend a few days mapping how wind, light, and snow actually move through your garden.
Wind-Driven Frost Patterns shift soil temperatures by 2 to 5°C in exposed beds, so Windbreak Placement matters.
Use Sun Exposure Mapping to find warm south-facing pockets.
Snow Insulation Effects, Microclimate Temperature Variation, snow fencing, snow load management, microclimate creation, and cold frame positioning all follow from what you observe.
Identifying Hardy, Semi-hardy, and Tender Plants
Three categories define how much work each plant will demand from you this winter.
hardy perennials selection starts with knowing your hardiness zone’s cold minimums. Check Frost Tolerance Rating, Stem Woodiness, Root Depth, and Leaf Persistence for every bed.
Semi-hardy vegetables and tender specimens need a different plan entirely.
Plant hardening history and Bloom Season timing tell you which ones genuinely need intervention.
Marking Plants That Need Extra Protection
Once you’ve sorted hardy from tender, mark your findings right in the bed. Push root zone stakes around shallow-rooted or grafted specimens to prevent accidental compaction.
Use color-coded tags — red for high protection, yellow for moderate, green for standard.
Add weather stake markers to log temperature drops, and attach moisture indicator ribbons where irrigation stops matter most.
Hang protection schedule cards so your frost protection plan stays visible all season.
Harvest and Clear Remaining Crops

Once the first frost warning hits, your harvest window closes faster than you’d think. Knowing what to pull, what to leave, and what to dig up makes all the difference between a clean garden and a wasted season.
Here’s how to work through your beds before winter takes over.
Picking Tender Vegetables Before Frost
Frost timing alerts aren’t just weather updates — they’re your cue to act.
Tender vegetables won’t survive hard frosts, so nighttime temperature monitoring matters every day in late fall. Keep these steps ready:
- Harvest leafy greens 10–14 days before first frost.
- Use harvest tool hygiene — clean cuts reduce decay.
- Apply rapid cooling methods, targeting 40°F within two hours.
Leaving Hardy Crops Until Needed
Hardy crops like kale, spinach, and collards don’t need pulling, just because temperatures drop. Leaving them in-situ storage style — roots intact in the ground — preserves flavor and extends your harvest window.
A light mulch layer provides root zone insulation, and natural snow insulation benefits the crowns during hard freezes. Low-growing crops along bed edges even create microclimate windbreaks, stabilizing nearby soil temperatures.
Digging and Storing Potatoes Properly
Potatoes are different from kale — they can’t stay put forever.
Once foliage yellows and dies back, dig carefully using a fork, practicing gentle lifting to avoid puncturing tubers. Don’t wash them yet.
Cure potatoes at 60–65°F with humidity control around 85–95% for two weeks. Then shift to burlap storage in a dark, cool spot for reliable sprout prevention all winter.
Removing Spent Annuals and Fallen Fruit
Once potatoes are stored, shift your focus above ground. Sweep debris, weeds, and spent annuals from beds within two weeks of hard frost — this is solid pest suppression tactics in action.
For fruit collection timing, pick up fallen fruit within 48 hours; rotting piles invite fungal problems fast. Compost healthy scraps in a hot pile, and rake beds clean for a proper soil refresh before the freeze.
Separating Healthy Debris From Diseased Material
Not all debris deserves the same fate. Bag diseased material — leaves with brown lesions, moldy fruit, or honeydew-coated stems — and send it to municipal waste, not your compost pile.
Label bins clearly: one for healthy leaves to compost, one for diseased matter to discard. Sanitize tools between loads.
Nail this debris timing now, and overwintering pests and diseases lose their foothold before spring.
Prune Perennials With Purpose

Not every perennial deserves the same treatment when cold weather rolls in. Some need cutting back now, while others are better left standing through the winter months.
Here’s how to tell the difference and handle each one with confidence.
Which Perennials to Cut Back in Fall
After the first hard frost, some perennials are ready to come down. Cut Echinacea trim candidates and Black-eyed Susan cutback candidates to ground level once foliage browns.
Hosta leaf removal should follow the first freeze.
Bee balm reduction to about six inches helps limit disease carryover.
For Hens and Chick pruning, remove dead rosettes only.
These winter pruning techniques keep beds tidy and healthy.
Which Stems and Seedheads to Leave Standing
Not every stem needs to go. Tall grass stems like Miscanthus add movement and texture through frost, while black-eyed Susan and coneflower seedheads carry real seedhead wildlife value deep into winter.
disease-free stems at least three feet tall for winter visual interest and hollow stem stability in wind. winter pruning techniques aren’t just aesthetic — they shelter beneficial insects all season.
Removing Disease-prone Foliage Before Winter
Disease monitoring starts now — don’t let infected foliage carry fungal disease into spring.
Your leaf removal protocol is simple: spot yellowing, spots, or powdery mildew, and cut it out.
Wear protective gloves, sanitize blades between plants with 70% alcohol, and bag all suspect material for trash.
Cold weather pruning of disease-prone perennials is essential, cleaning and debris removal before winter shuts the door on pathogen identification and control.
Preserving Hollow Stems for Pollinator Habitat
Leaving hollow stems standing is one of the smartest winter garden bed preparation steps you can take. Stems from Joe Pye Weed, Milkweed, and Monarda offer passage diameters between 2 and 6 millimeters — ideal pollinator habitat for solitary bees and wasps during the dormant season.
Follow species selection guidelines: Goldenrod and Switchgrass outperform non-natives.
Bundle stems loosely for moisture management, raise them off leaf litter, and monitor insect activity for exit holes that come in spring.
Trimming Evergreen and Semi-evergreen Perennials Lightly
Evergreen perennials don’t go fully quiet in winter — they still need a little attention. Light trimming keeps hellebore, Christmas fern, and cranesbill tidy without pushing tender new growth into cold air.
- Time cuts around Dormant Season Timing — late winter, before buds break.
- Make each Bud Above Cutting clean and angled, using sharp bypass pruners.
- Practice Minimal Crown Removal — never more than one-third of plant mass.
- Choose Wind Shielded Cuts on calmer days to reduce moisture loss at wounds.
- Match your approach to each plant’s Growth Habit Focus for balanced winter garden maintenance.
Build Healthier Beds for Winter

What you do to your soil now pays off the moment spring arrives. Fall is the right time to feed, balance, and top-dress your beds while the ground is still workable.
Here’s what to focus on before the cold locks everything in.
Adding Compost or Well-rotted Manure
Think of fall compost as a slow deposit into your soil’s bank account. Spread 5–10 kg of well-rotted manure or compost per square metre across bare beds before the ground locks up.
This organic matter improves soil structure enhancement over winter while nutrients release gradually in spring. Avoid fresh manure — pathogens and soluble nutrient loss make it a poor choice for winter garden preparation.
Correcting PH With Lime or Sulfur
If your soil test shows a pH below 6.0, apply calcitic or dolomitic lime — dolomitic lime types add magnesium too, which suits magnesium-deficient beds.
For alkaline soil above 7.0, sulfur oxidation gradually lowers pH over weeks.
Work either amendment 6–8 inches deep for best results.
Retest pH every five years, or sooner after significant soil amendment before spring planting.
Top-dressing Beds Before The Ground Freezes
Once pH is dialed in, timing your organic matter application matters just as much.
Top-dress beds with 1–2 inches of well-rotted compost or manure before soil temperatures drop below 7°C — that’s your Organic Matter Timing window.
This Moisture Retention Strategy and Soil Temperature Buffer keep microbial life active, facilitates Nutrient Release Management through winter, and gives your Layering Depth Guidelines real purpose heading into freeze.
Lightly Working Amendments Into The Topsoil
Once that top-dressing is down, don’t just leave it sitting on the surface. Lightly work amendments into the topsoil — about 15–20 cm deep — while soil temperatures stay above 5°C.
That’s your Soil Temperature Threshold for useful microbial mixing.
- Match Compost Particle Size to your soil type
- Keep Amendment Moisture Balance by working lightly damp soil
- Use Light Tilling Techniques — one gentle rake pass
- Follow Gentle Incorporation Depth without disrupting root zones
Mulch and Cover Bare Soil

Bare soil in winter is exposed soil — vulnerable to erosion, frost heave, and weed pressure that builds quietly underground. A well-chosen cover locks in warmth, protects root zones, and sets your beds up to wake strong in spring.
Here’s how to approach it, step by step.
Applying Mulch After a Hard Frost
Wait for a hard frost before spreading mulch — putting it down too early traps warmth and invites rodents. Once the ground firms up, apply 2–4 inches for solid soil insulation and freeze protection for plants.
Lightly rake after cold snaps to manage Mulch Crust Management and restore Air Pocket Mulch beneath.
| Mulch Timing Factor | Why It Matters |
|---|---|
| After hard frost sets | Prevents premature pest shelter |
| Dark mulch color effects | Absorbs solar heat near root zones |
| Seasonal Mulch Replenishment | Restores depth lost to compression |
Choosing Straw, Leaves, Bark, or Compost
Not all mulch is created equal — and picking the right one changes how well your beds survive winter.
- Straw mulch wins on Insulation Efficiency and Weed Control, cutting temperature swings by 2–5°C with good airflow underneath
- Leaf litter as mulch adds organic matter and delivers steady Nitrogen Contribution through decomposition
- Bark outlasts others, lasting 2–3 years with slow Decomposition Speed
- Compost feeds soil biology while retaining moisture
- Pine bark carries mild Soil Acidification risk — worth noting near acid-sensitive plants
Preventing Frost Heave Around Root Zones
Frost heaving quietly tears plants from the ground each winter — and stopping it starts with layering smart.
Aim for 4 to 6 inches of coarse mulch over root zones for real thermal insulation layers. Slope beds at a 2–5% grade so meltwater drains away fast.
Install root screening barriers around shallow-rooted perennials, and work in permeable soil amendments like aged compost to open up drainage before the freeze locks in.
Using Leaf Litter Without Burying Stems
Leaves are free mulch hiding in plain sight — but depth and placement make all the difference. Aim for a 2–4 cm leaf layer, and mind your stem clearance spacing: keep litter several centimeters back from crowns to prevent rot during wet spells.
- Litter depth control: Thin layers in wet or snowy climates prevent matting
- Species-specific litter: Oak and maple last longer; pine needles improve aeration for shallow roots
- Pest monitoring: Fluff compacted layers after rain to reduce sheltering spots
Suppressing Weeds With Cardboard or Black Plastic
Bare soil is an open invitation for weeds, but you can shut that door before winter settles in. Lay cardboard four to six sheets thick — that cardboard layer depth blocks up to 90 percent of germination.
Overlap edges 6–8 inches and top with mulch for soil moisture regulation.
Prefer black plastic? Secure edges firmly; plastic edge securing prevents wind gaps.
Both are solid eco-friendly material choices that deliver decomposition enrichment come spring.
Sowing Cover Crops for Winter Soil Protection
Cover crops are one of the best living mulches you can give your soil before freeze-up. For species selection, winter rye leads the pack — it’s winter-hardy, builds dense biomass, and locks in soil nitrate.
Mix ratios of rye and hairy vetch balance quick ground cover with nitrogen gain.
Seed 6–8 weeks before first frost, match seeding depth to soil texture, and plan termination timing before spring planting begins.
Protect Herbs, Shrubs, and Containers
Not every plant in your garden tolerates cold the same way, and that difference matters a lot come November. Some herbs, shrubs, and container plants need a little extra help to make it through dormancy without a setback.
Here’s what to do for each one.
Overwintering Tender Herbs Like Rosemary and Basil

Rosemary and basil share a name on your spice rack, but couldn’t be more different when the cold hits. Basil folds below 50°F — bring it in early. Rosemary tolerates light dips to 26–28°F with heavy mulching, but containerized plants overwinter best indoors.
- Meet Light Requirements: south-facing windows or Indoor Grow Lights (400–700 nm range) keep both herbs productive
- Match Temperature Management to each plant — 65–70°F for rosemary, no lower than 60°F for basil
- Use a well-draining Potting Mix Selection to prevent root rot during low-light months
- Try Herb Propagation — root basil cuttings indoors to renew stock through winter
- Avoid drafts; stable indoor air protects overwintering containers better than fluctuating temps
Mulching Crowns of Cold-sensitive Perennials

Cold-sensitive perennials — chrysanthemums, coral bells, Russian sage — need a 5 to 7 centimeters mulch layer applied after the first hard frost. Use leaf mold, straw, or bark for effective winter mulching techniques.
A simple berm design sheds cold water away from the crown.
Keep mulch clear of stem tissue, and check weekly for moisture buildup beneath breathable wraps.
Mounding Protection Around Borderline-hardy Shrubs

Shrubs like certain hydrangeas, lilacs, and spirea sit right on the edge of hardiness — one brutal winter can finish them.
Mound 8 to 12 inches of well-drained loamy soil around their crowns, focusing on root zone lift without burying the stem. Crown isolation matters here.
Add stone edging to hold the mound’s shape, wrap the base with a mulch ring, and check settlement each spring.
Moving Potted Plants to Sheltered Spots

Mounding protects what’s in the ground, but pots are a different challenge — roots have no earth buffer at all.
Before night temperatures drop below 3°C (37°F), move tender containers to a sheltered spot with bright indirect light placement and steady temperatures between 15°C and 22°C.
Track each pot with clear labels noting species and moisture needs, and keep soil slightly dry to prevent rot.
Insulating Containers to Prevent Root Damage

Even with pots moved to shelter, exposed walls and cold floors still steal heat from roots. These five steps keep root zones safer:
- Wall Insulation Materials like bubble wrap or kraft paper cut radiant heat loss by up to 25 percent.
- Thermal Sleeve Options — corrugated or gas‑filled wraps — add measurable temperature stability over 48‑hour cold snaps.
- Microclimate Placement against a south‑facing wall keeps containers 2–5°F warmer overnight.
- Container Base Insulation using wood or brick feet reduces ground‑chill contact by 1–3 degrees.
- Heat Retaining Inserts like polystyrene liners slow root zone temperature drops by 2–5°F during first frost.
Mulching the top two inches of soil inside pots also minimizes surface freezing — a simple step that pays off when protecting roots during cold months and rounding out your winter garden prep.
Winterize Water, Tools, and Supports

Once your plants are tucked in for winter, your tools and water systems need the same attention. A frozen hose or rusty trellis left outside can mean real headaches come in spring.
Here’s what to tackle before temperatures drop for good.
Shutting Down Irrigation Before Freezing Weather
Turn off the watering system 24 to 72 hours before your first hard freeze — that window is your best freeze risk assessment tool. Seasonal shutoff scheduling around local frost dates protects valves and controllers from cracking.
Disable rain and soil moisture sensors during sensor deactivation, cut power to the controller, and install insulated valve enclosures outdoors.
Proper pressure release timing keeps your whole system intact through winter.
Draining Hoses and Sprinkler Attachments
Once the irrigation controller is off, don’t stop there — your hoses and attachments need attention too. Open every drain valve fully, then hold the nozzle up to push out any remaining water.
Attachment rinsing removes mineral buildup before storage. Clean quick disconnects with a vinegar soak, fit new O-rings, and coil each hose loosely for coiled hose storage off the ground.
Backflow device prep means loosening bleeder screws and capping all openings.
Emptying Containers, Birdbaths, and Fountains
Draining containers, birdbaths, and fountains at least 24 hours before a predicted freeze is your best Frost‑Proof Water Removal strategy.
Follow proper Drainage Safety Procedures: pull pumps indoors, dry them completely using Pump Drying Guidelines, and flip birdbath basins face-down.
Skipping this invites cracked basins, and Mold Prevention Techniques become irrelevant if ice does the damage first.
Insect‑Free Storage starts with an empty, clean basin.
Cleaning, Sharpening, and Sanitizing Tools
Sharp tools protect your plants and your time. Start by scrubbing blades with the right Cleaning Brush Types — cork-lined brushes work well without leaving metal fragments behind.
Use soap and hot water first, then rinse off any Sanitizer Residue. Rinse thoroughly before soil contact.
Sharpening Angle Guides keep your edge consistent, while Blade Edge Deburring smooths micro-jagged edges after grinding.
Tool Organization Grid keeps everything accessible and rust-free all winter.
Storing Trellises, Arches, and Obelisks Properly
Don’t let a season of neglect undo structures that cost real money. Disassemble your trellises, arches, and obelisks before the freeze and move them to Dry Sheltered Storage.
Elevated Pallet Placement keeps wood and metal off damp floors.
Tuck in Moisture Absorbing Packs into any closed bins.
Use Labeling and Inventory tags so spring reassembly stays simple.
Good Rust Prevention Techniques start here, not later.
Protecting Metal Parts From Rust Over Winter
Plain carbon steel doesn’t stand a chance against winter moisture — surface rust can appear in as little as two to four weeks. Your best defense is choosing stainless steel or checking your galvanized coating thickness, since a 0.6 mm zinc layer buys you several seasons.
Powder coating benefits include up to 70 percent better rust resistance.
Finish with a wax sealants application on unpainted parts, and use elevated storage solutions to keep metal off damp ground.
Monitor The Garden Through Dormancy
A dormant garden isn’t one you can ignore until spring. Even in the coldest months, a few quiet checks can mean the difference between plants that bounce back and ones that don’t.
Here’s what to keep an eye on through winter.
Watering Only During Mild, Dry Spells
Most plants don’t need much water in winter — but they do need some. Wait for mild days above 40°F when the ground is unfrozen, then water slowly and deeply. Drip irrigation timing works well here.
For evergreen water needs, target 8–12 inches of root zone depth. Soil moisture testing every few weeks keeps your dormancy watering schedule honest, especially for containers.
Checking for Root Exposure and Wind Damage
After watering, scan beds for exposed roots—especially after windy, dry spells. Root Visibility Checks matter most where soil crusts or erodes, revealing roots by two inches or more.
Look for Stem Bend Indicators and bruised bark, signs windbreaks aren’t working.
Mulching for winter and timely Barrier Installation keep root zone insulation strong.
Soil Moisture Monitoring helps roots recover after wind damage.
Inspecting Mulch, Wraps, and Row Covers
Once you’ve addressed root exposure, turn your attention upward.
Do a Wrap Integrity Inspection on tree trunks and a Row Cover Tension check after every windstorm—loose garden row covers bunch and lose their winter protection fast.
Lift mulch edges for a Mulch Moisture Check; soggy Material Degradation underneath signals trouble.
Adjust plastic sheeting and cover up the garden beds where gaps appear.
Watching for Overwintering Pests and Disease
Now shift your focus to hiding in plain sight.
Pest scouting and disease surveillance during dormancy can save you weeks of headache in spring. Walk beds weekly and look for:
- Sticky traps near susceptible shrubs to catch overwintering moths and fungus gnats early
- Leaf litter management in sheltered corners, where aphids and mites cluster in milder microclimates
- Cankers or bore holes signaling overwintering diseases and pests before they surge
Microclimate mapping helps you target garden sanitation where it counts most.
Turning Compost When Conditions Allow
Your compost pile doesn’t shut down just because the garden does—but it does slow down.
Winter composting rewards patience and smart timing. Turn the pile only when daytime temperatures stay between 40–90°F. Use a compost thermometer; if core temps drop below 90°F, it’s time to act.
| Action | Winter Guideline |
|---|---|
| Turning Frequency | Every 4–6 weeks in cold climates |
| Temperature Monitoring | Target 130–160°F core during turns |
| Moisture Adjustment | Squeeze test—a few drops per handful |
| Aeration Techniques | Move outer material to center |
| Material Balancing | Maintain 25:1–30:1 carbon-to-nitrogen ratio |
Relocate cooler outer layers inward each turn. That’s where compost aeration and heat regeneration happen. Removing debris and composting after harvest keeps material balanced—garden composting best practices mean layering browns with greens consistently. Compost and mulch work together all winter long.
Keeping Notes for Spring Garden Recovery
A simple notebook does more for your spring garden than most tools ever will. Through winter, jot down what you observe — mulch depth, frost dates, any pest signs — so nothing slips away.
- Keep a Frost Date Log and Soil Amendment Tracker side by side
- Build a Recovery Checklist with task windows and bed names
- Add a Pest Observation Journal and Yield Forecast Record for seasonal garden planning and execution
Frequently Asked Questions (FAQs)
Is October too early to cut back perennials?
Not necessarily. October pruning works for many perennials once species dormancy sets in, but frost risk assessment matters.
Avoid cutting bud development on peonies. Leave pollinator-friendly hollow stems standing through late season growth periods.
Do dormant plants need to be watered in winter?
Yes, dormant plants still need occasional water. Check soil moisture at 4–6 inches deep before watering. Potted plant dryness is a real risk, as containers dry faster than ground soil.
What are winter gardening guidelines?
Winter gardening guidelines cover Frost-Resistant Varieties, Winter Soil Aeration, Cold Frame Management, Snow Insulation Techniques, and Pest Monitoring Protocols — giving you a clear path through every cold-season task.
What is winter gardening?
What grows when the frost bites? More than you’d think.
Cold weather gardening keeps soil alive through winter soil activity, hardy plant selection, and season extension techniques that work with the season, not against it.
Should you prepare your garden beds for winter?
Absolutely — prepare your garden beds for winter before the ground freezes.
Soil temperature regulation, root zone insulation, and winter nutrient management all depend on timely mulching, soil testing, and smart bed layout optimization now.
How to prepare garden soil for winter?
Neglect your soil in fall, and spring will make you pay for it tenfold. Work compost in now, test pH, and mulch before the freeze locks everything in place.
How do you prepare a garden for winter?
Preparing your garden for winter comes down to timing, assessment, and layered protection — from winterizing your garden‘s irrigation system to soil amendment and mulching before freeze sets in for good.
How do I succeed in winter gardening?
Steady steps and smart choices carry your garden through the coldest months.
Focus on mulching strategies to protect roots in cold, winterizing irrigation systems, and seasonal soil microbes — and spring will reward your effort.
How do I protect garden structures from snow?
Snow fences and garden windbreaks, placed at least 6 feet from structures, reduce drifting. Add roof overhangs, anchor systems, and snow guard panels, then clear snow gently once it hits 6–8 inches.
Can I add amendments to frozen soil?
Think of frozen soil like a locked vault — amendments can’t get in. Wait for a thaw above 4°C before adding compost or lime, so nutrients actually reach plant roots.
Conclusion
Think of your garden as a seed vault: your winter garden dormant season prep is the promise of next year’s harvest. By fortifying soil, shielding roots, and pruning with purpose now, you’re not just surviving winter—you’re engineering spring’s rebound.
When thaw reveals your beds, they’ll emerge not as survivors, but as thriving ecosystems, primed by your foresight. This quiet groundwork is where resilience begins.
Tend it wisely, and the frost will surrender to your patience, yielding a garden reborn.
- https://www.nrcs.usda.gov/wps/portal/wcc/home/climateSupport/wetlandsClimateTables/growingSeasonDatesLength
- https://hort.extension.wisc.edu/articles/hollyhock-rust/
- https://www.ndsu.edu/agriculture/extension/extension-topics/gardening-and-horticulture/trees-and-shrubs/how-wrap-trees-winter
- https://goto.walmart.com/c/1943169/568844/9383?subId1=gardeningknowhow-us-3922274358834894914&sharedId=gardeningknowhow-us&u=https%3A%2F%2Fwww.walmart.com%2Fip%2FExpert-Gardener-Fiberglass-D-Handle-Garden-Spade-with-Ergonomic-Comfort-Grip%2F6781251000%3F
- https://mygardenlife.com/frost-map-with-dates