This site is supported by our readers. We may earn a commission, at no cost to you, if you purchase through links.

Your plant looks fine on the surface, green leaves reaching toward the light, but pull it from its pot and the truth hits you: roots that should be firm and white are dark, mushy, and smell like decay. Root rot doesn’t announce itself with fanfare. By the time you notice wilting leaves or stunted growth, the damage below the soil line has already taken hold.
The good news is that dealing with root rot in plants isn’t guesswork—it follows a pattern you can learn to recognize and interrupt. Understanding what triggers this underground threat, how to spot the warning signs early, and which treatment steps actually work can mean the difference between losing a beloved plant and nursing it back to health.
Table Of Contents
- Key Takeaways
- What Causes Root Rot in Plants
- Common Symptoms of Root Rot
- How Root Rot Spreads in Your Garden
- Immediate Actions When Root Rot is Suspected
- Step-by-Step Root Rot Treatment
- Repotting After Root Rot
- Preventing Root Rot in Houseplants
- Managing Plant Recovery After Root Rot
- Top 4 Products for Root Rot Prevention
- Choosing Resistant Plants and Soil Solutions
- Frequently Asked Questions (FAQs)
- Can root rot spread to nearby healthy plants?
- Which houseplants are most vulnerable to root rot?
- Does root rot ever heal without intervention?
- Can salvaged plants fully recover their original size?
- Should fertilizer be used during root rot recovery?
- How long does root rot treatment usually take?
- Is root rot reversible in all plant types?
- Can outdoor plants get root rot from rain?
- Should I use tap or distilled water afterward?
- Conclusion
Key Takeaways
- Root rot stems from overwatering and poor drainage that starve roots of oxygen, creating perfect conditions for fungal pathogens like Pythium and Fusarium to attack weakened tissue.
- Early detection is critical—watch for wilting despite moist soil, yellowing leaves, and mushy black roots with a foul odor, as damage accelerates rapidly once symptoms appear above ground.
- Treatment requires immediate action: isolate the plant, prune away all soft or discolored roots with sterilized tools, treat with hydrogen peroxide or fungicide, and repot in fresh well-draining soil with proper drainage holes.
- Prevention beats cure every time—use pots with drainage holes, check soil moisture before watering, choose disease-resistant varieties, and add beneficial microbes like Trichoderma to outcompete harmful pathogens before they colonize roots.
What Causes Root Rot in Plants
Root rot doesn’t just happen out of nowhere. It’s usually the result of a few key problems working together to create the perfect storm for fungal growth.
Luckily, you can avoid most of these issues by following a few simple prevention strategies for container vegetables.
Let’s look at the main culprits behind this common plant disease.
From fungal infections to bacterial blights, understanding how to eliminate herb pests starts with identifying what’s actually attacking your plants.
Overwatering and Poor Drainage
At the heart of most root rot cases, you’ll find waterlogged soil choking your plant’s root zone. When you water too often or your pot lacks drainage holes, oxygen levels drop dangerously low. Here’s what happens:
Spotting early signs of overwatering in your summer garden can help you catch these oxygen-starved conditions before root rot takes hold.
- Saturated soil blocks air from reaching roots
- Roots can’t breathe and begin to decay
- Poor drainage systems trap excess water
- Soil aeration stops, accelerating root rot
Proper water management and soil moisture monitoring prevent this deadly cycle.
A well-planned watering schedule for different herbs helps you avoid both extremes and keeps plants thriving year-round.
Fungal and Bacterial Pathogens
Even when drainage looks good, your plant can still fall victim to soilborne pathogens lurking in the wet soil. Pythium and Fusarium are the usual suspects—microscopic fungi that trigger fungal infections and root decay the moment conditions turn favorable.
These fungal diseases thrive where moisture lingers, producing spores that swim through water films to invade weakened roots. Bacterial strains join the attack once rot starts, accelerating tissue breakdown.
Effective root rot management is vital to prevent significant damage to plants.
Contaminated Soil or Pots
Pathogens don’t just appear—they often hitchhike in from contaminated soil or unwashed pots. Reusing potting mix without soil sterilization lets soilborne pathogens like Pythium and Fusarium survive for seasons, ready to attack new roots.
Fortunately, natural methods to boost germination include beneficial microbes that outcompete these harmful fungi before they colonize young roots.
Used containers carry fungal contamination in cracks and residues, making pot disinfection essential.
Soil reuse risks and neglected root pathogens turn yesterday’s planter into today’s disease factory, undermining soil health before you even water.
Environmental Stress Factors
Beyond overwatering and waterlogged soil, stress weakens your plant’s defenses. Drought stress, temperature fluctuations, and light deficiency exhaust roots, inviting pathogens. Soil compaction restricts oxygen, creating conditions perfect for rot even with drainage holes. Salt damage from overfertilization injures root membranes, opening infection pathways.
Managing your watering schedule and improving soil health starts with recognizing how environmental pressures compromise resistance before disease ever takes hold.
Common Symptoms of Root Rot

Root rot doesn’t always announce itself clearly, which is why many plants suffer before you notice something’s wrong. The signs can look like other problems at first, making it easy to misread what your plant is telling you.
Here are the key symptoms that point to root rot so you can catch it early and take action.
Wilting and Droopy Leaves
When your plant’s leaves droop despite moist soil, you’re likely seeing root rot symptoms in action. Root damage disrupts water stress regulation, causing leaf turgor loss that mimics dehydration. This confusing signal often leads to overwatering, worsening the root disease.
- Watch for wilting that appears even after you’ve watered recently
- Notice droopiness concentrated near the most damaged root zones
- Expect rapid deterioration within 24-72 hours following irrigation
Yellowing and Browning Foliage
Yellowing leaves signal reduced root health—your plant can’t pull up enough water or nutrients when root rot takes hold. You’ll often spot this foliage decline in older growth first, then watch it creep toward new leaves. Browning along the edges points to localized tissue death from compromised roots.
These leaf color changes help you distinguish root rot symptoms from simple nutrient deficits or heat stress.
Mushy, Black, or Smelly Roots
Healthy roots feel firm and show white or cream tones, but root rot symptoms flip that script—you’ll find black, mushy tissue that crumbles at your touch. A foul odor signals fungal infection and soil contamination from waterlogged soil.
During root inspection, squeeze suspect roots; soft, water-soaked areas confirm root decay. That sour smell comes from anaerobic microbes thriving in overwatering conditions, making fungal disease treatment urgent.
Stunted Growth and Leaf Drop
When root decay hits, you’ll notice growth slowing to a near halt—new leaves emerge smaller and stems stretch less each week. Leaf loss patterns usually start with older foliage turning yellow, then 30–60% dropping within a month.
These plant stressors stem from overwatering that chokes roots, blocking nutrient uptake. Foliage regeneration depends on catching fungal disease treatment early and restoring root health quickly.
How Root Rot Spreads in Your Garden

Root rot doesn’t just stay put once it gets started. The pathogens that cause it move through your garden in ways you mightn’t expect, turning a single sick plant into a widespread problem.
Understanding how the disease spreads helps you stop it before it reaches your healthy plants.
Pathogens in Soil and Water
Once waterborne diseases like Pythium and Phytophthora infiltrate your irrigation system, they spread rapidly through containers and drainage water. Soil contamination compounds the problem when you reuse old potting mix harboring fungal spores. These pathogens disrupt microbial balance and trigger root infection by:
- Creating oxygen-starved zones around roots
- Surviving in standing water
- Producing decay-accelerating compounds
- Colonizing poorly drained soil pockets
Transmission by Fungus Gnats
Those tiny flies hovering over your pots aren’t harmless—fungus gnats act as delivery vehicles for root rot pathogens. Adults carry fungal spores on their bodies from contaminated soil to healthy plants, while larvae chew root tissues and create entry wounds for infection. Understanding this gnat life cycle helps you break the transmission chain through targeted gnat control and soil sanitization strategies.
| Vector Biology Stage | Root Rot Impact |
|---|---|
| Adult gnats transport spores | Spread fungal disease between pots |
| Larvae feed on roots | Create pathogen entry points |
| Eggs hatch in moist soil | Intensify infection cycles |
| Gnats breed in organics | Sustain continuous transmission |
| Flying between containers | Contaminate multiple plants |
Effective soil management and plant disease prevention require addressing fungus gnats as disease vectors, not just nuisances.
Sharing Water Between Plants
Beyond gnats, your watering habits can turn one infected plant into a garden-wide problem. When you water from the top or share saucers between pots, runoff carries pathogens straight to neighboring plants.
Drip irrigation lines that loop between containers create continuous moisture zones where fungi thrive.
Even using the same watering can without cleaning spreads soil-borne diseases through water transfer and contaminated droplets.
Immediate Actions When Root Rot is Suspected

When you suspect root rot, acting quickly can make the difference between saving your plant and losing it entirely. The first hours are critical—you’ll need to assess the damage, confirm your suspicions, and prevent the problem from spreading to healthy plants nearby.
Here’s exactly what to do the moment you notice the warning signs.
Removing The Plant From Its Pot
When you suspect root rot, the first step is getting your plant out safely. Work a dull tool around the edge to loosen the root ball without tearing healthy roots. Here’s how to proceed:
- Tilt the pot and gently coax the plant free
- Check drainage holes for clogs that trap water
- Set aside old potting mix for disposal
Handle with care to preserve what’s still viable.
Inspecting and Identifying Affected Roots
Once you’ve freed the root ball, spread the roots gently to examine them. Healthy roots stay firm and show white or cream tones. Rotting tissue turns black, feels mushy, and often smells sour.
Use this table for quick root inspection and diagnosis:
| Root Condition | What It Means |
|---|---|
| Firm, white | Healthy tissue |
| Black, mushy | Active fungal disease control needed |
| Brown, brittle | Severe decay |
| Foul odor | Late-stage root rot prevention required |
Sample multiple zones around the root ball for accurate plant pathology assessment. Cut suspect roots with a clean blade to check internal color—this reveals how deep the damage runs and guides your next steps in root rot prevention and treatment.
Isolating Infected Plants
After you’ve confirmed root rot, move the infected plant away from your other houseplants right away. Quarantine methods stop fungal disease from jumping to healthy specimens through shared tools or water splashes.
Follow these separation techniques for effective disease containment:
- Place the plant in a dedicated area with its own watering can
- Label it clearly so others won’t handle it
- Use separate pruning shears and pots
- Document symptoms and treatment dates
This sanitation protocol protects your collection while you focus on infected plant care.
Step-by-Step Root Rot Treatment
Once you’ve identified root rot and isolated your plant, it’s time to act quickly. The treatment process involves a few focused steps that remove the infection and give your plant a real shot at recovery.
Here’s how to clean up the damage and set things right.
Washing and Pruning Damaged Roots

Once you’ve rinsed the roots under cool water, use sterilized pruning tools to cut away every soft, brown section. Make clean, angled cuts so water won’t pool at the wound. Remove dead roots first, then trim marginally healthy ones. Sterilize your blades with 70% isopropyl alcohol between cuts to stop pathogens from spreading—this simple step makes all the difference in root recovery.
| Step | Action | Why It Matters |
|---|---|---|
| Rinse roots gently | Remove soil with cool water | Exposes hidden decay without breaking live tissue |
| Trim damaged sections | Cut away soft, brown roots at an angle | Prevents water pooling and further infection |
| Sterilize tools | Wipe blades with 70% alcohol | Stops cross-contamination between cuts |
| Air-dry roots briefly | Pat with clean towel, allow airflow | Reduces moisture that invites fungal control issues |
Treating Roots With Fungicide or Natural Solutions

After pruning, dip the exposed roots in a diluted hydrogen peroxide solution—3% concentration works well for root sanitation without harming live tissue. Alternatively, apply a labeled fungicide containing mefenoxam or chlorothalonil for treating root rot caused by stubborn fungal diseases and pests.
Natural remedies like beneficial Trichoderma or Bacillus products offer organic treatments that suppress pathogens, though results vary by species and severity.
Disposing of Infected Soil and Debris

Once you’ve trimmed damaged tissue, seal the infected soil and debris in leak-proof bags before disposal. Don’t reuse contaminated potting mix—it harbors fungus spores that spread plant disease. Follow local waste management rules for green waste removal.
Proper pathogen control means washing tools with a 1:9 bleach solution afterward. This sanitary disposal prevents root rot from jumping to healthy plants.
Repotting After Root Rot

Once you’ve treated the damaged roots, it’s time to give your plant a fresh start. The right pot and soil make all the difference in preventing another bout of root rot.
Here’s what you need to know about setting up your plant for a healthy recovery.
Selecting a Clean, Well-Draining Pot
After treating root rot, your choice of pot makes all the difference. You need drainage holes to let excess water escape—this isn’t optional. Terracotta and unglazed ceramic allow air movement through the walls, boosting soil aeration and root health.
Match the container size to your plant; oversized pots hold too much moisture. Check for cracks that harbor pathogens before you repot.
Choosing Fresh Potting Mix
Fresh potting mix is your plant’s clean slate after root rot. Look for a blend that’s light and well-draining, with coarse organic matter and aeration materials like perlite or vermiculite. Check the pH—most houseplants thrive between 5.5 and 6.5.
Never reuse old soil; it can harbor leftover pathogens that’ll sabotage your recovery efforts before they even begin.
Proper Replanting Techniques
Once your plant’s roots are clean and the fresh soil is ready, the way you settle it into its new home can make or break its recovery.
Follow these repotting methods:
- Position the plant at the same depth it grew before—burying it too deep invites trouble.
- Fill around roots gently with fresh potting mix, avoiding air pockets.
- Water lightly through drainage holes to settle soil without saturating it.
Preventing Root Rot in Houseplants

The best way to beat root rot is to stop it before it starts. Prevention comes down to a few key habits that keep your plants healthy and your soil in good shape.
Here’s what you need to focus on to protect your houseplants from root rot.
Correct Watering Practices
Your watering schedule matters more than you might think. Check the top inch of soil before watering—if it’s dry, it’s time. Water at the base to keep leaves dry, and always use pots with drainage holes.
Let containers dry slightly between waterings to create a healthy cycle. This simple routine prevents overwatering and protects root hydration without waterlogging your soil.
Selecting The Right Potting Mix
Beyond when you water, what you use makes all the difference. A well-draining potting mix with perlite or pumice allows air to reach roots and prevents waterlogging. Look for fresh, sterile soil—old or reused mixes can harbor fungal spores.
Organic matter like coco coir balances moisture retention with aeration, giving your plants freedom from root rot while keeping them hydrated.
Ensuring Good Drainage
Even the best potting mix won’t save your plants if water has nowhere to go. Choose containers with drainage holes at the bottom—this simple step prevents overwatering and keeps the root zone healthy.
Raise pots on feet or saucers with gaps to improve soil aeration and prevent water from pooling. Free-draining soil combined with proper drainage systems gives roots the breathing room they need to thrive.
Sterilizing Pots and Tools
Sanitizing pots and tools stops root rot from spreading between plants. Soak non-porous items in 70 percent isopropyl alcohol or a 1:9 bleach-to-water solution for at least 10 minutes, then air dry.
For pot sterilization, use a 10 percent bleach solution and rinse thoroughly. Wooden grips need extra attention—rinse, disinfect, and dry completely to prevent microbial residue from hitchhiking onto your next houseplant.
Managing Plant Recovery After Root Rot

Once you’ve treated root rot and repotted your plant, the real work begins. Recovery doesn’t happen overnight, and your plant needs careful attention to rebuild its root system and regain strength.
Here’s what you need to focus on to give your plant the best chance at bouncing back.
Monitoring Soil Moisture and Plant Health
After treating root rot, you need to keep a close eye on recovery. Digital monitoring tools like soil sensors track moisture levels in real time, helping you avoid water logging and overwatering.
Check your plant’s hydration daily—wilting or yellowing signals trouble with soil drainage or plant health. Consistent observation catches problems early, giving roots the best chance to rebuild.
For ideal plant care, using a soil moisture meter can provide valuable insights into the soil’s condition.
Adjusting Watering and Light Conditions
Once your plant’s repotted, dialing in Water Balance and Light Therapy becomes essential for Root Recovery. Proper Watering Schedules prevent repeat Overwatering, while bright conditions speed healing.
Here are the key steps to follow:
- Water houseplants once every 7 to 10 days post-treatment
- Let the top 1 to 2 inches of soil dry completely before rewatering
- Check Soil Moisture with your finger up to 2 inches deep
- Provide bright indirect light to boost energy and improve Soil Drainage
- Empty saucers within 30 to 60 minutes after watering
These Plant Watering Tips and effective Water Management strategies protect against future root rot.
Regular Root and Foliage Inspections
Weekly Root Health Checks keep you one step ahead of repeat infections. Gently slide your plant from its pot every 7 days to examine roots for dark spots or soft texture.
Pair this with Foliage Monitoring—yellowing leaves or wilting signal trouble below.
Use Plant Inspection Tools like moisture meters for Soil Moisture Management, and record your findings to track plant health and disease trends over time.
Top 4 Products for Root Rot Prevention
The right tools can make preventing root rot much easier than fighting it after the fact. A few well-chosen products help you keep soil conditions healthy, control pests that spread disease, and catch problems before they spiral.
Here are four practical items that belong in every plant keeper’s toolkit.
1. Food Grade Hydrogen Peroxide Cleaner
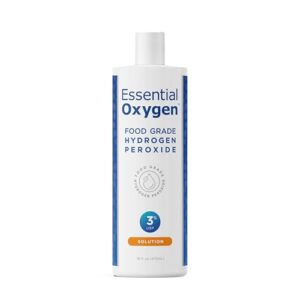
Food-grade hydrogen peroxide works like a gentle reset button for your plant’s root system, killing harmful pathogens without leaving toxic residues behind. Essential Oxygen’s 3% formula provides effective fungal control for root rot prevention and treatment.
You can use this plant sanitizer to clean roots during repotting or add diluted hydrogen peroxide to your watering routine. The hydrogen benefits go beyond root cleaning—it breaks down into oxygen and water, actually boosting plant health.
Unlike brown bottle peroxide, this version contains no harmful stabilizers that could damage delicate roots.
| Best For | Plant lovers dealing with root rot or fungal issues who want a food-grade, non-toxic solution that’s safe for organic gardening and won’t harm beneficial soil organisms. |
|---|---|
| Brand | Essential Oxygen |
| Item Form | Liquid |
| Primary Use | Multi-purpose cleaner |
| Indoor/Outdoor | Both |
| Eco-Friendly | Biodegradable |
| Plant Safe | Yes |
| Additional Features |
|
- Breaks down into just water and oxygen, leaving no harmful residues in your soil or on your plants
- Works as both a preventative treatment during repotting and an active solution for existing root rot problems
- Free from the toxic stabilizers found in regular drugstore hydrogen peroxide, making it safer for delicate root systems
- Needs to be diluted properly for different uses, which adds an extra step compared to ready-to-use products
- Can leak during shipping if the bottle isn’t sealed correctly
- Requires careful storage away from kids and pets since it’s more concentrated than typical household cleaners
2. Mosquito And Gnat Killer Bits
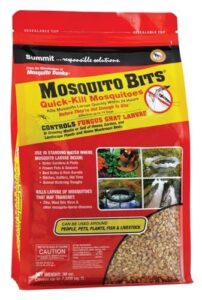
Summit’s Mosquito Bits target fungus gnats before they worsen root rot problems in your potted plants. These granules contain BTI, a bacterium that kills gnat larvae feeding near roots—the same larvae that damage delicate root tissue and spread fungal infections.
You’ll sprinkle the bits over soil or make a “tea” by soaking them in water, then drench your potting mix. BTI efficacy requires weekly applications for about three weeks to break the life cycle.
Combined with proper watering, this larval stage management helps protect vulnerable roots from both physical damage and plant disease.
| Best For | Indoor gardeners dealing with fungus gnat infestations in potted plants, especially those struggling with root rot issues caused by larvae feeding on damaged roots. |
|---|---|
| Brand | Summit |
| Item Form | Granules |
| Primary Use | Pest control |
| Indoor/Outdoor | Both |
| Eco-Friendly | EPA registered |
| Plant Safe | Yes |
| Additional Features |
|
- Targets gnat larvae where they cause the most harm—in the soil feeding on roots—using BTI bacteria that’s safe for plants, pets, and beneficial insects
- Can be applied as granules or a soaked “tea” drench, giving you flexibility to treat individual pots or larger collections efficiently
- EPA registered and works as part of a complete strategy to break the gnat life cycle when combined with better watering habits
- Requires weekly applications for three weeks minimum, so it’s not a one-and-done solution if you want lasting control
- Only kills early-stage larvae, meaning you need to start treatment before populations explode or it won’t be as effective
- Won’t fix the root cause of gnats or root rot—you still need to address overwatering and drainage problems in your soil
3. Sticky Gnat Traps For Plants

Yellow sticky traps catch adult fungus gnats before they lay eggs in moist soil around your houseplants. These simple cards rely on color attraction and adhesive to intercept flying gnats, breaking the reproduction cycle that damages roots.
Sticky trap placement matters—insert them near the soil surface where gnats hover, using at least one per infested pot for effective fungus gnat control. They won’t eliminate larvae already feeding on roots, so pair traps with proper watering and larvicides.
Monitor trap maintenance by replacing cards once they’re covered with captured insects for ongoing indoor gardening protection.
| Best For | Indoor plant owners dealing with fungus gnat infestations who want a safe, non-toxic solution that traps adult gnats without chemicals around kids or pets. |
|---|---|
| Brand | Dwcom Trap |
| Item Form | Paper |
| Primary Use | Insect trapping |
| Indoor/Outdoor | Both |
| Eco-Friendly | Non-toxic |
| Plant Safe | Yes |
| Additional Features |
|
- Yellow color and sticky adhesive effectively attract and trap adult fungus gnats, fruit flies, and other flying pests hovering near houseplants
- Non-toxic and odorless design makes them safe to use continuously in living spaces without releasing pesticides or harsh chemicals
- Easy setup with stakes that insert directly into soil at the right height to intercept gnats emerging from moist potting mix
- Only catches adult gnats flying above soil, not larvae feeding on roots, so you’ll still need to address moisture issues and consider larvicides for complete control
- Traps get messy and need replacement once they’re covered with bugs, requiring ongoing monitoring and regular swaps
- May accidentally stick to fingers, hair, or curious pets if not handled carefully during placement or removal
4. Stainless Steel Garden Thermometer Tool
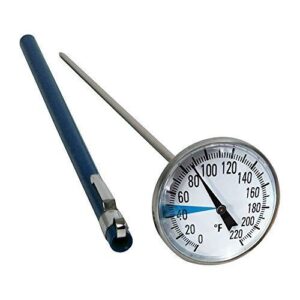
Beyond capturing gnats, a stainless steel garden thermometer lets you monitor soil temperature in the root zone—cold, saturated soil invites the same pathogens that cause root rot. A seven-inch probe reaches deep enough to measure where roots live, helping you time planting and watering so houseplants don’t sit in chilly, wet conditions.
Thermometer calibration ensures accurate readings, and rust-resistant construction withstands repeated use in moist potting mix. Tracking soil warmth prevents the stress that weakens plant health and opens the door to disease.
| Best For | Gardeners who want to prevent root rot by tracking soil temperature before planting and adjusting watering schedules based on root-zone conditions. |
|---|---|
| Brand | SmartChoice |
| Item Form | Analog Device |
| Primary Use | Temperature monitoring |
| Indoor/Outdoor | Both |
| Eco-Friendly | No power required |
| Plant Safe | Yes |
| Additional Features |
|
- Seven-inch stainless steel probe reaches deep enough to measure temperature where roots actually grow, not just at the surface.
- Rust-resistant construction holds up to repeated use in moist soil and cleans easily between measurements.
- Helps you avoid planting into cold, waterlogged soil that stresses plants and invites rot pathogens.
- Requires manual calibration to maintain accurate readings over time.
- Analog dial may be harder to read quickly compared to digital displays, especially in low light.
- No protective case or pocket clip included, so you’ll need to store it carefully to avoid bending the probe.
Choosing Resistant Plants and Soil Solutions

Once you’ve mastered the basics of watering and drainage, you can take prevention a step further by making smarter choices from the start. Some plants naturally resist root rot better than others, and the right soil amendments can stop problems before they begin.
Here are three long-term strategies that build a healthier foundation for your plants.
Selecting Disease-Resistant Varieties
Genetic resistance is your best shield against root rot. When you choose disease-tolerant cultivars or graft onto resistant rootstocks, you’re stacking the odds in your favor. Breeding programs now offer plants with proven resilience, making houseplant care less stressful and more reliable for plant health and disease management.
- Rootstock selection
- Cultivar choices
- Plant resistance codes
- Disease tolerance traits
- Extension variety guides
Using Beneficial Microbes
Beneficial microbes offer a living line of defense. Trichoderma and Bacillus strains colonize your plant’s roots, blocking pathogens through competition and antibiotic production. Mycorrhizae boost nutrient uptake while priming immune responses. Field trials show these biocontrol methods cut root rot severity by over 50 percent and improve growth. Apply early in rich, organic media for best root colonization and lasting soil health.
Beneficial microbes like Trichoderma and Bacillus colonize roots, blocking pathogens and cutting root rot severity by over 50 percent in field trials
| Microbe Type | Primary Benefit |
|---|---|
| Trichoderma spp. | Direct pathogen parasitism and root barrier formation |
| Bacillus subtilis | Antibiotic production in rhizosphere suppressing fungi |
| Pseudomonas fluorescens | Nutrient competition and growth hormone secretion |
| Arbuscular mycorrhizae | Enhanced phosphorus uptake and systemic resistance priming |
| Streptomyces spp. | Broad-spectrum antagonism against soilborne pathogens |
Improving Soil Structure and Drainage
Even the best microbial allies can’t thrive if your soil turns into a waterlogged swamp. Blend perlite or coarse sand into your potting mix for soil aeration and faster drainage. Organic matter like aged compost improves water retention without saturation.
In garden beds, install drainage systems or raise planting areas. These soil amendments create freedraining soil that keeps roots breathing. Smart soil management techniques prevent root rot before it starts.
Frequently Asked Questions (FAQs)
Can root rot spread to nearby healthy plants?
Bad news travels fast, and root rot is no exception. Soil pathogens like Pythium spread through cross contamination via contaminated tools, shared water, and gnat vectors, creating proximity risk for neighboring plants through fungal transmission.
Which houseplants are most vulnerable to root rot?
Tropical aroids like Monstera and Philodendron face high plant susceptibility to root rot and aroid diseases in standard potting mixes.
Peace lilies, ferns, and succulents also struggle with root decay from overwatering in indoor gardening setups.
Does root rot ever heal without intervention?
Root rot can’t heal on its own. Necrotic tissue is irreversible, requiring active fungal disease treatment and plant health management through root pruning, soil remediation, and proper replanting to enable plant recovery.
Can salvaged plants fully recover their original size?
Recovery depends on how much healthy root mass remains and the species’ natural vigor. Fast-growing houseplants with strong root regeneration can approach their former size, but many stabilize smaller after severe root rot.
Should fertilizer be used during root rot recovery?
No—hold off on fertilizer until your houseplants show active root regeneration. Damaged roots can’t absorb plant nutrition properly, risking fertilizer burn and disrupting nutrient balance. Wait for new growth, then resume feeding cautiously.
How long does root rot treatment usually take?
Treatment timelines vary widely. Root regeneration may begin within weeks after pruning and repotting, but full recovery can stretch several months depending on disease severity, fungicide efficacy, and your plant’s natural growth rate.
Is root rot reversible in all plant types?
Unfortunately, no—disease reversal depends on how much of the root system survived. Herbaceous houseplants with partial root damage often bounce back through root regeneration, but woody plants rarely recover once structural roots decay beyond repair.
Can outdoor plants get root rot from rain?
Yes, outdoor plants can develop root rot from rain when prolonged storms saturate soil for 7 to 14 days, especially in areas with poor drainage systems or heavy clay that keeps waterlogged roots oxygen-deprived.
Should I use tap or distilled water afterward?
Tap water works fine for most houseplants if left overnight to release chlorine.
Distilled water prevents mineral buildup in soil, but filtered tap water balances plant care with water conservation while supporting healthy watering and drainage.
Conclusion
Think of your plants’ roots as their foundation—once you understand what weakens them, you hold the blueprint for keeping them strong. Dealing with root rot in plants isn’t about reacting when things fall apart; it’s about building habits that stop trouble before it starts.
Watch the soil, trust what the roots tell you, and adjust before small problems become big losses. Your plants depend on what happens beneath the surface.