This site is supported by our readers. We may earn a commission, at no cost to you, if you purchase through links.
Your backyard apple tree drops half its fruit before you ever get to taste it, not because of pests or disease, but because you waited too long to pick. Most home gardeners lose 30-40% of their harvest to poor timing and rough handling—fruit that could’ve graced their table instead ends up composting on the ground.
The difference between a disappointing harvest and baskets full of perfect fruit often comes down to knowing when to pick and how to handle what you’ve grown. Small adjustments in your approach—like checking for the right color shifts, using a gentle twist instead of a yank, and cooling fruit within an hour of picking—can transform your yields.
Once you understand the signals your trees send and match your technique to each fruit type, you’ll wonder why you ever settled for half a harvest.
Table Of Contents
Key Takeaways
- Most home gardeners lose 30-40% of their harvest to poor timing and rough handling, but checking for color shifts, using gentle twisting techniques, and cooling fruit within an hour of picking can transform your yields.
- Harvesting in stages over multiple passes—rather than picking everything at once—extends freshness by 27%, reduces spoilage by 22%, and boosts secondary fruit production by 28% in crops like tomatoes and peppers.
- The right technique matters as much as timing: use a two-point grip with a gentle 39-degree twist while lifting upward, keep drop heights under 10 cm to prevent bruising, and handle fruit between 10°C and 20°C for best results.
- Tree health directly impacts harvest size—moderate pruning (no more than 25% of wood per season) combined with balanced fertilization can boost yields by 40%, while companion planting with species like borage near strawberries increases fruit production by 35%.
Preparing for Fruit Picking Success
Getting the most from your fruit harvest starts before you even step into the garden. You’ll need the right gear, a solid plan, and a system for tracking ripeness.
Let’s walk through what you need to set yourself up for a smooth, productive picking season.
Selecting The Right Tools and Equipment
You’ll need the right gear before you start picking fruit. Handheld tools with adjustable picker head types and telescopic pole materials like lightweight aluminum help you reach high branches safely. Basket size matters—larger baskets mean fewer trips. Gloves protect your hands, while pruning shears handle stubborn stems. Dual-purpose tools save money and space. Ladders work, but pole pickers reduce falls.
Agricultural technology investments are also a key market driver. Automation benefits larger operations, though manual harvesting tools and equipment suit most home gardens perfectly.
Dressing for Comfort and Safety
Having your tools lined up is one thing, but what you wear makes all the difference in staying safe and comfortable. Protective gear guards against real risks:
- UPF clothing blocks up to 98% of UV radiation
- Gardening gloves prevent cuts and allergen exposure
- Hat and sunscreen reduce sunburn during long sessions
- Good shoes with tread minimize slips and falls
- Ergonomic bags with proper straps prevent shoulder strain
Keep ladder safety in mind—even low falls can cause injuries. Gardening injuries can lead to emergency room visits, so protection is key.
Planning Your Picking Routine
Once you’re dressed and ready, map out when you’ll actually pick. Daily monitoring helps you catch fruit at its best, but checking every two days works for most home gardens.
Plan harvest intervals around each fruit’s window—strawberries in late spring, apples in fall. Staggered picking routines prevent waste and can boost yields by up to 78% compared to one-time harvests, making routine flexibility your secret weapon.
Monitoring Fruit Ripeness Regularly
Ripening charts offer starting points—McIntosh apples around mid-September, Redhaven peaches in early August—but weather adjustments matter more than calendars.
Check visual color shifts and texture firmness every seven to ten days as harvest approaches. Signs of peak ripeness include ground color fading from green to yellow and flesh softening under gentle pressure.
Varieties like Chenango Strawberry ripen fast, so daily checks prevent overripe losses.
Identifying Peak Ripeness in Home-Grown Fruit
Knowing when your fruit is ready to pick makes all the difference between a good harvest and a great one. Each type of fruit sends out its own signals through color shifts, texture changes, and subtle aromas that tell you it’s time.
Let’s look at the key signs that help you catch your fruit at its absolute best.
Color and Texture Indicators by Fruit Type
Every fruit sends its own signal when ready, and learning to read those signs turns you into a better gardener. Fruit-specific harvesting depends on recognizing color changes and texture checks unique to each type.
- Apples and pears: Background color shifts from green to yellow; firmness decreases noticeably when you press gently near the stem
- Berries: Uniform color across the surface and slight softness indicate berry firmness has reached ideal ripeness
- Tomatoes: Progress through distinct tomato stages—from green to red—while developing slight give under gentle pressure
- Grapes: Watch for cultivar-appropriate color and a visible waxy grape bloom coating the skin
Taste and Aroma as Ripeness Clues
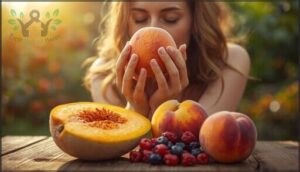
Your nose and tongue work together as ripeness indicators that color can’t match. A strong, sweet aroma signals that volatile compounds have peaked—peaches and cantaloupes practically announce they’re ready.
Tasting techniques confirm it: ripe fruit balances sweetness indicators with natural acids, creating flavor balance that tells you more than any visual cue. These ripeness signals and taste tests beat guesswork every time.
Timing Harvests for Maximum Flavor
Harvest timing is critical for peak flavor, as it significantly impacts the taste and quality of fruits and vegetables. Sugar concentration increases throughout the afternoon as fruits ripen on the tree, while maturity indices such as starch conversion, firmness, and soluble solids fluctuate daily due to seasonal factors.
- Apples harvested at starch index 6–7 deliver 12–14% sweetness for immediate eating
- Sweet corn holds peak sugar for just one to two hot days
- Prompt postharvest preservation locks in the flavor your ripeness indicators and taste tests confirmed
Recognizing Signs of Overripe Fruit
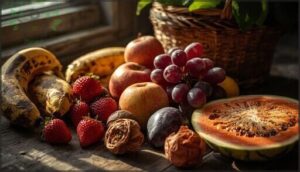
Knowing when fruit crosses from ripe to overripe saves both harvest and flavor. Textural degradation appears as mushiness in apples and wrinkled skin in plums, while visual cues include brown spots and dull coloring. Olfactory changes—sour or fermented aromas—signal spoilage, and pigmentation shifts reveal declining fruit quality.
Act quickly when softness checks reveal declining ripeness indicators to minimize spoilage impact.
| Fruit Type | Overripe Signs |
|---|---|
| Apples | Surface browning, loss of firmness |
| Strawberries | Dark pressure spots, softness (74% incidence) |
| Bananas | Brown-spotted skin, mushy pulp |
| Grapes | Dull color, dry brown stems |
| Watermelon | Hollow centers, mealy texture (54% of reports) |
Effective Fruit Picking Techniques
Once you’ve spotted ripe fruit, how you pick it matters as much as when you pick it. The right technique protects both the fruit you’re harvesting and the tree that’ll produce next season’s crop.
Let’s look at some practical methods that keep your harvest in great shape from branch to basket.
Gentle Twisting and Lifting Methods
When you’re ready to harvest, use a two-point grip with your thumb and forefinger—this grip optimization reduces damage and mimics robotic mimicry used in automated systems. Gently twist the fruit about 39 degrees while lifting upward, paying attention to peduncle considerations like stem flexibility.
This gentle picking technique works best on strawberries and blueberries, achieving up to 92% success in handpicking and handling fruit correctly, with training benefits greatly improving your harvesting techniques.
Minimizing Bruising and Stem Damage
Bruising starts with drop height impact—apples dropped from just 30 cm show 46% more damage than those from 10 cm. Ripeness and firmness matter too; softer fruit bruises 35% easier.
You’ll minimize this by mastering gentle picking techniques and keeping drops under 10 cm. Temperature control helps—handle fruit between 10°C and 20°C.
Proper handpicking and handling fruit correctly protects against microbial spoilage and keeps your harvest fresh.
Using Baskets and Pickers Properly
The right equipment makes all the difference when harvesting fruit. Basket-style pickers increase your harvest speed by 35% and cut injury rates by 27% compared to ladder work. Choose telescopic picker benefits like adjustable reach, ergonomic picker design with cushioned grips, and rust-resistant basket material for durability.
Clean your picking tools after each use—87% of home gardeners do this to prevent disease. Proper equipment handling protects both you and your harvest.
Harvesting in Stages for Extended Freshness
Once you’ve got your tools in hand, you’re ready to tackle one of the smartest strategies for home fruit growing. Harvesting in stages for peak freshness means picking over several days or weeks as each piece reaches perfect ripeness. This approach delivers staggered picking benefits like 27% longer freshness, multi-harvest spoilage reduction by up to 22%, and a continuous yield increase of 18% or more.
Here’s how to get the most from your harvest window:
- Check varietal ripening windows – Plant early, mid, and late-season varieties to extend picking from two weeks to 3–4 months.
- Monitor fruit ripeness daily – Walk your garden every 48 hours to spot color changes, texture shifts, and aroma development.
- Pick in multiple passes – Harvest strawberries every 2–3 days, tomatoes at green, pink, and red stages, and apples over three maturity levels.
- Remove ripe fruit promptly – Early removal cuts pest attraction by 36% and fungal infections by 29%.
- Record your observations – Note which varieties ripen when, helping you plan better for next season.
Incremental harvest quality beats batch picking every time. Stone fruits like plums stay firm and flavorful up to six days longer when you harvest over multiple stages. Citrus picked in three-week intervals holds 13% more vitamin C than single harvests. You’ll notice the difference in taste, texture, and shelf life—berries harvested at 48-hour intervals show just 9% decay compared to 22% with one-time picking.
The beauty of this method is how it keeps giving. Tomatoes and peppers set 28% more secondary fruit when you remove ripe ones regularly. Your plants stay healthier, pests lose interest in overripe stragglers, and you enjoy fresh harvests throughout the season instead of drowning in fruit all at once.
Harvesting ripe fruit regularly keeps plants healthier, boosts secondary yields by 28%, and extends your season instead of overwhelming you all at once
Handling and Storing Picked Fruit
Once you’ve picked your fruit, the real work begins. How you handle and store it determines whether you’ll enjoy fresh flavor for days or watch it spoil by morning.
Let’s walk through the essential steps to keep your harvest at its best, from the moment it leaves the tree to long-term preservation.
Cooling and Transporting Fruit Safely
Don’t let your harvest go to waste after all that hard work. Cool your fruit quickly—within an hour—to extend shelf life and prevent spoilage. A cooler with ice packs works well for transport temperatures.
Use ventilated packaging solutions to improve air circulation, and handle fruit gently to avoid bruising.
Proper postharvest care protects quality, prevents decay, and reduces the economic impact of waste through smart refrigeration and fruit handling practices.
Short-Term Storage: Room Temperature and Refrigeration
Once your fruit is safely home, choose storage wisely. Most fruit benefits from refrigeration at 0°C–5°C, which can double or triple shelf life compared to room temperature. Bananas, sweet potatoes, and onions prefer 16°C–21°C instead.
Keep ethylene producers like bananas separate from sensitive fruits, and maintain high humidity in your fridge drawer to prevent shriveling and spoilage.
Long-Term Storage: Freezing and Preservation
When you’ve picked more than you can eat in a week, freezing techniques preserve your harvest for months. Store fruit at -18°C or below to retain 85–95% of nutrients and flavor for up to 12 months—far better than room-temperature alternatives.
Home preservation through freezing keeps your garden’s bounty available year-round.
- Peel and slice fruit before freezing to speed up prep later
- Flash-freeze on trays before bagging to prevent clumping
- Use airtight containers or freezer bags to avoid freezer burn
- Label with harvest dates to track quality over time
Preventing Spoilage and Waste
In U.S. households, roughly 30–40% of purchased food goes uneaten, with fresh fruit among the top items discarded. Cooling techniques right after harvesting slow respiration and water loss dramatically.
Sort out damaged pieces before fruit storage—one bruised apple can spoil the bunch. Consider ethylene sensitivity: keep apples away from sensitive produce.
Proper packaging in airtight containers prevents moisture loss, and freeze-drying fruits transforms surplus into shelf-stable snacks, turning potential waste into preserved treasure.
Maximizing Yields and Tree Health
Getting a steady harvest from your fruit trees isn’t just about picking at the right time—it starts with choosing the right trees and caring for them throughout the year.
Healthy trees produce more fruit, and a few simple practices can make a real difference in how much you harvest. Let’s look at how to set your trees up for success from the ground up.
Choosing Fruit Trees for Your Climate and Space
Your climate zone determines which fruit trees will thrive in your garden. Check USDA hardiness zones and match varieties to your area—apples tolerate zones 3–8, while citrus needs zones 9–11.
Space constraints? Dwarf varieties fit small yards, requiring just 10 feet between trees instead of 30.
Don’t forget chill hours and pollination needs when selecting your fruit varieties for reliable harvests.
Tree Care for Improved Harvests
Regular fruit tree care directly impacts your harvests. Pruning techniques, especially light trimming in summer, maintain yields without stressing trees—10% pruning intensity can nearly double harvested fruit weight.
Fertilization strategies matter too: applying nitrogen, phosphorus, and potassium up to 4% of last season’s fruit weight boosts citrus yields by 150%.
Don’t overlook irrigation needs, pest control, and soil health—these foundational practices strengthen trees and increase fruit yield year after year.
Companion Planting and Pollinator Attraction
Planting companions around your fruit trees creates a pollinator buffet that drives real yield benefits. Borage and nasturtiums near strawberries boost fruit production by 35%, while lavender draws bees that improve pollination rates.
These companion species also handle pest management naturally—garlic and chives repel borers, and nitrogen-fixing clovers provide soil enrichment.
Space companions 18–24 inches from trunks for best results.
Pruning and Fertilizing for Better Yields
Pruning techniques shape your harvest for years to come. Remove no more than 25% of wood per dormant season—exceeding this triggers unproductive water sprouts. Time matters: prune apples in late February, cherries mid-March, peaches as buds show color.
Pair cuts with bio-organic fertilizer at 45,000 kg per hectare for a 40% yield boost. Moderate pruning plus balanced nutrients gives you both quality and quantity in fruit tree care.
Frequently Asked Questions (FAQs)
What pests commonly damage fruit before harvest?
Insect pest damage from codling moths, stink bugs, and fruit flies can ruin up to 80% of your harvest.
Vertebrate pest damage from birds and rodents destroys another 25%, while fungal pest infections spread through wounds.
Can you pick fruit in the rain?
You can pick fruit in the rain, but it’s risky. Wet conditions increase bruising, disease spread, and spoilage.
Wait at least 24 hours after rainfall for safer harvesting and better fruit quality.
How do you reach fruit on tall branches?
You can use telescopic picking poles that extend from 6 to 20 feet, allowing you to harvest fruit from tall branches without climbing ladders—a safer method that reduces injury risks in home orchards.
Should you wash fruit immediately after picking?
You don’t need to wash fruit immediately after picking if it looks clean. Washing benefits include contamination risks reduction, but immediate washing can affect storage impact by increasing moisture.
Wait until you’re ready to eat for better fruit preservation.
What to do with damaged or imperfect fruit?
Damaged fruit doesn’t have to mean waste. Cut away minor blemishes for culinary uses like jams or baking, compost spoiled pieces, or redirect safe scraps to animal feed—all reducing waste while protecting food safety.
Conclusion
The proof is in the pudding—or in this case, the basket. When you apply these home garden fruit picking tips, your trees will reward you with crisp apples, juicy peaches, and plums that taste like summer itself.
Check ripeness often, handle each piece with care, and cool your harvest quickly. Those small habits add up to fewer bruises, less waste, and more fruit on your table instead of rotting on the ground.
- https://everglades.farm/blogs/news/4-best-practices-for-growers-of-fruit-trees
- https://extensionpubs.unl.edu/publication/g2089/na/html/view
- https://www.ruralsprout.com/increase-edible-yield/
- https://www.cognitivemarketresearch.com/fruit-harvesting-machines-market-report
- http://www.ers.usda.gov/data-products/food-availability-per-capita-data-system/food-loss


