This site is supported by our readers. We may earn a commission, at no cost to you, if you purchase through links.
You checked your seed trays this morning and there it is: a fuzzy white film creeping across the soil. Your stomach drops a little, because you know what comes next. Damping-off can wipe out a whole tray of seedlings in a day or two, and it doesn’t care how careful you thought you’d been.
Here’s the thing, though. Mold isn’t bad luck. It’s a signal that moisture, airflow, or sanitation slipped somewhere along the way.
Once you know how to prevent mold in seed starting trays, you stop babysitting your seedlings out of fear and start growing with real confidence, tray after tray.
Table Of Contents
- Key Takeaways
- Why Mold Grows in Seed Trays
- Choose Mold-Resistant Starting Media
- Water Seedlings Without Encouraging Mold
- Improve Airflow Around Seedlings
- Control Light, Heat, and Humidity
- Clean Trays Before Seed Starting
- Top 5 Seed Starting Helpers
- Frequently Asked Questions (FAQs)
- How to prevent mold during seed stratification?
- Is mold harmful to seedlings?
- Does cinnamon prevent mold on seeds?
- What kills mold on seedlings?
- Can moldy seedlings still be safely transplanted outdoors?
- Does cinnamon actually work as an antifungal treatment?
- How do I sterilize tools and trays between uses?
- Is it safe to scrape mold off soil surfaces?
- Should affected seedlings be isolated from healthy ones?
- Conclusion
Key Takeaways
- Excess moisture is the main cause of mold, so water from below, dump standing water within 30 minutes, and let the soil surface dry between waterings.
- Keep humidity below 60% (aiming for 50% during germination), run a small fan daily, and vent or remove humidity domes once seedlings sprout and grow true leaves.
- Use sterile, well-draining seed-starting mix instead of garden soil or pure compost, since organic-heavy media traps moisture and feeds mold.
- Thoroughly clean and disinfect reused trays, tools, and domes with bleach or hydrogen peroxide before each new planting, since scratched containers and leftover debris harbor hidden mold spores.
Why Mold Grows in Seed Trays
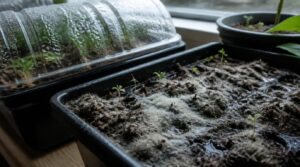
So mold doesn’t just show up out of nowhere, it’s usually your seed trays telling you something’s off. A few sneaky conditions team up to create the perfect mold party, and most of us don’t notice until it’s staring back at us. Let’s break down exactly what’s inviting that fuzzy mess in.
Excess Moisture
Nine times out of ten, mold problems trace back to one culprit: excess moisture. Overwatering starves roots of oxygen and invites damping off, a fungal disease that kills seedlings fast.
Pairing the right watering schedule with good airflow keeps roots healthy—these proper watering techniques for indoor herb gardens can help you strike that balance.
Watch for these warning signs:
- Soggy surface after 24-48 hours
- Slow or stalled germination
- Yellowing from nutrient leaching
- Foggy condensation cycles on lids
Managing indoor humidity levels is also key to prevent broader environmental hazards.
Good moisture control (think bottom watering) keeps fungal pathogen risks low.
Poor Airflow
Moisture is only half the story. Even damp trays stay mold-free if air keeps moving, but stagnant air pockets trap humidity right at the soil surface, giving fungal spores the stillness they need to settle in.
Think of your setup like a mini HVAC system: clogged filters, blocked vents, or bad ductwork design all choke airflow. Seed trays are no different, so keep vents obstruction-free and let air circulate.
High Humidity
Fans help, but if the air itself stays soggy, you’re just moving damp around. Once relative humidity climbs past 60%, condensation forms on domes and tray edges, creating perfect mold nurseries.
- Foggy dome lids you keep wiping off
- Water beads sliding down tray walls
- Weak, gasping seedlings that won’t dry out
- Musty air that makes you wrinkle your nose
- Botrytis rot creeping in overnight
Organic-heavy Media
Rich, compost-heavy media sounds nourishing, but it’s a mold buffet. That dense organic matter spikes microbial activity, feeds fungal spores, and holds onto excess moisture through capillary action long after your soilless medium should’ve dried out.
| Media Type | Mold Risk |
|---|---|
| Compost-heavy | High |
| Soilless mix | Low |
Compaction blocks airflow too, setting the stage for damping off.
Dirty Reused Containers
Grab last year’s trays and look close: those scratches aren’t harmless. Scuffed plastic breeds microbial biofilm risks, hiding pathogens standard rinsing can’t touch. Hidden residue crevices and worn seams shelter mold spores season after season.
That’s poor container surface integrity at work, plus material wear impact and pathogen cross-contamination risks.
So disinfect your containers with a bleach solution—clean containers aren’t optional, they’re your first defense.
Choose Mold-Resistant Starting Media
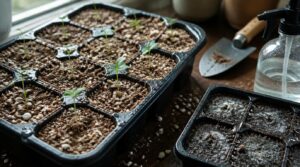
So if mold keeps showing up, your soil might be the real culprit here. But the fix is simpler than you’d think, it just starts with what you fill your trays with. Here are five easy swaps that’ll make mold a lot less likely to move in.
Use Sterile Seed Mix
Think of sterile seed mix as a clean slate for germination. It’s pasteurized, so fungal spores and weed seeds are eliminated before they start—no soil sterilization needed on your end.
The fine texture matters too:
- Better seed-to-media contact
- Easier root penetration
- Consistent moisture without compaction
- Inert medium prevents nutrient lockout
This growing medium sets seedlings up for clean, uniform germination conditions from day one.
Avoid Garden Soil
That bag of garden soil sitting in your shed? Leave it there. It’s packed with soil-borne pathogens, fungal spores, and dormant weed seeds just waiting for warm, moist conditions to wake up.
Garden soil also compacts easily, trapping moisture around fragile roots—a recipe for rot.
Switching to a lighter, well-draining mix designed for containers—like the tips in this guide to seed starting in small spaces—helps roots breathe instead of sitting in soggy soil.
Stick with sterile seed-starting mix instead; it sidesteps pathogen risks entirely and gives seedlings a genuinely clean start.
Skip Pure Compost
Pure compost feels like a natural choice, but it holds way too much moisture for tiny seedling roots. That excess moisture invites mold on seedlings fast.
Skip it in favor of a sterile seedstarting mix with real aeration amendment advantages. Better porosity means faster drying, uniform germination, and far less fungal spore prevention guesswork on your end.
Check Drainage Holes
Ever pick up a tray that "feels" fine but stays wet for days? Check the holes first.
Ideal hole diameter is ¼ to ½ inch, letting excess moisture escape without washing out media from seed starter pots. Follow smart hole placement patterns—centered, gridded, spaced apart.
Use proper drilling tray materials technique, then try clearing clogged holes or adding a mesh screen to prevent mold outbreaks.
Limit Soggy Peat
Peat holds water like a sponge, sometimes over 60% of its own weight, which sounds great until it stays wet for days.
That soggy state, called field capacity, starves roots of oxygen diffusion and invites anaerobic mold colonization plus nutrient leaching. So squeeze a handful. If water drips out, let it dry before replanting. Good moisture management beats overwatering every time.
Water Seedlings Without Encouraging Mold
So here’s the thing: how you water your seedlings matters just as much as what you plant them in. Too much water sitting around is basically an open invitation for mold. Let’s walk through a few simple habits that’ll keep things damp enough for growth, but dry enough to keep mold away.
Water From The Bottom
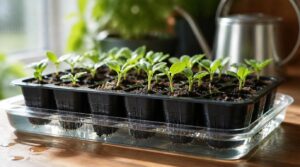
Skip the watering can overhead and pour water into the tray instead, letting your seed trays drink from below. Capillary action pulls moisture upward through the media, hydrating roots while keeping the surface drier, so mold spores have less to feed on.
Add water in the morning, wait 10-20 minutes, then dump any standing water. Simple habit, big payoff.
Let Surfaces Dry
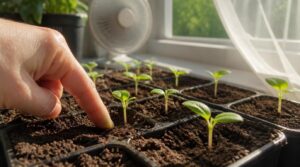
That damp top layer is where trouble starts. Surface evaporation rates speed up with warm, dry air and a little airflow, so let that soil face breathe between waterings.
Do a tactile moisture check — press a finger in. Dry to the touch means you’re winning against surface mold, keeping humidity control on your side without babying it.
Empty Standing Water
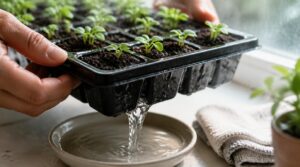
So checking soil surface is one thing, but that puddle sitting in the tray bottom? That’s the real culprit. Standing water breeds mold in 24-72 hours.
- Tip trays within 30 minutes post-watering
- Wipe saucers dry to prevent puddling
- Build a quick post-watering cleanup routine
Good tray drainage efficiency means residual water removal happens fast, keeping bottom watering safe instead of risky.
Use Moisture Sensors
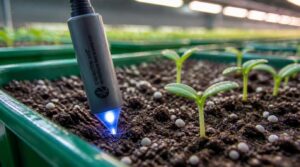
Guessing gets old fast, so let a capacitive moisture sensor take over—it resists corrosion better than resistance types. Insert the probe 2-4 inches deep, into the root zone.
| Media Type | Calibration Note |
|---|---|
| Peat-based | Higher baseline reading |
| Perlite mix | Rapid moisture swings |
| High-organic | Recalibrate often |
| Fertilized soil | Salts skew readings |
Watch real-time trends daily to catch overwatering before mold does.
Mist Carefully When Needed
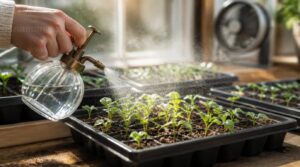
Occasionally, seedlings look thirsty on top even when the seedling soil below is fine, and that’s when a light mist helps more than another round of watering from the bottom.
Grab a fine mist bottle, aim for droplets under 0.5mm, and spritz for just a second or two, mornings only. Pair it with airflow after, and check for mildew—no point inviting mold back in.
Improve Airflow Around Seedlings
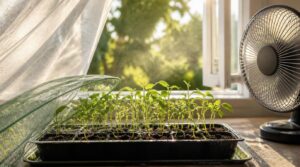
So mold loves still, damp air, and your seedlings are basically sitting in a tiny greenhouse all day. But moving air keeps things dry and makes stems grow stronger, not weaker. Here are five easy ways to get that air circulating.
Run a Small Fan
Stagnant air is basically a welcome mat for mold.
A small oscillating fan on low, run for an hour or two daily, keeps things moving. Place it about 12 inches from your trays, angled slightly downward.
Skip the natural wind mode for now — steady, gentle airflow works better than gusty bursts while seedlings are still tender.
Vent Humidity Domes
That dome trapping moisture around your seedlings? It’s doing its job a little too well. High humidity under a sealed dome invites condensation drips and mold fast.
Crack the vents early for gentle microclimate control. Adjustable vent tuning lets air exchange without drafts. If your dome has automated sensor domes, even better — they self-adjust based on internal humidity monitoring, easing germination airflow without guesswork.
Remove Domes After Germination
Once true leaves show up, it’s time to say goodbye to that dome for good. Improper ventilation past this point just invites high humidity right back in.
- Tiny leaves unfurling like little green flags
- Condensation beading on the lid
- Seedlings stretching toward the light
Full removal usually works within 7 to 14 days, kicking off post-germination acclimation and stem strengthening breezes.
Thin Crowded Seedlings
Ever notice how a crowded tray looks lush at first, then suddenly everyone’s pale and stretched? That’s root competition stealing nutrients and light.
Grab scissors, snip the weak ones at soil level, and keep your strongest seedling. Thinning cuts damping-off risk and legginess fast.
| Sign | Cause | Fix |
|---|---|---|
| Leggy stems | Crowding | Thin out |
| Pale leaves | Light competition | Select vigor |
| Weak stems | Poor spacing | Remove excess |
Space Trays Apart
Packed trays create tiny microclimates where moisture just sits, so give them room. A 2 to 4 inch gap boosts air circulation and evens out light across your seed trays.
Wider spacing means better canopy airflow, no more hidden hotspots, and easier daily checks. Add spacers on uneven benches, and you’ve got a flexible, modular setup that keeps mold guessing.
Control Light, Heat, and Humidity
So mold isn’t just about water, it’s about the whole environment you’re creating. Light, heat, and humidity all work together, and getting the balance wrong invites trouble fast. Here’s what to keep in check.
Provide Strong Grow Light
Grab a light strong enough to prevent leggy seedlings, thin, weak stems reaching for light instead of growing sturdy.
Look for full spectrum coverage with balanced blue and red wavelengths, plus a PPFD reading of 100-300 µmol m⁻² s⁻¹.
Uniform coverage across the whole tray matters too, so no seedling gets stuck in low light while its neighbor thrives.
Use Outlet Timers
Now that your lights are strong enough, keep them consistent with an outlet timer instead of remembering to flip switches yourself.
- Set 12–16 hour automated lighting schedules
- Choose digital timers for precise programming
- Cut lighting energy consumption by up to 40%
- Reduce fire risk with safety shutoffs
- Add smart home features for remote control
Consistency prevents leggy stems and keeps mold-friendly darkness from lingering too long.
Keep Humidity Below 60%
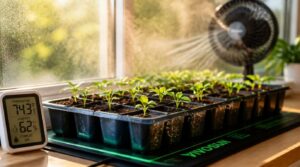
Timers keep your light schedule steady, but humidity is the sneaky one that creeps up overnight. Aim for 50% RH during germination, never above 60%, using a hygrometer for accurate readings. Watch for condensation on domes, that’s a spike warning. Balance temperature with humidity so they don’t shift against each other, and you’ll dodge mold before it starts.
Stop Heat Mats Early
So once humidity’s dialed in, look down at your heat mats. Stop bottom heat once true leaves appear, usually 7-14 days after germination, this prevents damping off disease and legginess.
- Use a thermostat control for precise shutoff
- Try gradual cooling instead of abrupt removal
- Watch root zone temperature, not just the clock
Mold on seedlings loves warm, moist soil, so cutting mat heat protects those roots.
Prevent Leggy Seedlings
Ever wonder why your seedlings look more like spaghetti than sturdy plants? That’s leggy growth, and it’s tied to mold risk too—weak, stretched stems fall over into damp soil, inviting seedling blight.
Leggy seedlings aren’t just weak, their stretched stems topple into damp soil and invite mold
Fix your ideal light distance (2-3 inches away), stick to daily tray rotation, and nail photoperiod timing.
| Light Setup | Result |
|---|---|
| Low light | Leggy, mold-prone |
| Proper distance | Strong stems |
Clean Trays Before Seed Starting
So here’s a truth that catches a lot of new gardeners off guard: mold can live on your trays long after last season’s plants are gone. If you’re reusing containers, they need a real cleaning before a single seed goes in. Let’s walk through exactly how to get them spotless and germination-ready.
Wash Reused Trays
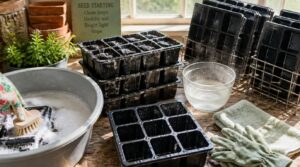
Old seed starter pots and trays can hide leftover organic debris from last season, and that grime is basically mold food. So before anything else, scrape out solid waste and rinse dirty trays with warm water.
Temperature controlled washing (45-60°C) breaks down residue without warping thin plastic. Rinse twice to prevent detergent buildup, then air dry and store trays efficiently to prevent mold growth and pests.
Disinfect With Bleach Solution
Grab regular unscented bleach and mix 5 tablespoons per gallon of cold water for a proper 0.1% solution. Keep surfaces wet a full minute for real contact time efficacy.
- Test an inconspicuous spot first
- Never mix with ammonia or acids
- Mix fresh daily, store safely, away from kids
This step alone knocks out lingering fungal infection risk and keeps your seed trays truly clean.
Clean Humidity Domes
Domes trap moisture just as well as they trap heat, so mold loves hiding in those little ridges and vents.
Wash with dish soap, then spritz with 3% hydrogen peroxide to kill lingering spores. This clears biofilm buildup before it turns into that white fuzzy growth.
Dry lids fully—mold-resistant plastics only work if you let them actually dry.
Sanitize Garden Tools
Your trowel and scissors can carry mold spores from one tray to the next without you ever noticing.
Effective disinfectant choices: 70% isopropyl alcohol, 1:9 bleach solution, or hydrogen peroxide. Dipping small tools works best; spraying suits bigger ones. Rinse metal after bleach, dry everything fully to prevent corrosion, and check wooden grips—swelling means trouble for tool longevity and future plant health.
Use Fresh Containers
Even sturdy trays wear out. Cracked plastic and scratched surfaces trap fungal pathogens no bleach solution can fully reach.
Fresh containers matter, food-grade plastic with smooth surface design avoids crevices where mold and mildew hide. Look for antimicrobial liner benefits and vents for airflow. A simple container rotation system lets some dry completely between uses. Stack seed starter pots for vertical storage efficiency, and skip cracked ones entirely, avoiding material leaching risks altogether.
Top 5 Seed Starting Helpers
So by now you know what causes mold and how to stop it. But having the right gear on hand makes all of this so much easier. Here are five tools worth adding to your seed starting setup.
1. 9GreenBox seed starter germination kit
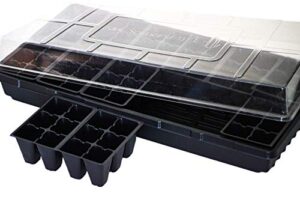
This 72-cell tray comes with a humidity control dome, giving you a compact setup that fits right on a windowsill. The dome traps moisture to speed germination, while vents let you adjust airflow as seedlings grow. Individual cells mean easy transplanting without disturbing roots.
Just watch the plastic in extreme heat, and don’t skip cleaning between uses. Sanitizing the tray and dome after each cycle is your best defense against mold sneaking back in.
| Best For | Home gardeners and hydroponic enthusiasts looking for a compact, easy-to-use seed starting setup for young seedlings. |
|---|---|
| Material | Plastic |
| Primary Use | Seed Starting |
| Indoor Use | Yes |
| Portability | Lightweight |
| Maintenance Level | Manual Monitoring |
| Target User | Hobby Gardener |
| Additional Features |
|
- Humidity dome helps speed up germination by trapping moisture around seeds
- 72 individual cells make transplanting seedlings easy without disturbing their roots
- Compact tray design fits well in small spaces like windowsills
- Plastic material can warp or get damaged if exposed to extreme heat
- Fixed tray size isn’t ideal for larger plant varieties as they grow
- Needs regular manual monitoring of humidity and warmth, plus cleaning between uses to prevent mold
2. Indoor Outdoor Moisture Sensor
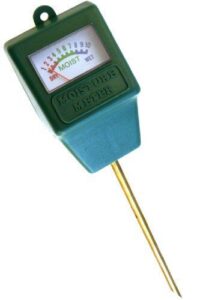
Guessing when to water is a gamble, and overwatering is the number one mold trigger. An indoor outdoor moisture sensor takes the guesswork out by using capacitive sensing to read moisture without soil contact, so results stay accurate longer.
Many sync to an app for real-time graphs and alerts when moisture crosses your set threshold. That means you’ll know before soggy soil becomes a mold problem, not after you spot fuzzy white patches staring back at you.
| Best For | Hobby gardeners and indoor plant enthusiasts who want a simple, no-fuss way to check soil moisture before watering lawns, garden beds, or houseplants. |
|---|---|
| Material | Metal/Glass/Plastic |
| Primary Use | Soil Moisture Check |
| Indoor Use | Yes |
| Portability | Handheld |
| Maintenance Level | Periodic Calibration |
| Target User | Hobby Gardener |
| Additional Features |
|
- No batteries required, so it’s ready to use anytime with simple mechanical operation
- Color-coded needle gauge makes moisture levels easy to read at a glance
- Lightweight and versatile enough for both indoor and outdoor plants
- Manual needle gauge isn’t as precise as electronic moisture probes
- Calibration can drift over time, so periodic accuracy checks are needed
- Not well suited for deep-rooted trees or very large planting areas
3. Root Radiance Seedling Heat Mat Pad
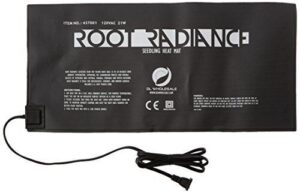
Once your moisture sensor tells you it’s time to plant, warmth matters just as much as water. The Root Radiance mat warms the root zone 10–20°F above room temperature, speeding up germination without harsh temperature spikes.
Its neoprene build resists water, so splashes won’t damage it, and even heat distribution keeps every seedling growing at the same pace. Just remember: no built-in thermostat means you’ll want to monitor temps yourself, especially near the cooler edges.
| Best For | Indoor gardeners, hobby nurseries, and small greenhouse owners who want to speed up seed germination and plant propagation with steady, even root-zone warmth. |
|---|---|
| Material | Neoprene |
| Primary Use | Seedling Warmth |
| Indoor Use | Yes |
| Portability | Lightweight |
| Maintenance Level | No Thermostat Needed |
| Target User | Home Gardener |
| Additional Features |
|
- Evenly distributed heat keeps seedlings growing at a consistent pace
- Water-resistant neoprene construction makes cleanup easy and worry-free
- Lightweight, portable design fits one 10" x 20" tray and can be moved as needed
- No built-in thermostat, so you’ll need to monitor temperatures yourself
- Outer edges run cooler than the center, which can lead to uneven warmth
- No adhesive backing, meaning it won’t stay fixed in place on surfaces
4. Organic Biodegradable Peat Seedling Pots
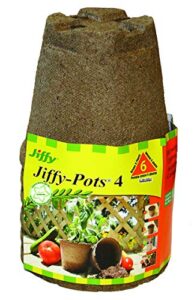
Warmth handled, so now let’s talk about what your seedlings actually sit in. Peat seedling pots skip transplant shock entirely, since you plant the whole thing straight into soil.
Made from pressed peat and wood pulp, they break down in 6–12 weeks, so timing your sowing matters. The porous walls breathe well, which helps prevent that soggy, moldy mess.
Just don’t let them sit around wet and unplanted too long. Constant moisture weakens the material fast, and that’s when mold sneaks in.
| Best For | Gardeners starting seeds indoors or potting up young seedlings who want an eco-friendly, plastic-free option that transplants directly into the ground. |
|---|---|
| Material | Peat |
| Primary Use | Seed Starting |
| Indoor Use | Yes |
| Portability | Lightweight |
| Maintenance Level | Watering Monitoring |
| Target User | Home Gardener |
| Additional Features |
|
- Minimizes transplant shock by letting you plant the pot directly into soil, root system undisturbed
- Made from responsibly sourced, OMRI-listed organic peat that biodegrades naturally
- Breathable walls help prevent soggy conditions and reduce mold risk when watered properly
- Structural integrity weakens quickly if kept constantly saturated with water
- Can dry out fast, so watering needs close monitoring
- May develop mold if left moist and unplanted indoors for too long
5. Lasko Adjustable Pedestal Fan
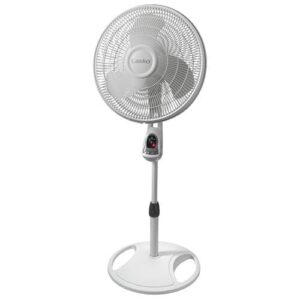
Stagnant air is mold’s best friend, so a good fan solves that fast. The Lasko pedestal fan adjusts from 32 to 47 inches, letting you angle airflow right across your trays without blasting seedlings directly.
Run it on low for an hour or two daily—that’s usually enough to keep humidity from settling. The remote’s handy too, with auto-off timers so you’re not babysitting it.
Just remember: airflow helps, but it won’t fix soggy soil or bad drainage on its own.
| Best For | Anyone dealing with mold-prone spaces like grow rooms, basements, or plant nurseries who needs adjustable, steady airflow to keep humidity from settling. |
|---|---|
| Material | Plastic |
| Primary Use | Air Circulation |
| Indoor Use | Yes |
| Portability | Wheel-free Portable |
| Maintenance Level | Battery Replacement |
| Target User | Home User |
| Additional Features |
|
- Height adjusts from 32 to 47 inches, so you can angle airflow precisely without blasting seedlings directly
- Remote control with 1-, 2-, and 4-hour auto-off timers means no babysitting the fan
- Wide-range oscillation and three speed settings help circulate air evenly across larger spaces
- Remote requires two AAA batteries, which aren’t included
- Plastic construction may feel less sturdy than metal-cased fans
- Airflow alone won’t fix underlying issues like soggy soil or poor drainage
Frequently Asked Questions (FAQs)
How to prevent mold during seed stratification?
What’s the secret to stress-free stratification? Use sterile, well-draining media, water from below, and keep humidity under 60%. Add gentle airflow, and you’ll dodge mold without hovering over your trays like a nervous parent.
Is mold harmful to seedlings?
Not always fatal, but it’s a warning sign. Seedlings can survive surface mold, though the same damp, stagnant conditions often invite root rot and damping off, so treat mold as your cue to fix airflow and watering fast.
Does cinnamon prevent mold on seeds?
Yes, to a degree. Cinnamon’s active compound, cinnamaldehyde, disrupts fungal cells on the soil surface, slowing new mold. It won’t kill established colonies deeper down, though, so treat it as a helpful sidekick, not your whole defense plan.
What kills mold on seedlings?
A light spray of 3% hydrogen peroxide kills surface mold fast. For lingering spots, scrape mold off gently with a spoon, then sprinkle cinnamon, a natural antifungal that helps stop regrowth without harming tender roots.
Can moldy seedlings still be safely transplanted outdoors?
It’s a bit like sending a sick soldier into battle: risky. If mold is only surface-deep with healthy roots, trim it away first. Otherwise, hold off—weak, moldy seedlings rarely survive outdoor stress.
Does cinnamon actually work as an antifungal treatment?
Cinnamon does have real antifungal power thanks to compounds like cinnamaldehyde, which disrupt fungal cell walls. But ground cinnamon is milder than oil form, so treat it as a helpful backup, not your only defense against mold.
How do I sterilize tools and trays between uses?
Give trays and tools a 10% bleach soak or wipe with a 1:1 vinegar-water mix. Dry completely before reuse—leftover moisture dilutes the disinfectant and invites mold right back in.
Is it safe to scrape mold off soil surfaces?
Only partly. Scraping removes visible mold, but hidden spores stay beneath the surface and can become airborne, irritating your airways. It disturbs roots too. Better bet: remove the top layer entirely, then replace with fresh, sterile mix.
Should affected seedlings be isolated from healthy ones?
Yes, isolate them right away. It stops airborne spores from spreading, keeps water splash from carrying pathogens to healthy pots, and lets you treat symptomatic seedlings without exposing everyone else to fungicides or cross-contamination risks.
Conclusion
Less water, more airflow, cleaner trays. That’s really all mold prevention comes down to.
Once you know how to prevent mold in seed starting trays, those fuzzy white patches stop feeling like some scary mystery and start looking like simple, fixable mistakes. Your seedlings don’t need everything to be perfect; they need consistency.
So check moisture daily, keep that fan running, and trust the process you’ve built. Healthy trays aren’t luck; they’re habits. Keep them up, and thriving seedlings become your new normal.
- https://gardenculturemagazine.com/why-is-there-mold-growing-in-my-seedling-tray
- https://homesteadandchill.com/prevent-algae-mold-seedling-soil
- https://www.thespruce.com/white-fuzzy-mold-on-seedlings-3972289
- https://www.seedtospoon.net/how-to-prevent-and-treat-mold-issues-in-seed-starting
- https://www.bootstrapfarmer.com/blogs/how-to-grow-seedlings/how-to-use-humidity-domes-when-starting-seeds