This site is supported by our readers. We may earn a commission, at no cost to you, if you purchase through links.

Your first tomato plant doesn’t need to be perfect—it just needs six hours of sun, decent soil, and water when the top inch feels dry. That’s the truth most gardening guides bury under pages of Latin names and complex soil chemistry.
New gardeners abandon their plots by mid-July not because they lack green thumbs, but because they started with 20 varieties, amended soil like chemists, and overwhelmed themselves before harvest. The path to fresh vegetables is simpler: choose a sunny spot, start with five easy crops like lettuce and radishes, and learn as you grow.
Success in beginner vegetable gardening tips down to manageable steps—plot location, soil prep, and consistent care—that transform a bare patch into your own produce section by season’s end.
Table Of Contents
- Key Takeaways
- Planning Your First Vegetable Garden
- Preparing Soil for Healthy Growth
- Essential Planting and Care Tips
- Top 5 Tools for Beginner Vegetable Gardeners
- Frequently Asked Questions (FAQs)
- Why should a beginner start a vegetable garden?
- How to start a vegetable garden?
- How do I choose the perfect spot for my beginner vegetable garden?
- How do I start a garden as a beginner?
- What are the best vegetable gardening tips?
- How do I learn vegetable gardening?
- What is the easiest vegetable to grow for a beginner?
- What is the most common mistake of first time gardeners?
- How to start a vegetable garden for beginners step by step?
- Which vegetables should not be planted next to each other?
- Conclusion
Key Takeaways
- Start your first vegetable garden small—a 4×6-foot bed with five easy crops like radishes, lettuce, and bush beans—so you won’t get overwhelmed before harvest.
- Most vegetables need six to eight hours of direct sunlight daily and well-draining soil enriched with two to three inches of compost worked into the top six to eight inches.
- Water deeply when the top two to three inches of soil feel dry (typically one to 1.5 inches weekly), and apply a two- to four-inch layer of mulch to suppress weeds and retain moisture.
- Check your plants weekly for pests and disease early warning signs like yellowing leaves or chewed edges, and rotate crops annually to prevent soil-borne problems.
Planning Your First Vegetable Garden
Planning a vegetable garden doesn’t have to be complicated—you just need to think through a few key decisions before you break ground.
Start by choosing vegetables that are forgiving and productive for beginners, like tomatoes, lettuce, or zucchini.
The right location, a realistic size, smart plant choices, and understanding what your vegetables actually need will set you up for success from day one. Let’s walk through the essentials so you can start your garden with confidence.
Choosing The Best Garden Location
Before you plant a single seed, scout your yard for the perfect garden location—one that combines sunny exposure with practical access.
Most vegetables need 6 to 8 hours of direct sunlight daily, so south-facing spots in the northern hemisphere work best. Check for good drainage, wind protection, and proximity to a water source.
Your garden site selection sets the foundation for everything that follows. For additional guidance, consider sunshine requirements and soil considerations when making your decision.
Deciding on Garden Size and Layout
Start small—a 4 by 6 meter raised bed fits 8 to 12 tomato plants and won’t overwhelm you. Sketch a simple garden plan with 18 to 24 inch pathways for comfortable kneeling, and arrange beds to face south for maximum sun.
Smart layout planning with proper bed design and pathway creation sets you up for success; add a gentle slope for drainage systems that prevent waterlogging.
Selecting Easy-to-Grow Vegetables for Beginners
Once you’ve mapped your beds, pick vegetables that forgive mistakes—radishes sprout in 3 to 7 days and harvest in 25, bush beans yield in 30 to 50 days, and lettuce rewards you in 30 to 45 days.
These easy-to-grow vegetables for beginners turn your seed selection into confidence; focus on beginner greens like spinach or arugula, and you’ll master vegetable gardening for beginners without stress.
Understanding Sunlight and Drainage Needs
Fast-growing picks won’t survive without the right sunlight hours and drainage systems—most vegetables demand 6 to 8 hours of direct sun daily, while waterlogged soil drowns roots in minutes. Scout your garden location for morning light (east-facing beds work wonders), check soil moisture by squeezing a handful, and confirm water doesn’t pool after rain—these garden planning steps protect your investment before you break ground.
- Measure sunlight exposure from dawn to dusk across your chosen plot
- Test drainage by digging a 12-inch hole and filling it with water
- Observe garden orientation to capture gentle morning warmth
- Assess water table depth if you notice persistent dampness
- Plan soil preparation around your findings for ideal plant care
Preparing Soil for Healthy Growth
Your soil foundation is the foundation of everything that happens in your garden—it feeds your plants, anchors their roots, and determines whether they’ll thrive or just survive.
Before you drop a single seed, you’ll want to get that dirt in top shape. Let’s walk through three straightforward steps to prepare soil that’ll set your vegetables up for success.
Removing Weeds, Rocks, and Debris

You can’t build a healthy garden on a weedy, rocky foundation—so soil preparation begins with a thorough cleanup. Weed control starts early: slice through annual weeds at the surface with a hoe before they set seed, preventing reemergence for months. Rock removal and debris cleanup follow—use a wide-head rake to collect stones larger than 1 inch, sticks, and plant matter in a single pass.
Once your soil is ready for planting, mastering the proper vegetable harvesting guide ensures your hard work pays off with peak-flavor produce.
| Task | Tool | Benefit |
|---|---|---|
| Weed Control | Hoe or weeding knife | Reduces future growth by 95% |
| Rock Removal | Garden rake | Prevents root damage, improves contact |
| Debris Cleanup | Wheelbarrow | Clears pest habitats, boosts air flow |
| Mulching | Organic mulch (2–3 inches) | Blocks light, retains moisture by 20% |
After cleanup, mulch benefits kick in: a 2- to 3-inch layer of straw or wood chips suppresses new weed germination and cuts your watering by about 20 percent. Plan a mid-spring cleanup before planting, then inspect beds every week or two during peak season to catch new growth. This garden maintenance routine sets the stage for strong roots and a thriving harvest.
Improving Drainage and Soil Structure

Good drainage and soil structure work together like a one-two punch for healthy roots. To boost water infiltration, try these soil amendment tactics:
- Till to 8–10 inches to break soil compaction and open air pockets for oxygen.
- Add perlite or coarse sand at 10–15% volume to loosen heavy clay.
- Install raised beds or drainage systems if your garden plan faces persistent waterlogging.
Soil aeration sets the stage for organic matter integration.
Adding Compost and Organic Matter

Organic matter acts as a secret weapon for soil health, transforming lifeless dirt into living earth.
Work 2–3 inches of finished compost into the top 6–8 inches—this soil amendment fuels microbes, releases nutrients slowly, and improves structure over time.
Green manure crops like clover fix nitrogen naturally, while a proper composting process at 130–160°F kills pathogens and creates dark, crumbly gold for your garden.
For more on the benefits of organic matter and soil amendments, explore how they help improve soil structure, moisture retention, and nutrient cycling.
Essential Planting and Care Tips

Once your soil is ready, it’s time to get your hands dirty—literally. The way you plant and care for your garden in those first few weeks sets the stage for a healthy harvest.
Here’s what you need to know to give your vegetables the best start possible.
Proper Planting Depth and Spacing
Getting planting depth and spacing right makes all the difference between crowded, struggling plants and a thriving garden. Seed depth guidelines vary by size—tiny seeds go 1 to 2 times their width, beans about 1 inch deep, and corn or peas 1.5 to 2 inches.
Proper plant spacing prevents disease and ensures healthy growth:
- Space leafy greens 6 to 12 inches apart
- Bush beans need 4 to 6 inches between plants
- Tomatoes require 18 to 24 inches for airflow
- Adjust spacing wider in clay soils to prevent waterlogging
Transplanting techniques matter too; set seedlings at the same depth they grew in their containers—except tomatoes and peppers, which benefit from planting 1 to 2 inches deeper for stronger roots. In sandy soils, plant slightly shallower so seeds contact moisture; in clay, go a bit deeper and wider to avoid compaction. Think of spacing like giving each plant its own breathing room—crowded gardens invite fungal diseases and compete for nutrients, while well-spaced rows let you manage weeds and allow sunlight to reach every leaf.
Watering Techniques for Beginners
Watering your garden doesn’t have to feel like guesswork—stick a finger 2 to 3 inches into the soil; if it’s moist, you’re golden. Most vegetables need 1 to 1.5 inches of water weekly, delivered through deep soaks rather than daily sprinkles. Early morning watering conserves moisture and prevents fungal problems, giving you healthier plants with less effort.
| Watering Method | Best For | Water Conservation |
|---|---|---|
| Drip Irrigation | All vegetable types | Excellent—precise delivery saves 30-50% |
| Soaker Hoses | Rows and raised beds | Good—slow release at soil level |
| Sprinkler Systems | Large garden areas | Moderate—some evaporation loss |
| Watering Cans | Seedlings and containers | Variable—depends on technique |
| Rainwater Harvesting | Supplemental watering | Excellent—free, chemical-free resource.” |
Check soil moisture regularly with a simple finger test or moisture meter—dry at 2 to 3 inches means it’s time to water. Containers dry faster than ground beds, often needing daily attention in summer heat, while established plants thrive on deep watering twice weekly. These beginner gardening tips for plant care help you avoid overwatering yellowed leaves and underwatering stress, building confidence as you learn each crop’s rhythm.
Benefits of Mulching and Weed Control
Mulch transforms your garden from a weedy battleground into a thriving ecosystem—it’s like laying down a protective blanket that works while you sleep. Here’s what a 2 to 4 inch layer delivers:
Mulch acts like a protective blanket that suppresses weeds, moderates soil temperature, retains moisture, and enriches your garden while you sleep
- Weed suppression by blocking sunlight, cutting germination up to 80 percent
- Soil temperature moderation, cooling surfaces 5 to 10 degrees during heat waves
- Moisture retention, reducing evaporation by 30 percent for consistent hydration
- Organic matter enrichment as straw or shredded leaves break down, feeding beneficial microbes
Keep mulch a few inches from stems to prevent rot—refresh annually for best results.
Monitoring for Pests and Common Diseases
While mulch defends against weeds, your eyes become your best pest control tool—weekly walk-throughs catch aphids, beetles, and fungal spots before they spiral. Check leaf undersides with a 10x magnifier for tiny thrips and mites; yellowing foliage or chewed edges signal trouble brewing.
Map disease hotspots with stakes, rotate crops annually for soil health, and keep a simple garden hygiene log tracking symptoms—early detection beats emergency rescue every time.
| Early Warning Sign | What It Likely Means |
|---|---|
| Yellowing, mottled leaves | Aphids, mites, or virus transmission |
| Holes with chewed edges | Caterpillars, beetles, or slugs |
| White powdery coating | Powdery mildew fungal disease |
| Wilting despite watering | Root disease or soil-borne problems |
Top 5 Tools for Beginner Vegetable Gardeners
You don’t need a shed full of fancy equipment to grow a successful vegetable garden—just a handful of well-chosen tools that’ll make your life easier from day one.
The right gear helps you test your soil, water efficiently, manage your harvest, and keep your garden tidy without breaking the bank. Here are five essential tools that’ll set you up for gardening success, whether you’re working with a small raised bed or a sprawling backyard plot.
1. Cesun Stainless Steel Garden Hose
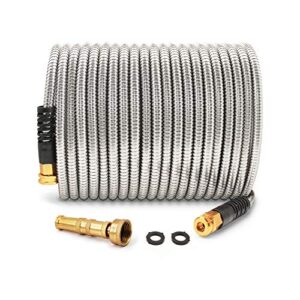
A dependable hose can make or break your watering routine—and the Cesun Stainless Steel Garden Hose delivers durability you can count on. Built with 304 stainless steel and brass fittings, this 50-foot hose resists kinks, punctures, and UV damage while staying lightweight enough for easy handling.
It tolerates temperatures from -20 to 140°F and manages up to 400 psi, so you won’t worry about leaks mid-watering. The flexible design coils neatly for storage, and its leak-proof construction means less frustration, more growing.
| Best For | Homeowners who need a tough, kink-free hose that can handle outdoor watering, vehicle washing, and pet care without constant replacements. |
|---|---|
| Material | Stainless steel |
| Primary Use | Watering/irrigation |
| Durability | UV and puncture resistant |
| Assembly | Ready to use |
| Weight | 5.44 pounds |
| Color | Silver |
| Additional Features |
|
- 304 stainless steel construction resists punctures, kinks, and UV damage while staying flexible and lightweight
- Leak-proof brass fittings and rubber gaskets handle up to 400 psi and temperatures from -20 to 140°F
- Easy to coil and store thanks to its flexible design, making cleanup quick after yard work
- Not compatible with push-fit connectors or some hose reels, limiting your setup options
- Some users report leaks or damage after several months of regular use
- Water pressure may be lower compared to traditional rubber or vinyl hoses
2. Rapitest Soil Test Kit
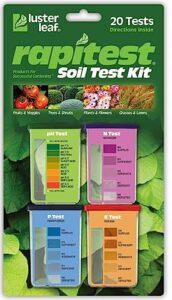
Good soil is your garden’s foundation—but guessing what’s in it won’t get you far.
The Rapitest Soil Test Kit takes the mystery out of amendments with 40 tests for pH, nitrogen, phosphorus, and potassium. You’ll mix a soil sample with the included capsules, match the color to the chart, and know exactly what your beds need. At around $15.50, it’s a smart investment that prevents wasted fertilizer and helps you grow healthier vegetables from the start.
| Best For | Home gardeners who want to test their soil’s pH and nutrient levels without sending samples to a lab. |
|---|---|
| Material | Plastic components |
| Primary Use | Soil testing |
| Durability | Reusable kit |
| Assembly | No assembly required |
| Weight | Lightweight |
| Color | Not specified |
| Additional Features |
|
- Tests pH, nitrogen, phosphorus, and potassium for just $15.50—cheaper than lab testing
- Patented color comparator makes reading results straightforward
- Includes a soil pH preference list for over 450 plants
- Only 5 tests per nutrient type (20 total), so you’ll need refills for larger gardens
- Gel capsules can be tricky to open and pour accurately
- Results need low light to read properly, which can be inconvenient
3. Galvanized Metal Raised Garden Bed Kit
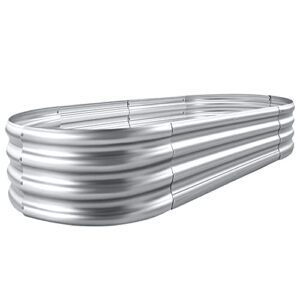
If your soil’s good but your backyard drainage isn’t, a raised bed solves both problems at once. This 4×2×1-foot galvanized metal kit holds 7.14 cubic feet of soil, offers an open base to prevent waterlogging, and snaps together in about five minutes with interlocking panels and wedge locks.
The double-layer galvanized coating resists rust season after season, and the oval-frame design keeps corners stable—even when you’re leaning over to harvest tomatoes or pull weeds.
| Best For | Gardeners dealing with poor drainage or heavy clay soil who want a quick-setup solution that won’t rust out after one season. |
|---|---|
| Material | Galvanized metal |
| Primary Use | Growing vegetables |
| Durability | Double-layer anti-corrosion |
| Assembly | 5 minutes setup |
| Weight | Not specified |
| Color | Silver |
| Additional Features |
|
- Assembles in about 5 minutes with no tools needed—just snap the panels together and lock them in place
- Double-layer galvanized coating holds up well against rain and moisture without showing rust
- Open-bottom design lets excess water drain naturally while giving roots room to spread
- Some units arrive with loose panels or missing hardware due to quality control issues
- The 0.78mm thickness can feel flimsy compared to thicker metal beds, especially at the corners
- Limited to silver finish, so it won’t match every garden style
4. Granite Ware Canning Kit

Once your garden delivers bushels of zucchini, tomatoes, and cucumbers, you’ll want to preserve the harvest—and this 21.5-quart enamel-on-steel canner makes water-bath canning straightforward for beginners.
The kit includes a jar rack that holds seven quart jars, plus a five-piece tool set: bubble remover, jar lifter, magnetic lid lifter, jar wrench, and wide-mouth funnel. The enamel finish heats evenly and cleans easily, so you can tackle jams, pickles, and salsas without wrestling with stains or scrubbing for hours.
| Best For | Home gardeners who want to preserve their harvest with a complete starter kit that includes all the essential canning tools. |
|---|---|
| Material | Enamel-on-steel |
| Primary Use | Food preservation |
| Durability | Rust-proof coating |
| Assembly | Minimal assembly |
| Weight | 11 pounds |
| Color | Multiple colors available |
| Additional Features |
|
- Comes with everything you need to start canning—jar rack, lifter, funnel, and other helpful tools
- Enamel coating heats evenly and wipes clean without stubborn stains
- Large 21.5-quart capacity handles up to seven quart jars at once
- Can’t be used on glass cooktops because the bottom isn’t flat enough
- The jar rack can feel flimsy and may develop rust stains over time
- Requires careful maintenance to prevent rust and keep it in good shape
5. INFLATION Heavy Duty Leaf Rake
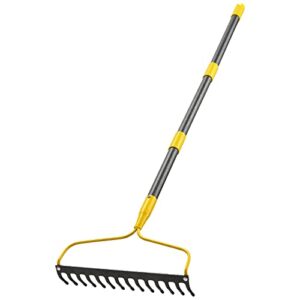
Before you plant a single tomato, you’ll need to prep that soil prep—and a 73-inch-long metal rake with 14 sturdy tines makes breaking up clumps, leveling beds, and clearing debris a whole lot easier.
This heavy-duty bow rake loosens compacted ground, rakes out rocks, and spreads compost evenly across your plot. Assembly can be a bit fiddly, and the tool feels larger than some gardeners expect, but once it’s together, you’ll have a reliable workhorse for soil prep and seasonal cleanup.
| Best For | Gardeners who need a reliable tool for breaking up soil, leveling garden beds, and clearing leaves or debris before planting season. |
|---|---|
| Material | Metal |
| Primary Use | Soil preparation |
| Durability | Heavy duty design |
| Assembly | Assembly required |
| Weight | Not specified |
| Color | Not specified |
| Additional Features |
|
- 14 metal tines and heavy-duty bow design handle tough soil and rock removal
- 73-inch handle gives you good reach without constantly bending over
- Versatile enough for multiple jobs—loosening soil, raking leaves, spreading compost, or clearing grass seed
- Assembly can be tricky, with some parts not fitting together smoothly
- Heavier and larger than expected, which might feel unwieldy for smaller gardeners
- Quality control issues reported, including incomplete instructions and misaligned components
Frequently Asked Questions (FAQs)
Why should a beginner start a vegetable garden?
Think of your own backyard as a personal farmstand—you’ll harvest fresh lettuce and radishes in just 60 days, cut grocery bills, and enjoy hands-on learning that builds real gardening skills while getting outdoors.
How to start a vegetable garden?
Start by choosing a sunny spot with six to eight hours of direct light, then prepare the soil with compost.
Select four to six beginner-friendly crops, and create a simple planting calendar.
How do I choose the perfect spot for my beginner vegetable garden?
Scout for a sunny zone that soaks up six to eight hours of direct light daily—preferably between ten a.m. and two p.m.—with well-draining soil and easy water access nearby.
How do I start a garden as a beginner?
Choose a sunny spot with 6 to 8 hours of light, prepare well-draining soil with compost, and pick easy-to-grow vegetables like lettuce or radishes—then just water regularly and watch your garden thrive.
What are the best vegetable gardening tips?
Pick vegetables suited to your climate, test soil pH yearly, water deeply every 2–3 days rather than lightly each day, and rotate crops annually to prevent disease buildup.
How do I learn vegetable gardening?
You’ll build real skills by starting small—maybe a few tomatoes or lettuce—keeping notes on what works, and watching local gardening videos that show you exactly when to plant.
What is the easiest vegetable to grow for a beginner?
Radishes top the beginner-friendly list—they germinate in just 3 to 7 days, mature in 25 to 30 days, and tolerate various soils while thriving in containers or garden beds.
What is the most common mistake of first time gardeners?
Like diving into deep water before learning to swim, starting with too large a plot overwhelms beginners—you’ll struggle with maintenance, uneven care, and eventual burnout before harvest arrives.
How to start a vegetable garden for beginners step by step?
Start by selecting a sunny spot with at least six hours of direct sunlight, then clear debris and add compost to enrich the soil.
Before planting, consider easy vegetables like tomatoes and lettuce.
Which vegetables should not be planted next to each other?
You’ll run into trouble when tomatoes meet corn—both hog nitrogen and leave soil depleted fast.
Cucumbers and pumpkins crowd each other too, choking airflow and inviting rot in cramped quarters.
Conclusion
What separates a thriving garden from an abandoned one isn’t talent—it’s choosing a sunny spot, starting small, and showing up with your watering can.
These beginner vegetable gardening tips strip away the overwhelm and leave you with a clear path: decent soil, five easy crops, and consistent care. Your first harvest won’t be perfect, but biting into a sun-warmed tomato you grew yourself? That’s the moment everything clicks.