This site is supported by our readers. We may earn a commission, at no cost to you, if you purchase through links.

A pepper seed sitting in cold soil is basically asleep. Below 60°F, germination slows to a crawl—sometimes stopping entirely. Most gardeners blame bad seeds when the real culprit is soil temperature, not seed quality.
Root-zone warmth triggers the enzymatic activity that cracks open a seed and drives early cell division. Without it, even premium seeds underperform.
A seed starting heat mat solves this by delivering steady bottom heat directly where it counts—the root zone—rather than warming the air around your tray. The difference in germination speed and seedling strength between a heated and unheated tray can be dramatic enough to change how you start every crop.
Table Of Contents
- Key Takeaways
- What is a Seed Starting Heat Mat and How Does It Work
- 7 Benefits of Using a Seed Starting Heat Mat
- Best Seeds to Use With a Heat Mat
- Optimal Temperature Ranges for Seed Germination
- Top 5 Seed Starting Heat Mats for Gardeners
- What to Consider When Choosing a Heat Mat
- 5 Mistakes to Avoid When Using a Heat Mat
- Best Practices for Safe and Effective Heat Mat Use
- Natural Alternatives to Seed Starting Heat Mats
- Frequently Asked Questions (FAQs)
- Are heat mats worth it for seed starting?
- Do seed heat mats use a lot of electricity?
- Are heat mats worth it for seedlings?
- How long should you keep seedlings on a heat mat?
- Are seed starter mats worth it?
- Will seeds germinate without a heating pad?
- Can heat mats damage seeds or seedlings?
- How long should heat mats run daily?
- Do all vegetable seeds need heat mats?
- Whats the ideal heat mat wattage needed?
- Conclusion
Key Takeaways
- Cold soil is the real reason most seeds fail — not bad seed quality — because germination stalls below 60°F when enzymes can’t activate.
- A heat mat works by warming the root zone directly, not the air, which triggers faster sprouting, denser root growth, and stronger seedlings from day one.
- Peppers, tomatoes, eggplants, and other warm-season crops need soil between 75–85°F to perform; cool-season crops like lettuce and spinach don’t need a mat at all.
- Pair your mat with a probe thermostat, insulate it from cold surfaces, and pull seedlings off as soon as they sprout — those three habits prevent most heat mat mistakes.
What is a Seed Starting Heat Mat and How Does It Work
A seed starting heat mat is a low-wattage electric pad that warms the soil from below, giving seeds the root-zone heat they need to sprout faster and more evenly.
Pair your heat mat with the right lighting setup—this guide to indoor seed starting light requirements helps you dial in both warmth and brightness for stronger germination.
It’s a simple tool, but the details — how heat travels, what types exist, and which features actually matter — make a real difference in how well it works for you.
Here’s what you need to know before you buy or use one.
How Bottom Heat Reaches The Root Zone

When your heated germination mat sits beneath the tray, it moves warmth upward through conduction pathways — direct contact carries heat straight into the growing medium.
Tray contact efficiency matters here; gaps kill that transfer fast.
Moisture-mediated transfer helps too, since damp soil conducts better than dry.
Insulation impact is real — a cold table steals heat from below.
Good heat distribution uniformity keeps every cell warm, protecting roots from uneven bottom heat without risking root scorch.
Types of Seed Starting Heat Mats

Not all mats heat the same way. The heating element inside determines how evenly warmth reaches your seeds.
- Carbon Fiber Mats spread heat uniformly with no hot spots
- Etched Foil Mats deliver consistent low-wattage warmth across the surface
- Traditional Wire Mats work fine but need a digital thermostat to stay safe
- Dual Zone and Modular Tile Mats scale with your setup
Most use PVC construction with IP67-rated waterproof heating pad protection. Ensuring an IP67 waterproof rating helps protect against spills and maintains safety.
Key Features to Look For

Beyond mat type, the features built into your mat decide how well it performs. Look for thermal spreaders that eliminate cold spots, adjustable thermostats for temperature precision, and a non-slip base to keep trays steady.
PVC construction with a waterproof heating pad rating of IP67 manages spills safely. Fire-resistant materials, modular design options, and energy-efficient wiring keep your setup reliable all season.
7 Benefits of Using a Seed Starting Heat Mat

A heat mat does more than just warm your soil — it changes what’s possible at the seed-starting stage. The right bottom heat can mean the difference between a tray that germinates in a week and one that sits cold and sluggish for three.
Here are seven real benefits worth knowing before your next sowing season.
Faster and More Uniform Germination
Warm soil doesn’t just speed things up — it rewires how seeds behave. Bottom heating triggers enzyme activation and increases membrane fluidity, dropping the dormancy threshold so radicle emergence happens days earlier. Temperature consistency across the tray means every cell warms evenly, tightening your germination window.
Bottom heat doesn’t just warm seeds — it rewires them, triggering dormancy to break days earlier
proper temperature regulation for seed starting, you get a tray that sprouts together — which makes everything after that easier.
Higher Germination Rates for Difficult Seeds
Some seeds just refuse to cooperate without the right conditions — and that’s where seedling heat mats change the game. Techniques like cold stratification, hormone priming, and seed pre-soaking help, but without proper seed germination temperature control, they only go so far.
Bottom heating fills that gap for notoriously stubborn seeds:
- Peppers sprout in ~10 days at 85°F versus 2–3 weeks in cool soil
- Eggplant and okra germination improves dramatically with soil medium optimization at 85–95°F
- Tropical flowers respond to steady warmth when light quality adjustment alone isn’t enough
Germination mats give difficult seeds the thermal trigger they need to break through.
Stronger Root Development and Seedling Vigor
Bottom heat does more than wake seeds up — it builds the root system that carries your seedlings through transplant and beyond. Root Zone Warmth drives Root Hair Density upward, which directly boosts Nutrient Absorption and Biomass Growth.
| Root Benefit | What It Means |
|---|---|
| Higher Root Hair Density | More surface area absorbing water and nutrients |
| Stronger plant root development | Deeper, wider roots from early on |
| Faster Biomass Growth | Sturdier stems and fuller leaves by week two |
| Better Transplant Establishment | Roots recover quickly after moving to beds |
| Improved seedling vigor | Even, consistent growth across every cell |
Temperature regulation through soil warming keeps roots active, giving you transplants that hit the ground running.
Reduced Risk of Fungal Disease and Rot
Cool, damp soil is basically a welcome mat for damping-off pathogens. A heat mat changes that equation fast. Soil Surface Drying happens naturally when bottom heat is consistent, and Moisture Balance Control keeps root zones between 60–65% humidity — right where seedlings thrive, not fungi.
- Antifungal Coatings on quality mats limit surface mold between waterings
- Ventilated Tray Design improves airflow, cutting prolonged leaf wetness
- Hygienic Mat Cleaning between batches removes spore-harboring residue
Pair that with tight heat mat thermostat settings, and fungal disease prevention becomes almost automatic — protecting seedling health from day one.
Consistent Soil Warmth Day and Night
Temperature doesn’t negotiate — and neither should seed tray. Turning off your heat mat at night creates the kind of Day‑Night Temperature Balance swings that stall germination.
Root Zone Thermal Stability matters most in cool rooms and basements, where soil temperature can quietly drop overnight. Continuous Thermostat Control and Energy‑Smart Continuous Warmth keep bottom heat steady, so every seed gets consistent warmth around the clock.
Earlier Seed Starting for Season Extension
A heat mat hands you weeks you’d otherwise lose waiting for spring. Pair bottom heat with Frost Date Planning, and you can map your Seasonal Calendar Planning around real transplant windows — not wishful thinking. Seedling heat mats make earlier seed starts practical indoors, where temperature control for germination stays consistent night and day.
- Push Indoor Light Scheduling earlier, so seedlings reach transplant size right on cue
- Align Seed Stratification Timing with your last frost, not the weather’s mood
- Begin Early Transplant Hardening with stronger, more developed plants
Better Results With Warm-Season Crops
Warm-season crops are genuinely demanding — peppers, tomatoes, and eggplants want soil around 75 to 80°F before they’ll commit to sprouting. Seedling heat mats deliver exactly that, boosting germination rates and cutting emergence time by several days.
Pair bottom heat with Light Intensity Optimization, Soil Moisture Management, and smart Nutrient Timing, and your warm-season crops hit the ground running from day one.
Best Seeds to Use With a Heat Mat

Not every seed belongs on a heat mat, but the ones that do will reward you for it. Warm-season crops especially thrive when their roots get that steady bottom heat from day one.
Here’s a look at the seeds that respond best to heat mat treatment.
Peppers, Tomatoes, and Eggplants
If you’re growing peppers, tomatoes, or eggplants, a heat mat isn’t optional — it’s your edge.
Pepper seeds need soil temperature between 80 and 85°F for reliable germination.
Tomatoes follow close behind, and eggplants share that same warm-soil preference.
Without consistent bottom heat, your soil mix optimization efforts stall before the seed even cracks.
Get the temperature right, and everything else follows faster.
Melons, Cucumbers, and Squash
Cucumbers, melons, and squash respond quickly to heat mat use — these warm-season vegetables need soil temperature between 75 and 95°F for reliable seedling growth acceleration.
Here’s what each one demands:
- Cucumbers – aim for 85–95°F
- Melons – ideal around 85–90°F
- Squash – germinates well from 70–90°F
Nail temperature regulation for seed starting, and these crops reward you fast.
Basil, Okra, and Heat-Loving Annual Flowers
Basil, okra, and annual flowers like Vinca and Celosia belong on a seedling heat mat without question.
Basil germinates best at 70–85°F; okra wants 80–95°F. These heat-loving crops respond faster with steady bottom heat.
| Crop | Ideal Soil Temp | Days to Sprout |
|---|---|---|
| Basil | 70–85°F | 5–10 days |
| Okra | 80–95°F | 6–14 days |
| Vinca | 75–80°F | 10–21 days |
Seeds That Do Not Need a Heat Mat
Not every seed craves heat. cool-season vegetables like lettuce, spinach, and arugula germinate reliably at 40–60°F — a heat mat can actually hurt them.
Lettuce is also light-dependent germination, so a bright south-facing window beats bottom heat every time.
Cilantro and dill do fine at 60–70°F with moisture consistency and a thin seed mix.
Save the mat for seeds that genuinely need it.
Optimal Temperature Ranges for Seed Germination

Not every seed wants the same temperature — and getting that wrong is one of the fastest ways to kill germination before it even starts. Your heat mat can hit the mark every time, but only if you know what range each crop actually needs.
Here’s a breakdown of the key temperature zones to keep in mind.
Warm-Season Crop Temperature Requirements
Warm-season crops are picky about soil temperature, and getting it wrong means slow, patchy germination. Here are the soil temperature targets you need to hit:
- Tomatoes – 75–80°F for rapid, even sprouting
- Peppers – 80–85°F; drop below 70°F and they stall
- Eggplants – 75–85°F ideal range
- Cucumbers and melons – peak germination around 85–90°F
- Basil – 70–75°F minimum
Keep nighttime temperatures above 60°F to protect seedling vigor.
Cool-Season Crop Temperature Requirements
Cool-season crops don’t want your heat mat — they actually germinate better without it.
The lettuce germination range tops out around 70°F, and spinach seed temperature stays ideally between 45 and 68°F.
Pea soil requirements peak near 50 to 65°F.
Brassica cool zones suit broccoli and kale just fine at 65 to 75°F.
Root crop timing for radishes and carrots also favors cool soil — around 55 to 70°F.
Using a Thermostat to Hit The Right Range
A digital thermostat turns your heat mat from a rough guess into a precision tool. Set it once, and it holds your seed mix inside the ideal temperature range — no overnight dips, no midday spikes.
- Probe Placement Tips: Push the probe 0.25–0.5 inches into moist mix at seed depth
- Setpoint Calibration: Target 80–85°F for peppers, 75–85°F for tomatoes
- Temperature Drift Management: Verify with a separate soil thermometer periodically
- Digital Thermostat Benefits: Cycles the mat on/off automatically, cutting energy usage monitoring guesswork
Top 5 Seed Starting Heat Mats for Gardeners
Not all heat mats are built the same, and the one you choose can make a real difference in your results. After testing five options over a full month, a few clear winners stood out.
Here’s what performed best for gardeners who want reliable warmth and consistent germination.
1. VIVOSUN Seedling Heat Mat Thermostat

The VIVOSUN Seedling Heat Mat with Digital Thermostat is the go-to pick for most home growers, and it earns that spot honestly. The 10 x 20.75-inch mat fits a standard 1020 tray, draws just 20 watts, and pairs with a thermostat that controls temps from 40 to 108°F. That covers peppers, tomatoes, eggplants — anything you’d want to push early.
The IP67 waterproof rating tolerates regular irrigation splashes, and the probe keeps your root zone, not the room, at the target temp.
| Best For | Home growers who want reliable bottom heat for seed starting, cuttings, or small fermentation projects without spending a lot on electricity. |
|---|---|
| Mat Size | 10 x 20.75 in |
| Waterproof Rating | IP67 |
| Power Draw | 20W |
| Thermostat Included | Yes, digital |
| Safety Certification | UL & MET |
| Quantity | 1 mat |
| Additional Features |
|
- At 20 watts, it costs next to nothing to run and still keeps your root zone in the sweet spot for germination
- The built-in thermostat with a temperature probe reads actual soil temp — not just ambient air — so your seeds get consistent heat
- IP67-rated and flexible, so it’s easy to wipe down and roll up when you’re done for the season
- The mat runs about 10 x 20 inches, which can leave edges of larger or double trays uncovered
- The thermostat can overshoot by a few degrees, and adjusting it takes a long-press sequence rather than a simple tap
- The power cord sits on top of the mat, so you may need a shim to keep trays perfectly level
2. VIVOHOME Waterproof Seedling Heat Mat
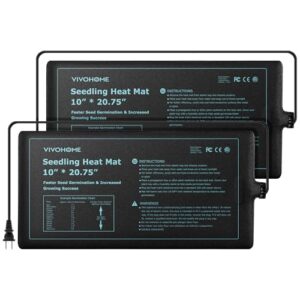
If your budget’s tight but your grow list isn’t, the VIVOHOME Waterproof Seedling Heat Mat deserves a close look. You get two mats per pack — each measuring 10 × 20.75 inches — for the price others charge for one.
Each mat draws just 20 watts and raises soil temps 10–20°F above ambient. The IPX-4 splash-resistant surface supports routine watering without issue.
There’s no built-in thermostat, so pair it with an external controller to stay in that sweet germination zone.
| Best For | Budget-conscious gardeners who want to start more seeds without spending more — especially in cooler spaces like basements or garages. |
|---|---|
| Mat Size | 10 x 20.75 in |
| Waterproof Rating | IPX-4 |
| Power Draw | 20W per mat |
| Thermostat Included | No |
| Safety Certification | Not specified |
| Quantity | 2 mats |
| Additional Features |
|
- Two mats for the price of one is genuinely hard to beat
- Low 20W draw means you can run these all season without sweating the electric bill
- IPX-4 splash resistance holds up fine to everyday watering and greenhouse humidity
- No built-in thermostat, so you’ll need to buy an external controller to avoid cooking your seeds
- The temp bump tops out at 20°F above ambient, which may not cut it in a really cold space
- Some users report actual wattage running closer to 15W, which could mean slower or uneven heating
3. BN LINK Seedling Heat Mat Thermostat
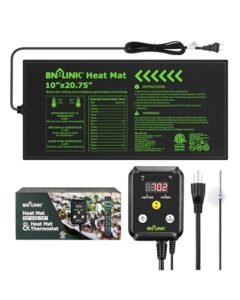
The BN-LINK bundle gives you everything in one box — a 10 × 20.75-inch mat plus a digital thermostat controller with a wired probe. Set target anywhere from 40 to 108°F, and the controller cycles power to hold that temperature instead of running nonstop.
That probe sits right in your rooting medium, so you’re measuring what actually matters. At 20 watts, it’s efficient, and the IP67-rated waterproof mat wipes clean between cycles.
A solid, no-guesswork kit for growers who want precision built in from day one.
| Best For | Beginner and intermediate growers who want a plug-and-play heat mat setup with built-in temperature control for seed starting, cuttings, or fermentation projects. |
|---|---|
| Mat Size | 10 x 20.75 in |
| Waterproof Rating | IP67 |
| Power Draw | 20W |
| Thermostat Included | Yes, digital |
| Safety Certification | ETL listed |
| Quantity | 1 mat + controller |
| Additional Features |
|
- All-in-one kit — mat and thermostat come together, so there’s nothing extra to buy
- Wired probe reads temps right at the root zone, giving you accurate, real-world feedback
- IP67 waterproof rating makes cleanup easy and protects against spills
- Some users notice a 5–10°F gap between the set temp and actual readings, especially above 90°F
- The suction cup mount is flimsy and often needs extra help staying in place
- Only works on 120V systems, so it’s a no-go internationally without an adapter
4. AC Infinity Dual Waterproof Seedling Mat
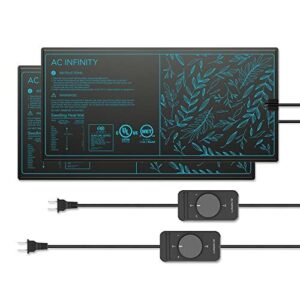
When one mat isn’t enough, AC Infinity’s SUNCORE A3X2 gives you two. Each pad measures 10 × 20.75 inches, so you’re warming two standard 1020 trays at once — useful when your propagation bench fills up fast.
Far-infrared film distributes heat evenly, pushing the root zone up to 20°F above ambient. The IP67-rated quad-layer PVC wipes clean easily.
The dial controller keeps things simple: low, medium, or high. No complicated programming, just steady warmth across both mats.
| Best For | Gardeners and hobbyists who need to warm multiple trays at once — especially those propagating seeds, cloning plants, or cultivating mushrooms on a budget. |
|---|---|
| Mat Size | 10 x 20.75 in |
| Waterproof Rating | IP67 |
| Power Draw | Not specified |
| Thermostat Included | No, dial only |
| Safety Certification | UL & MET |
| Quantity | 2 mats |
| Additional Features |
|
- Two full-size mats in one pack, so you can heat two 1020 trays without buying extra gear
- Far-infrared film spreads heat evenly, so you’re not burning one corner while the other stays cold
- IP67-rated PVC means spills and splashes wipe right off — easy to sanitize between grows
- Tops out around 23°C, which won’t cut it for heat-loving seeds that need warmer soil temps
- The dial only gives you three settings, so dialing in a precise temperature means grabbing a separate thermometer
- One mat can run slightly hotter than the other, which matters if you need both trays to stay consistent
5. Super Sprouter Heated Propagation Kit
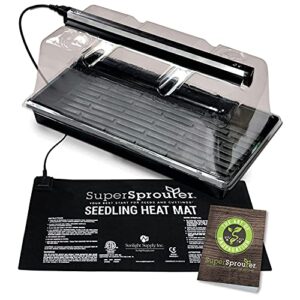
The Super Sprouter Heated Propagation Kit takes a different approach — it bundles everything into one box. You get a 10×20 inch no-hole tray, a 7‑inch vented dome with built‑in light‑track channels, an 18‑inch T5 grow light, and an ETL‑listed heat mat.
Setup takes under five minutes. The catch? There’s no thermostat, so the mat can run hot in warm rooms.
It’s a solid starter kit, but experienced growers will likely want to add a separate temperature controller.
| Best For | Beginner growers who want a ready-to-go setup without hunting for individual components. |
|---|---|
| Mat Size | 10 x 20 in |
| Waterproof Rating | Not rated |
| Power Draw | Low-wattage |
| Thermostat Included | No |
| Safety Certification | ETL & UL listed |
| Quantity | Full kit |
| Additional Features |
|
- Everything you need is in one box — tray, dome, light, and heat mat
- Quick five-minute setup, no guesswork
- The built-in light channel spreads illumination evenly across the whole tray
- No thermostat on the heat mat, so temps can get out of hand in warmer rooms
- Light height is fixed, which gets awkward as seedlings grow taller
- The dome doesn’t seal tight, so expect some dripping condensation on your work surface
What to Consider When Choosing a Heat Mat

Not every heat mat is built the same, and the wrong choice can cost you more than just money.
Before you buy, a few key factors will separate a mat that actually works from one that frustrates you all season. Here’s what to look at closely.
Mat Size and Seed Tray Compatibility
Match your mat to your tray before anything else. Most heat mats are built around 1020 footprint matching, designed to sit under a standard 10×20.75-inch seedling tray.
Half Tray Pairing, one mat accommodates two 10×10 trays simultaneously. Quarter tray inserts group four to a full flat. Large mat layouts suit multi-tray setups, and proper dome alignment depends entirely on your base tray footprint.
Waterproof Rating and Material Durability
Size sorted, now think about what the mat is made of. Seed starting means water, and water plus electricity demands respect.
IP67 waterproof rating means the mat survives 30-minute submersion — IPX4 only manages splashes.
Durable PVC construction with heat-sealed edge seal integrity keeps moisture out for seasons. Check cord strain relief too; that’s where most mats quietly fail first.
Built-in Vs. Separate Thermostat Controller
Built-in controllers keep setup simple, but a separate digital thermostat gives you real Probe Placement Flexibility — positioning the sensor directly in the root zone rather than reading mat surface heat. That accuracy matters when peppers want 85°F and lettuce wants 70°F.
Separate units also offer a solid Controller Upgrade Path and Repair Replacement Flexibility, since you can swap a failed controller without ditching a working mat.
Energy Consumption and Running Costs
Most mats draw just 17–20 watts — less than a third of an old incandescent bulb. At $0.16 per kilowatt-hour, that’s roughly $2.30 a month running nonstop.
Power Scaling matters when adding trays: four mats double your bill fast.
Cut costs through Runtime Management — remove mats after germination — and Heat Loss Mitigation by placing them on insulated shelves, not cold concrete.
5 Mistakes to Avoid When Using a Heat Mat

A heat mat is a simple tool, but a few common slip-ups can quietly sabotage your seedlings before they ever get going. Getting the most out of yours means knowing what not to do just as much as what to do.
Here are five mistakes worth avoiding.
Leaving Seedlings on The Mat Too Long
Once germination hits 50–80%, pull the tray off the mat. Leaving seedlings on too long triggers leggy stem growth, root heat stress, and faster media drying — problems that snowball fast.
Mixed crop trays are especially vulnerable since cool-season types stretch and stress before warm-season neighbors even catch up.
Overheating after sprouting causes more transplant shock than any cold snap will.
Placing The Mat on a Cold or Uninsulated Surface
Cold concrete or tile steals heat from below — and that directly cuts into the warmth your seeds actually receive. Most mats only raise soil temps 10–20°F above ambient, so surface temperature gap losses are no small thing.
Simple insulation fixes to protect heat efficiency:
- Slide rigid foam board under the mat
- Use a cork sheet as a thermal break
- Set the mat on a dry wood board
- Raise everything onto a shelf above cold floors
- Confirm root zone temps with a soil probe
Skipping a Thermostat and Risking Overheating
Running seedling heat mats without a thermostat controller is like leaving your oven on with no timer — something will burn. An uncontrolled mat can push root zone temperatures into the mid-90s°F, causing Root Zone Burn and Seed Viability Loss before you even notice a problem.
| Risk Without Thermostat | What Actually Happens |
|---|---|
| Temperature Spike Symptoms | Uneven, stalled emergence across tray |
| Thermal Runaway Danger | Continuous heating with no shutoff point |
| Root Zone Burn | Heat stress below soil before leaves show damage |
| Temperature Swings | Night-to-day fluctuations reduce germination uniformity |
| Energy Waste Risks | Mat runs full power when seeds need none |
A probe thermostat cuts power once your set point is reached — problem solved.
Neglecting to Monitor Soil Moisture Levels
Bottom heat is quietly drying your trays faster than you think. A heat mat raises soil temperature 10–20°F above room temperature, and that warmth accelerates evaporation constantly.
Watch for these seedling moisture management warning signs:
- Dry Media Crust blocks weak sprouts from emerging
- Uneven Moisture causes patchy, staggered germination
- Root Desiccation wilts cotyledons before you notice
- Weight-Based Checks reveal dryness faster than visual inspection
- Fingertip Moisture Test, half an inch deep, beats surface guessing
Wasting Tray Space With Poor Mat Placement
Moisture isn’t the only thing quietly working against you — so is geometry.
A tray sitting diagonally causes Diagonal Tray Alignment loss, pushing cells into cooler zones. Bench Edge Overhang breaks mat contact. Gap Between Trays wastes live heat. Probe Placement Bias gives false readings.
| Placement Error | Heat Impact | Fix |
|---|---|---|
| Edge Heat Loss | Edge cells lag | Align tray square |
| Gap Between Trays | Warm band wasted | Pack trays edge-to-edge |
| Diagonal Tray Alignment | Uneven emergence | Square placement always |
Best Practices for Safe and Effective Heat Mat Use

Getting the most from your heat mat comes down to a few consistent habits. From pairing it with the right thermostat to knowing exactly when to unplug it, small decisions add up fast.
Here’s what to do at each stage to keep your seedlings safe and your mat running season after season.
Pairing Your Mat With a Probe Thermostat
A digital thermostat transforms a basic heat mat into a precision tool. Without one, you’re flying blind. Insert the soil thermometer probe 0.5–1 inch deep into a central cell for accurate readings—not at the tray bottom.
- Probe Placement Depth: Central cell, 0.5–1 inch deep
- Calibration Procedure: Compare against a separate thermometer; adjust within ±1–2°F
- Hysteresis Settings: Tight cycling (±1–2°F) prevents temperature spikes
- Overheat Protection: A dislodged probe risks uncontrolled heating—secure it with tape
When and How to Remove The Heat Mat
Once sprouts appear and cotyledons unfold, removal timing matters.
That’s your signal—not a calendar date.
Unplug the mat first; safety unplugging prevents cord snags when lifting trays.
Check moisture management too, since warm media dries fast.
A cotyledon check on each cell confirms readiness.
Follow a simple cool down procedure: set trays on an unheated surface immediately after removal.
Transitioning Seedlings After Heat Mat Removal
Once your seedlings are off the mat, root zone cooling begins immediately—and that shift matters. Expect to dial back watering adjustments since cooler media dries more slowly.
Watch light intensity closely; weak light causes legginess faster than any temperature drop. Run a small fan for airflow management to strengthen stems.
Pale leaves or purple undersides are stress indicators worth catching early.
Cleaning and Storing Your Mat Between Seasons
Before you pack it away, a little end-of-season care goes a long way toward protecting your investment.
- Unplug cleaning first — always disconnect before wiping down.
- Surface soap wipe — mild dish soap on a damp cloth only.
- Full drying flat — moisture ruins waterproof seedling heating pads over time.
- Inspection checklist — check for cracks, fraying cords, scorch marks.
Roll loosely into a storage bag. Skip this, and even quality heat mat accessories degrade fast.
Natural Alternatives to Seed Starting Heat Mats

A heat mat isn’t the only way to give your seeds a warm start. If you don’t have one yet — or just want a backup on hand — a few low-tech methods can do a surprisingly solid job.
Here are three natural approaches worth knowing.
Sunlit Windowsill and Cloche Trapping
A sunny windowsill paired with a simple cloche punches above its weight for indoor seed starting.
Solar heat gain through south-facing glass can warm trapped air considerably, boosting microclimate humidity that benefits peppers and tomatoes.
Place your seed tray on the windowsill, cover it with a repurposed jar or plastic dome, and ventilation timing becomes critical — crack it daily to prevent overheating and fungal buildup.
Thermal Mass Objects for Overnight Warmth
Thermal mass works like a slow battery — it absorbs heat during the day and releases it overnight.
Dark-painted water barrels excel at Water Barrel Storage because water holds more heat per pound than brick or stone.
A Masonry Heat Sink using concrete pavers adds heat retention without the weight risk.
Smart Container Placement beside your trays, not shaded corners, maximizes Thermal Mass Capacity for natural temperature regulation.
Mulching to Insulate Soil Temperature
Mulching is a low-tech, energy-efficient alternative to a heat mat. A 2–4 inch layer of straw insulation slows overnight heat loss by trapping air pockets around the soil.
Wood chip buffer works best for established beds, holding steadier temperatures through warm days and cool nights.
Time your seasonal mulch timing right — apply after soil warms — and plastic mulch warming can boost soil temperature faster than organic options.
Frequently Asked Questions (FAQs)
Are heat mats worth it for seed starting?
Yes, heat mats are worth it. They cut germination time, boost seedling success, and the electricity cost is minimal — around $02 daily.
For peppers and tomatoes, the return on investment is clear.
Do seed heat mats use a lot of electricity?
Not really. Most mats draw around 20W — less than a light bulb. Running one 24/7 for a month costs roughly $45 at average utility rates. That’s genuinely cost-efficient power draw.
Are heat mats worth it for seedlings?
For most gardeners growing peppers, tomatoes, or eggplants, the ROI for gardeners is clear — germination speed improves, seedling heat mat benefits compound fast, and energy efficiency keeps running costs surprisingly low.
How long should you keep seedlings on a heat mat?
Keep seedlings on a heat mat only until they sprout — usually 3 to 21 days depending on the crop. Once you see emergence, that’s your removal cue.
Are seed starter mats worth it?
For most growers, yes — especially if you’re starting peppers or eggplants in a cool room.
Low wattage means real energy savings, and the boost to your seed germination rate makes the cost‑benefit analysis easy.
Will seeds germinate without a heating pad?
Yes, seeds germinate without a heating pad. Moisture requirements, oxygen availability, seed viability, and soil temperature drive germination.
Ambient temperature and your soil medium matter most. Cool-season crops like lettuce and peas sprout fine without one.
Can heat mats damage seeds or seedlings?
Yes, they can. Overheating risks, moisture loss, and root zone stress are real. If thermostat failure occurs, seed coat drying follows fast, and roots scorch before you notice.
How long should heat mats run daily?
Run your heat mat around the clock during germination. Steady soil warmth—day and night—is what seeds actually need, not a fixed daily schedule.
Do all vegetable seeds need heat mats?
No, not every vegetable needs one. Cool-season crops like lettuce, peas, and spinach germinate fine at room temperature. Heat mats matter most for peppers, tomatoes, and eggplants.
Whats the ideal heat mat wattage needed?
For a single 10×20 tray, 17–20 watts is all you need. That’s about 10 watts per square inch — enough to push soil temps 10–20°F above room temperature.
Conclusion
Think of a seed starting heat mat as a wake-up call for your seeds. It jumpstarts germination and sets your seedlings up for success.
By providing the right amount of root-zone warmth, you’ll enjoy seed starting heat mat benefits like faster germination, stronger seedlings, and a head start on the growing season.
With this simple tool, you can transform your seed starting process and grow healthier, more hardy plants that thrive from the very beginning.