This site is supported by our readers. We may earn a commission, at no cost to you, if you purchase through links.
Spring arrives, and suddenly your garden soil is still too cold, too wet, or too compacted to plant anything. That’s where raised garden beds change everything. By lifting your growing space above ground level, you gain control over soil quality, drainage, and temperature—giving your plants a head start when it matters most.
Building raised garden beds for spring planting doesn’t require complex carpentry skills or expensive materials. You’ll need basic tools, rot-resistant lumber, and a weekend to create a structure that can produce fresh vegetables for years. The key is choosing the right dimensions and filling your beds with a balanced soil mix that warms quickly and drains well.
Once you’ve built your first bed, you’ll wonder why you ever struggled with in-ground gardening.
Table Of Contents
- Key Takeaways
- Benefits of Raised Garden Beds
- Planning Your Raised Garden Bed
- Selecting Materials and Building The Frame
- Filling and Preparing The Soil
- Planting and Maintaining Raised Beds in Spring
- Frequently Asked Questions (FAQs)
- What is a DIY elevated garden bed?
- Are raised beds ready for spring?
- How do you build a raised bed?
- Can you build a raised bed garden?
- What can you plant in a raised bed?
- How do you prepare a raised bed for spring?
- How to prepare a raised bed for spring planting?
- What to add to raised garden beds in spring?
- When should you not use a raised bed?
- Are raised beds a good idea for spring?
- Conclusion
Key Takeaways
- Raised garden beds improve soil quality, drainage, and warmth, allowing for earlier planting and healthier, more productive plants.
- Building a raised bed is a simple DIY project using rot-resistant wood, basic tools, and thoughtful sizing to make gardening easier on your body.
- A balanced soil mix of topsoil, compost, and aeration materials supports strong root growth and reduces weeds, while careful bed depth ensures every plant gets what it needs.
- Regular maintenance, proper watering, and smart plant choices in spring set your raised bed up for a successful and abundant harvest.
Benefits of Raised Garden Beds
Raised garden beds offer several practical advantages for home gardeners. If you’re weighing your options, it’s helpful to know what sets them apart from traditional plots.
Let’s look at the key benefits you can expect.
Improved Soil Quality and Drainage
When you’re building raised garden beds, you take charge of soil composition and water drainage right from the start. Good soil preparation means less soil compaction and healthier roots. For instance, a custom blend holds nutrients and drains efficiently, keeping soil quality high.
Raised beds also allow for efficient irrigation systems that conserve water and promote plant health. Over time, you’ll notice improved soil health and long-term productivity—your plants will thrive with better support.
Longer Growing Season in Spring
Early soil warming is a gift that raised bed gardening brings to your spring garden beds. With good soil preparation, these beds warm up faster, letting you plant sooner and enjoy an extended planting window.
Raised beds warm faster in spring, extending your planting window and delivering earlier harvests
Their elevation reduces frost risk, creating a more reliable microclimate. You’ll notice increased early yield and stronger plants, all thanks to improved soil quality.
Raised beds allow you to manage localized environmental conditions for best growth.
Easier Weed and Pest Control
Raised Bed Gardening makes weed control and pest exclusion much simpler. With raised garden beds, weed barriers and physical frameworks help block invaders. You’re working with fresh soil, often weed-free and lower in soil pathogens.
Crop rotation and mulch cut down weed germination further. Good fencing and row covers boost pest control—biological control thrives in this contained environment.
Reduced Physical Strain for Gardeners
For many gardeners, tending a DIY Raised Garden Bed means less bending and fewer aches. Ergonomic bed height, especially 18–36 inches, eases joint pain and cuts fatigue. With an accessible bed design, you’re spared repetitive squatting, which helps prevent injury.
There’s a reason Raised Bed Gardening Benefits include:
- Joint pain relief
- Reduced fatigue
- Improved injury prevention
- Easier Gardening for Beginners
Planning Your Raised Garden Bed
Before you start building, it pays to spend a little time thinking through your setup. The right plan helps your raised beds thrive from day one.
Let’s look at what matters most when picking a spot and shaping your garden.
Choosing The Best Location
The right spot can make or break your spring harvest. Your raised bed needs 6 to 8 hours of direct sunlight—vegetables like tomatoes thrive with full sun exposure. Choose level ground with good drainage to prevent waterlogging and root rot.
Place beds near a water source for easier care, and consider wind protection from fences or hedges. Keep pathways accessible for comfortable planting and harvesting.
Determining Optimal Bed Size and Depth
How wide should your raised garden bed actually be? Standard dimensions range from 3 to 4 feet wide and 6 to 8 feet long, letting you reach every plant without stepping on the soil. You’ll need 12 to 18 inches of depth for most vegetables—root crops especially benefit from deeper beds.
Wheelchair access works best at 24-inch ergonomic bed height and 3-foot width, balancing plant needs with space constraints.
Spacing Between Multiple Beds
Spacing plays a huge role in garden planning and maintenance efficiency. You’ll want at least 24 to 36 inches between beds for comfortable paths—this aids tool access, disease prevention through better airflow, and layout optimization. Consider your accessibility needs too:
- Basic access requires 12-18 inch pathways
- Wheelbarrows need 36-48 inches
- Wheelchair access works best at 36-48 inches
- Wider paths reduce plant damage during garden design tasks
Site Preparation and Leveling
A level site is crucial for effective water distribution and soil stability. Before construction, it’s essential to clear away debris, turf, and weeds. This process significantly reduces weed pressure by 65% and lowers pathogen levels by 40%. Loosening compacted soil to a depth of at least 8 inches promotes healthier root growth. Grading the site to within 2 degrees of horizontal helps prevent runoff and preserves essential nutrients.
| Preparation Task | Benefit | Impact |
|---|---|---|
| Clearing debris and weeds | Weed control | 65% reduction in first year |
| Tilling 8+ inches | Reduces soil compaction | 20% better root growth |
| Leveling within 2° | Drainage solutions, slope orientation | 70% less erosion risk |
Installing weed barriers, such as cardboard, can suppress up to 85% of weeds while maintaining proper drainage. In areas with heavy clay soil, adding gravel beneath beds increases water removal by 45% and helps prevent root rot. Employing proper leveling techniques and soil preparation for raised beds ensures healthier garden beds and simplifies maintenance when spring planting begins.
Selecting Materials and Building The Frame
Building your raised bed starts with picking the right materials and putting them together properly. The frame you choose will affect how long your bed lasts and how well your plants grow.
Let’s look at the main materials you can use, the tools you’ll need, and how to assemble everything step by step.
Wood Vs. Alternative Materials
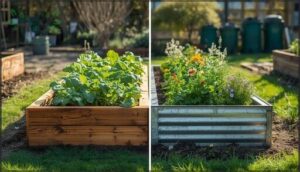
Choosing garden bed materials means weighing material lifespan, cost comparison, and maintenance needs. Wood raised beds—like cedar raised beds—offer natural warmth and affordability, lasting 5-10 years but requiring yearly sealing. Steel raised beds cost 60% more upfront yet endure 25-30 years with minimal upkeep.
Consider safety concerns, sustainability impact, and your budget when choosing garden bed materials. Lumber remains popular, but alternatives offer distinct advantages.
Choosing Rot-Resistant Wood Species
Wood durability depends on natural preservatives within the lumber itself. Rot resistance varies dramatically—pine lasts 3–7 years, while cedar and redwood endure 10–20 years without treatment.
When choosing wood species for beds and building raised garden beds, consider these eco-friendly materials:
- Cedar: Affordable rot resistance at $2–$4 per foot
- Black locust: Decades of durability, harder to source
- Redwood: Premium longevity, costs up to $14 per board foot
- Accoya pine: Acetylation treatment offers 50-year warranties
Sustainable sourcing matters for choosing garden bed materials.
Tools Needed for Construction
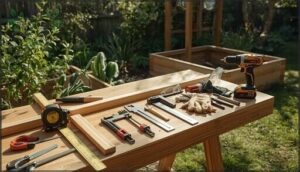
Once you’ve selected your lumber, building raised garden beds requires the right garden tools. You’ll need measuring tools—a tape measure and framing square—to keep corners true. Cutting equipment like a circular saw shapes your material, while a cordless drill manages fastening methods with three-inch screws.
Don’t skip safety gear: goggles and gloves protect you during your DIY raised garden bed project. Assembly techniques work best when you’re properly equipped.
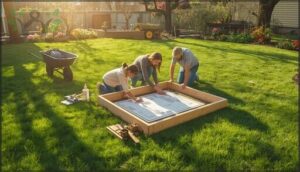
Step-by-Step Bed Assembly
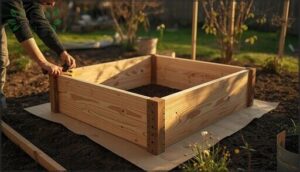
Now you’re ready to put it all together. Proper frame alignment keeps your raised garden bed square and sturdy throughout filling. Follow these DIY garden projects steps:
- Pre-drill pilot holes to prevent wood splitting by over 60%.
- Attach corners at exact 90-degree angles using at least eight screws per joint.
- Add support stakes midway on beds longer than eight feet for corner reinforcement.
Lay cardboard beneath for weed prevention before filling.
Filling and Preparing The Soil
You’ve got your frame built and level, and now it’s time to fill it with the right blend of soil.
The mix you choose directly affects how well your plants will grow and produce throughout the season.
Let’s walk through the soil formula, volume calculations, and finishing touches that set your bed up for success.
Mixing Soil, Compost, and Aeration Materials
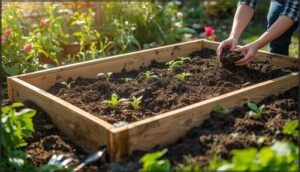
A strong soil mix sets your plants up for success from day one. You’ll want to combine 40% screened topsoil, 40% mature compost, and 20% aeration materials like perlite or coarse sand. This balanced blend optimizes soil quality, drainage, and root health while supporting vigorous spring growth.
| Component | Percentage | Purpose |
|---|---|---|
| Screened topsoil | 40% | Foundation structure and mineral content |
| Mature compost | 40% | Nutrient supply and organic matter |
| Perlite or coarse sand | 20% | Drainage and oxygen availability |
| Optional biochar | 5–10% (replaces aeration) | Moisture retention during dry spells |
| Mycorrhizal inoculant | Light dusting | Enhanced nutrient uptake for roots |
Compost incorporation improves soil properties and fertility. The aeration materials prevent compaction, letting roots breathe and water drain freely. Sustainable amendments like mycorrhizal fungi boost your soil’s long-term health without synthetic inputs.
Mix everything thoroughly before filling your bed—this ensures even distribution and consistent growing conditions throughout.
Calculating Soil Volume Needed
Once you’ve got your soil mix ready, figuring out how much you need prevents waste and surprise runs to the garden center. For rectangular beds, multiply length × width × height in feet, then divide by 27 to get cubic yards. Here’s how different bed shape formulas work:
- L-shaped beds: Calculate each rectangle separately, then add the volumes together.
- Hexagonal beds: Use the formula V = (3/2)(√3)s²h, where s is side length and h is height.
- Octagonal beds: Apply V = 2(1 + √2)s²h for accurate measurements.
- Irregular shapes: Measure base area, multiply by depth, and convert to cubic yards.
Soil depth impact matters—most spring vegetables need 8–12 inches, while root crops like carrots require 12–18 inches. An 8′ × 4′ raised garden bed at 1.81 feet deep needs roughly 2.15 cubic yards of soil. Volume calculator tools available online simplify these calculations and factor in material density for different soil types.
Cost estimation methods help with budgeting. Organic planting soil averages $30–$50 per cubic yard, while screened topsoil runs $20–$40. For a standard 4′ × 8′ bed at one foot deep, expect to purchase about 1.19 cubic yards of garden soil preparation materials—that’s roughly sixteen standard bags if buying bagged products.
Adding Weed Barrier or Mulch
Before filling your raised garden bed, you’ll want to think through weed control. Studies show landscape fabric can reduce initial weed emergence by up to 90%, though after two seasons weeds often break through.
Mulch application depth matters—aim for 2–4 inches of organic mulch. This approach cuts weeding labor by 65% while supporting soil microbial activity better than plastic barriers, which can reduce beneficial organisms by 35%.
Ensuring Proper Soil Depth for Plants
Your root system depends on depth. Leafy greens thrive in 8 inches, tomatoes need 12–24, while asparagus demands 24–36 inches. Soil settling reduces depth by 10–15% after the first season, so add extra.
Here’s your planting depth guide:
- Lettuce and herbs: 6–8 inches minimum
- Beans and cucumbers: 8–12 inches
- Peppers and carrots: 12–18 inches
- Tomatoes and squash: 18–24 inches
- Artichokes and asparagus: 24–36 inches
Deeper soil improves water retention and nutrient distribution, directly boosting crop yield.
Planting and Maintaining Raised Beds in Spring
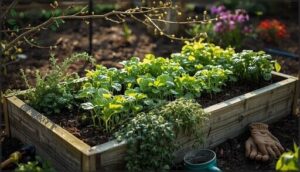
Once your raised bed is built and filled with rich soil, it’s time to get plants in the ground. Spring brings ideal conditions for many vegetables and herbs, but success depends on choosing the right plants and caring for them properly.
Here’s what you need to know to turn your new raised bed into a productive garden.
Choosing Suitable Spring Vegetables and Herbs
You’ll want to pick the right vegetables and herbs to make the most of your spring raised bed. Cold-tolerant veggies like spinach, lettuce, and peas thrive in cool soil, while fast-yielding crops such as radishes and arugula mature quickly. Space-efficient choices—carrots, chard, and salad greens—fit neatly into compact beds.
Popular spring herbs like basil, parsley, and chives grow vigorously when spaced properly. For warm-season options—tomatoes, peppers, and squash—wait until soil warms to at least 60°F before planting seedlings.
| Category | Examples |
|---|---|
| Cold-Tolerant Veggies | Spinach, lettuce, peas, broccoli |
| Fast-Yielding Crops | Radishes, arugula, bush beans |
| Popular Spring Herbs | Basil, parsley, chives, oregano |
Sowing Seeds Vs. Transplanting Seedlings
You have two choices when planting your raised garden bed: sowing seeds directly into soil or setting out seedlings. Direct seeding works best for root crops like carrots and radishes, which don’t tolerate root disturbance.
Transplanting seedlings extends your growing season by 8–10 weeks and boosts yield comparison by 10–25%, though it costs more upfront. Germination rates vary—transplants offer better disease resistance and stand establishment.
Watering and Fertilizing Newly Planted Beds
Once you’ve planted your raised bed, getting the watering and fertilizer application right sets up everything else for success. Initial watering during the first two weeks means checking soil daily—you’ll likely water every one to two days in hot weather. Soil conditioning with balanced nutrients boosts seedling emergence by up to 22%. Here’s what works:
- Apply about one inch of water weekly, adjusting for rain and temperature
- Water in the morning around 6 am to reduce evaporation and improve nutrient uptake
- Use drip irrigation for even moisture distribution across the bed
- Add granular 10-10-10 fertilizer one to two weeks before planting—about 1/8 cup per 2–3 square feet
- Monitor soil health every few days as roots establish, extending watering intervals gradually
Inconsistent watering techniques can increase seedling losses by 25–37%, so stay attentive early on.
Ongoing Maintenance and Mulching
Keeping your raised garden bed productive means regular attention to a few key tasks. Add mulch renewal annually—beds lose 15–25% of soil volume each year, so top off with compost to restore depth. Rake out plant debris to cut pest overwintering by 40%.
Pathway mowing around your bed reduces weed pressure by 30%, and frame repair every 5–10 years keeps everything stable for healthy soil and watering efficiency.
Frequently Asked Questions (FAQs)
What is a DIY elevated garden bed?
A DIY elevated garden bed is a freestanding planting container built above ground level. You can construct it using lumber like cedar or redwood, filling it with custom soil composition for improved drainage and easier access.
Are raised beds ready for spring?
Your raised beds can be spring-ready if soil temperature reaches 50–65°F. Check bed preparation by testing warmth, adding compost, and selecting cold-tolerant crops.
Proper garden timing ensures successful spring garden beds.
How do you build a raised bed?
You’ll start your DIY project by marking the bed outline and securing lumber with rebar.
Frame construction involves stacking boards, corner bracing with screws, and adding bed liners before soil mixing begins.
Can you build a raised bed garden?
With basic DIY gardening tools and weekend time, you can transform any garden layout planning dream into reality.
Building raised beds yourself gives total control over garden bed design, raised bed materials, and soil preparation from start to finish.
What can you plant in a raised bed?
With a raised garden bed, you’ll open the door to growing vegetables and herbs, vibrant flowers, or even fruit.
Companion planting, careful vegetable varieties, herb selection, and thoughtful garden design and planning help boost your raised bed gardening plans.
How do you prepare a raised bed for spring?
Preparing spring garden beds for planting is like setting the foundation for a house—everything rests on it. Begin with debris removal, refresh soil health with amendment, lay a weed barrier, calibrate soil volume, and time planting for the season.
How to prepare a raised bed for spring planting?
Getting your raised beds ready for spring means loosening last year’s garden soil, adding compost, and checking bed liners for wear.
Use spring fertilizers, review your garden layout, and consider crop rotation to optimize soil temperature and plant health.
What to add to raised garden beds in spring?
It’s no accident that raised garden beds thrive in spring when you refresh with compost types, balanced fertilizer options, customized soil amendments, and a soil mix rich in organic matter.
Add a mulch layer and check pH balancers—your soil health blossoms.
When should you not use a raised bed?
You shouldn’t use a raised garden bed over poor native soil that’s highly compacted or waterlogged, in extreme climates that dry soil rapidly, or when growing crops with deep roots that need more lateral spread than raised garden beds allow.
Are raised beds a good idea for spring?
Raised beds make spring gardening more reliable. Spring soil warming lets you plant earlier and harvest sooner.
You get better soil moisture control, improved frost protection, and a longer planting time for higher early crop yields in raised garden beds.
Conclusion
Imagine the first green shoots breaking through soil that’s warm and welcoming, sheltered high above the lingering chill of early spring. By building raised garden beds for spring planting, you put nature’s odds in your favor—giving roots the space and nourishment they crave.
Each plank and handful of compost returns as an easier, more fruitful season ahead. With the right foundation under your feet, you’re not just planting—you’re laying groundwork for healthy harvests year after year.
- https://www.finegardening.com/article/the-benefits-of-raised-garden-beds
- https://extension.okstate.edu/fact-sheets/raised-bed-gardening.html
- https://fieldreport.caes.uga.edu/publications/C1027-3/raised-beds-vs-in-ground-gardens/
- https://www.youtube.com/watch?v=6q26Q07z80k
- https://frameitall.com/blogs/frame-it-all/soil-raised-garden-bed

