This site is supported by our readers. We may earn a commission, at no cost to you, if you purchase through links.

The difference between thriving cold frame crops and stunted, disease-prone plants often comes down to soil preparation—removing pathogens, achieving the right texture, and building fertility before you ever sow a seed.
Getting your soil right from the start sets the foundation for a productive cold frame system that extends your growing season by weeks or even months.
Table Of Contents
Key Takeaways
- Cold frame success depends on soil preparation before planting—removing pathogens, achieving proper texture with 40% sand/40% silt/20% clay loam, and building fertility through compost amendments prevents disease and boosts yields by 15–25%.
- Strategic placement facing south with 6–8 hours of sunlight raises internal temperatures 5–10°C above outdoor conditions, while wind protection and proper drainage reduce frost damage by 70% and prevent root disease.
- Soil depth requirements vary by crop—leafy greens need 12–18 inches, root vegetables require 24–36 inches, and all plantings benefit from 4 inches of gravel beneath topsoil for drainage.
- Season-long soil health maintenance through moisture monitoring at 41–80% field capacity, strategic mulching that suppresses weeds by 85–95%, and crop rotation every 2–3 years cuts pathogen presence by 60% while sustaining productive harvests.
Choosing The Best Location for Your Cold Frame
Your cold frame’s success starts with choosing the right spot in your garden. The location you select will directly impact soil temperature, plant growth, and how much work you’ll need to put in throughout the season.
Let’s look at the three key factors that will help you find the perfect home for your cold frame.
Maximizing Sunlight Exposure
For the best cold frame gardening results, position your frame to face south. This orientation captures maximum sunlight exposure, raising internal temperatures by 5–10°C above outdoor conditions. To secure your setup:
- Slope the lid 15–35° toward the south to increase solar energy capture by up to 28%
- Guarantee at least 6–8 hours of daily sunlight for productive cool-season crops
- Keep frames 2 meters from structures to minimize shadow interference
- Use polycarbonate or glass covers that transmit 80–92% of available light
- Place frames near south-facing walls for reflected heat while maintaining full sun access
By understanding the benefits of cold frame gardening, you can create an ideal environment for your plants to thrive.
Protecting From Wind and Harsh Weather
After securing sunlight, you’ll need to shield your cold frame from wind and harsh weather. Position it on the south side of a building to gain up to 25% greater windbreak protection, or place barriers like shrubs 50 feet away to cut wind speed by half.
Cold frames boost internal temperatures 5–10°F above outside conditions, protecting crops from frost and storm damage. Choose polycarbonate lids that withstand 65 mph winds and use hinged designs to prevent lid loss. Proper cold frame venting on sunny days prevents overheating while maintaining weather shielding.
These cold frame benefits include 70% fewer frost damage incidents and extended harvests through harsh conditions. By utilizing season extension techniques, growers can optimize their crop yields and improve overall plant health.
Ensuring Proper Drainage
Weather protection means nothing if water drowns your plants. Position your cold frame on naturally draining ground or a slight south-facing slope to prevent waterlogging, which raises disease risk by 40–70%. Poor drainage suffocates roots and undermines soil preparation efforts.
Poor drainage drowns roots and spikes disease risk by up to 70 percent—always position cold frames on naturally draining or south-sloping ground
- Install 3–4 inches of gravel layers beneath the frame to boost drainage systems and manage runoff
- Choose sites where the water table stays below root depth, ensuring soil porosity remains ideal
- Raise frames 8–18 inches above grade to improve ventilation, temperature control, and water movement
Check soil moisture weekly and clear debris from drainage paths after storms.
Selecting and Building a Cold Frame Structure
Before you start building, you’ll need to choose the right materials and design for your cold frame.
The structure’s dimensions, depth, and placement will directly affect how well you can prepare and maintain the soil inside.
Let’s look at the key decisions that will set you up for success.
Ideal Materials for Cold Frames
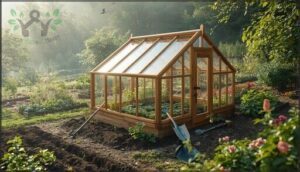
Choosing the right materials for construction of hotbeds and cold frames means balancing durability, insulation, and cost. Cedar frame materials resist decay naturally and cost around 31 USD per board, while twin-wall polycarbonate glazing options deliver an R-value of 1.72, outperforming glass by 40 percent in heat retention.
Sustainable frames built with recycled materials, like reclaimed window sashes or cold-formed steel containing 25 percent recycled content, reduce environmental impact without sacrificing performance. Your cold frame becomes a reliable season extender when you match building techniques to your climate and budget.
Recommended Dimensions and Depth
A standard cold frame measures 3 by 6 feet, giving you 18 square feet of growing space while keeping all areas within arm’s reach.
Frame materials for construction of hotbeds and cold frames should support walls 12 inches high at the front and 18 inches at the back, creating a slope that captures winter sunlight.
Your soil depth requirements depend on crop choice: leafy greens thrive in 12 inches of prepared soil, while potatoes need 24 inches for vigorous root development.
Placement Considerations for Soil Preparation
Before choosing the right location, consider how soil preparation connects with frame orientation and microclimate management. South-facing placement raises soil temperature by 5–10°C on winter days, accelerating germination and extending your season.
Wind protection from nearby structures keeps soil warmth 1.5–2°C higher overnight, while proper drainage systems prevent waterlogging—compacted ground increases fungal risk by 60%.
Embedding your frame 10–15 cm deep retains 4–6°C more heat, stabilizing soil moisture for vigorous root development.
Preparing and Amending Soil for Cold Frames
Your cold frame is built and positioned, but the real foundation of success lives in what fills it. Soil preparation separates a thriving cold frame from a disappointing one, and you’ll need to address four critical areas before planting.
Let’s walk through the essential steps to create the ideal growing environment for your cool-season crops.
Removing Weeds, Pathogens, and Pests
Your soil preparation starts with a clean slate, and that means tackling the invisible threats lurking in your cold frame. Before you plant anything, focus on eliminating weeds, pathogens, and pests that can undermine your entire season:
- Soil sterilization through heat treatment – Steam or solarize your soil to reach 60°C for 30 minutes, which kills Rhizoctonia, Pythium, and most weed seeds while preserving microbial balance.
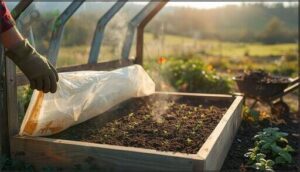
- Weed suppression with transparent mulch – Cover moist soil with clear polyethylene for 4–6 weeks during peak sun to raise temperatures to 38–50°C, achieving 90% weed seed mortality.
- Pathogen removal through physical cleanup – Remove all diseased plant residue and debris before winter to cut overwintering pest populations by 80%.
Proper pest control now prevents headaches later, setting you up for healthier crops without constant intervention.
Achieving Optimal Soil Texture and Drainage
Proper soil texture and drainage form the bedrock of successful cold frame gardening, directly influencing root health and crop yield. You need loam soil—ideally 40% sand, 40% silt, and 20% clay—to balance water infiltration at 0.5–1.0 inches per hour while retaining nutrients.
Compaction prevention is critical; compacted soils slash infiltration from 1.06 to just 0.25 inches per hour. Amend heavy soils with 10–30% perlite addition or coarse sand to boost soil aeration and drainage systems, preventing the waterlogging that increases root diseases fourfold.
Adding Organic Matter and Nutrients
Think of organic matter as your cold frame’s long-term investment account—steady deposits pay off season after season. You’ll want to apply cattle, horse, or hog manure at 300–500 pounds per 1,000 square feet, or half that rate for nutrient-rich poultry and rabbit manures.
Work in a 2–4 inch compost layer to the top 6 inches, boosting soil organic matter by 18% and improving nutrient cycling. This soil preparation increases cool-season vegetable yields by 15–25% while supporting vigorous microbial activity essential for sustained fertilization throughout your growing season.
Ensuring Proper Soil Depth for Root Growth
Root Zone Optimization determines whether your cold-frame crops thrive or merely survive. You’ll achieve proper Soil Depth Management by following these root-specific guidelines:
- Shallow-rooted greens (lettuce, spinach) need 12–18 inches of quality soil for Thermal Regulation and steady soil moisture
- Medium-rooted crops (beets, bush beans) require 18–24 inches to prevent Soil Compaction and support ideal soil temperature
- Root vegetables (carrots, parsnips) demand 24–36 inches of loose, well-drained material for full taproot development
- Drainage Systems beneath all depths—add 4 inches of sand under topsoil to eliminate waterlogging.
Double-dig to 24 inches when soil preparation begins, breaking compaction that restricts root elongation by 50%.
Planting Cool-Season Vegetables in Cold Frames
Once your soil is properly prepared, you’re ready to select crops and get seeds in the ground. The timing, spacing, and density of your plantings will determine how successful your cold frame harvest becomes.
Let’s look at the key decisions you’ll need to make as you begin planting.
Choosing Suitable Crops for Early Planting
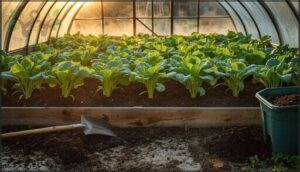
Crop selection separates frustration from early harvest success when planting cool-season vegetables in your cold frame. You’ll want cold-hardy crops like spinach, lettuce, kale, and arugula—these withstand frost and remain viable when outdoor temperatures drop below freezing.
Radishes, carrots, and beets mature quickly in protected conditions, while broccoli raab and cabbage tolerate soil temperatures as low as 40°F. Choose varieties with proven frost tolerance to optimize your cold frame’s potential.
Seed Spacing and Sowing Techniques
Once you’ve picked the right crops, seed depth and sowing methods determine germination success. Plant seeds at a depth equal to their largest dimension—0.25 to 0.5 inches for lettuce or spinach works well. You’ll see better results when soil temperature stays above 45°F, with germination rates dropping 15% below 40°F.
Here’s how to optimize your seed starting success:
- Space rows 4 to 6 inches apart to improve airflow and reduce damping-off disease by 18%
- Sow small seeds 0.25 inches deep in furrows for 13% better germination uniformity
- Use block sowing patterns with 3-by-3-inch grids for intensive planting
- Maintain consistent moisture until emergence to cut pre-emergence losses by 18%
- Practice successive sowing every 2–3 weeks for 30% higher yields throughout the season
Keep soil consistently moist but not saturated, and ventilate frames when temperatures exceed 50°F.
Managing Plant Density for Healthy Growth
After sowing, your plant spacing and plant height decisions directly shape air circulation, root development, and soil quality in the frame. Dense planting boosts crop yield per square meter by 22%, but crowding reduces individual plant size by 17%.
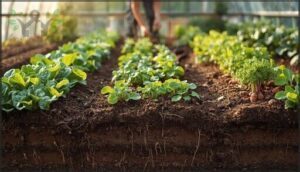
Space lettuce 2 to 3 inches apart for strong roots and airflow—this cuts fungal disease risk by 28% while supporting vigorous vegetable gardening performance throughout the season.
Maintaining Soil Health Throughout The Season
Once your cold frame is planted and thriving, the work isn’t over—you’ll need to monitor soil moisture, replenish nutrients, and protect against diseases to keep your crops healthy. Consistent care throughout the season ensures strong root development and productive harvests.
Here’s how to maintain ideal soil conditions from planting through harvest.
Monitoring and Adjusting Soil Moisture
Managing soil moisture in your cold frame isn’t guesswork anymore. Soil sensors calibrated to your specific growing medium can track moisture levels with accuracy within 1–2%, giving you real-time data to adjust irrigation systems precisely.
You’ll want to keep volumetric water content between 41–80% of field capacity for cool-season crops like lettuce and spinach. Morning watering combined with proper venting helps maintain humidity control while preventing fungal issues that thrive in overly wet conditions.
Fertilizing and Mulching Strategies
Consistently pairing organic fertilizers with mulch transforms your cold frame into a nutrient powerhouse. Apply 2–3 inches of well-rotted compost into the top 6–8 inches of soil 1–2 weeks before planting to boost nutrient availability and support microbial activity throughout the season.
Strategic mulching and fertilization deliver measurable advantages:
- Organic matter retention increases yields by up to 25% compared to unfertilized plots
- Mulch layers suppress weeds by 85–95% while stabilizing soil temperature swings
- Combined strategies improve water use efficiency by 30–60% in protected environments
- Nutrient leaching drops by 40–50%, keeping amendments where roots need them most
Reapply mulch when layers decompose below one inch, and side-dress with compost tea every 3–4 weeks to sustain nutrient cycling.
Preventing Soil-Borne Diseases and Pests
Vigilance against soil-borne threats keeps your cold frame productive season after season. Start with soil sterilization using clear polyethylene for 4–6 weeks to eliminate 85–95% of damping-off organisms and fungal diseases like Fusarium.
Rotate plant families every 2–3 years to cut pathogen presence by 60%, and remove diseased residues at season’s end to reduce overwintering threats by 80%.
Maintain humidity below 80% through daily venting to suppress Rhizoctonia and Pythium outbreaks by 45%.
Apply beneficial nematodes or Bacillus subtilis for biological barriers that control pests and reduce damping-off by 70–90% without chemicals.
Frequently Asked Questions (FAQs)
Can cold frames work in shaded garden areas?
Cold frames can function in shaded areas, though they work best with at least eight hours of direct sunlight.
If your garden has partial shade, you can still succeed by choosing low-light crops like spinach, kale, and lettuce.
How often should cold frame soil be replaced?
You should replace or rejuvenate your cold frame soil every four to five years to prevent pest accumulation, disease buildup, and nutrient depletion.
Top-dressing with compost annually helps maintain soil health between full replacements.
Should I sterilize soil before using cold frames?
Sterilizing soil sends pathogens packing, but it’s rarely required for cold frames if you start with quality garden soil and practice proper site preparation, pathogen control, and regular crop rotation to maintain microbial balance and soil health.
Can I reuse soil from previous growing seasons?
You can reuse garden soil, but expect nutrient depletion—nitrogen drops over 40% with repeated cropping. Combat this through compost additions, crop rotation, and targeted fertilization.
Address pathogen buildup with soil amendments and proper sanitation between seasons.
Conclusion
Like a gardener banking coals for winter warmth, you’ve now laid the groundwork for cold frame success that will carry through the coldest months.
Cold frame gardening soil preparation isn’t just another step—it’s the difference between scraped-by survival and thriving abundance when outdoor beds lie dormant. You’ve removed pathogens, built texture, enriched nutrients, and created a root-friendly environment that transforms your frame from simple shelter into a productive growing system.
Now those early spring harvests aren’t wishful thinking—they’re inevitable.

