This site is supported by our readers. We may earn a commission, at no cost to you, if you purchase through links.
 Drying and preserving fresh herbs at home starts with harvesting at the right moment—early morning when dew’s gone but before the heat hits. You’ll want to cut your herbs before they flower, when those essential oils are at their peak.
Air drying works like magic for most herbs; just bundle them loosely and hang in a dark, well-ventilated spot. For quicker results, try a dehydrator on low heat, but don’t rush the process—good things take time, as my grandmother always said.
Store your dried treasures in airtight glass jars, labeled with dates, and keep them away from light and heat. The secret lies in mastering these traditional methods alongside modern shortcuts.
Table Of Contents
- Key Takeaways
- Harvesting Fresh Herbs at Home
- Preparing Herbs for Drying
- Drying Methods for Fresh Herbs
- Storing Dried Herbs for Maximum Freshness
- Alternative Herb Preservation Techniques
- Frequently Asked Questions (FAQs)
- Which herbs should not be dried?
- Is it better to dry or freeze fresh herbs?
- Is it better to dehydrate or air dry herbs?
- How do you dry herbs for long-term storage?
- How to dry and preserve fresh herbs?
- Is it better to air dry or dehydrate herbs?
- How long will frozen herbs retain flavor?
- How to tell if dried herbs spoiled?
- Can you mix herbs when drying?
- Best way to crush dried herbs?
- Conclusion
Key Takeaways
- You’ll get the best flavor by harvesting herbs in the early morning after the dew evaporates but before the heat hits – this captures peak essential oils when they’re strongest.
- Air drying works perfectly for most herbs when you bundle them loosely and hang them in dark, well-ventilated spots, though dehydrators speed things up if you’re in a hurry.
- Store your dried herbs in airtight glass jars away from light and heat to preserve potency – proper storage keeps them flavorful for up to 12 months.
- Don’t limit yourself to drying alone – freezing herbs in oil or ice cubes, preserving with salt, or making herb-infused honey gives you more ways to capture your garden’s bounty.
Harvesting Fresh Herbs at Home
You’ll want to step into your garden with scissors in hand during those magical early morning hours, when the dew’s still fresh and your herbs are bursting with their strongest oils. My grandmother always said this was when plants held their secrets closest.
Step into your garden during those magical morning hours when your herbs are bursting with their strongest oils and secrets
Cut your herbs with confidence, leaving about a third of the stem so they’ll bounce back for another harvest. There’s nothing quite like the satisfaction of knowing you’ve timed it just right.
Best Time to Harvest Herbs
When you’re after peak flavor and ideal potency, timing makes all the difference in harvesting herbs. Weather impact plays a vital role, so aim for that sweet spot when plants reach proper maturity.
Here’s your harvesting game plan:
- Morning magic: Harvest between 10 a.m. and noon for maximum essential oils
- Pre-flower power: Cut just before blooms appear when leaves pack the most punch
- Dry leaves only: Skip the wet, dewy herbs to prevent mold issues
- Plant maturity matters: Wait until herbs hit 8-10 inches tall before your first major harvest
- Re-harvest timing: Cut no more than one-third of the plant to encourage new growth
To enhance flavor, consider the morning harvest timing. Smart harvest leaves strategy ensures you’ll have flavorful herbs all season long.
Harvesting Leaves, Flowers, and Roots
Different plant parts require different harvesting approaches and timing for ideal herb preservation. Harvest leaves when they’re fully developed but before flowering begins, selecting unblemished specimens with sharp, clean harvesting tools. Collect flowers at the flower bud stage or just as they open, when essential oils peak. Root harvesting timing depends on the plant’s dormant season, usually fall or early spring.
My grandmother always said, "Harvest with intention, handle with care" – and she was right about post-harvest handling being vital for quality.
Proper Handling and Preparation
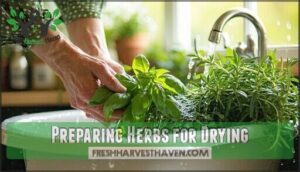
Once you’ve gathered your herbs, treat them like delicate treasures. Give them a gentle washing under cool water to remove dirt, but don’t scrub—bruising prevention keeps those precious oils intact. Shake off excess water and pat dry with paper towels.
Cut stems to your desired length, leaving enough for bundling. The clock’s ticking though—immediate processing after harvesting ensures you capture peak flavor before those oils start disappearing into thin air.
Preparing Herbs for Drying
Once you’ve gathered your fresh herbs, you’ll want to give them a gentle rinse and trim away any damaged leaves, just like my grandmother always did with her prized basil from the backyard garden.
The key is handling them with care while they’re still full of those precious oils that make your kitchen smell like heaven.
Cleaning and Trimming Techniques
Once you’ve harvested your fresh herbs, it’s time to give them a gentle spa treatment. Start with cool water washing techniques to remove dirt and tiny hitchhikers. Pat dry with paper towels, then grab your trimming tools to remove damaged leaves that could spoil the bunch.
This pre-drying prep ensures your herbs dry evenly and stay flavorful.
Choosing Herbs for Drying
Not all herbs dry equally well, so you’ll want to choose varieties with high oil content and sturdy leaves. Mediterranean herbs like rosemary, thyme, and oregano are your best friends here – they practically dry themselves! Their strong flavor profiles and natural pest resistance make them perfect candidates.
- Rosemary and thyme – These woody herbs maintain excellent flavor and have high drying yield
- Oregano and marjoram – Their concentrated oils create intense flavor even after drying
- Sage and lavender – Dense leaves with natural preservatives that resist spoilage
- Mint varieties – Quick-drying with strong herb suitability for year-round use
Tips to Preserve Essential Oils
Once you’ve selected the right herbs, protecting those precious essential oils becomes your next mission. Keep temperatures below 100°F during drying—higher heat destroys up to 60% of those flavor-packed oils. Choose gentle drying methods like air drying or low-temperature dehydrators. Handle herbs like delicate treasures, avoiding bruising that releases oils prematurely.
Air drying herbs Air drying herbs is easiest, but hard in humid climates. Store immediately in airtight containers away from light and heat.
Drying Methods for Fresh Herbs
Now that you’ve prepared your fresh herbs properly, it’s time to choose the right drying method for your harvest.
From the time-honored technique of air drying bundles like our grandmothers did to modern dehydrators that speed up the process, each method preserves those precious essential oils in its own special way.
Air Drying Bundles and Racks
Now you’ll create neat bundles using rubber bands, which stretch as herbs shrink during drying. **Keep bundle size small—about pencil thickness—so airflow importance isn’t compromised.
** Hang bundles in a warm, dry spot with good ventilation for mold prevention.
Rack materials like screens work perfectly for delicate leaves that can’t handle bundling. **Your drying location should stay dark to preserve those precious oils that make homegrown herbs shine.
Using Dehydrators and Screens
Dehydrators work like magic for herb drying methods, setting temperatures between 95-115°F for perfect results. Arrange herbs on screens in single layers for even drying – no crowding allowed!
Your dehydrator will finish the job in 1-4 hours, while drying screens need several days but cost nothing extra. Both preserve essential oils beautifully when done right.
Microwave and Alternative Drying Methods
When you’re in a pinch, microwave drying works fast but needs careful attention. Place herbs between paper towels, use 30-second intervals on medium power, checking frequently to prevent scorching.
Solar drying harnesses nature’s power—spread herbs on screens in direct sunlight. Rice drying and silica gel create moisture-absorbing chambers for delicate flowers.
Hybrid methods combining dehydrator warmth with oven finishing deliver consistent results.
Storing Dried Herbs for Maximum Freshness
You’ve worked hard to dry your herbs perfectly, and now proper storage becomes your best friend for keeping those garden treasures flavorful for months ahead.
My grandmother always said that the secret wasn’t just in the drying, but in treating those crispy leaves like the precious pantry gold they truly are.
Airtight Container Storage
Once your herbs are properly dried, you’ll want to store them in airtight containers to lock in that precious aroma and flavor. Glass jars work best since they don’t absorb odors like plastic can.
These containers prevent moisture from sneaking back in, which is your dried herbs’ biggest enemy. Keep those jars away from light and heat to maintain potency for months.
Labeling and Dating Jars
Your airtight containers won’t serve you well without a proper Labeling Best Practices system. Write the herb name, harvest date, and intended uses on waterproof labels—trust me, discovering mystery jars of green powder isn’t fun!
Date Code Systems help with Inventory Management and Shelf Life Tracking. Jar Organization becomes a breeze when you can spot your oregano from across the pantry. Smart Storing Dried Herbs means knowing what you have.
Ideal Storage Conditions
With good container material and temperature stability, your herbs will thank you for creating their perfect home. Keep storage areas around 20°C with 40-60% humidity for maximum shelf life.
Dark glass jars block light exposure that damages potency, while airtight containers prevent moisture from sneaking in.
Remember, storing dried herbs properly means they’ll keep their flavor punch longer than your patience for bland meals!
Alternative Herb Preservation Techniques
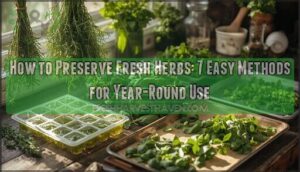
While drying herbs is wonderful, your grandmother probably knew that freezing basil in olive oil or layering delicate cilantro with salt can preserve flavors just as beautifully.
These time-tested methods, from honey-infused herb blends to herb-flavored sugars, give you creative ways to capture summer’s bounty when traditional drying just won’t do the trick.
Freezing Herbs in Oil or Ice Cubes
For busy home cooks, freezing herbs in oil transforms garden abundance into convenient flavor bombs. Herb-oil infusions capture essential oils beautifully—simply chop fresh herbs like basil or oregano, mix with olive oil, and freeze in ice cube trays.
Pesto ice cubes work wonderfully too, preserving that summer garden taste. These freezing techniques maintain excellent flavor retention for up to twelve months, giving you instant culinary applications year-round.
Preserving With Salt, Honey, or Sugar
When busy schedules don’t allow time for air drying, salt preservation methods offer a reliable backup plan. You’ll layer fresh herbs with kosher salt in glass jars, creating natural preservation that lasts 6-12 months.
Honey infusion benefits include antibacterial properties that keep herbs fresh for up to a year.
Herbal sugar uses work perfectly for mint or lavender, absorbing essential oils while preventing spoilage through moisture removal.
Extending Shelf Life and Flavor
Smart storage container types make all the difference in extending your herbs’ lifespan. Vaporproof containers protect against humidity fluctuations, while dark glass jars shield from light exposure effects that cause flavor degradation factors.
You’ll find ideal humidity levels around 10% work best for storing herbs long-term. When rehydrating dried herbs, a quick sprinkle of water brings them back to life beautifully!
Frequently Asked Questions (FAQs)
Which herbs should not be dried?
Like trying to capture morning mist in a jar, some herbs simply lose their soul when dried. Delicate herbs, such as basil, borage, chives, cilantro, and parsley, lose a lot of their punch when dried.
These tender leaves wilt under heat’s harsh embrace.
Is it better to dry or freeze fresh herbs?
Both methods work well, but your choice depends on the herb. Delicate ones like basil and cilantro freeze well to preserve their bright flavors.
Heartier herbs like rosemary and thyme dry beautifully and concentrate their essence.
Is it better to dehydrate or air dry herbs?
What’s the best path when your garden’s bounty overwhelms your kitchen counter? Dehydrators win for speed and consistency, drying herbs in 2-4 hours with controlled temperature.
Air drying takes 1-2 weeks but preserves delicate flavors naturally, especially for tender herbs like basil.
How do you dry herbs for long-term storage?
Gather herbs in early morning after dew evaporates but before heat builds. Bundle stems with rubber bands and hang in dark, well-ventilated areas for 1-2 weeks until crispy.
How to dry and preserve fresh herbs?
Harvest, bundle, dry—three simple steps reveal nature’s pantry. You’ll cut herbs in early morning when oils peak, tie small bundles with rubber bands, then hang them in warm, airy spots away from sunlight for one to three weeks until crisp.
Is it better to air dry or dehydrate herbs?
Both methods work well, but air drying preserves more delicate flavors while dehydrators offer speed and consistency.
Tougher herbs like rosemary handle dehydrator heat just fine, but you’ll get better results air drying tender herbs like basil.
How long will frozen herbs retain flavor?
Frozen herbs retain peak flavor for 12 months when stored properly. **Ice cube preservation works like a time capsule for your garden’s bounty.
Simply chop fresh herbs, freeze them in water or oil, and enjoy that summer taste all winter long.
How to tell if dried herbs spoiled?
You’ll know dried herbs have spoiled when they lose their vibrant color, smell musty or off, feel overly brittle, or show any signs of mold or moisture.
Can you mix herbs when drying?
Like birds flocking together, herbs can absolutely share drying space! You’ll want to group herbs with similar drying times and moisture levels.
Keep strong-scented ones like mint separate from delicate herbs, or you’ll end up with everything tasting like a peppermint explosion.
Best way to crush dried herbs?
Gently crush dried herbs between your fingers or use a mortar and pestle for coarser textures.
A spice grinder works perfectly for fine powders, but pulse carefully—you don’t want herb dust everywhere like I learned the hard way!
Conclusion
Studies show that home gardeners waste nearly 40% of their herb harvest due to improper preservation—a loss that’d make any seasoned cook weep.
Mastering drying and preserving fresh herbs at home transforms your kitchen into a year-round herb haven. You’ve learned five reliable methods, from traditional air-drying to modern shortcuts.
Remember, patience pays off—rushing ruins those precious essential oils. Start with easy herbs like oregano and thyme, then tackle the trickier ones.
Your future self will thank you when winter arrives and your pantry’s still bursting with summer’s bounty.
- https://extension.psu.edu/lets-preserve-drying-herbs
- https://www.wildnfreefarms.com/drying-herbs/
- https://homesteadingfamily.com/preservation-101-intro-to-dehydrating-food/
- https://extension.okstate.edu/fact-sheets/culinary-herbs-for-oklahoma-gardens.html
- https://extension.colostate.edu/topic-areas/nutrition-food-safety-health/herbs-preserving-and-using-9-335/


