This site is supported by our readers. We may earn a commission, at no cost to you, if you purchase through links.

Last August, I watched three bushels of heirloom tomatoes rot on my kitchen counter because I ran out of ideas after making the fifth batch of marinara. That heartbreak taught me what every gardener eventually learns: the harvest doesn’t wait for you to figure out what to do with it.
Learning a few simple preservation methods transforms that overwhelming abundance into pantry staples you’ll savor all winter, and you don’t need fancy equipment or culinary school skills to do it.
Whether you’re staring down a mountain of zucchini or picking berries by the gallon, the right technique keeps your hard-earned harvest from becoming expensive compost.
Table Of Contents
- Key Takeaways
- Easy Canning Methods for Garden Produce
- Freezing Fresh Fruits and Vegetables
- Dehydrating Fruits, Vegetables, and Herbs
- Simple Pickling and Fermenting Techniques
- Making Jams, Jellies, and Preserves
- Best Storage Solutions for Preserved Foods
- Top 10 Tools for Garden Bounty Preservation
- 1. Magic Mill Compact Food Dehydrator
- 2. 95kpa Vacuum Sealer Machine Silver
- 3. SPAM Classic Canned Pork Lunch Meat
- 4. Silicone Dehydrator Trays for Cosori Dehydrator
- 5. GoodCook Everyday Nonstick Baking Sheet Set
- 6. Orange Flesh Sweet Potatoes 3 lb
- 7. Gallon Fermentation Jars Wide Mouth Kit
- 8. UView Airlift Cooling System Leak Checker
- 9. ThermoPro Digital Thermometer and Hygrometer
- 10. 365 Organic Marinara Pasta Sauce Jar
- Frequently Asked Questions (FAQs)
- How do you preserve a garden harvest?
- How can we preserve summer’s bounty all year long?
- What can you do with excess garden produce?
- How can food preservation help save the taste of summer?
- How do you store dried herbs?
- How do you preserve herbs?
- How to preserve your garden harvest?
- How to make garden vegetables last all year?
- What are the best ways to preserve?
- How do you preserve food without a garden?
- Conclusion
Key Takeaways
- Preservation methods like canning, freezing, dehydrating, and fermenting transform overwhelming garden abundance into shelf-stable pantry staples that last months or even years, preventing waste and extending your harvest well beyond the growing season.
- Water bath canning works safely for high-acid foods like fruits and pickles, while low-acid vegetables require pressure canning at 240°F to eliminate botulism risks, and tomatoes need added lemon juice to guarantee safe acidity levels.
- Blanching vegetables before freezing stops enzyme activity that causes flavor loss and texture breakdown, extending freezer life from 4-6 weeks to 8-12 months, while vacuum sealing can push that timeline to 2-3 years by preventing freezer burn.
- Simple techniques like refrigerator pickles, lacto-fermentation for sauerkraut, and freezing herbs in oil cubes require minimal equipment and no special skills, making food preservation accessible even for beginners with small kitchens.
Easy Canning Methods for Garden Produce
Canning lets you preserve your garden’s harvest in jars that sit happily on your pantry shelf for months or even years. The method you choose depends on what you’re putting up, since different foods need different approaches to stay safe.
Let’s look at the main canning techniques that’ll help you turn fresh produce into shelf-stable treasures.
Water Bath Canning for High-Acid Foods

When canning fruits, jams, or pickles, you’re working with high-acid foods that have a pH of 4.6 or lower—making the hot water bath method both safe and effective. This approach keeps boiling water at 212 °F throughout processing times that range from 5 to 85 minutes, depending on jar size and what you’re preserving.
The acidity stops dangerous bacteria like Clostridium botulinum from surviving, but you’ll need to consult tested recipes to assure safe canning practices. You’ll need to adjust processing times for altitude—each 1,000 feet higher means a few extra minutes in the canner.
Pressure Canning for Low-Acid Vegetables

Low-acid vegetables like green beans, carrots, and corn need pressure canning because boiling water alone can’t reach the 240°F required to eliminate botulism risks. Ensuring proper venting techniques is key for safe canning.
You’ll adjust pressure based on altitude—11 pounds under 2,000 feet, rising to 14 pounds above 6,000 feet. This method preserves nutritional quality while following safe practices that protect your family from foodborne illness.
Canning Whole or Halved Tomatoes

Tomatoes sit right on the edge of acidity, often hovering above a pH of 4.6, which means they need extra protection from botulism. You’ll add 2 tablespoons of bottled lemon juice per quart—or 1 tablespoon per pint—before processing to guarantee canning safety.
Start by blanching your tomatoes for 30 to 60 seconds, then peel, core, and pack them whole or halved into sterilized canning jars, leaving a half-inch of headspace and covering them with heated juice for proper preservation.
Hot Packing Vs. Raw Packing Techniques

Once you’ve got your tomatoes prepped, you’ll want to choose between hot packing and raw packing—two canning techniques that affect food quality, jar efficiency, and shelf stability differently.
Hot packing means you’ll simmer your produce for 2 to 5 minutes before filling jars, which removes up to 30% of trapped air, improves your vacuum seal, and helps colors stay vibrant for 12 to 18 months.
Raw packing skips that step, keeping firmer textures but often leading to floating, shrinkage, and quicker discoloration within 3 to 6 months. Both methods require proper canning process times for canning safety.
Freezing Fresh Fruits and Vegetables

Freezing is one of the simplest ways to lock in the flavor and nutrition of your fresh harvest, and it doesn’t require special equipment or complicated steps. Whether you’re dealing with a bushel of green beans or a counter full of ripe berries, the right freezing technique makes all the difference.
Here’s how to freeze your garden produce so it tastes garden-fresh months from now.
Blanching Vegetables Before Freezing
Blanching is like hitting pause on the clock—it stops enzymes from breaking down your vegetables while they’re frozen. This essential step ensures your harvest stays vibrant and tasty all winter long. Here’s how to blanch properly:
- Boil vegetables briefly in water (broccoli needs 3 minutes) or use steam blanching for better nutrient retention
- Cool immediately in ice water for the same time as blanching to halt enzyme deactivation completely
- Time it right—under-blanching activates enzymes, while over-blanching destroys up to 40% of vitamin C
- Drain thoroughly before freezing to prevent large ice crystals that ruin texture
Without blanching, frozen vegetables develop off-flavors within just 4–6 weeks, but properly blanched ones stay fresh for 8–12 months.
Vacuum Sealing for Maximum Freshness
After blanching, you can lock in that freshness even longer with a vacuum sealer machine. Removing air from freezer bags prevents freezer burn and keeps your vegetables tasting garden-fresh for months beyond standard freezer-safe containers.
Here’s what vacuum sealing delivers:
| Benefit | Standard Storage | Vacuum Sealed |
|---|---|---|
| Green beans shelf life | 8 months | 2–3 years |
| Nutrient retention | Moderate oxidation | Up to 5× less loss |
| Waste reduction | 30–40% discarded | Much less spoilage |
This method excels across produce types—corn extends from six months to a full year, while berries stay vibrant for weeks in your refrigerator.
Modern sealer standards meet FDA requirements, and many pouches now skip BPA entirely. Market growth reflects what gardeners already know: vacuum sealing works. You’ll protect flavor compounds, maintain firmness in tomatoes, and reduce the frustration of tossing spoiled food. Freezing fresh produce this way means your summer harvest truly lasts through winter.
Freezing Herbs in Oil Cubes
Beyond blanching and vacuum sealing, you can preserve fresh herbs by freezing them in oil cubes—a simple trick that locks in flavor far better than water-based methods.
Wash and dry your herbs thoroughly, chop them finely, then fill an ice cube tray about three-quarters full before topping with olive oil. This freezer technique maintains up to 85% of aromatic compounds and prevents botulism growth, a safety concern when storing herbs in oil at room temperature.
Once solid, transfer cubes to labeled freezer bags; they’ll deliver intense flavor retention for up to a year, ready to toss straight into hot dishes for instant oil infusions.
Freezing Whole Tomatoes and Berries
When you freeze whole tomatoes and berries straight from the garden, you’re capturing peak-season flavor with minimal effort. Here’s your quick-freeze game plan:
- Blanch firm tomatoes 30–60 seconds in boiling water, then plunge into ice water—this blanching technique loosens skins for easy peeling and preserves up to 95% of nutrients
- Arrange whole berries on trays before bagging to prevent clumping and maintain texture preservation through smaller ice crystals
- Label with harvest dates and store at −18°C for safe handling; tomatoes stay fresh 8–12 months, berries last 12–18 months
Both frozen summer berries and tomatoes lose some firmness, so save them for cooked dishes where nutrient retention and shelf life matter most.
Dehydrating Fruits, Vegetables, and Herbs

Dehydrating is one of the oldest preservation methods around, and it’s easier than you might think. Whether you use a dehydrator, your oven, or even the sun, you can turn fresh produce into shelf-stable snacks and seasonings.
Here’s how to get started with four simple dehydrating methods.
Using a Food Dehydrator
A quality electric dehydrator makes drying your harvest efficient and consistent, using around 300 to 800 watts per hour while preserving nutrient retention far better than you might expect. Modern models maintain steady temperatures between 40°C and 75°C, which helps your dehydrated fruits and vegetables hold onto their minerals and fiber while extending shelf life from six months to several years.
That’s a practical win for sustainability impacts, reducing waste and cutting storage costs without needing refrigeration.
Oven Drying and Sun-Drying Methods
You don’t need an electric dehydrator to preserve your harvest—your oven and the sun can do the work just as well.
Oven drying at 50–70°C (120–160°F) gives you controlled heat and better microbial safety, especially in humid climates, while preserving nutrients consistently.
Sun drying works beautifully when temperatures stay above 85°F and humidity is low, costing nothing but requiring vigilance against dust and pests.
Both methods handle drying herbs, fruits, and vegetables effectively, though drying time varies based on sun exposure and oven temperature settings.
Making Tomato Powder and Dried Snacks
Once you’ve mastered oven drying and sun-drying, tomato powder becomes your secret weapon for intense flavor and extended storage stability.
Dehydrating tomatoes at 80°C for 11 hours yields ideal nutritional quality, preserving lycopene while reducing moisture to about 11% for long-term stability.
Here’s what makes tomato powder worth the effort:
- Reconstitutes easily with a 1:2 ratio (powder to water) for instant sauces and soups
- Delivers 302 kcal and 13g protein per 100g serving, packing serious nutritional value
- Stores 6–12 months in airtight containers when kept below 25°C
- Enhances pasta dough, seasoning blends, and stews with concentrated tomato taste
- Uses whole tomatoes including skins, minimizing kitchen waste while maximizing flavor
Your food dehydrator works best for consistent results, though oven drying at lower temperatures prevents nutrient loss and maintains that sweet, tangy profile homegrown tomatoes offer.
Drying and Storing Fresh Herbs
After perfecting tomato powder, you’ll find that drying herbs and vegetables preserves their peak flavor for months ahead.
Harvest herbs in early morning after dew evaporates, just before flowering, to capture maximum essential oils. Air drying works well for sturdy varieties like rosemary and thyme—hang small bundles in cool, dark spaces with humidity below 60%. Your food dehydrator gives better moisture control at 95–115°F, preventing mold while keeping volatile oils intact.
Dried leaves should crumble easily, signaling about 5% moisture content. Store in airtight glass jars away from light to maintain 70–90% flavor potency for up to a year.
Simple Pickling and Fermenting Techniques

Pickling and fermenting turn your extra cucumbers, cabbage, and other vegetables into tangy, flavorful foods that last for months. These methods don’t require fancy equipment, and you can start with simple refrigerator pickles before moving on to fermentation projects.
Let’s look at four easy techniques that’ll help you preserve your harvest and add new flavors to your meals.
Refrigerator Pickles and No-Cook Methods
Why settle for plain pickles when you can master easy food preservation techniques that keep your cucumbers crisp for weeks? Refrigerator pickles skip the canning process entirely, relying instead on cold brine, proper brine acidity, and refrigeration for microbial safety. You’ll love how they maintain vegetable crispness while offering endless flavor variations.
Here’s what makes these methods for food preservation so practical:
- Mix 1 ½ cups water with ½ cup 5% vinegar and 2–3 teaspoons salt per quart jar
- Pour cooled brine over sliced cucumbers, carrots, or cauliflower without any heating
- Refrigerate for 36–48 hours before tasting your crisp, tangy pickles
- Enjoy peak flavor and texture for 3–4 weeks of storage duration
- Watch for cloudiness or bubbling as signs your batch needs disposal
The no-cook approach preserves that garden-fresh snap while keeping pickling simple and safe.
Brining and Vinegar Pickling
When you’re ready to store produce for months, brining and vinegar pickling deliver shelf-stable results with proven microbial safety. Salt concentrations above 15% slow browning and extend shelf life two to three times, while vinegar acidity levels between 5–7% inhibit bacterial growth and meet U.S. safety standards.
These pickling recipes maintain over 85% nutrient retention, and market trends show a 16% rise in premium pickled product sales from 2023 to 2025—proof that traditional vinegar pickling still resonates with home preservers.
Lacto-Fermentation for Sauerkraut and Kimchi
Lacto-fermentation harnesses beneficial bacteria to transform fresh cabbage and vegetables into probiotic-rich foods packed with complex flavor. You’ll need only shredded produce, salt at 2–3% by weight, and fermentation jars to begin—LAB dynamics drive the process as Leuconostoc and Lactobacillus strains convert sugars into lactic acid, dropping pH below 4.6 within days for food safety.
- Sauerkraut: Massage 2% salt into shredded cabbage, pack tightly, and ferment at room temperature for 5–7 days
- Kimchi: Mix napa cabbage with 3% salt, gochugaru, garlic, and ginger; ferment near 10°C for balanced acidity
- pH changes: Monitor acidity as it drops to 3.5–4.0, creating an inhospitable environment for pathogens
- Salt concentration: Maintain proper ratios to favor LAB growth and inhibit spoilage bacteria
- Health benefits: Enjoy enhanced vitamin bioavailability, improved gut diversity, and antioxidant support
Fermenting vegetables delivers months of shelf life and digestive wellness in every tangy bite.
Troubleshooting Common Fermentation Issues
When fermenting food goes off track, you can usually fix it by addressing temperature, salt, or oxygen exposure. Mold prevention starts with complete brine submersion—exposed vegetables invite fungal growth. Stuck fermentation often signals a salt imbalance; maintaining 2–3% salinity ensures proper lactic acid production while limiting pathogen risks. Temperature control is crucial: keep jars below 72°F to discourage yeast overgrowth and support probiotic-rich food development. If the fermentation process stalls, check your brine strength and room conditions before discarding the batch—food safety depends on the pH dropping below 4.6 within three days.
| Issue | Quick Fix |
|---|---|
| White film on brine | Skim kahm yeast; lower temperature to 68°F or below |
| Slow acidification | Add ½ tsp salt per quart; maintain 65–75°F range |
| Visible mold spots | Discard batch; sanitize jars; ensure full submersion next time |
Making Jams, Jellies, and Preserves

When your garden overflows with fruit, turning it into something sweet and spreadable is one of the most rewarding ways to capture summer’s flavor. Jams, jellies, and preserves let you enjoy your harvest on toast, in yogurt, or straight from the jar all year long.
Here’s how to get started with these simple, delicious preservation methods.
Refrigerator Jam With Summer Berries
Summer berries are like jewels from your garden, and turning them into refrigerator jam means you can savor that sweetness without fuss. You’ll mix 3 cups of berries with ¾ cup sugar and 2 tablespoons lemon juice, then simmer for 15–25 minutes until it thickens. Here’s what makes this method work:
- Berry Ratios: Use 454 grams of berries to 150 grams sugar for balanced flavor
- Cooking Duration: Reach 104°C for proper thickening without pectin
- Storage Methods: Keep refrigerated at 4°C for 3–4 weeks
- Nutritional Value: About 47 calories per tablespoon with natural antioxidants
- Food Safety: Acidic pH between 2.8–3.5 prevents spoilage
This homemade preserves approach gives you spreadable summer harvest in airtight jars, ready whenever you need a taste of sunshine.
Easy Homemade Jelly and Marmalade
Making jellies and marmalades is simpler than it looks once you understand pectin types and sugar concentration. Regular pectin needs acid and sugar to gel properly, while low-sugar versions use calcium ions instead.
You’ll want your fruit mixture between pH 2.8 and 3.5 for both texture and safety.
After cooking, use thermal processing through water bath canning to seal jars—this gives you shelf-stable homemade preserves that last up to 12 months in cool storage.
Roasted Tomato Sauce and Ketchup Recipes
Slow-roasting tomatoes overnight transforms your garden harvest into a deeply caramelized sauce without additives. This process reduces the water content by 40% while intensifying the natural sweetness. Roast at 200–250°F for 8–10 hours, then blend to a smooth consistency using an immersion blender.
For safe canning, add 1/4 teaspoon bottled lemon juice per pint to maintain acidity below pH 4.1. This ensures your homemade preserves remain shelf-stable for 12–18 months when stored in a cool place.
Using Pectin and Sugar for Preservation
Pectin gelation works like a molecular handshake between pectin, sugar, and acid, locking fruits into spreadable jams with reliable texture factors. You’ll need sugar above 55% and pH below 3.5 for traditional high-methoxy pectin, but sugar alternatives like calcium-set low-methoxy pectin let you skip the sweetness without sacrificing gel formation.
Proper ratios guarantee storage stability and shelf life up to a year, turning your homemade preserves into canning success stories that taste like summer long after harvest ends.
Best Storage Solutions for Preserved Foods

You’ve done the hard work of preserving your harvest, but storing it properly matters just as much as the preservation method you chose. Poor storage can undo all your effort, leading to spoiled food, wasted time, and lost money.
Here’s how to keep your preserved foods safe, fresh, and ready to enjoy throughout the year.
Pantry and Root Cellar Storage Tips
Beyond the harvest basket, your pantry and root cellar become partners in extending shelf life when you control temperature and humidity levels. Root cellars thrive at 32–40°F with 85–95% relative humidity, while pantries prefer cooler temps around 50–60°F.
Use a thermometer and hygrometer to monitor conditions, and keep airflow optimization in mind by spacing crates on slatted shelves.
Practice FIFO rotation—first in, first out—to reduce waste by 25%, and check monthly for pest prevention to catch issues early.
Freezer Organization for Preserved Produce
While root cellars work best for onions and squash, your freezer accommodates tender crops that won’t last in cool storage. Organizing frozen produce helps you prevent waste and find items quickly, especially when you follow the FIFO method and sort by food type.
Flat-freezing in quality packaging materials extends shelf life from 6–8 months to over a year, and stackable bins boost usable space by 25%.
- Set your freezer to -18°C and maintain 75–85% capacity for energy efficiency
- Use space zoning—dedicate separate bins for fruits, vegetables, and prepared meals
- Choose vacuum-sealed flat packages or freezer bags rated for extreme cold to prevent freezer burn
- Label every container with freezing dates and use clear plastic containers for faster retrieval
Monitoring Temperature and Humidity
Proper food storage hinges on consistent conditions, and temperature sensors paired with digital thermometer-hygrometers let you track both factors from a cool, dry, airy location. Keep dry storage between 50–70°F and root cellars at 85–95% humidity to prevent spoilage.
Data logging reveals patterns before problems appear, while daily checks catch fluctuations that accelerate mold growth by up to 60%. Humidity control through ventilation and storage optimization through monitoring tools cut waste and extend shelf life for months.
Properly Labeling and Dating Preserved Goods
Once your monitoring system is running smoothly, you’ll need clear labels to complete your food storage strategy. Labeling laws require product names and dates on preserved goods, yet date confusion drives 37% of consumers to toss food prematurely—wasting perfectly safe jars and bags.
Use archival materials like acid-free tags with cotton string to keep information readable for months, and include both “canned on” and “best by” dates. This simple habit matches proper food storage techniques with airtight containers, extends shelf life, reduces waste, and helps you rotate stock before quality fades.
Top 10 Tools for Garden Bounty Preservation
Having the right tools makes all the difference when you’re preserving your garden harvest. The equipment you choose can save you time, protect food quality, and make the whole process more enjoyable.
Here are ten essential tools that’ll help you preserve everything from tomatoes to herbs with confidence.
1. Magic Mill Compact Food Dehydrator
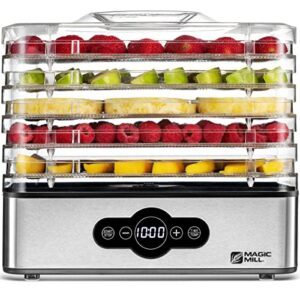
When you’re preserving garden harvest in bulk, using a dehydrator can feel like having an extra set of hands in the kitchen. The Magic Mill Compact Food Dehydrator manages food preservation with a 240-watt motor and five adjustable trays, giving you flexibility to dry everything from tomato slices to fresh herbs.
It keeps nutrient preservation high—around 97% of vitamins stay intact—while pulling just 0.24 kWh per hour, so energy efficiency won’t strain your budget.
User reviews consistently rate it above 4.6 stars for even drying and quiet operation. Its compact design fits smaller kitchens without sacrificing dehydrator performance, making it a practical choice for year-round preserving.
Best For: Home cooks and gardeners who want to preserve seasonal produce, herbs, and meats efficiently without taking up much counter space.
- Retains 97% of nutrients through precise temperature control (95°F-158°F) and even airflow, keeping vitamins and minerals intact during drying
- Energy-efficient operation at 240 watts costs only $0.70-$0.80 per 24-hour cycle while maintaining quiet performance under 48 dB
- Five adjustable trays (0.6-1.1 inches) accommodate different food thicknesses simultaneously, with dishwasher-safe components for easy cleanup
- Trays reported as flimsy or fragile by some users, raising durability concerns for frequent use
- Limited tray height even with adjustments, restricting thickness of foods like large fruit slices or thick jerky strips
- Short 3-foot power cord and occasional balance issues reported, with some units producing concerning smells or noises during operation
2. 95kpa Vacuum Sealer Machine Silver
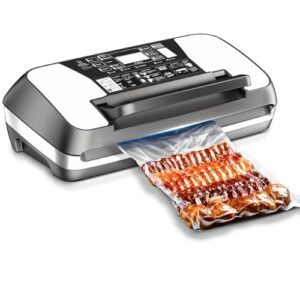
Vacuum sealing locks in freshness and stretches freezer storage beyond what standard containers can manage. The 95kPa Vacuum Sealer Machine Silver removes 99.8% of air with 95 kilopascals of pressure, giving you serious sealer performance that fights freezer burn.
Its dual-pump system seals bags in under eighteen seconds, so you’re not stuck waiting while your harvest wilts. Design durability shows in the stainless steel housing and 12mm double seal, while energy efficiency keeps costs low at 0.09 kWh per cycle.
Market comparison reveals it outperforms 230W models by thirty to forty-five percent, making it a smart pick for food preservation techniques and reliable food storage.
Best For: Home cooks and meal preppers who want to extend food shelf life significantly while reducing freezer burn and food waste.
- Removes 99.8% of air with 95kPa pressure, extending food freshness up to 5–8 times longer than standard containers and reducing freezer burn by 40%.
- Fast dual-pump system seals bags in 8–18 seconds with a durable 12mm double seal, outperforming lower-wattage models by 30–45%.
- Energy-efficient at 0.09 kWh per cycle with built-in bag cutter, automatic standby mode, and compatibility with standard bag rolls.
- Some users report weak suction, sealing failures, and durability issues including breakage of the locking mechanism.
- No power switch requires unplugging to turn off, and operation is slower than some competing vacuum sealers.
- Performance may decline over time with careful handling needed to avoid damaging internal components.
3. SPAM Classic Canned Pork Lunch Meat

Long-term food storage gains a reliable ally when you stockpile canned goods like SPAM Classic, which holds a three-year best-by date and can last years beyond that mark in cool, dry conditions. Each twelve-ounce can delivers seven grams of protein per two-ounce serving, making it a practical protein source for food security planning.
Market trends show the global canned meat sector climbing to USD 47.27 billion by 2033, reflecting growing demand for shelf-stable foods. The manufacturing process uses vacuum sealing and heat sterilization to prevent spoilage, while culinary uses span from breakfast scrambles to emergency meal kits, giving you flexible food preservation options year-round.
Best For: Emergency preparedness planners, camping enthusiasts, and budget-conscious households seeking shelf-stable protein with versatile meal applications.
- Exceptional shelf life of 3 years with proper storage, making it ideal for long-term food security and emergency supplies
- Delivers 7g of protein per serving at an economical price point, especially when purchased in bulk packs of 12 cans
- Highly adaptable ingredient that works across breakfast, lunch, and dinner recipes from multiple cuisines including Hawaiian, Korean, and American dishes
- High sodium content at 790mg per serving (34% daily value) may be problematic for those monitoring salt intake
- Fat comprises 82% of calories with 16g total fat per serving, limiting its suitability for low-fat diets
- Requires refrigeration and consumption within 3-7 days once opened, reducing convenience despite the unopened shelf stability
4. Silicone Dehydrator Trays for Cosori Dehydrator
When dehydrating fruits and vegetables turns messy, silicone sheets save the day by catching purees and sticky slices before they drip through mesh trays. These food-grade mats fit Cosori CP267-FD dehydrators precisely at 11.8 by 10.6 inches, and they’re also compatible with Magic Mill and BioChef models.
Non-stick performance lets you peel dried fruit leather cleanly without tearing, while heat resistance up to 450°F accommodates any electric dehydrator task.
Cleaning takes minutes—just toss them in the dishwasher or hand-wash with soap. Market availability expanded in 2023, with sets of three priced between $15 and $25, making them an affordable upgrade for dehydrating food.
Best For: Anyone dehydrating fruit leathers, purees, or sticky foods in a Cosori CP267-FD, Magic Mill, or BioChef dehydrator who wants mess-free drying and easy cleanup.
- Non-stick surface releases dried fruit leather cleanly without tearing, and the material withstands heat up to 450°F through 200 uses
- Precise 11.8 x 10.6-inch fit prevents liquid spillage while maintaining airflow, with dishwasher-safe cleaning that takes under 15 minutes
- Sets of three cost $15–$25, offering a reusable alternative to disposable parchment with consistent 4.8/5 user satisfaction ratings
- Silicone needs a hard tray underneath for support and can’t be used alone during dehydration
- Some units arrive with an initial odor that requires washing, and the material may conduct heat poorly, potentially extending drying times
- Dishwasher cleaning can be tricky despite manufacturer claims, with some users reporting difficulty removing residue
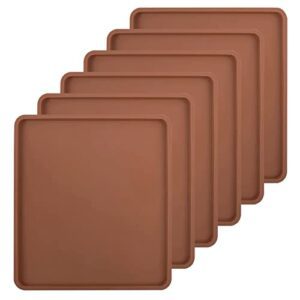
5. GoodCook Everyday Nonstick Baking Sheet Set

Heavy-gauge carbon steel sheets handle heat up to 410°F without warping, making them ideal for oven drying herbs and vegetables at low temperatures. Their PTFE-free nonstick coating ensures food safety and releases roasted produce cleanly, while the scratch-resistant surface withstands metal spatulas during food preservation techniques.
The three-pan sizes—13″ x 9″, 15″ x 10″, and 17″ x 11″—give you flexibility for batch processing garden bounty, whether you’re freezing blanched greens or dehydrating tomato slices. Compatibility with parchment paper enables eco-friendly dehydrating and freezing workflows.
Hand washing preserves the coating’s effectiveness beyond 25 uses.
Best For: Home gardeners and food preservationists who need versatile, safe baking sheets for oven-drying herbs, dehydrating vegetables, and batch-processing seasonal produce.
- PTFE-free nonstick coating ensures chemical-free food contact and easy release of roasted or dried produce
- Three different pan sizes (13″ x 9″, 15″ x 10″, 17″ x 11″) accommodate various batch sizes for preservation tasks
- Heavy-gauge carbon steel withstands up to 410°F without warping and distributes heat evenly for consistent dehydrating
- Hand washing required to maintain nonstick coating beyond 25 uses, adding extra maintenance time
- Largest sheet may not fit in smaller ovens or toaster ovens
- Coating can degrade 15–20% faster if run through dishwasher repeatedly despite being labeled dishwasher-safe
6. Orange Flesh Sweet Potatoes 3 lb
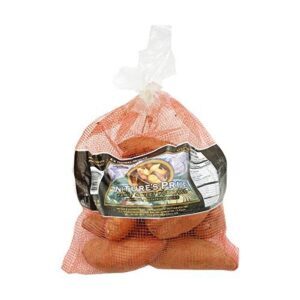
A 3-pound bag of orange flesh sweet potatoes gives you multiple preservation options, from canning and dehydrating to root cellaring—methods that tap into global production trends showing sweet potatoes as a rising star in vegetable preservation.
After curing your sweet potatoes at 80–85°F for a week, you’ll notice their natural sugars develop, making them perfect for pressure canning (65 minutes for pints), oven drying into chips, or simple pantry storage for three to five weeks.
Their beta-carotene content and sweet potato nutrition make them worth preserving through any method, whether you’re exploring culinary uses like mashed sides or experimenting with root vegetables in your root cellar, and their storage duration extends beautifully when you match the technique to your needs.
Best For: Home cooks and gardeners who want to preserve nutrient-rich sweet potatoes through multiple methods like canning, dehydrating, or root cellaring while maximizing their 3-pound purchase.
- High beta-carotene and vitamin A content support immune function and eye health, with nutritional value retained through most preservation methods.
- Versatile preservation options including pressure canning (65 minutes for pints), dehydrating into chips, or simple pantry storage for 3-5 weeks after curing.
- Triple-washed and ready to use with no additives or preservatives, making them convenient for immediate cooking or batch preservation projects.
- Some customers received small or thin sweet potatoes with quality and size inconsistencies that may affect preservation yields.
- May wilt or lose freshness quickly if not cured or preserved promptly after purchase, requiring immediate action for optimal results.
- Scarring on some roots requires removal before processing, adding extra prep time to canning or dehydrating projects.
7. Gallon Fermentation Jars Wide Mouth Kit
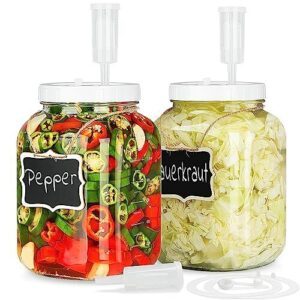
A gallon fermentation jar kit offers a simple way to turn cabbage, cucumbers, and other surplus vegetables into probiotic-rich foods with minimal fuss. With a 1-gallon jar capacity—enough for roughly 8 pounds of veggies—you can ferment large batches of sauerkraut or kimchi, and the included airlock lid maintains anaerobic safety features throughout the fermenting food process.
Market trends show glass fermentation jars now represent 41% of kit sales, reflecting growing interest in the fermentation process, and cleaning methods stay straightforward since these USDA-certified jars don’t harbor odors or leach chemicals like plastic alternatives.
Best For: Home fermenters who want to make large batches of sauerkraut, kimchi, or pickles with a reliable airlock system that keeps the process hands-off and reduces contamination risk.
- Wide mouth design (4.3″ diameter) makes packing vegetables and cleaning much easier than standard jars, and the included airlock automates gas release so you don’t have to burp jars manually.
- Food-grade glass construction is USDA-certified, doesn’t leach chemicals or hold odors, and lets you visually monitor fermentation progress to catch any spoilage early.
- Complete kit with 3 airlocks, spare grommets, and exact measurement markings helps beginners get consistent results across batches without buying extra accessories.
- Some users report lids may not seal properly, which can lead to leaks and potentially ruin a batch if the anaerobic environment isn’t maintained.
- Full jars weigh quite a bit—around 2.8 pounds empty and much more with 8 pounds of vegetables—making them awkward to move and risky to drop.
- Glass breaks if mishandled, and the jars aren’t ideal if you need to shake ingredients frequently during fermentation, like when making mead.
8. UView Airlift Cooling System Leak Checker
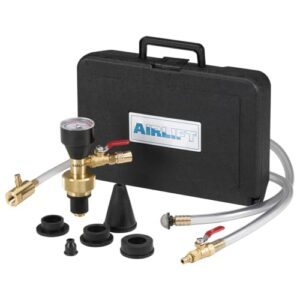
Once your jars are sealed and stored, monitoring your garden produce preservation area becomes the next step.
A UView Airlift Cooling System Leak Checker helps keep your chest freezer running smoothly by detecting coolant leaks through vacuum testing—creating up to 25 inches of mercury to confirm airlock prevention before refilling.
This diagnostic accuracy saves time, cutting service work by 50% compared to manual methods, so you won’t lose batches of frozen vegetables to a failing freezer system.
Best For: Professional mechanics, DIY car enthusiasts, and anyone who regularly services cooling systems and wants to save time while ensuring proper refills and leak detection.
- Fills the entire cooling system in under 60 seconds and eliminates airlocks completely, cutting service time by up to 50% compared to manual bleeding methods.
- Creates 25 inches of mercury vacuum to accurately detect leaks from head gaskets, cracked blocks, or external connections before you add coolant.
- Works with over 21 vehicle types including cars, trucks, hybrids, and EVs, plus includes multiple nickel-plated brass adapters for broad compatibility.
- Requires a shop air compressor to operate, so it’s not a standalone tool you can use anywhere without compressed air access.
- Some users received units with cracked gauge glass due to inadequate packaging during shipping.
- May need additional adapters or modifications for certain vehicle models despite the advertised universal compatibility.
9. ThermoPro Digital Thermometer and Hygrometer
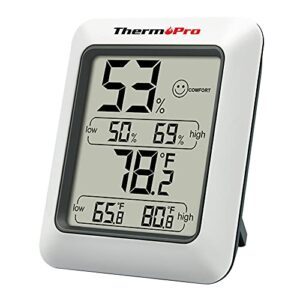
Keeping your preserved food safe means watching temperature and humidity levels closely, and a ThermoPro digital thermometer hygrometer makes that job simple. This device refreshes readings every 10 seconds with accuracy within ±1°F and ±2-3% humidity, so you’ll catch problems before spoilage starts.
You can mount it with the tabletop stand, magnetic back, or hanging option—perfect for pantries, root cellars, or chest freezers where ideal conditions matter most.
Monitoring helps you maintain the right environment for food storage methods like canning and dehydrating, extending shelf life while preserving flavor and nutrients in your garden bounty.
Best For: Home food preservers and gardeners who need reliable monitoring of temperature and humidity in storage spaces like pantries, root cellars, and freezers to prevent spoilage and maintain food quality.
- Highly accurate readings (±1°F, ±2-3% RH) with fast 10-second refresh rate let you catch environmental problems before food spoils.
- Three mounting options (tabletop, magnetic, hanging) and clear LCD display with comfort indicators make it easy to use anywhere you store preserved food.
- Records high and low readings so you can track conditions over time and adjust storage environments for better preservation results.
- Requires periodic AAA battery replacement, adding minor ongoing maintenance to your food storage routine.
- Accuracy may decrease in extreme temperature environments outside the standard range, limiting use in some specialized storage conditions.
- No waterproof rating means you’ll need to keep it away from direct moisture in humid cellars or near washing areas.
10. 365 Organic Marinara Pasta Sauce Jar
You’ve got fresh garden tomatoes ready for preservation, but you’ll also want quality options on hand for quick weeknight meals.
The 365 Organic Marinara Pasta Sauce Jar gives you both—use it straight from your pantry, or treat it as a starting point for canning your own tomato sauce variations. At $3.69 per jar, this organic marinara contains no added sugar and features basil, oregano, and extra virgin olive oil.
Try mixing it with roasted garden vegetables before hot packing into sterilized jars, or layer it with your frozen produce for ready-to-cook meals that taste homemade all winter long.
Best For: Home cooks who want an organic, no-added-sugar marinara that works straight from the jar or as a base for customized sauces and meal prep.
- USDA organic with no added sugar, keeping carbs at 9g per serving and fitting low-carb or clean-eating diets
- Budget-friendly at $3.69 for a 2.38-pound jar, making organic eating more accessible
- Versatile for pasta, pizza, or as a starter for adding your own vegetables and seasonings
- Texture can be watery and may need draining or simmering to thicken for some recipes
- Mushroom pieces can be chewy and require longer cooking to soften properly
- Flavor may need boosting with extra salt, pepper, or herbs compared to more robust brands
Frequently Asked Questions (FAQs)
How do you preserve a garden harvest?
Don’t put all your eggs in one basket—home food preservation works best when you combine techniques for preserving fruits and vegetables.
Your harvest preservation goals guide whether you choose canning, freezing, dehydrating, or fermenting, while produce selection criteria and preservation safety tips guarantee quality results year-round.
How can we preserve summer’s bounty all year long?
You can extend summer’s abundance year-round through canning and freezing food, dehydrating, pickling, and fermenting—methods of food preservation that support waste reduction, cost savings, and food security.
While mastering preserving garden harvests develops valuable skill development, these techniques also ensure year-round enjoyment of seasonal produce.
What can you do with excess garden produce?
You can share excess harvest with neighbors, donate to food pantries, or create recipes like sauces and salsas.
Alternatively, use preservation methods—canning, freezing, and dehydrating—to reduce food waste and increase garden yield year-round.
How can food preservation help save the taste of summer?
Freezing can help you capture flavor at its absolute peak, and blanching vegetables before freezing retains up to 1300% more vitamin C compared to skipping that step.
When you preserve food using methods like canning, freezing, or dehydrating, you’re locking in summer harvest flavors and extending seasonal eating well into winter.
How do you store dried herbs?
Store dried leaves in airtight storage containers made of amber glass or ceramic, keeping them in cool, dark spaces below 70°F. Ideal conditions include 40-60% humidity to prevent mold.
Quality retention lasts one to three years, though degradation indicators like color fading or aroma loss signal declining potency.
How do you preserve herbs?
You can preserve herbs through several herb preservation methods. Drying techniques work well for hardy herbs like rosemary and thyme, while freezing fresh herbs in oil infusions maintains flavor.
Vinegar preserves also extend shelf life, though storage safety requires refrigeration for oil-based methods.
How to preserve your garden harvest?
Your choices in preserving garden produce—canning high-acid foods, pressure canning low-acid vegetables, freezing blanched items, or dehydrating for long-term storage—directly impact food safety and shelf life while maximizing your harvest’s value throughout the year.
How to make garden vegetables last all year?
Think of your garden vegetables like a retirement fund—you can’t harvest all year, but with smart preservation planning and the right storage techniques, you can enjoy fresh flavors across every season.
Smart preservation planning turns your garden vegetables into a retirement fund—you can’t harvest all year, but proper storage techniques let you enjoy fresh flavors across every season
Combine freezing vegetables, canning, and dehydrating to extend shelf-life, creating your own preservation calendar that turns garden bounty into a year-round harvest.
What are the best ways to preserve?
The best food preservation methods depend on what you’re working with, but canning, freezing, and dehydrating cover most needs.
Freezing wins for nutritional value retention, keeping vitamin C and folate levels high when you blanch first and vacuum seal properly.
How do you preserve food without a garden?
You don’t need dirt to start your food preservation journey. Buying bulk produce when food prices dip, visiting community gardens, or foraging lets you stockpile food and stretch your grocery budget while reducing food waste through strategic preservation.
Conclusion
Imagine this: you’re standing in your kitchen next February, sleet tapping the windows, while you spoon homemade strawberry jam onto toast and toss frozen basil cubes into soup. That’s the real payoff of these easy ways to preserve garden bounty—turning summer’s fleeting abundance into everyday magic when the ground’s frozen solid.
Start with just one method this season, whichever fits your schedule and available equipment, and you’ll wonder why you ever let anything go to waste.
- https://www.globenewswire.com/news-release/2025/05/19/3084203/0/en/United-States-Canning-Jar-Market-Is-Poised-To-Reach-Valuation-of-US-1-573-56-Million-By-2033-Astute-Analytica.html
- https://www.neafcs.org/assets/documents/impact/2024-Impact/2024%20Home%20Food%20Safety%20and%20Preservation%20Impact%20Statement%20FINAL.pdf
- https://pmc.ncbi.nlm.nih.gov/articles/PMC7691006/
- https://ift.onlinelibrary.wiley.com/doi/10.1111/1750-3841.16810
- https://www.sciencedirect.com/science/article/abs/pii/B9780128187333000102