Skip to Content

Garden Harvest Salsa Recipe: Fresh & Easy Step-by-Step Guide (2025)

This site is supported by our readers. We may earn a commission, at no cost to you, if you purchase through links.

garden harvest salsa recipeYour garden harvest salsa recipe transforms sun-ripened tomatoes, crisp onions, and fresh peppers into chunky perfection in just minutes.

You’ll combine diced Roma or beefsteak tomatoes with sweet yellow onions, minced garlic, jalapeños, and cilantro, then brighten everything with lime juice and salt.

Pick tomatoes when they yield slightly to pressure and peppers at full color for maximum flavor.

Drain chopped tomatoes for 30 minutes to prevent watery consistency, and wear gloves when handling hot peppers.

This versatile salsa works beautifully with chips, grilled meats, or as a fresh topping for tacos and eggs.

The secret lies in balancing acidity, heat, and texture for restaurant-quality results, which makes it a great addition to various dishes, and its flavor can be enhanced by the use of fresh ingredients.

Key Takeaways

  • You’ll get restaurant-quality results by harvesting tomatoes when they yield slightly to pressure and peppers at full color for maximum flavor
  • You can prevent watery salsa by draining chopped tomatoes for 30 minutes and removing seeds before mixing your ingredients
  • You should wear gloves when handling hot peppers since capsaicin oils can cause burning sensations lasting up to 24 hours
  • You’ll create perfect balance by combining diced Roma or beefsteak tomatoes with sweet yellow onions, garlic, jalapeños, cilantro, lime juice, and salt

Garden Salsa Basics

Making fresh salsa from your garden harvest transforms ripe tomatoes, crisp peppers, and fragrant herbs into a vibrant condiment that captures summer’s peak flavors.

You’ll need just a few basic ingredients and simple preparation techniques to create this versatile addition to your kitchen repertoire.

Essential Ingredients

From seed to salsa bowl, your garden harvest salsa recipe depends on six essential ingredients that transform ordinary vegetables into extraordinary flavor.

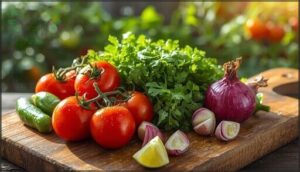
Start with ripe Roma or beefsteak tomatoes for that perfect chunky base, then add sweet yellow onions that balance the tomatoes’ natural acidity beautifully.

Ripe Roma or beefsteak tomatoes create the perfect chunky foundation for your homemade salsa success

  • Tomato Selection: Choose Roma varieties for thickness or beefsteak for juiciness
  • Pepper Choices: Jalapeños deliver mild heat—adjust quantity based on your taste preferences
  • Cilantro Usage: Fresh cilantro adds that signature bright, herbaceous note

Round out your homemade salsa with fresh garlic for depth, lime juice for bright acidity, and salt to tie everything together.

Understanding the importance of healthy eating habits can also enhance your approach to creating delicious and nutritious garden harvest salsa recipes.

Prep Time and Yield

Your homemade salsa comes together in just 15 minutes once you’ve harvested your ingredients.

One batch size produces about 5 cups – enough for several meals or entertaining friends.

Yield factors depend on your harvest quantity, but expect roughly 7 pints when canning larger amounts.

Prep timing works best with sharp knives and efficient chopping technique.

This easy salsa recipe scales beautifully whether you’re making a small bowl or preserving your entire tomato crop.

The cooking time stays minimal since you’re working with fresh ingredients.

Serving Suggestions

Your garden fresh salsa transforms into countless meal enhancers beyond traditional appetizer duties.

Pair this vibrant snack with tortilla chips for classic snack options, or elevate taco toppings and nacho recipes.

Try it over scrambled eggs for creative breakfast ideas, or dollop onto grilled chicken and fish.

These versatile serving suggestions make your homemade creation shine at barbecues, potlucks, or weeknight dinners when you need quick serving ideas.

Choosing Salsa Plants

choosing salsa plants
Selecting the right plants for your salsa garden sets the foundation for fresh, flavorful homemade salsa all season long.

You’ll want to choose tomato varieties that offer the perfect balance of flavor and texture, along with peppers that match your heat preference and herbs that complement the overall taste profile.

Tomato Varieties

Your tomato choice makes or breaks your garden salsa recipe. Roma Tomatoes deliver thick, meaty flesh with fewer seeds—perfect for chunky homemade tomato salsa that won’t turn watery. Beefsteak Tomatoes add substantial bite, while Heirloom Varieties bring complex flavors that store-bought can’t match.

Consider these proven performers for fresh tomato salsa:

  • Paste varieties like San Marzano for concentrated flavor and minimal juice
  • Cherry Tomatoes for bursts of sweetness and visual appeal
  • Tomato Hybrids combining disease resistance with consistent yields

For the best results, understanding salsa tomato characteristics is essential to creating a great garden harvest salsa.

Pepper Options

When choosing pepper varieties for your salsa garden, consider your heat tolerance carefully.

Jalapeño heat ranges from 2,500 to 8,000 Scoville units, making them perfect starter peppers.

Anaheim peppers offer mild warmth with thick flesh, while serrano varieties pack more punch at 10,000-25,000 units.

Poblano peppers bring earthy smokiness when roasted.

For serious heat lovers, cayenne spice delivers 30,000-50,000 units of fire.

Mix sweet bell peppers with spicier varieties for balanced flavor.

Add smoked paprika during preparation to enhance any pepper’s natural smokiness and create complex flavor profiles.

To create the perfect salsa, research the best peppers for your desired level of heat and flavor.

Cilantro and Onion Selection

Now that you’ve picked your perfect peppers, it’s time for an expert touch with cilantro and onion selection.

Go for cilantro varieties like ‘Slow Bolt’ to stretch those summer harvests—nothing ruins a good salsa like bitter, flowering greens. For Onion Types, sweet standouts such as Vidalia or Walla Walla mellow every bite.

Plant green onions if you love constant snipping. Remember, Harvest Timing matters—grab cilantro before flowers form, keeping those fresh Flavor Profiles and bright Aroma Selection locked in.

To achieve ideal growth, consider the soil quality factors that affect plant health and development.

Harvesting Salsa Ingredients

Knowing when to harvest your salsa ingredients makes the difference between bland and brilliant flavors.

You’ll want to pick tomatoes at peak ripeness, peppers when they’ve developed full color, and cilantro before it bolts to seed.

Timing The Harvest

timing the harvest
Planning your harvest timing guarantees peak ripeness across all ingredients.

Staggered planting creates succession harvest windows, while weather impact affects maturity rates.

Most salsa vegetables overlap from August until first frost, giving you several weeks of optimal flavor.

Morning picking captures maximum freshness before afternoon heat reduces quality.

Track each plant’s development cycle to synchronize your timing the harvest perfectly.

Tomato Readiness

tomato readiness
Ripening Stages reveal when your fresh tomatoes reach peak flavor. Perfectly ripe ingredients show full color development and yield slightly to gentle pressure.

Variety Differences matter – beefsteak tomatoes ripen slower than Roma varieties. Watch the blossom end for color changes.

Consistent watering prevents cracking prevention issues. Watering Impact affects tomato readiness, so maintain steady moisture levels for your garden tomato salsa success.

Pepper and Cilantro Harvest

pepper and cilantro harvest
Timing your pepper and cilantro harvest perfectly guarantees maximum flavor in your homemade salsa. Pepper selection depends on heat preference, while cilantro care requires watching for flower buds that signal bitter flavors ahead.

Harvest timing makes the difference between bland and brilliant salsa:

  • Check peppers daily when they reach full size – green jalapeños pack mild heat, while red ones bring serious fire
  • Snip cilantro stems before white flowers appear, as blooming ruins the fresh, bright taste your salsa craves
  • Harvest in early morning when plants hold maximum moisture and essential oils
  • Keep pepper burn relief handy – wear gloves when handling hot varieties to protect your skin

Crop rotation and soil quality affect flavor intensity year after year.

Preparing Salsa Ingredients

preparing salsa ingredients
Once you’ve harvested your fresh salsa ingredients, proper preparation becomes the key to achieving that perfect garden-to-table flavor.

You’ll need to master three essential techniques: chopping vegetables to the right size, removing excess moisture from tomatoes, and safely handling spicy peppers without burning your hands.

Chopping and Dicing

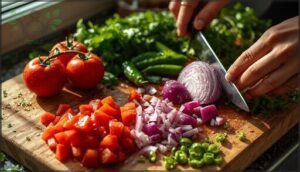
Sharp knife skills make the difference between amateur and professional-looking salsa.

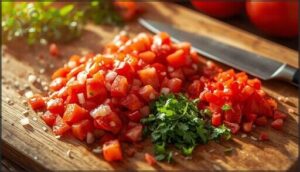
Use proper cutting boards and dicing techniques to create uniform cuts about quarter-inch in size for consistent texture.

Chop methods matter—dice onions with steady, even strokes while using quick motions for cilantro to prevent bruising.

Good vegetable prep and knife skills guarantee each spoonful delivers balanced flavor.

Master these chopping and dicing fundamentals for restaurant-quality results every time.

Investing in quality cutting board materials can substantially improve the durability and hygiene of your kitchen tools.

Removing Seeds and Skins

After chopping your vegetables, properly removing seeds and skins transforms your salsa from watery mess to restaurant-quality perfection.

Smart tomato prep prevents that soggy disappointment we’ve all experienced.

Your skin texture game-changer starts with blanching. Drop tomatoes in boiling water for 60 seconds until skins crack, then plunge into ice water. The skins practically slide off like magic.

Master these seed removal techniques:

  1. Score an X on tomato bottoms before blanching for effortless peeling
  2. Extract cores completely to eliminate bitter flavors ruining your batch
  3. Scoop seeds thoroughly using a spoon to prevent watery consistency
  4. Drain chopped tomatoes in colander for 30 minutes after seed extraction
  5. Save that precious tomato juice for cooking or drinking later

These peel methods guarantee your homemade salsa achieves the perfect chunky consistency without excess liquid diluting those fresh garden flavors.

Handling Hot Peppers

Hot peppers demand respect—their capsaicin oils can cause burning sensations lasting up to 24 hours. Pepper safety starts with proper glove usage: always wear food-grade disposable gloves when handling hot peppers. No gloves? Slip plastic bags over your hands as makeshift protection.

Respect the heat—capsaicin burns linger for hours and demand serious protection!

Protect your hands from pepper burn—those oils linger for hours and cause serious irritation!

Never touch your eyes, nose, or mouth while cutting peppers. The heat level doesn’t matter—even mild jalapeños can cause skin irritation. Keep kids away from your workspace during hot handling.

Pepper Type Heat Level Safety Tips

For burn prevention, use nonporous cutting boards to avoid capsaicin absorption. If pepper burn occurs, rinse hands with milk or vegetable oil first, then soap and water. This removes 90% of capsaicin residue, protecting your heat tolerance for enjoying your homemade salsa.

Customizing Salsa Recipe

customizing salsa recipe
One of the best parts about making your own garden salsa is how easily you can tweak the recipe to match your taste buds perfectly.

Whether you’re craving extra heat, a touch of sweetness, or want to try something completely different, simple adjustments can transform your basic salsa into a personalized creation, allowing for a perfect blend that suits your taste, with simple adjustments making all the difference.

Adjusting Spiciness

With your ingredients prepped, fine-tuning heat levels separates average salsa from memorable batches.

Different pepper varieties offer distinct heat levels and flavor profiles that transform your garden harvest into customized perfection. Start with conservative amounts—you can always add fire, but cooling down requires dilution.

Jalapeño peppers range from 2,500-8,000 Scoville units, while serrano peppers pack 10,000-25,000 units for serious heat lovers. Remove seeds and white pith to cut spiciness in half without sacrificing pepper flavor.

Here’s your heat control playbook:

  1. Test pepper varieties – Sample different chili types before adding to gauge individual heat levels
  2. Master seed removal – Scrape out jalapeño pepper innards with a spoon for milder results
  3. Blend heat sources – Mix mild poblanos with hot serranos for balanced spice blends
  4. Add cayenne pepper gradually – Start with pinches of this concentrated heat booster
  5. Use cooling agents – Balance intense spice with honey, sugar, or lime juice for rounded flavor profiles

Remember: spice control improves with practice, so keep notes on your winning combinations.

Adding Fruits and Herbs

Beyond heat levels, you can transform your salsa with sweet fruit options like diced mango, peaches, or pineapple.

These peach variations and mango salsa combinations balance spice beautifully. Fresh herb choices such as oregano, basil, or mint create exciting herb infusions beyond cilantro.

Smoked paprika pairings add depth to your spice blends. This flavor experimentation with adding fruits and herbs turns basic garden salsa into gourmet fruit salsa creations.

Considering the benefits of seasonal fruit can also enhance your salsa recipes with the best ingredients.

Using Alternative Ingredients

Don’t settle for ordinary when you can create extraordinary flavor combinations.

Using alternative ingredients opens up endless possibilities for your garden salsa.

  • Tropical twists: Add diced mango salsa ingredients or pineapple twist for Caribbean flair
  • Nutty surprises: Incorporate spicy pecans or sunflower seeds for unexpected crunch
  • Citrus variations: Swap lime for lemon zest or try garlic scapes instead of regular garlic

Different sweeteners like agave replace honey perfectly, while ingredient substitutions create your unique flavor profile through creative flavor experimentation.

Making Homemade Salsa

Once you’ve prepared all your garden ingredients, you’re ready for the fun part—bringing everything together to create your fresh salsa.

This simple process transforms your chopped vegetables into a flavorful condiment that’ll make your garden’s hard work shine.

Combining Ingredients

combining ingredients
The magic happens when you combine your prepped ingredients in a large mixing bowl.

Start with your diced tomatoes as the foundation, then fold in peppers, onions, garlic, and cilantro.

This texture blending lets natural juices mingle, creating balanced flavor profiles and proper ingredient ratios.

Gentle mixing preserves chunks while allowing spice levels to distribute evenly throughout your fresh garden salsa.

Adding Lime Juice and Salt

adding lime juice and salt
Squeeze fresh lime juice over your chopped garden ingredients—two tablespoons creates perfect acidity levels for your garden harvest salsa recipe.

Start with half a teaspoon of salt, then taste-test your way to ideal salt ratio and flavor enhancement.

This flavor customization step transforms raw vegetables into balanced salsa by balancing taste between sweet tomatoes and spicy peppers through proper seasoning adjustments.

Chilling and Serving

chilling and serving
During your fresh garden salsa’s chilling time of thirty minutes, flavors develop their perfect harmony.

This refrigeration and shelf life step guarantees maximal serving temperature and texture balance.

Your fresh storage approach maintains food safety while allowing flavor customization to shine.

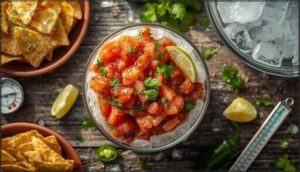
When chilling and serving your fresh garden salsa, present it with sturdy tortilla chips in vibrant bowls.

These essential serving tips transform your harvest into an unforgettable appetizer that guests will request again and again.

Salsa Texture and Consistency

salsa texture and consistency
Getting the right salsa texture can transform your garden harvest from watery disappointment to perfect chunky goodness.

You’ll control consistency by adjusting your chopping technique and managing moisture from fresh tomatoes.

Thinning or Thickening

Achieving perfect salsa consistency requires understanding three key texture control methods.

You’ll want to balance juice reduction with proper blender speed settings for ideal results.

Here’s your texture control toolkit:

  1. Drain excess tomato juice using a fine-mesh strainer for 15-20 minutes
  2. Add thickening agents like tomato paste or extra diced onions gradually
  3. Control moisture levels by salting tomatoes beforehand to draw out water
  4. Master pulsing techniques with short bursts instead of continuous blending

Perfect salsa consistency comes from understanding how each ingredient affects the final texture.

Using Food Processors

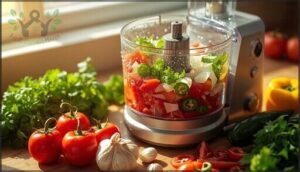
Transform your garden harvest into perfect salsa using food processors efficiently.

Start with small batches for better texture control—process tomatoes first, then add peppers and onions gradually.

Use pulsing techniques instead of continuous blending to prevent mushy results.

Component Processing Method Result
Tomatoes Quick pulses (3-4) Chunky texture
Peppers Brief bursts Even distribution
Onions Short intervals Crisp pieces
Final mix Gentle combining Perfect consistency

Different blade options create varying textures—standard blades work best for chunky salsa.

Practice speed control and safety precautions while processing for ideal results.

The right blade replacement options can substantially impact the overall performance of your food processor.

Achieving Desired Consistency

Your consistency game hinges on texture control and smart technique choices.

Here’s your roadmap to salsa perfection:

  1. Pulse Technique – Short bursts prevent over-processing chunky ingredients
  2. Seed Removal – Drain tomato seeds for thicker consistency
  3. Consistency Checks – Test texture between additions
  4. Blender Tips – Add liquids gradually, solids first
  5. Texture Balance – Mix smooth and chunky elements strategically

Remember: you can always thin salsa, but thickening takes more work.

Preserving Garden Salsa

preserving garden salsa
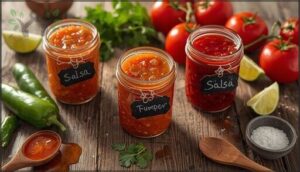
Once you’ve made your perfect batch of garden harvest salsa, you’ll want to preserve it properly to enjoy those fresh flavors for months to come.

The good news is that you have several reliable storage options, from simple refrigeration to freezing and even water bath canning for long-term preservation.

Canning and Water Bath

Water bath canning requires precise acidification levels and jar sterilization for canning safety.

Follow tested canning instructions that include proper acid ratios – never skip bottled lemon juice or vinegar. Sterilize jars, fill with hot salsa leaving ½-inch headspace, then process in boiling water bath for recommended times.

These safe canning practices prevent botulism and guarantee your canning salsa recipe succeeds perfectly.

To achieve vital results, it’s essential to use proper canning jars for storage and preservation.

Freezing Fresh Salsa

Your freezer becomes a time capsule for garden abundance when you master freezing fresh salsa properly.

Though texture softens after thawing, frozen salsa works perfectly in cooked dishes and maintains excellent flavor for months.

Essential freezing methods:

  • Use freezer safe containers or portion-sized bags to prevent ice crystal formation
  • Drain excess liquid before freezing to maintain better consistency
  • Label with harvest dates for frozen shelf life tracking
  • Choose thicker salsas over watery versions for ideal freeze drying results

Follow proper freezer safety guidelines and you’ll preserve harvest flavors long past growing season.

Refrigeration and Shelf Life

Store your fresh salsa in airtight storage containers and refrigerate immediately for maximum shelf life.

Proper refrigeration tips include maintaining temperatures below 40°F and using clean utensils to prevent contamination.

Food safety dictates consuming homemade salsa within 5-7 days, as storage impact affects quality.

Watch for spoilage signs like off-odors or mold, which indicate it’s time to discard your batch for safety.

Advanced Salsa Techniques

advanced salsa techniques
Once you’ve mastered basic salsa making, you can elevate your garden harvest with advanced techniques that add depth and complexity to your recipe.

These methods transform simple ingredients into restaurant-quality salsa with smoky, roasted flavors and unique combinations that’ll impress your family and friends, utilizing advanced techniques to create a truly memorable dish.

Roasting Peppers

Three roasting methods will elevate your pepper game substantially. You can broil peppers at 450-500°F for 15-30 minutes, turning them halfway for even charring.

Roasting Times and Spice Levels vary by pepper type:

  • Poblanos need 20-30 minutes for smoky heat development
  • Jalapeños require 15-20 minutes for moderate roasted flavor
  • Bell peppers take 25-30 minutes for sweet pepper blends
  • Fresno peppers need 18-25 minutes for intense heat
  • Anaheim peppers roast in 20-25 minutes for mild warmth

After cooling, skins peel easily, revealing tender flesh perfect for roasted poblano salsa with smoky charred flavor. To achieve prime flavor, understanding proper pepper storage is vital for maintaining the quality of your peppers.

Using Smoked Paprika

Building on the rich smokiness from roasted peppers, smoked paprika brings another layer of smoky heat and flavor depth to your garden harvest salsa recipe. This paprika spice works magic without masking your fresh vegetables’ natural brightness.

Here’s how to master smoked flavor enhancement in your salsa:

  1. Start with 1/4 teaspoon – Sweet smoked paprika varieties complement tomatoes better than hot versions
  2. Blend with cumin – These spice blends create restaurant-quality complexity
  3. Add after chopping – Prevents bitter flavors from over-processing ingredients
  4. Taste and adjust gradually – Build flavor enhancement slowly for perfect balance
  5. Mix thoroughly – Make certain of even distribution throughout your fresh salsa

This technique transforms ordinary salsa into something extraordinary while maintaining that garden-fresh taste you’re after.

Creating Unique Flavor Combinations

Beyond traditional garden salsa combinations, you’ll craft gourmet creations through bold experimentation with diverse flavor profiles.

Mix mango with habanero for tropical fruit additions, or blend basil and mint for complex herb blends.

Spice levels transform when you add cumin and coriander for smoky notes.

Flavor enhancement comes from balancing sweetness with honey against heat.

Creating unique flavor combinations through flavor fusion turns basic salsa into extraordinary culinary adventures.

Frequently Asked Questions (FAQs)

How long does it take to make Garden Salsa?

Like Rome wasn’t built in a day, your fresh garden salsa doesn’t need hours either. You’ll whip up this vibrant condiment in just fifteen minutes with simple chopping and mixing.

Can you make salsa from a vegetable garden?

You can absolutely grow your own salsa ingredients in a vegetable garden. Plant tomatoes, peppers, onions, cilantro, and garlic together for fresh, flavorful homemade salsa straight from your backyard harvest.

How do you make a homemade salsa?

Dice fresh tomatoes, onions, peppers, and garlic, then mix with chopped cilantro, lime juice, and salt. Let the flavors meld in the refrigerator for at least thirty minutes before serving.

How do you make salsa from tomatoes?

Start by washing fresh tomatoes, then remove the cores and seeds to prevent watery salsa.

Dice the tomatoes into small, uniform pieces.

Mix with chopped onions, peppers, garlic, cilantro, lime juice, and salt.

Chill before serving.

How do you make salsa in a food processor?

Pulse fresh tomatoes, onions, peppers, cilantro, and garlic in your food processor for chunky salsa. Don’t over-process – you’ll want texture, not soup! Add lime juice and salt afterward.

How do you add salt to salsa?

Picture those tiny white crystals dissolving into your chunky garden medley, transforming separate flavors into one harmonious bite.

You’ll sprinkle salt gradually while tasting, starting with half a teaspoon per two cups of salsa, then adjust to your preference.

What can I grow in my garden to make salsa?

You’ll want to plant Roma tomatoes, jalapeño peppers, sweet onions, garlic, and cilantro for a complete homegrown salsa.

These core ingredients thrive together in garden beds or containers with good drainage and full sun.

What’s the difference between restaurant style salsa and regular salsa?

Restaurant-style salsa runs rougher and thicker than regular salsa.

You’ll notice it’s blended less, creating a chunky texture that clings to chips better.

Regular salsa’s smoother consistency makes it runnier and lighter for spooning, which contrasts with the thicker nature of restaurant-style salsa.

How long does fresh garden salsa last?

Fresh garden salsa lasts about 5 days in your fridge, sealed tight.

If you spot soggy bits or off smells, it’s past its prime.

For best flavor and crunch, eat it sooner—your taste buds will thank you!

Should you remove seeds from tomatoes when making salsa?

Most home cooks remove about half their tomato seeds unnecessarily.

You should remove tomato seeds and cores when making salsa to prevent watery consistency, but keep the skins for texture and nutrition.

Conclusion

Nothing beats the satisfaction of transforming your garden’s bounty into this incredible garden harvest salsa recipe that’ll make store-bought versions seem like cardboard.

You’ve mastered every step from selecting perfect tomatoes to balancing flavors, and now you can create restaurant-quality salsa anytime.

This garden harvest salsa recipe works perfectly with chips, tacos, or grilled dishes. Store it properly, and you’ll enjoy fresh, vibrant flavors for days while impressing family and friends with your homemade creation.

Avatar for Mutasim Sweileh

Mutasim Sweileh

Mutasim is a passionate gardener, sustainability advocate, and the founder of Fresh Harvest Haven. With years of experience in home gardening and a love for fresh, organic produce, Mutasim is dedicated to helping others discover the joy of growing their own food. His mission is to inspire people to live more sustainably by cultivating thriving gardens and enjoying the delicious rewards of farm-to-table living. Through Fresh Harvest Haven, Mutasim shares his expertise, tips, and recipes to make gardening accessible and enjoyable for everyone.