This site is supported by our readers. We may earn a commission, at no cost to you, if you purchase through links.
You don’t need a backyard to grow your own basil, rosemary, or mint. Growing herbs in containers transforms even the smallest apartment balcony or kitchen windowsill into a productive garden that delivers fresh flavors year-round.
Container gardening puts you in complete control of soil quality, moisture levels, and sunlight exposure—advantages that traditional ground planting can’t match. Your herbs stay portable too, moving indoors when frost threatens or relocating to chase the sun as seasons shift.
Whether you’re snipping oregano for tonight’s pasta or harvesting thyme for your morning tea, container-grown herbs bring restaurant-quality ingredients within arm’s reach while requiring nothing more than a few pots and some basic know-how.
Table Of Contents
- Key Takeaways
- Benefits of Growing Herbs in Containers
- Choosing The Best Containers for Herbs
- Selecting Herbs for Container Gardening
- Preparing Soil and Planting Your Herbs
- Essential Care and Maintenance Tips
- Frequently Asked Questions (FAQs)
- What herbs are best to grow in pots?
- What herbs go well together in a container?
- What are common herb storage mistakes?
- What are the best herbs to grow in pots?
- How deep should container be for herbs?
- What herbs grow best in pots?
- What herbs should not be potted together?
- How deep should a container be for herbs?
- What is the best container for growing herbs?
- Do herbs grow better in the ground or in pots?
- Conclusion
Key Takeaways
- Container gardening gives you complete control over soil quality, drainage, and sunlight exposure while allowing you to move plants indoors during frost or relocate them to chase optimal light throughout the seasons.
- Most culinary herbs need 6 to 8 inches of container depth and thrive in a potting mix that combines 60 percent garden soil with 40 percent compost plus perlite for drainage, with moisture-loving herbs benefiting from self-watering systems while Mediterranean varieties prefer soil that dries between waterings.
- Successful herb pairings depend on matching plants with similar water and sunlight needs—basil pairs well with oregano in full sun with excellent drainage, while parsley thrives alongside chives in consistently moist conditions.
- Regular pruning above leaf nodes triggers bushier growth and increased yields, with most herbs tolerating harvests of up to one-third of their foliage while requiring 6 to 8 hours of direct sunlight daily for optimal flavor and productivity.
Benefits of Growing Herbs in Containers
Container gardening puts fresh herbs within arm’s reach, no matter where you live or how much outdoor space you have. You’ll gain control over growing conditions while enjoying the freedom to move your plants as seasons change.
From winter gardening in containers to year-round kitchen staples, you can cultivate a thriving garden regardless of climate or season.
Here’s what makes containers the smart choice for growing your own herbs.
Space-Saving and Flexibility
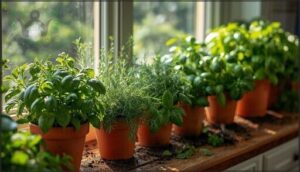
In small space gardening, containers let you reclaim unused areas like balconies, windowsills, and countertops for thriving herb production. Vertical planters and herb towers stack upward, multiplying your growing capacity per square foot without expanding your footprint.
Compact gardens adapt to any layout, whether you’re tucking a single herb container on a shelf or building flexible layouts that shift as your indoor gardening needs evolve.
Mobility and Seasonal Adjustments
Wheeled planters free your power to follow the sun, rolling your potted herbs across a 20-meter daily route as light shifts through seasons.
Wheeled planters let you chase the sun, rolling your herbs up to 20 meters daily as light shifts through the seasons
Moving carts turn seasonal relocation into a five-minute task, shifting your container gardening setup indoors before frost strikes. Indoor transitions protect tender basil and oregano from winter damage, while outdoor gardening resumes when temperatures climb. You control the climate your herbs experience.
Control Over Soil and Watering
Container gardening hands you complete authority over soil quality and water balance, eliminating clay-heavy ground that drowns Mediterranean herbs like rosemary.
You control the potting mix ratio—60 percent garden soil, 40 percent compost—plus perlite for drainage systems that prevent root rot. Irrigation control becomes straightforward: check soil moisture, water deeply, and adjust your watering techniques based on each herb’s specific needs rather than unpredictable weather.
Decorative and Aromatic Appeal
Beyond soil control, your herb container delivers a sensory experience that brightens any patio or windowsill.
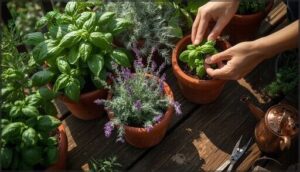
Fragrant herb gardens fill the air with rosemary and basil scents while colorful foliage—from deep emerald to variegated creams—creates visual drama against ceramic pots.
Textured leaves and aromatic blooms like purple lavender transform simple herb plants into living décor that performs double duty in your herb garden design.
Choosing The Best Containers for Herbs
The right container makes all the difference between thriving herbs and struggling plants.
Choose pots with good drainage and enough space for root growth, and check out these herb garden maintenance tips to keep your plants healthy all season.
You’ll find plenty of options out there, from traditional clay pots to modern self-watering systems, and each material brings its own advantages. Here’s what you need to know about selecting containers that’ll set your herbs up for success.
Container Size and Depth Requirements
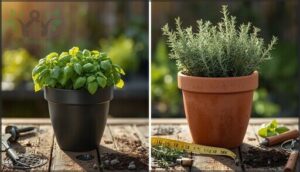
Your herb container size directly determines your harvest potential. A 6-inch pot holds one plant, while a 12-inch container accommodates four to six herbs with deeper root zones.
Most culinary herbs need 6 to 8 inches of depth for spreading roots, but hardy varieties like rosemary thrive in pots over 12 inches deep, minimizing watering frequency and maximizing soil volume needs.
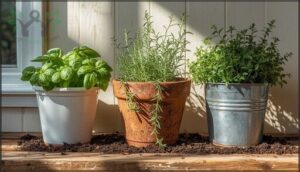
Material Options: Plastic, Clay, Metal
Material Comparison matters when choosing herb planters, because plastic durability, clay pots, and metal rust resistance each shape your container gardening success differently.
- Plastic containers are lightweight and budget-friendly, resisting cracks in temperature shifts while warming quickly in sunlight, though they lack the container insulation that stabilizes root zones
- TerraCotta pots allow air flow through porous walls, but their moisture absorption demands more frequent watering and makes large containers difficult to move
- Metal planters deliver a sleek modern look yet conduct heat rapidly, risking root damage without proper shading in your herb container garden
- Recycled plastic options reduce environmental impact while maintaining the practical benefits of standard plastic for container gardening for herbs
Ensuring Proper Drainage for Healthy Roots
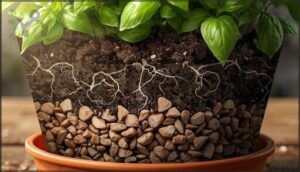
Healthy herb roots depend on drainage that prevents waterlogged soil and promotes Soil Aeration in your container garden. Install a Drainage Layer of 1 to 2 inches using coarse stone at the bottom, and choose a Potting Mix with perlite to improve Root Health.
| Drainage Feature | Impact on Root Health |
|---|---|
| Two 1/4-inch holes | Even water exit prevents root rot |
| Drainage Layer depth | Improves air space for oxygen access |
| Elevated pot base | Allows airflow beneath drainage outlets |
Self-watering containers with a Water Reservoir suit moisture-loving herbs, while Mediterranean varieties thrive when soil mix dries between waterings—your container size and drainage setup determine watering frequency.
Selecting Containers for Annual Vs. Perennial Herbs
Annual herbs complete their life cycle in one season, so they perform well in containers measuring 12 to 14 inches in diameter with 10 to 12 inches of Container Depth. Perennial herbs develop extensive Root Systems that need Soil Volume found in 14 to 18 inch pots for container gardening success.
Match Container Size and Pot Material to your herb cultivation goals—annuals thrive in lightweight plastic with Drainage Holes, while perennials benefit from insulated resin containers that protect root systems through winter.
Selecting Herbs for Container Gardening
Choosing the right herbs sets the foundation for a thriving container garden, and some varieties adapt to pot life far better than others.
You’ll want to match your selections to your cooking habits, available sunlight, and maintenance preferences while considering which plants can share space without competing. The following categories will help you pick herbs that deliver both success and satisfaction from your first planting season forward.
Easy-to-Grow Herbs for Beginners
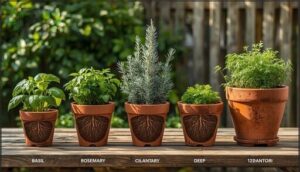
Start your container gardening journey with herbs that forgive mistakes and deliver results. Basil thrives in 6 to 12 inch pots with full sun, producing abundant leaves within 4 to 6 weeks.
Mint spreads aggressively, making containers ideal for control. Oregano tolerates drought and neglect, while parsley offers steady growth in cool conditions—perfect beginner tips for easy to grow herbs.
Culinary and Ornamental Herb Varieties
Herb classification splits into two camps: culinary herbs like basil with its sweet aromatic flavor for Mediterranean dishes, and fragrant herbs including lavender for decorative appeal.
You’ll find edible flowers on many aromatic plants, expanding your harvest beyond leaves. Cilantro delivers bright citrusy notes for salsa, while mint offers cool menthol for teas.
Growing herbs in containers lets you master both herb pairings and container gardening simultaneously.
Combining Herbs With Similar Needs
Successful herb pairing depends on matching soil preferences, watering needs, and growth habits within your container design. You’ll set yourself up for thriving herb gardens when plants share similar requirements.
Consider these herb plant care and maintenance combinations for growing herbs in containers:
- Basil and dill – both prefer warm weather and well-draining soil with moderate watering
- Oregano and thyme – drought-tolerant partners once established
- Parsley and chives – evenly moist soil lovers
Managing Invasive Herbs in Pots
Some herbs like mint and thyme spread aggressively, but pots naturally limit their invasion.
Choose wide, shallow containers at least 12 inches in diameter to monitor root spread. Install physical barriers 6 inches deep in the potting mix to block runners from escaping. Physical strategies such as using metal or plastic barriers can further help prevent herbs from spreading beyond their containers.
Prune regularly before flowering starts, and replant into fresh mix every 12 to 18 months to maintain root health and control growth.
Preparing Soil and Planting Your Herbs
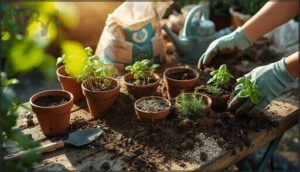
Getting the soil right is half the battle when you’re growing herbs in containers. The mix you choose affects everything from drainage to nutrient availability, and planting techniques determine whether your herbs thrive or struggle from day one.
Let’s walk through the essentials you need to know before you get your hands dirty.
High-Quality Potting Mix Selection
A premium potting mix gives your container gardening setup the foundation it needs for thriving herb gardening.
Look for blends that combine organic matter like coconut coir with perlite for soil aeration and water retention. Most quality soil mixes include slow-release fertilizer content to feed your herbs for one to three months, ensuring excellent soil quality without constant amendment.
For best results, make sure your containers provide proper drainage for herbs, as this is critical to prevent root rot and promote healthy growth.
Soil Drainage and PH Considerations
Water retention and soil aeration work hand in hand when you balance drainage systems with nutrient balance. Your soil mix should drain freely within 15 to 30 minutes after watering, allowing oxygen to reach roots while holding enough moisture for consistent growth.
Most herbs prefer pH levels between 6.0 and 7.0 for ideal soil quality:
- Add 25 to 50 percent perlite for improved drainage
- Test pH regularly to guide gentle fertilizer adjustments
- Verify water exits drainage holes within 1 to 3 hours
- Let the top 1 to 2 inches dry between waterings
Adding Compost and Amendments
Quality compost transforms container soil by building organic matter and boosting nutrient balance without overpowering tender roots. Mix 1 part well-aged compost with 3 parts potting mix to maintain proper drainage and prevent compaction.
Add worm castings at 1 to 2 tablespoons per pint for slow-release plant nutrition. Choose clean, crumbly material aged 3 to 6 months to protect your herb garden maintenance routine from pathogens and weeds.
Proper Planting and Spacing Techniques
Set seedlings at the same depth they occupied in their nursery container to prevent stem rot and promote root expansion.
Space small herbs like basil 6 to 12 inches apart, while larger varieties need 12 to 18 inches for proper soil aeration and drainage.
Container depth and size directly affect growth patterns, so avoid plant crowding by digging holes twice as wide as each root ball in your container gardening setup.
Essential Care and Maintenance Tips
Getting your herbs in the ground is just the beginning—keeping them healthy and productive takes consistent attention to a few critical tasks. Your container herbs depend on you for sunlight, water, and regular pruning since they can’t tap into natural soil resources or spread their roots freely.
The following care practices will help you boost growth, prevent common problems, and enjoy fresh harvests throughout the growing season.
Sunlight and Placement for Optimal Growth
Most herbs demand 6 to 8 hours of direct sunlight daily, so scout your brightest south-facing window placement or outdoor orientation before you commit.
Light intensity drives flavor and bushiness, while sun direction shifts with the season—rotate pots weekly to balance exposure.
In scorching climates, use shading techniques like afternoon shade cloth to prevent leaf scorch. Full sun means thriving herb garden design in container gardening success.
Watering Schedules and Techniques
Your watering schedule depends on heat, pot size, and plant density—check the top inch of soil moisture daily and saturate until water drips from drainage holes.
Self-watering containers deliver steady irrigation for seven to fourteen days, while drip watering conserves resources and prevents overwatering.
Fertilizer needs drop when you master water balance through efficient container gardening techniques.
Pruning, Harvesting, and Promoting Bushiness
Regular pinching above a leaf node triggers two new shoots and transforms spindly herbs into dense, productive plants.
Harvest in the morning after dew dries, trimming no more than one-third of the foliage to preserve vigor while maximizing leaf production.
Basil thrives with frequent cuts above the second leaf pair, while parsley benefits from removing outer stems near the base—strategic pruning methods turn every harvest into a bushiness-promoting opportunity.
Managing Pests, Diseases, and Overwintering
Scout your containers weekly for aphids, spider mites, and fungus gnats—early detection makes pest control simple with insecticidal soap or a strong water spray.
Disease prevention starts with keeping foliage dry and using sterile tools between cuts.
For overwintering tips, move tender perennials to a sheltered porch when temperatures drop below 40°F, insulate pots with bubble wrap, and prune back one-third to conserve energy through cold months.
Frequently Asked Questions (FAQs)
What herbs are best to grow in pots?
Choose basil, mint, parsley, chives, thyme, and oregano for reliable container performance. These herbs adapt well to pots, require minimal space, and deliver fresh flavor whether you’re starting your first container garden or expanding your collection.
What herbs go well together in a container?
Successful herb pairings rely on shared sun, water, and soil needs.
Basil and oregano thrive together in full sun with excellent drainage, while chives pair well with parsley in consistently moist conditions for ideal growth.
What are common herb storage mistakes?
You might think fresh herbs last forever, but leaving them in sunlight, loose plastic bags, or freezing without prep ruins flavor fast.
Trim stems, use airtight containers, and apply proper herb preservation methods for lasting freshness.
What are the best herbs to grow in pots?
Basil, chives, parsley, thyme, and cilantro rank among the easiest herb varieties for container gardening.
These low maintenance options offer frequent harvests when you pinch leaves regularly, encouraging bushier growth and flavorful herb pairings.
How deep should container be for herbs?
Most culinary herbs thrive in containers 6 to 8 inches deep, providing adequate root growth and soil volume for consistent water retention and drainage—though deeper-rooted varieties like rosemary benefit from 8 to 12 inches.
What herbs grow best in pots?
You can’t go wrong with container gardening MVPs like chives, mint, parsley, cilantro, and basil—they’re herbs that thrive in pots with proper potting mix, consistent watering tips, and smart herb pairing for your herb garden.
What herbs should not be potted together?
Avoid pairing mint spreads with slower growers, as it spreads aggressively and dominates containers.
Don’t combine fennel compounds with most herbs due to growth-inhibiting compounds. Keep dill separate from low-growing varieties it will shade and outcompete.
How deep should a container be for herbs?
You’ll want 6 to 8 inches of container depth for most herbs, though sage and rosemary appreciate 12 inches to support root growth and prevent overcrowding in your container gardening setup.
What is the best container for growing herbs?
The best container for growing herbs combines adequate drainage with the right material for your climate.
Plastic pots retain moisture and stay lightweight, while terracotta wicks water quickly in hot weather.
Do herbs grow better in the ground or in pots?
Neither option is inherently better—both methods work well depending on your space and goals.
Ground herbs develop stronger root systems, while containers offer precise control over soil, drainage, and microclimate effects.
Conclusion
Think of your container herbs as a culinary insurance policy—always available, never wilting in the back of your fridge. Growing herbs in containers doesn’t require gardening experience or outdoor space, just consistent attention to sunlight, water, and occasional pruning.
Start with three pots on your windowsill this week. By next month, you’ll wonder why you ever bought those expensive plastic clamshells at the grocery store. Your kitchen deserves better.

