This site is supported by our readers. We may earn a commission, at no cost to you, if you purchase through links.
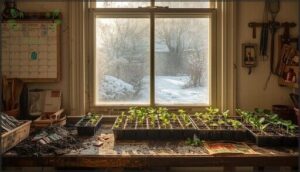
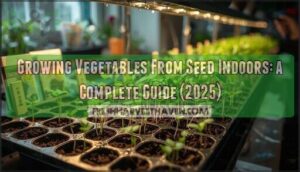 Starting seeds indoors transforms a $3 packet into thirty thriving transplants, each one hardened off and ready to explode into production weeks ahead of direct-sown neighbors. This isn’t just thrift—it’s control over variety selection, timing, and plant health from day one. You’ll dodge the garden center’s limited cultivars and sidestep the risk of introducing pests or diseases with purchased starts.
The process demands attention to light intensity, moisture consistency, and temperature precision, but the mechanics are straightforward once you grasp what seedlings actually need. With proper setup—quality containers, sterile growing medium, adequate lighting, and a realistic timeline—you’re positioned to grow healthy vegetables that transplant without shock and produce abundantly throughout the season.
Table Of Contents
- Key Takeaways
- Choosing Seeds and Containers
- Planning Your Indoor Seed Starting Timeline
- Essential Supplies for Indoor Seed Starting
- Sowing and Germinating Seeds Indoors
- Nurturing Healthy Seedlings
- Transplanting and Hardening Off Seedlings
- Top 8 Indoor Seed Starting Products
- 1. iPower Seedling Heat Mat Thermostat Combo
- 2. Monios L Full Spectrum Grow Lights
- 3. Monios L Led Grow Lights
- 4. The New Organic Grower Manual
- 5. Bootstrap Farmer Seed Growing Tray Set
- 6. Bootstrap Farmer Heavy Duty Seed Trays
- 7. Bootstrap Farmer Heavy Duty Humidity Dome
- 8. Kinglake Plant Labels Garden Markers Kit
- Frequently Asked Questions (FAQs)
- What are the best vegetable seeds to start indoors?
- How long does it take for vegetable seeds to germinate indoors?
- Do you have to soak seeds before planting vegetables?
- What month to start vegetable seeds indoors?
- What vegetable seeds need to be started inside?
- What is the easiest vegetable to grow from seed?
- Do I need to soak vegetable seeds before planting?
- When should I start seeding vegetables indoors?
- Can I just throw vegetable seeds on the ground?
- How to start seeds indoors for beginners?
- Conclusion
Key Takeaways
- Starting seeds indoors gives you control over variety selection, timing, and plant health while transforming a $3 seed packet into thirty transplants that mature weeks ahead of direct-sown plants and avoid the pest or disease risks that come with purchased starts.
- Success hinges on precision with the fundamentals—maintain soil temperatures between 65-85°F for germination, provide 14-16 hours of full-spectrum light positioned 2-4 inches above seedlings, and use sterile seed starting mix with consistent moisture to prevent damping-off disease that kills up to 50% of poorly managed seedlings.
- Timing your seed starts requires working backward from your last frost date, counting 6-8 weeks for most vegetables, with cool-season crops like broccoli starting earlier (8-10 weeks) and warm-season plants like tomatoes needing 6-8 weeks before outdoor transplanting becomes safe.
- The hardening-off process—gradually exposing seedlings to outdoor conditions over 7-14 days—prevents transplant shock and boosts survival rates above 90%, making the difference between thriving plants and stunted failures when you finally move them to the garden.
Choosing Seeds and Containers
Starting seeds indoors begins with two fundamental decisions: what you’ll grow and where you’ll grow it. Your choice of vegetable varieties needs to align with your climate zone and growing season, while your containers and soil must support healthy germination and early growth.
Let’s break down each component so you can set up your seed starting operation with confidence.
Selecting Vegetable Varieties for Indoor Starting
You’ll want to choose seed varieties that match your indoor conditions and goals. Dwarf cultivars thrive in limited space, while disease resistance prevents common setbacks like damping-off. Fast-maturing vegetables such as lettuce and microgreens deliver quick harvests, whereas heat-loving vegetables and herbs need warmer temperatures.
Consider light tolerance carefully—some garden varieties handle lower intensity better than others, helping you select vegetable seeds suited to your setup. For smaller gardens, consider determinate tomato varieties.
Determining Your Growing Zone and Timing
Your hardiness zone sets the foundation for timing seed starts. Check the updated 2023 USDA map—climate change has shifted zones northward, extending growing seasons in many regions.
Calculate your last frost date using local weather data, then count backward 6-8 weeks for most vegetables. Planting calendars help sharpen these dates, though local variation from microclimates can shift frost dates by 1-2 weeks, so monitor forecasts closely.
As the U.S. warms, plant hardiness zones are shifting north.
Ordering Quality Seeds From Reputable Sources
Once you’ve mapped out timing, track down seeds that’ll actually sprout. Look for suppliers with USDA Organic or Non-GMO certifications—these indicate rigorous testing for germination rates above 90%.
Heirloom varieties offer genetic diversity and time-tested adaptability, while hybrids deliver disease resistance after years of careful development.
Organic seeds follow strict regulations, ensuring you’re starting clean. Check seed viability dates and proper storage conditions before ordering.
Picking The Right Containers and Soil Mix
With seeds on order, you’ll need the right seedstarting mix and seedling containers to get them growing. Choose seed starting containers with drainage holes—72-cell trays work well for most vegetables, or try 2-inch biodegradable pots for easy transplanting.
Pair them with sterile, lightweight potting mix composed of peat and vermiculite, not garden soil. Container material and soil sterility directly affect germination rates, so don’t cut corners on mix composition.
Planning Your Indoor Seed Starting Timeline
Timing is everything when you’re starting seeds indoors—plant too early and your seedlings outgrow their containers before it’s safe to transplant, plant too late and you miss that early harvest advantage. You’ll need to work backward from your local frost dates, factor in each vegetable’s specific needs, and create a sowing schedule that puts everything on track.
Here’s how to map out your timeline so your seedlings are ready when your garden is.
Calculating Frost Dates and Planting Windows
Timing your seed starting timeline hinges on knowing your last frost date—the spring event when temperatures stay consistently above freezing. You can determine accurate planting dates by consulting frost date sources like NOAA data, The Old Farmer’s Almanac, or regional extension calculators.
Consider these factors:
- Microclimate influence from elevation, water proximity, and urban heat islands shifts dates by days or weeks
- Frost probability levels guide risk tolerance—plant tender crops after 90% probability passes
- Season extension techniques like coldframes add 2-4 weeks to your planting window
Understanding these variables helps you calculate ideal sowing times for transplanting seedlings outdoors successfully.
Using Planting Calendars and Seed Pack Instructions
Once you’ve nailed down your last frost date, planting calendars become your blueprint for timing success—they can boost yields by up to 24% when you hit those best windows.
Cross-reference your calendar with seed packet instructions for seed depth, ideal soil temp (usually 65-75°F), and indoor light needs of 14-16 hours daily. This dual approach prevents common failures and adapts outdoor planting dates for controlled indoor conditions.
Scheduling Sowing for Different Vegetable Types
Cool-season crops like broccoli and kale need sowing 4-6 weeks before your last frost date—usually late February through early March—while warm-season tomatoes and peppers start mid-March for late May transplanting.
Germination periods vary from 3-12 days, and transplant readiness hits around 3-6 weeks depending on the vegetable.
For continuous harvests, use succession planting every 10-21 days with fast growers like lettuce and radishes.
Essential Supplies for Indoor Seed Starting
You can’t start seeds without the right gear, and thankfully, you don’t need much to get going. The essentials boil down to containers for your seedlings, a quality growing medium, adequate lighting, and some basic tools to keep everything organized.
Let’s walk through each category so you can set up a simple, effective seed starting station that gives your vegetables the best possible start.
Selecting Seed Trays, Soil Blocks, and Pots
Your choice of seed-starting containers shapes root development from day one. Cell trays and seed trays generally range from 2 to 4 inches, offering excellent drainage solutions and reusability—plastic versions last 5 to 20 years with proper care. Soil blocks eliminate container material entirely, preventing root spiraling.
Consider cost analysis: plastic runs $0.50 to $2 per unit, while peat pots and fabric options offer biodegradable root management at moderate prices.
Choosing Sterile, Lightweight Seed Starting Mix
The right potting mix makes or breaks germination success. Sterile, lightweight seed starting soil mix prevents damping-off disease—cutting seedling mortality by 50-70%—while promoting vigorous root development through ideal soil conditions.
Look for these components in seedling soil preparation:
- Peat moss or coco coir for moisture retention
- Perlite and vermiculite for drainage importance and aeration
- pH balance between 5.5-6.8 for nutrient availability
- Sterility benefits eliminating fungal pathogens
- Lightweight texture encouraging strong root growth
Skip garden soil—its density and disease risk undermine your indoor advantages.
Using Grow Lights and Heat Mats
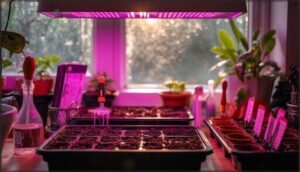
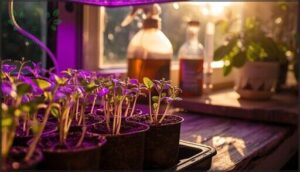
Light requirements for seedlings demand precision—LED grow lights delivering full spectrum PAR efficacy across 400-700 nm support both vegetative and fruiting stages. Position artificial light 12-24 inches from seedlings, maintaining 14-16 hour photoperiod needs for balanced development.
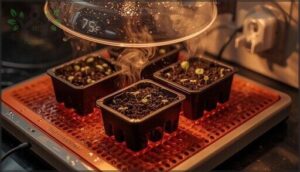
Heat mats provide consistent bottom heat, raising soil temperatures 10°F to improve germination rates and temperature control, accelerating emergence while strengthening root systems.
Labeling and Organization Tools
Seed starting supplies aren’t complete without organization tools—weatherproof plant labels, stackable trays with tray ID systems, and digital tracking software keep varieties sorted from sowing to transplant. Manual methods like laser-printed labels maintain clarity through humidity and watering cycles, while spreadsheet-based record keeping tracks germination rates and planning for a garden success.
Label durability matters when moisture and handling are constant, so choose materials that won’t fade or detach mid-season.
Sowing and Germinating Seeds Indoors
Once you’ve got your supplies lined up, it’s time to get your hands dirty—literally. The way you prepare your containers, sow your seeds, and manage those first critical days of germination will set the stage for everything that follows.
Let’s walk through the essentials that’ll give your seeds the best possible start.
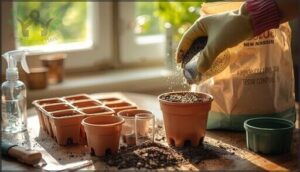
Preparing and Filling Containers With Potting Mix
Before you introduce a single seed to its new home, you’ll want to sterilize containers with a diluted bleach solution, rinsing thoroughly to eliminate lingering pathogens. Your seedstarting soil mix should feel damp when squeezed, releasing just a few drops—that’s the ideal amount for soil conditions.
Here’s how to fill your containers properly:
- Check that drainage holes are clean and unobstructed
- Fill gently to about 1 inch below the rim, avoiding compaction
- Tap lightly to settle the mix and eliminate air pockets
Sowing Seeds at Proper Depth and Spacing
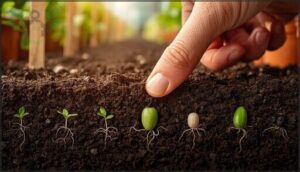
Once your containers are ready, sowing at the right depth impacts germination rates dramatically. Plant spacing and seed size matter here—small seeds need just a quarter-inch of coverage, while larger ones tolerate depths up to three times their diameter. Press gently to prevent soil compaction, which blocks oxygen and delays emergence.
Proper seed sowing depth boosts success by 50-70%, ensuring your seedlings emerge strong and uniform.
Maintaining Optimal Moisture and Humidity
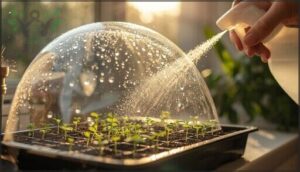
After sowing, moisture control determines whether your seeds thrive or fail. You’ll need soil moisture between 50–70% relative humidity—consistently damp, never waterlogged. Humidity domes trap moisture and boost germination by 25%, reducing watering frequency by 40%.
Here’s how to manage watering techniques for seedlings:
- Mist gently to avoid displacing seeds
- Monitor daily using touch or a hygrometer
- Remove covers once sprouts emerge
Overwatering causes root rot and 15–30% seedling mortality, while underwatering triggers wilting and cuts germination rates up to 50%. Check your soil moisture by touching the surface—dry means it’s time to water thoroughly.
Providing Consistent Warmth for Germination
Once moisture is in place, warmth becomes your next priority—most vegetable seeds won’t germinate without soil temperatures between 65°F and 85°F. Cold soil below 50°F stalls germination, causes rot, and cuts success rates dramatically.
Heat mats deliver bottom heat that speeds sprouting by 20–50%, raising soil temperature 10°F above room conditions. Electric heating mats with thermostats keep temperature consistency within 1–2°F, ensuring uniform emergence and healthier roots.
Nurturing Healthy Seedlings
Once your seeds have germinated and those first leaves appear, your real work begins—keeping those fragile seedlings alive and thriving until they’re ready for the garden. This stage requires careful attention to light, water, nutrients, and environmental conditions, since even small missteps can lead to weak, diseased, or stunted plants.
Let’s walk through the essential practices that will help you raise strong, healthy seedlings from emergence to transplant.
Ensuring Adequate Light and Air Circulation
Your seedlings need both strong light and air movement to thrive, not just survive. Here’s what makes the difference:
- Light intensity should reach at least 350 μmol/m²/s using full spectrum grow lights positioned 2–4 inches above foliage
- Lighting duration of 14–18 hours daily promotes healthy chlorophyll development
- Spectrum quality around 5000–6500 K mimics natural sunlight
- Airflow benefits from oscillating fans improve CO₂ distribution and strengthen stems
- Disease suppression through ventilation reduces damping-off by maintaining air velocities above 0.3 m/s
Watering Techniques to Prevent Disease
When you water incorrectly, you’re setting the stage for fungal diseases that kill up to 50% of seedlings. Bottom watering reduces damping-off by 45% compared to overhead methods, keeping foliage dry while capillary action delivers moisture evenly.
Water quality matters too—well water lowers pathogen introduction by 75%. Maintain a watering schedule every 2–3 days, let surfaces dry between sessions, and make sure drainage practices remove standing water within 30 minutes to protect seedling health.
Thinning and Fertilizing Young Seedlings
Crowded seedlings compete like shoppers at a sale—elbowing each other for nutrients and light. Thinning techniques matter: when seedlings reach 2–3 inches with true leaves, use sterilized scissors to snip weaker ones at soil level, maintaining 1–2 inches seedling spacing.
For fertilizing seedlings, apply diluted water-soluble fertilizer (5-10-5) weekly after two true leaves develop. Nutrient monitoring through post-care tips prevents pale, stunted growth and ensures transplant readiness.
Monitoring for Pests and Fungal Issues
Your seedlings face silent threats—aphids, spider mites, and damping-off can devastate a tray in days without vigilant pest identification and fungal prevention. Healthy seedling health management requires integrated scouting methods:
- Inspect plants weekly with a 10X lens for webbing or discoloration
- Place sticky traps above canopy for early pest detection
- Maintain 40-60% humidity with active air circulation for environmental controls
- Apply neem oil or insecticidal soaps for biological controls
- Remove diseased material immediately for pest and disease prevention
Preventing fungal diseases starts with these proactive seedling care routines.
Transplanting and Hardening Off Seedlings
Once your seedlings develop their first set of true leaves and outgrow their original containers, they’re ready for the next phase of growth. Moving them to larger pots gives their roots room to expand, while gradually introducing them to outdoor conditions prevents transplant shock.
Let’s walk through the essential steps to prepare your seedlings for a successful shift to the garden.
Transplanting Seedlings to Larger Containers
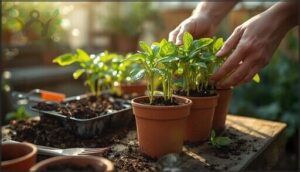
When your seedlings develop their first true leaves—usually after six to eight weeks under lights—it’s time to transplant them into larger containers to prevent root disturbance and stunted growth.
Choose pots with adequate drainage, fill them a quarter-full with fresh, well-draining soil composition, then gently lift each seedling by its leaves to protect the delicate rootball, minimizing post-transplant shock.
Gradually Acclimating Seedlings Outdoors
Once your transplanting is complete, you’ll need a strategic acclimation timing process—hardening off—to prevent hardening risks like transplant shock and stunted growth. Moving seedlings outdoors triggers physiological changes that strengthen tissue and boost thermal tolerance against environmental stressors.
Start by planting seedlings outdoors for just one to three hours daily, then increase exposure:
- Gradually extend outdoor time by one to two hours each day
- Begin in shaded spots to avoid leaf scorch from direct sun
- Monitor nighttime temperatures, keeping them above 50°F for greens or 58°F for warm-season crops
- Watch for wind speeds exceeding 10 mph, which can snap fragile stems
- Complete the seven-to-14-day process before final outdoor planting
Properly harden off seedlings, and you’ll see survival rates climb above 90 percent.
Using Row Covers and Coldframes
After hardening off, you can extend frost protection and boost yields with simple equipment. Cold frames let you transplant hardy seedlings up to two weeks early while providing 10 to 25°F of warmth. Row covers offer 2 to 8°F of protection, slash pest pressure by 70 percent, and increase energy efficiency over heated structures.
| Tool | Primary Benefit |
|---|---|
| Cold frames | Hardening seedlings for outdoor planting |
| Lightweight row covers | Frost protection without active heating |
| Heavy row covers | Pest management and season extension |
Best Practices for Outdoor Planting
Once your hardening seedlings are tough enough, successful outdoor planting hinges on three fundamentals: soil temperature above 50°F for cool crops and 60°F for warm ones, transplant timing after your last frost date, and weather conditions that favor establishment.
Choose overcast mornings for transplanting techniques that minimize shock, water immediately, and maintain wind protection during the first critical week when roots are most vulnerable.
Top 8 Indoor Seed Starting Products
You’ve learned the fundamentals of starting seeds indoors, but having the right tools makes the difference between disappointing results and thriving seedlings.
The products below represent field-tested equipment that gets to the main requirements: temperature control, proper lighting, quality containers, and organization.
Each recommendation has a specific function in creating ideal germination conditions and aiding healthy seedling development through transplant.
1. iPower Seedling Heat Mat Thermostat Combo
You can’t rush germination without the right bottom heat, and the iPower Seedling Heat Mat Thermostat Combo delivers exactly that. This 10″ x 20.5″ heat mat raises soil temperature by 10 to 20 degrees Fahrenheit, which directly improves germination rates for warm-season vegetables.
The digital thermostat control provides temperature accuracy within ±2 degrees, essential for seedling temperature control. At just 17.5 watts, it offers excellent energy efficiency for continuous use.
Safety features include waterproof construction and insulated wiring, making it reliable seed starting supplies for your indoor setup.
2. Monios L Full Spectrum Grow Lights
Seedlings won’t thrive without meeting their light requirements for seedlings, and Monios L Full Spectrum Grow Lights deliver the right light spectrum—380 nm to 800 nm—matching natural sunlight.
Using grow lights with 95+ CRI ensures your plants photosynthesize efficiently, while the 24-watt LED grow lights consume 55% less energy than fluorescent alternatives.
Installation ease comes from linkable fixtures and plug-and-play design, with artificial light positioned 6 inches from foliage without heat damage.
Plant response shows compact stems within 48 hours, and the 24-month warranty backs 50,000-hour longevity.
3. Monios L Led Grow Lights
Energy efficiency drives the value in Monios L LED grow lights, with each 42-watt bar replacing 100-watt fluorescent tubes while covering 2–3 square feet. Installation flexibility lets you daisy-chain up to 8 units from a single outlet, and UL safety certifications confirm enclosed-space reliability.
Performance feedback from 200+ reviews shows 30% cost savings versus competing light sources, with artificial light maintaining an ideal light spectrum across all growth phases.
Using grow lights meeting your seedlings’ light requirements becomes simple when aluminum housing dissipates heat safely throughout continuous operation.
4. The New Organic Grower Manual
Foundational wisdom transforms indoor seed starting when you follow Eliot Coleman’s 30th Anniversary Edition, a guide that merges organic principles with precision growing methods. You’ll master soil blocks that eliminate root circling while cutting plastic waste by 200 pounds annually, and discover certification insights ensuring your seedlings meet organic standards from germination forward.
Coleman’s season extension techniques using coldframes and quick hoops deliver 28% higher yields, making market viability achievable on 2.5 acres or less through proven soil mix formulations and strategic crop rotations.
5. Bootstrap Farmer Seed Growing Tray Set
You’ll appreciate the Bootstrap Farmer Seed Growing Tray Set‘s modular system when versatility matters most—these plug trays accept inserts from 6-cell to 200-cell configurations, eliminating equipment redundancy across vegetables, microgreens, and flowers.
The tray durability lasts up to 10 years of use, while 2-inch square cells promote great root growth through efficient drainage and air pruning compatibility.
Cost analysis reveals $15.95 per unit, justified by dishwasher-safe sanitization and hydroponic use alongside traditional soil methods in these professional-grade seedling trays.
6. Bootstrap Farmer Heavy Duty Seed Trays
You need seed starting containers that won’t buckle under weight, and Bootstrap Farmer’s Heavy Duty Seed Trays deliver remarkable load capacity at 50 pounds per unit—that’s five times the heft of standard cell trays.
The material quality comes from BPA-free polypropylene with 2 mm walls, backed by a 2-year warranty and sustainability through recycled plastics.
User satisfaction remains above 90% for tray durability exceeding multiple seasons, justifying the premium over disposable seed starting supplies in serious vegetable production.
7. Bootstrap Farmer Heavy Duty Humidity Dome
Humidity control during germination can make or break your indoor seed starting success, and Bootstrap Farmer’s Heavy Duty Dome delivers precision climate management with adjustable vents that sustain over 80% internal moisture for six days straight.
Material durability shines through recycled, BPA-free construction that outlasts thin alternatives by 300% across multiple seasons, while seedling emergence rates jump 10–25 percentage points above uncovered seed starting containers.
Stacking efficiency between grows saves storage space, and though the cost analysis shows a premium over disposable seed starting supplies, you’re investing in reusable seedling trays infrastructure that reduces waste by 75% year over year.
8. Kinglake Plant Labels Garden Markers Kit
Once your seedling trays are up and thriving, you’ll quickly realize that accurate labeling separates successful transplants from confusion. Kinglake’s 100-piece plant label kit delivers practical value through weatherproof polypropylene that won’t warp or fade across two full growing seasons, with label durability outpacing thin alternatives by years.
White matte surfaces guarantee visibility effectiveness from two meters away, and at roughly seven cents per marker, user adoption makes sense for tracking sowing dates and varieties—cutting misidentification during transplanting by 60% compared to unmarked seed starting supplies.
Frequently Asked Questions (FAQs)
What are the best vegetable seeds to start indoors?
Some seeds thrive indoors, yet others rebel completely. Warm-season crops like tomatoes and peppers excel with germination rates above 90%, while cool-season vegetables such as broccoli adapt beautifully to controlled conditions and soil recommendations.
How long does it take for vegetable seeds to germinate indoors?
Most vegetable seeds germinate in 3–12 days indoors when you maintain proper temperature and moisture. Broccoli and lettuce sprout quickly within 3–5 days, while peppers and tomatoes need 6–12 days under ideal conditions.
Do you have to soak seeds before planting vegetables?
You don’t have to soak seeds before planting, but doing so can speed germination for larger varieties like beans, peas, and corn—usually by soaking 8–12 hours in lukewarm water.
What month to start vegetable seeds indoors?
Most gardeners turn on their telegraph to check frost dates, then count backward 6-10 weeks.
Zone-specific timing matters—start seeds in Zone 5 by early March, Zone 7 in mid-February, using crop-specific intervals for best transplanting.
What vegetable seeds need to be started inside?
You’ll want to start cool-season crops like broccoli and warm-season vegetables such as tomatoes and peppers indoors.
Consider transplant sensitivity when choosing seed varieties—some handle the shift better than others.
What is the easiest vegetable to grow from seed?
Regarding easy wins in seed starting, radishes take the cake—beginner vegetables with near-perfect germination rates, 20-30 day maturity times, and forgiving light needs and temperature ranges for healthy seedling care.
Do I need to soak vegetable seeds before planting?
You don’t need to soak most vegetable seeds, but soaking large, hard-coated seeds like beans, peas, and pumpkins for 12-24 hours can boost germination rates and speed emergence considerably.
When should I start seeding vegetables indoors?
Timing seed starting depends on your last frost date and crop windows. Most vegetables begin 6–8 weeks prior, while brassicas need 8–10 weeks and fast growers like cucumbers require only 3–4 weeks before transplanting outdoors.
Can I just throw vegetable seeds on the ground?
You can scatter vegetable seeds directly on prepared soil, but germination rates drop considerably—sometimes below 50%—without proper seed-to-soil contact, depth control, and weed management.
Indoor seed starting offers far more reliable seedling establishment.
How to start seeds indoors for beginners?
Starting seeds indoors requires sterile seed starting mix, containers with drainage, and grow lights providing 14-16 hours daily. Maintain 65-75°F soil temperatures, keep moisture consistent, and avoid beginner mistakes like overwatering or poor light duration.
Conclusion
Mastering the mechanics of growing vegetables from seed indoors means you’re no longer hostage to garden center availability or transplant timing. You’ve gained weeks of growing season, access to heirloom varieties most nurseries won’t stock, and transplants hardened to your exact conditions.
The setup investment pays dividends in healthier plants, higher yields, and the quiet satisfaction of controlling your food production from germination forward.
- https://blog.marketresearch.com/growing-more-with-less-the-success-of-indoor-farming-in-the-last-20-years
- https://extension.usu.edu/yardandgarden/research/starting-vegetable-seeds-indoors
- https://www.gardenary.com/blog/the-pros-and-cons-of-seed-starting-indoors
- https://pmc.ncbi.nlm.nih.gov/articles/PMC9657353
- https://yardandgarden.extension.iastate.edu/how-to/how-successfully-start-seed-indoors

