This site is supported by our readers. We may earn a commission, at no cost to you, if you purchase through links.
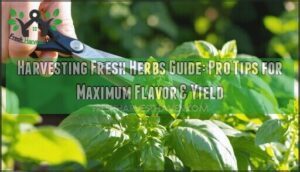 You’ll get the best flavor when you harvest herbs in the morning after dew dries but before the heat sets in.
This harvesting fresh herbs guide starts with timing—pick most herbs just before they flower when oils are most concentrated.
Use clean, sharp scissors or pruners to make clean cuts. Follow the one-third rule: never take more than a third of the plant at once.
Cut just above a leaf node to encourage new growth. For leafy herbs like basil, pinch the stem above two sets of leaves.
Your herb garden will thank you by producing more flavorful leaves all season long. But there’s more to the story than just when and where to cut.
Table Of Contents
- Key Takeaways
- Choosing The Right Harvesting Tools
- Harvesting Techniques for Different Herbs
- How to Harvest Herbs for Continued Growth
- Harvesting Herbs for Seeds and Roots
- Storing and Preserving Harvested Herbs
- Herb Freezing and Dehydration Methods
- Creative Ways to Use Harvested Herbs
- Common Mistakes in Herb Harvesting
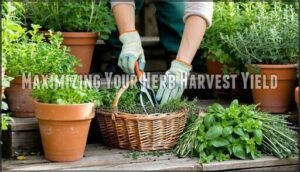
- Maximizing Your Herb Harvest Yield
- Frequently Asked Questions (FAQs)
- How do you harvest herbs?
- How do you pick herbs?
- When should I Harvest my herbs?
- How many harvests a year should a herb grow?
- When should you harvest herbs for drying?
- What herbs are harvested?
- How do I maximize my herb harvest?
- When should I Harvest herbs?
- How do you harvest herbs in a pot?
- How do you harvest a perennial herb?
- Conclusion
Key Takeaways
- You’ll get the best flavor when you harvest herbs in the morning after dew dries but before heat sets in, cutting just before flowers bloom when essential oils are most concentrated.
- You should follow the one-third rule and never take more than a third of any plant at once, cutting just above leaf nodes with clean, sharp scissors to encourage healthy regrowth.
- You can preserve your harvest through multiple methods like air-drying bundles, freezing herbs in oil or water cubes, or creating herb salts and infused butters that last for months.
- You’ll maximize your yield by harvesting regularly every week or two, which triggers the plant to produce more leaves and keeps your herbs productive throughout the entire growing season.
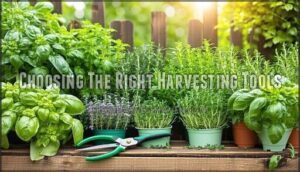
Choosing The Right Harvesting Tools
You can’t harvest healthy herbs without the right tools, just like you can’t build a house with a spoon.
You can’t grow a thriving herb garden without proper harvesting techniques, just like you can’t bake bread without kneading the dough.
Clean, sharp pruners or scissors make the difference between encouraging new growth and damaging your plants.
So investing in proper harvesting equipment protects both your current harvest and future yields.
Pruners and Scissors for Herb Harvesting
With the right cutting tools in your arsenal, herb harvesting becomes effortless and enjoyable.
Sharp, quality pruners and scissors create clean cuts that encourage robust plant regrowth while preventing damage.
Your tool selection depends on what you’re harvesting:
- Bypass pruners – Essential for woody stems like rosemary and sage
- Spring-loaded herb scissors – Reduce hand fatigue during extended harvesting sessions
- Micro-tip snips – Perfect for delicate herbs requiring precise trimming
- Kitchen shears – Versatile option for most tender herb varieties
- Ergonomic tools – Investment-worthy for comfortable, extended garden work
Consider specialized options like ergonomic herb shears for efficient harvesting.
Importance of Clean Harvesting Tools
You’ve picked the perfect pruners, but now comes the real secret: keeping them spotless. Clean harvesting tools are your herbs’ best friend, preventing disease from jumping between plants like an unwelcome house guest.
Dirty tools spread disease faster than gossip at a garden party—keep those blades sparkling clean!
Before you start cutting, wipe down your clean pruners and scissors with rubbing alcohol. This simple tool sterilization step stops bacteria and fungi in their tracks. Think of it as giving your plants a spa treatment instead of a surgery with dirty instruments.
Maintaining sharpness through regular cleaning also means cleaner cuts that heal faster. Dull, dirty blades crush stems, creating entry points for infection and bruising delicate tissues. Clean cuts from properly maintained herb harvesting tools promote faster healing and better regrowth.
Your herbs will thank you with stronger growth and longer harvests. Plus, clean tools help with extending shelf-life of your fresh herbs by reducing contamination from the start.
Recommended Harvesting Tools for Herbs
With clean tools ready, you’ll want the right gear for each herb type.
Bypass pruners handle woody stems like rosemary and sage with ease. Herb scissors with spring-loaded handles reduce hand fatigue during big harvests.
Micro-tip snips give you precision for delicate basil and cilantro cuts. Garden snips work perfectly for medium-duty tasks.
Ergonomic pruners are worth the investment if you’re harvesting regularly. Consider purchasing specialized tools for superior results.
Match your herb harvesting tools to the job—your plants and your hands will thank you.
Harvesting Techniques for Different Herbs
Different herbs need different harvesting methods to keep them healthy and productive.
You’ll treat annual herbs like basil differently from perennial herbs like rosemary, and you’ll use specific techniques for leaves, flowers, and seeds to get the best flavor from each plant, considering the unique needs of each to maintain their productivity.
Harvesting Annual and Perennial Herbs
Understanding the difference between annual and perennial herbs transforms your harvesting success.
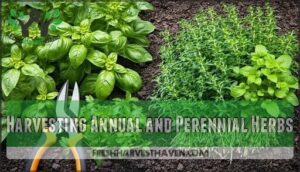
Annual herbs like basil and cilantro complete their life cycle in one growing season, while perennial herbs such as rosemary and thyme return year after year.
This knowledge shapes your entire approach to harvesting herbs.
Here’s how to master both categories:
- Annual Harvesting: Cut back 50-75% of the plant once it reaches 5-10 main stems, promoting fresh herbs production throughout the season.
- Perennial Harvesting: Never remove more than one-third of growth at once, ensuring these hardy plants survive for years of superior flavor.
Special Harvesting Techniques for Chives and Mint
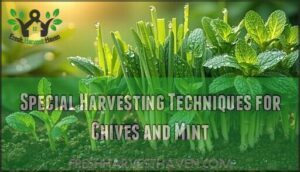
Chives and mint aren’t your typical herbs—they’re the rebels of the garden that actually love aggressive treatment. These powerhouses bounce back stronger after bold harvesting moves.
Harvesting herbs in the morning can help to guarantee maximum flavor.
Master these chive scissoring and mint pinching techniques:
- Chive Scissoring: Cut stems 1 inch above soil level, bundling them together for clean cuts that promote dense regrowth
- Mint Pinching: Shear entire stems to the base—this aggressive approach triggers rapid propagation cuttings from underground runners
- Flavor Timing: Harvest both herbs in early morning when essential oils peak, ensuring maximum taste impact
Your regrowth strategies pay off with continuous fresh herb supplies all season long.
Harvesting Herbs for Leaves, Flowers, and Seeds
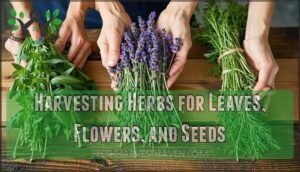
Your herb garden offers three distinct treasures, each requiring different harvesting techniques for perfect timing and maximum flavor.
| Plant Part | Best Timing | Key Indicator |
|---|---|---|
| Leaves | Early morning | Concentrated oils, vibrant color |
| Flowers | Pre-bloom stage | Buds tight, petals showing |
| Seeds | Full maturity | Brown pods, still attached |
Understanding these harvesting stages guarantees you’ll capture peak leaf flavor, flower aroma, and seed maturity from your fresh herbs.
How to Harvest Herbs for Continued Growth
You can keep your herb plants producing fresh leaves all season long by following smart harvesting techniques that encourage new growth.
The secret lies in cutting your herbs the right way and at the right spots, which triggers the plant to branch out and create even more flavorful stems for future harvests.
The One-Third Rule for Harvesting Herbs
Success in harvesting herbs hinges on restraint. The one-third rule protects Plant Health while maximizing your Growth Impact across all Herb Types.
Never harvest more than one-third of any plant at once, cutting just above a leaf node.
This golden standard guarantees:
- Your herbs maintain enough leaves for photosynthesis
- Root systems stay strong and nourished
- Visual Cues show healthy regrowth within days
- Rule Exceptions rarely apply to common fresh herbs
Follow this herb harvesting technique religiously, and you’ll enjoy continuous harvests all season long.
Pinching Back Herbs for Branching
Your garden’s secret weapon lies in pinching back herbs at the right moment. This simple harvesting technique creates dramatic branching by cutting stems just above leaf nodes.
When you pinch these growing tips, you’re triggering growth stimulation that transforms single-stem plants into bushy powerhouses. To prevent plant damage, it’s important to use sharp shears.
These branching techniques turn sparse plants into productive herb gardens with maximum fresh herbs potential, utilizing the power of dramatic branching to increase yield.
Thinning Herbs for Better Growth
While pinching encourages branching, thinning herbs transforms your herb garden into a powerhouse.
Remove crowded stems to improve seedling density and create proper herb spacing between plants. This technique boosts air circulation and sunlight penetration, giving roots room for healthy root development.
When harvesting herbs this way, target the weakest stems first. You’ll notice stronger growing herbs and increased yield from your fresh herbs garden.
Harvesting Herbs for Seeds and Roots
When you’re ready to expand your herb collection beyond leaves, you’ll want to harvest seeds and roots at specific times for the best results.
Seeds need to turn brown and dry on the plant before collection, while roots should be dug up during the plant’s dormant season when their flavor compounds are most concentrated.
Harvesting Seeds From Herb Plants
Once you’ve mastered harvesting herbs for continued growth, collecting seeds opens up a whole new world of possibilities. Think of it as your ticket to an endless herb garden—and it’s completely free!
Seed Maturity Signs are your best friend here. Wait until seed heads turn brown and feel papery to the touch. Mature seeds will rattle when you shake the stem, signaling they’re ready for harvesting seeds.
Viability Testing is simple: gently press a few seeds between your fingers. If they’re firm and don’t squish, you’ve got winners for seedsaving.
Here’s your action plan for herb harvesting techniques:
- Collect on dry, sunny days to prevent mold during storage
- Use paper bags to catch falling herb seeds during handling
- Store in labeled, airtight containers away from heat and light
Your Seed Storage Duration can last years when stored properly!
Harvesting Roots From Herb Plants
Beyond seed collection lies another treasure hiding beneath your soil – the powerful roots of your herb plants. Root harvest timing proves critical for maximum potency, with autumn offering the sweet spot when plants store concentrated nutrients underground.
Many herb varieties like horseradish, ginger, and turmeric develop robust edible herb roots packed with medicinal root benefits. Harvesting in autumn allows you to maximize the medicinal root potency of your herbs.
Follow these steps for successful root harvesting:
- Loosen soil carefully around the base using a garden fork
- Extract roots gently, keeping some intact for root propagation uses
- Brush off dirt immediately but delay root washing methods until ready to use
- Process quickly within 24 hours to preserve therapeutic compounds
This harvesting herbs technique reveals your garden’s hidden potential while supporting perennial herbs’ continued growth.
Preserving Harvested Roots and Seeds
Once you’ve mastered root harvesting, preserving herbs becomes your next victory.
Root drying requires thorough cleaning and thin slicing to prevent mold.
Seeds need careful seed cleaning before storage.
Test germination testing on a small batch first—it’s like a preview of next season’s garden magic.
A key step involves harvesting before flowering to maximize flavor.
| Preservation Method | Storage Duration | Success Rate |
|---|---|---|
| Air-dried roots | 1-2 years | 95% |
| Properly stored seeds | 2-3 years | 85% |
| Frozen herb roots | 6-12 months | 90% |
| Dehydrated seeds | 3-4 years | 80% |
Root storage in cool, dark places maintains seed viability.
Label everything with dates—your future self will appreciate this simple step when harvesting herbs next spring.
This simple act of organization is crucial for a successful and stress-free gardening experience.
Storing and Preserving Harvested Herbs
You’ve successfully harvested your herbs, but now you need to preserve that fresh flavor before it fades away.
Proper storage and preservation methods will extend your herbs’ shelf life from days to months, ensuring you can enjoy their peak taste year-round, with the help of proper storage.
Drying Herbs for Preservation
Herb preservation through drying transforms your garden bounty into year-round flavor treasures.
You’ll master several reliable drying herbs methods that maintain essential oils and taste.
Top herb drying techniques:
- Hanging Bundles – Secure small herb clusters with rubber bands, then hang upside down in dark, well-ventilated spaces for 1-3 weeks
- Tray Drying – Spread individual leaves on screens, turning daily until crisp
- Dehydrator Use – Set temperature between 95-115°F for consistent results
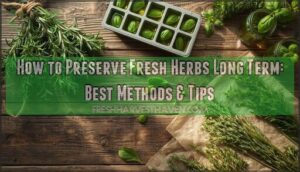
Freezing Herbs for Freshness
Freezing herbs locks in fresh flavors better than drying delicate varieties like basil and cilantro.
Create herb ice cubes by chopping herbs and placing them in ice cube trays with water or olive oil for oil infusions.
Try blanching herbs briefly before freezing for color retention.
Store frozen cubes in freezer bags for convenient flavor preservation that lasts months longer than fresh.
Other Preservation Methods for Herbs
Your herb-preservation arsenal extends far beyond basic drying and freezing methods.
These creative techniques transform your garden harvest into culinary treasures that last for months:
- Herb-infused vinegar and herb-infused honey capture fresh flavors while adding gourmet touches to your cooking
- Herb salts and herb sugars create seasoned ingredients that preserve aromatic properties naturally
- Herbal tinctures in alcohol maintain potency for up to two years
Salt preservation extends herb storage life while creating ready-to-use seasonings.
To maximize flavor retention, be sure to use airtight glass containers for storage.
These preserving herbs methods guarantee your herb flavor stays vibrant long after harvest season ends.
Herb Freezing and Dehydration Methods
You’ve got fresh herbs ready to preserve, and freezing or dehydrating them keeps their flavor locked in for months.
These two methods work differently but both give you tasty herbs when fresh ones aren’t available.
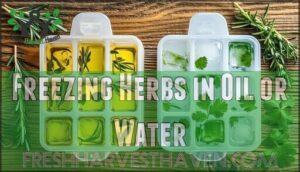
Freezing Herbs in Oil or Water
When your garden overflows with aromatic herbs, freezing preserves their peak flavors for months ahead. Oil vs Water makes all the difference in Flavor Preservation. Oil-based cubes work brilliantly for woody herbs like rosemary and thyme, while water suits delicate varieties like cilantro and parsley.
Consider Cube Size and Herb Combinations for your herb freezing techniques. Standard ice cube trays create perfect single-serving portions.
Dehydrating Herbs for Storage
Your garden’s bounty doesn’t have to disappear with the season.
Air drying remains the gold standard for preserving fresh herbs—bundle stems and hang upside down in a dry, ventilated space.
For faster results, try oven drying at low temperatures or microwave drying in short bursts.
Quality depends on proper timing: harvest morning herbs after dew evaporates.
Store your dried treasures in airtight containers away from light for maximum potency.
Using a Food Dehydrator for Herbs
When you master your food dehydrator, you’ll transform fresh herbs into flavorful treasures that last months.
Set your dehydrator temperature between 95-105°F to preserve essential oils without burning delicate leaves.
You can even find herb dehydrator products online for convenience.
Here’s your step-by-step process:
- Prepare herbs by removing thick stems and washing gently
- Arrange single layers on trays with proper spacing for airflow
- Monitor drying time every 30 minutes during the first two hours
- Test moisture content by checking if leaves crumble easily
- Choose storage containers that seal tightly for maximum freshness
Herb varieties like basil and oregano dry beautifully using this method.
Creative Ways to Use Harvested Herbs
You’ve worked hard to grow and harvest your herbs, and now it’s time to transform them into flavorful creations that’ll make your kitchen smell amazing.
From herb-infused butters that melt perfectly on warm bread to custom salt blends that add a gourmet touch to any dish, these simple techniques help you get the most value from every leaf you’ve carefully picked.
Making Herb Butter and Infused Oils
While fresh herbs shine on their own, transforming them into butter and infused oils creates versatile kitchen staples.
You’ll master Butter Herb Ratations by combining four tablespoons softened butter with two tablespoons chopped fresh herbs. For Oil Infusion Methods, gently warm oil with herbs for thirty minutes, then strain.
These Flavor Combinations enhance everyday cooking—basil butter melts perfectly on pasta, while rosemary oil transforms roasted vegetables.
Proper Storage Best Practices keep these Culinary Applications fresh for weeks.
Creating Herb Salt and Sugar Mixes
Two cups of fresh herbs mixed with half a cup of coarse salt creates your foundation for incredible Flavor Combinations.
Choose kosher or sea salt for Salt Selection, while granulated sugar works best for Sugar Types.
Master Blending Techniques by pulsing ingredients in a food processor until evenly distributed.
Let your culinary herbs dry completely before transferring to airtight containers.
These Storage Solutions preserve herb flavor enhancement for months.
Try rosemary sugar for cookies or garlic-herb salt for vegetables—your herb recipes just got more exciting.
Other Creative Uses for Harvested Herbs
Your herb harvest opens countless creative possibilities beyond traditional cooking.
Transform your bounty into unique home essentials that showcase herb flavor enhancement and natural herb aroma throughout your living space.
- Herb-infused honey drizzled over cheese creates gourmet appetizers with complex flavors
- Herbal teas blended from dried mint and chamomile offer soothing evening rituals
- Bath herbs bundled in muslin sachets turn ordinary soaks into spa experiences
- Herb vinegars infused with rosemary add depth to salad dressings
- Herbal bouquets bring garden freshness indoors while naturally scenting rooms.
Consider adding herbs to your cocktails, as rosemary adds complexity to drinks.
Common Mistakes in Herb Harvesting
You might think herb harvesting is simple, but common mistakes can ruin your plants’ flavor and kill future growth.
These errors include cutting too much at once, picking herbs at the wrong time of day, and storing them incorrectly after harvest.
Over-Harvesting and Under-Harvesting Herbs
After mastering creative herb applications, you’ll want to avoid harvesting pitfalls that compromise herb health.
Overharvesting creates severe plant stress, weakening your plants and slowing regrowth rate. Taking too much damages root health and reduces flavor impact.
Underharvesting seems safer but creates woody, bitter herbs with poor taste.
Proper harvesting means following the one-third rule—never remove more than 33% at once. This approach maintains sustainable yield while keeping plants productive and flavorful throughout the growing season.
Harvesting Herbs at The Wrong Time
Timing truly makes or breaks your herb harvesting success. When you harvest at the wrong time, you’re basically throwing away months of careful growing.
Harvesting fresh herbs during peak heat or wet conditions creates a perfect storm of problems that’ll leave you frustrated.
Here’s what goes wrong with poor timing:
- Flavor Compromised – Essential oils concentrate differently throughout the day, leaving you with bland, disappointing herbs
- Plant Damage – Wrong timing stresses plants, reducing their ability to bounce back and produce future harvests
- Fungal Growth – Wet harvesting conditions invite mold and disease that’ll destroy your precious crop
The sweet spot? Early morning after dew evaporates but before the sun gets intense. This window preserves maximum flavor while keeping your plants healthy for continued production.
Not Preserving Herbs Properly
Poor preservation turns your precious herb harvest into expensive compost.
You’ve spent time growing and harvesting herbs, but improper storage ruins everything.
Here’s what kills your fresh herbs:
- Flavor degradation from storing wet leaves that haven’t dried properly
- Mold growth when excess moisture gets trapped in sealed containers
- Freezer burn from inadequate packaging during freezing
- Storage duration mistakes that leave herbs too long without proper care
- Improper drying techniques that destroy essential oils and color
Master these basics: dry herbs completely, freeze in oil, or refrigerate stems in water.
Maximizing Your Herb Harvest Yield
You can triple your herb harvest by understanding what makes plants produce more leaves instead of just surviving.
Smart gardeners know that regular cutting, proper spacing, and consistent care create bushier plants that keep giving fresh herbs all season long, which allows them to triple their herb harvest.
Planning Your Herb Garden for Maximum Yield
Why settle for a mediocre herb harvest when smart planning can triple your yield? Start with proper Soil Preparation—mix compost into well-draining earth.
Your Garden Layout should place tall herbs like rosemary behind shorter basil. Companion Planting works magic: pair basil with tomatoes for natural pest control. Succession Planting guarantees continuous harvests by sowing cilantro every two weeks.
Smart Variety Selection matters too.
| High-Yield Herbs | Expected Harvest |
|---|---|
| Basil | 2-3 cups weekly |
| Mint | Endless supply |
| Parsley | 1 cup weekly |
| Chives | Daily snippings |
| Oregano | Monthly bunches |
This foundation maximizes herb production and herb growth dramatically.
Providing Optimal Growing Conditions for Herbs
Proper herb care sets the foundation for abundant harvests throughout the growing season.
Your herbs need specific conditions to reach their full potential and deliver maximum flavor.
Creating the perfect environment requires attention to three key factors:
- Sunlight requirements: Most herbs thrive with 6-8 hours of direct sunlight daily—south-facing locations work best for herb cultivation.
- Soil composition: Well-draining soil prevents root rot while providing essential nutrients for healthy herb garden growth.
- Watering practices: Deep, infrequent watering encourages strong root development without waterlogged conditions.
Harvesting Herbs Regularly for Better Yield
With ideal growing conditions in place, regular pruning becomes your yield-boosting superpower.
Consistent cutting every week or two triggers growth stimulation that keeps plants producing fresh leaves.
This yield frequency approach maintains plant vigor better than sporadic harvesting.
When you’re cutting herbs regularly, you’re basically telling the plant to keep working.
Each snip signals "make more leaves," creating a continuous cycle of abundance throughout the growing season.
One-third rule
Frequently Asked Questions (FAQs)
How do you harvest herbs?
Cut herb stems above leaf nodes using clean scissors or pruners.
Harvest in morning after dew dries but before heat peaks.
Pick leaves before flowers bloom for best flavor and encourage continued growth.
How do you pick herbs?
Like selecting the finest jewels, you’ll pinch soft herbs with your fingertips or snip stems with clean scissors.
Choose morning hours when leaves are dry and vibrant for the best flavor and freshness.
When should I Harvest my herbs?
Harvest herbs in early morning after dew dries but before heat builds.
Pick when plants reach six inches tall with vibrant leaves, just before flowers open for peak flavor and essential oils.
How many harvests a year should a herb grow?
Think of your herb garden as a generous friend who keeps giving all season long.
You’ll typically get 3-5 harvests from annuals and continuous pickings from perennials throughout their growing season.
When should you harvest herbs for drying?
Timing matters when you’re planning to dry herbs.
You’ll want to harvest just before flowers open, when essential oils peak.
Choose early morning after dew evaporates but before afternoon heat wilts your plants.
What herbs are harvested?
Almost every herb in your garden becomes a treasure waiting to be harvested.
You’ll gather annual herbs like basil, cilantro, dill, and parsley, plus perennial favorites including rosemary, sage, oregano, mint, and thyme.
How do I maximize my herb harvest?
Cut regularly to encourage new growth, harvest in morning when oils peak, pinch flowers before they bloom, and use proper tools. You’ll keep plants producing fresh leaves all season long.
When should I Harvest herbs?
Like catching morning dew before it disappears, you’ll want to harvest herbs early morning after dew evaporates but before heat hits.
Pick when plants are bushy, leaves are dry, and flowers haven’t opened yet.
How do you harvest herbs in a pot?
Use clean scissors or pruners to snip stems just above leaf nodes on potted herbs.
Harvest in morning after dew dries, taking no more than one-third of perennial herbs or half of annuals at once.
How do you harvest a perennial herb?
Perennial herbs can live for decades when harvested correctly.
You’ll want to cut only one-third of the plant at once, snipping stems just above leaf nodes.
This gentle approach keeps your rosemary, thyme, and sage thriving year after year.
Conclusion
Mastering this harvesting fresh herbs guide transforms your garden from a simple hobby into a reliable source of peak-flavor ingredients.
You’ll notice the difference immediately—herbs harvested at the right time with proper techniques taste markedly more vibrant than store-bought alternatives.
Remember to harvest regularly, use clean tools, and follow the one-third rule.
Your consistent efforts will reward you with abundant, flavorful herbs throughout the growing season, making every meal more delicious and aromatic.
- https://www.fda.gov/media/85323/download
- https://www.wga.com/wp-content/uploads/d7files/herb-document.pdf
- https://www.ars.usda.gov/is/np/CommercialStorage/CommercialStorage.pdf
- https://www.researchgate.net/publication/242549288_Postharvest_Handling_and_Packaging_of_Fresh_Herbs
- https://www.frontiersin.org/journals/plant-science/articles/10.3389/fpls.2023.1237577/full

