This site is supported by our readers. We may earn a commission, at no cost to you, if you purchase through links.
When you use clean tools, wash your hands properly, and pick fruit at the right stage of ripeness, you protect your produce from the bacteria and damage that cut shelf life short. Simple techniques like gentle twisting motions and sanitized containers can reduce bruising by 15–20% and keep your fruits fresh longer, turning your garden’s bounty into meals you can actually enjoy.
Table Of Contents
- Key Takeaways
- Preparing for Safe Fruit Harvests
- Identifying Ripeness in Garden Fruits
- Choosing The Right Harvest Time
- Safe Harvesting and Handling Techniques
- Cleaning and Storing Harvested Fruits
- Preserving and Consuming Garden Fruits Safely
- Frequently Asked Questions (FAQs)
- Can I harvest garden fruit during rainy weather?
- What to do with bruised or blemished fruit?
- Are certain fruit varieties more prone to pests?
- How to determine fruit allergies from homegrown produce?
- Is it safe to eat wild garden fruit volunteers?
- How do you prevent pest contamination during harvesting?
- What are signs of chemical residue on fruits?
- How long can harvested fruits sit before processing?
- Should you harvest fruits during or after rain?
- Whats the safest way to transport harvested fruits?
- Conclusion
Key Takeaways
- Clean tools and proper handwashing remove up to 99% of bacteria, while gentle twisting motions and sanitized containers reduce bruising by 15–20%, protecting your harvest from the contamination and damage that cut shelf life short.
- Picking fruit at the right ripeness stage—watching for color changes, firmness shifts, and easy detachment—prevents the 25% sweetness loss of underripe fruit and the 50% higher bacterial rot rates of overripe produce.
- Harvesting during cooler morning hours (after dew dries, before 9 a.m.) captures 15% better firmness and 10% higher yields while avoiding midday heat that spikes respiration rates and causes 25% more bruising.
- Proper storage separates ethylene-producing fruits from sensitive varieties and maintains cold temperatures (30–40°F for most fruits) with 90–95% humidity, cutting spoilage by up to 70% compared to mixed storage methods.
Preparing for Safe Fruit Harvests
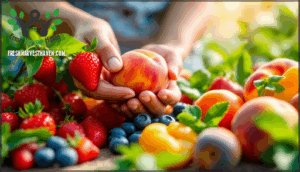
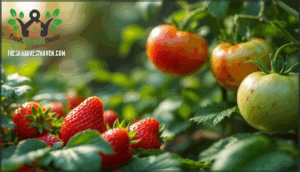
Before you pick your first ripe strawberry or sun-warmed tomato, you’ll want to set yourself up for success with the right preparation. Safe harvesting starts well before you step into the garden—it’s all about having clean tools, healthy habits, and a sharp eye for potential problems.
Let’s walk through three key areas that’ll keep your harvest fresh, safe, and delicious from the vine to your kitchen.
Essential Harvesting Tools and Equipment
Harvesting produce safely starts with the right gear. You’ll need sharp, stainless steel pruning shears and knives—clean them daily to slash microbial contamination and prevent those nasty entry points for pathogens. Here’s your essential toolkit:
- Hand tools with proper sanitation – Sharp, food-grade cutting equipment reduces bruising by 15–20% and extends shelf life greatly when maintained well.
- Clean container materials – Food-grade plastic or stainless-steel bins kept off the ground prevent soil contamination and spoilage.
- Cleaning equipment and protective gear – Weekly disinfection with bleach solutions (50–150 ppm) cuts bacterial loads by over 99%, while gloves and non-slip footwear protect you during collection. To minimize postharvest losses, regular sanitizing is crucial.
Mechanical harvesters boost productivity in larger gardens, though hand-picking remains gentler on delicate fruits. Following safe food handling practices and garden produce safety protocols protects both your harvest and your family.
Personal Hygiene and Handwashing Practices
Beyond your tools, your hands play the biggest role in food safety practices. Clean hands are your best defense against pathogens that cause illness. Washing with soap and water for 20 seconds removes up to 99% of bacteria—hand sanitizer alone won’t cut it when you’re dealing with garden soil.
Make hand washing a habit before harvesting, after bathroom breaks, and whenever your hands get dirty. Farms with hygiene compliance training programs see 50% fewer contamination events, proving that simple routines protect your harvest and family health.
Fresh produce harvesters should adhere to good hygiene practices to prevent contamination.
Inspecting for Health and Safety Hazards
Before heading to the garden, check your surroundings for physical contaminants like stones, sticks, or debris—they account for 35% of postharvest contamination cases. Look for pesticide residues, standing water (a hot spot for pathogens), and signs of wildlife intrusion, which raises biological risks by 25%.
Inspect ladders for damage and verify equipment sanitation to prevent cross-contamination. These simple checks protect fresh produce safety and reduce environmental hazards that threaten garden hygiene and safe food handling.
Identifying Ripeness in Garden Fruits
Picking fruit at just the right moment makes all the difference between bland, tough produce and the juicy, flavorful harvest you’ve been dreaming about. Learning to spot ripeness isn’t guesswork—it’s about noticing color changes, texture, and a few simple clues that tell you when each crop is ready.
Here’s what to look for in your garden to time your harvests perfectly.
Common Signs of Fruit Ripeness
Ever notice how fruit tells you when it’s ready to eat? Learning to read those signs of ripeness makes all the difference between bland pickings and perfect flavor. Your garden fruits undergo dramatic changes during fruit ripening, and you can spot them with your own eyes and hands.
Here are the most reliable visual ripeness and texture changes to watch for:
- Color changes: Fruit background shifts from green to yellow, orange, or develops red and purple pigments as chlorophyll breaks down and sugars accumulate
- Firmness shifts: Ripe fruit softens noticeably as enzymes break down cell walls, though it shouldn’t feel mushy
- Detachment ease: Mature fruit separates cleanly from branches with gentle pressure when the stem’s abscission zone weakens
Sugar levels climb as acids convert to sweetness, and seed maturity shows through hard, dark seeds rather than soft, white ones—confirming your fruit’s reached peak ripeness and flavor.
Crop-Specific Ripeness Guidelines
Each fruit variety has its own sweet spot for harvesting, and knowing these signs of ripeness helps you pick at peak excellence. Here’s your guide to fruit ripening benchmarks:
| Fruit | Key Ripeness Indicators |
|---|---|
| Apples | Apple Maturity Index shows firmness of 13–18 pounds-force, 12–14 °Brix sugar levels, and yellow ground color replacing green |
| Tomatoes | Tomato Color Stages reach 85–90% red development with 4.5–6.5 °Brix sweetness and gentle give when squeezed |
| Grapes | Grape Sugar Levels hit 18–24 °Brix with plump, firmly attached berries and color matching the variety |
| Bananas | Banana Peel Hue shifts from green to yellow as sugars reach 8–12%, while Pear Flesh Firmness drops to 18–22 pounds at harvest |
Test firmness, color, and detachment ease—your senses combined with these ripening standards guarantee ideal timing.
Preventing Harvest of Overripe or Underripe Produce
When you ignore maturity indexing and ripeness indicators, you’re rolling the dice with harvest timing—and that gamble doesn’t pay off. Picking immature fruit can slash watermelon sweetness by 25%, while overripe tomatoes show 50% more bacterial soft rot and bruise 40% easier.
These mistakes lead to serious economic losses and storage impact. Watch for precise signs of ripeness across ripening stages—combining visual cues with measurement tools cuts mis-harvest errors by 45%, protecting both fruit maturity and your hard work.
Choosing The Right Harvest Time
Picking fruit at just the right moment isn’t only about ripeness—it’s also about working with nature’s rhythms. Weather patterns, sunlight exposure, and even the time of day can make a real difference in your harvest’s quality and safety.
Let’s look at three key timing factors that’ll help you bring in the best possible crop.
Weather and Climate Considerations
Weather can feel like a coin toss when you’re harvesting, but checking weather data helps you dodge trouble. Heat stress above safe thresholds cuts your picking time short and raises foodborne illness risks if you rush.
Heavy rainfall within 24 hours spikes bacterial contamination in produce by up to 25-fold, so wait before harvesting. Shifting blooming cycles and air quality also affect food safety and timing, while postharvest climate during transport impacts freshness and shelf life.
Impact of Day Length and Sunlight
Day length isn’t just about sunshine hours—it’s actually a major ripening indicator that shapes fruit flavor and harvest timing. Photoperiod effects can boost strawberry yields nearly ten-fold under 16-hour lighting, while sunlight intensity drives sugar accumulation in apples and grapes.
Light spectrum matters too: red wavelengths improve tomato lycopene, blue light firms fruit texture. Regional variations mean mid-latitude growers may see harvest windows shift by 2-3 weeks seasonally.
Smart sunlight management—like partial shading or strategic pruning—prevents sunburn while optimizing ripeness signs for harvesting fruit safely.
Best Times of Day for Harvesting
Timing your harvest is like catching fruit at its peak performance—temperature swings throughout the day dramatically affect quality and shelf life.
Morning vs. Afternoon harvesting strategies:
- Early morning (after dew dries, before 9 a.m.): You’ll capture crispness and flavor as fruits hold 15% better firmness and 10% higher yields in leafy greens, with cooler temperatures (10–18°C) preserving volatile compounds in berries and herbs.
- Midday risks (noon to 3 p.m.): Skip this window—temperatures above 25°C spike respiration rates by 20–30%, causing 25% more bruising and 8% sugar loss in thin-skinned crops like tomatoes.
- Afternoon advantage (3 p.m. to sunset): Heat-tolerant crops like avocados show 10–20% fewer ripe rots when picked now, with reduced surface moisture lowering contamination risk during storage.
- Night harvesting benefits: Cooler conditions (12–16°C) retain 10–15% higher sugars and extend shelf life by 30%, making the diurnal cycle work for your cold storage chain.
Match best crop timing to each fruit’s temperature tolerance—apples prefer morning cool, while avocados thrive in stable afternoon warmth around 25°C.
Safe Harvesting and Handling Techniques
Once you’ve picked the perfect time to harvest, how you handle those fruits makes all the difference. The right techniques protect your produce from bruises, germs, and contamination that can spoil your harvest before you even get it to the kitchen.
Let’s walk through the key practices that’ll keep your garden fruits fresh, safe, and ready to enjoy.
Gentle Picking Methods to Prevent Bruising
Think of each piece of fruit like a water balloon—one wrong move, and you’re looking at bruising that cuts shelf life short. When harvesting fruit, your picking technique makes all the difference. Use a gentle twisting motion at the stem junction rather than yanking from the fruit surface; this reduces skin bruising by about 35% and keeps your harvest market-ready. Controlled pressure below 15 N (that’s lighter than you think!) prevents cell rupture that triggers early spoilage.
Here’s your quick reference for bruise-free harvesting techniques:
| Harvest Method | Bruise Reduction |
|---|---|
| Stem grasping technique | 35% fewer bruises |
| Cotton gloves during picking | 20-28% less abrasion |
| Morning harvest (below 20°C) | 30% lower susceptibility |
| Worker training programs | 40-60% damage reduction |
| Foam-padded pickers | 50% fewer skin bruises |
Minimize drop heights—keep delicate fruits like avocados below 10 cm when they’re softening. Worker training isn’t just nice to have; teams practicing gentle handling see damage rates plummet by half or more. Cotton gloves help protect thin-skinned varieties, and here’s a tip: harvest during cooler morning hours when fruits are naturally firmer and less prone to damage.
These signs of ripeness combined with proper harvesting techniques mean you’ll enjoy better fruit flavor and longer storage life. Your hands are the first step in quality control!
Using Clean, Sanitized Tools and Containers
Gentle handling starts with clean tools—your first line of defense against contamination. The FDA Produce Safety Rule requires all food-contact surfaces, including harvest tools, be cleaned and sanitized regularly to prevent pathogen transfer. Pathogens like E. coli can persist on equipment for days, making tool sanitization methods a cornerstone of food safety practices.
Here’s your cleaning and sanitizing routine:
- Scrub away visible soil and debris with food-grade detergent and potable water before any sanitizing step
- Apply bleach solution at 50–200 ppm chlorine (roughly 1 teaspoon per gallon) and let surfaces stay wet for one minute
- Clean daily during active harvest and weekly for storage containers to meet cleaning frequency guidelines
- Air-dry completely and store in animal-proof spaces like locked sheds to prevent cross-contamination
- Check sanitizer strength with test strips to confirm effectiveness and avoid chemical overuse
Switching between fruit types? Sanitize containers between uses—it’s your best cross-contamination prevention strategy. Clean tools after handling damaged fruit, and remember: washing and storage guidelines work together.
Separate washed from unwashed produce in dedicated, sanitized containers for safe storage that protects quality from garden to table.
Wearing Gloves and Protective Clothing
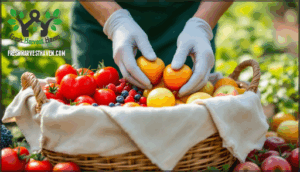
Clean tools protect your harvest—so does what you wear. More than 90% of pesticide exposure happens through skin contact, making proper glove use a cornerstone of food safety practices.
Choose nitrile or neoprene gloves for chemical resistance over cotton, which offers less than 10% protection. Replace them every 2–4 hours to prevent breakdown, and pair with long sleeves and pants to cut exposure by 90%.
This clothing chemical resistance aids post-harvest protection and regulatory compliance under EPA guidelines, preventing foodborne illness from field to table.
Avoiding Soil and Animal Contamination
Your harvest site matters just as much as your technique. Soil contamination sources like lead and arsenic can concentrate in fruit tissue—a 2020 study found strawberries grown in contaminated ground absorbed lead at levels reaching 0.84 mg/kg. Animal feces introduces E. coli, Salmonella, and Listeria through uncomposted manure, which carries pathogens at dangerously high levels. Poor irrigation water quality spreads contamination even to above-ground fruits.
Raised bed benefits include eliminating detectable heavy metal uptake, while washing harvested fruit removes surface pathogens after careful picking.
Cleaning and Storing Harvested Fruits
Once your fruits are safely picked, the next step is getting them clean and keeping them fresh. How you wash, store, and separate your harvest makes all the difference in preventing spoilage and keeping your family safe.
Let’s walk through the best practices for each of these important steps.
Proper Washing and Sanitizing Procedures
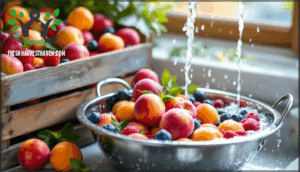
Your freshly picked fruit deserves a proper bath to assure consumer safety and remove field residues. Washing produce under running water lessens contamination considerably, and following proven hygiene practices makes all the difference:
- Wash your hands with warm, soapy water for at least 20 seconds before handling any fruit
- Rinse all produce under cool running potable water—never use soap or detergent on porous skins
- Scrub firm-skinned fruits like melons and apples with a clean brush to remove surface bacteria
- Consider vinegar solutions (5-10% acetic acid) for an extra microbial reduction of 80-90%
- Dry thoroughly with clean paper towels to lower bacteria counts by another 25%
Water temperature matters less than mechanical friction during washing. Sanitizer usage with chlorine (1-7 mg/L) works well for larger batches, while vinegar solutions offer gentler alternatives for delicate berries.
Proper drying methods and storage aftercare prevent recontamination after all your careful work.
Optimal Storage Temperatures and Conditions
Once your fruit is clean and dry, proper storage methods become your best friend for maintaining freshness and food safety.
Temperature Effects and Humidity Control work hand in hand—most fruits like apples thrive at 30–40°F with 90–95% humidity, while tropical varieties need warmer conditions (45–55°F) for Injury Prevention from chilling damage.
Climate Management means keeping ethylene-producing fruits like tomatoes away from sensitive ones, since Ethylene Impact accelerates ripening and spoilage. Food preservation starts with understanding these storage needs—your refrigerator’s crisper drawer offers the ideal environment for storing harvested produce when set correctly.
Separating Fruits to Prevent Cross-Contamination
Beyond refrigeration alone, physical barriers like separate bins and covered containers shield your produce from contamination—up to 70% more effectively than mixed storage.
Ethylene segregation matters too; keep apples away from berries to prevent premature spoilage. Sanitary equipment and temperature control below 41°F slow bacterial growth, while proper humidity levels (85–95%) maintain freshness without promoting mold.
Never store fruits near raw meat or cleaning supplies—crosscontamination from drips or aerosols threatens food safety even after careful washing.
Short-Term and Long-Term Storage Solutions
When you’re storing harvested produce, think about your timeline—room temperature works for 1–7 days with citrus or tomatoes ripening nicely at 20–22°C, while cold storage at 0–4°C extends shelf life up to 12 months.
Preservation methods like freezing, canning, or drying lock in quality long-term. Use proper packaging guidelines—perforated polyethylene or modified atmosphere packaging cuts water loss by 35–55%. Storage monitoring through weekly inspections prevents up to 28% spoilage.
Preserving and Consuming Garden Fruits Safely
You’ve done the hard work of growing and harvesting your garden fruits—now it’s time to preserve them so you can enjoy fresh flavors long after the season ends.
Proper preservation methods keep your fruits safe to eat while locking in their taste and nutrition.
Let’s look at the best ways to freeze, dry, and can your harvest, plus how to avoid common mistakes that could make you or your family sick.
Safe Freezing, Drying, and Canning Methods
Once you’ve mastered harvesting and food preservation, you’re ready to lock in freshness year-round. Freezing techniques like individual quick freezing (IQF) preserve texture beautifully—think 88% retention versus just 65% with standard methods.
For drying guidelines, keep your dehydrator at 131°F minimum and slice fruits thin for even moisture removal. Canning standards require 212°F for acidic fruits; low-acid varieties need higher heat.
These storage methods extend your preserving garden harvest from weeks to months, keeping your hard-earned bounty safe and delicious.
Preventing Foodborne Illness During Preservation
Even sterilized jars can harbor trouble if you skip critical safety steps. Protecting your preserved produce from contamination means staying sharp on these fronts:
- Temperature and pH monitoring – Pressure canners must hit 240–250°F to destroy botulism spores, and acidic fruits below pH 4.6 prevent toxin formation.
- Tool sanitization – Boil jars for 10 minutes and disinfect all utensils to eliminate surface microorganisms.
- Cross-contamination prevention – Keep raw and processed produce separate, and sanitize cutting boards between batches.
Ongoing monitoring through regular microbial testing catches contamination before storage, keeping your hard work safe.
Guidelines for Safe Consumption and Shelf Life
Knowing when to eat or toss your harvest protects your family from foodborne illness. Fresh fruits like apples last 3–8 months at 30–40°F, while berries stay safe just 2–7 days under similar conditions.
Always rinse under running water before eating—skip soaking—and discard anything showing mold, off-odors, or mushy spots.
Extend storage by separating ethylene producers like bananas from sensitive berries, and check canned goods for bulging or rust before opening.
Frequently Asked Questions (FAQs)
Can I harvest garden fruit during rainy weather?
Rain rarely ruins your harvest plans, but you shouldn’t pick fruit during heavy downpours or when produce is dripping with dew. Rainy harvest risks include increased fecal contamination of produce, post-rain pathogens like E. coli thriving on wet surfaces, and fruit cracking—so wait for drying techniques to work their magic before harvesting.
Worker safety matters too: slippery conditions lead to accidents, and washing can’t fully remove contaminants from already-compromised fruit. Storage after rain requires extra vigilance since moisture accelerates spoilage.
What to do with bruised or blemished fruit?
Bruised or blemished fruit doesn’t have to go to waste. You can cut away damaged spots and use the rest fresh, or transform imperfect produce into jams, sauces, or dried snacks—processing options that recover economic value while minimizing discards and food donation opportunities.
Are certain fruit varieties more prone to pests?
Some fruit varieties practically roll out the welcome mat for pests, while others seem to have built-in defenses. Peaches, nectarines, and stone fruits are magnets for stink bugs and piercing insects, with damage sometimes exceeding 20% in unmanaged orchards. Apples and pears face similar challenges from codling moths, while grapes, strawberries, and tomatoes battle fungal diseases like grey mold.
Climate vulnerability and horticultural practices play big roles—warmer, wetter conditions boost pest populations, and repeated pesticide use can trigger resistance development. Plant characteristics matter too; some cultivars are naturally tougher than others. Your best defense? Choose resistant varieties and practice good garden sanitation.
How to determine fruit allergies from homegrown produce?
If you suspect a fruit allergy from your homegrown produce, watch for symptoms like itching, swelling, or oral tingling after eating.
Consult an allergist for allergy diagnostic methods like skin prick tests with fresh produce testing or oral food challenges—these are the most reliable ways to confirm homegrown fruit allergens and manage cross-reactivity causes.
Is it safe to eat wild garden fruit volunteers?
Volunteer fruit risks include identification challenges—you can’t always tell edible from toxic plants by looks alone.
Wild garden volunteers face contamination from soil, animal waste, pesticides, and other environmental sources that threaten safe consumption of produce.
How do you prevent pest contamination during harvesting?
Ironically, the cleanest-looking fruit can harbor the nastiest surprises—like E. coli from feces or pest contamination.
You’ll prevent these risks through IPM strategies, tool sanitation with bleach solution, physical barriers like netting, debris removal, and thorough washing of all produce.
What are signs of chemical residue on fruits?
Look for unusual powdery coatings, greasy or oddly shiny patches, or off odors like chemical or bitter smells—these sensory residue signs hint at pesticide presence, though washing produce can reduce residue by 50-90% in conventional gardening.
How long can harvested fruits sit before processing?
Picture a basket brimming with sun-warmed berries—but how quickly do they need processing? For most fruits, aim for 24–48 hours to prevent microbial growth and preserve quality.
Refrigeration below 40°F extends this to 7–14 days, depending on fruit damage and ethylene production. Prompt processing delays spoilage.
Should you harvest fruits during or after rain?
Harvesting fruits during or after rain isn’t your best move. Wet conditions create a playground for bacteria and fungi, slashing shelf life and inviting spoilage.
Wait until surfaces dry completely—your fruits will thank you with better quality and longer storage.
Whats the safest way to transport harvested fruits?
You’ve picked your fruit carefully—now don’t let it spoil on the way to storage! Transport harvested produce in clean, sanitized containers made from polyethylene or polycarbonate, ensuring proper temperature control and gentle packing techniques with cushioning materials to prevent bruising and contamination during transit.
Conclusion
Think of your garden like a bank account—you’ve invested time, sweat, and care, and harvesting garden fruits safely is how you cash in without losing value to careless mistakes. When you wash your hands, pick at peak ripeness, and handle each piece like it matters, you’re protecting not just the fruit but the effort behind it.
Your neighbor’s compost pile doesn’t need your tomatoes—your dinner table does. Clean tools, gentle hands, and proper storage turn weeks of growing into food that actually makes it to your fork, fresh and safe.
- https://ohioline.osu.edu/factsheet/hyg-1153
- https://www.theroanokestar.com/2025/07/23/tips-for-safe-handling-of-garden-produce-from-a-va-tech-expert/
- https://www.fda.gov/media/116766/download
- https://www.foodprotection.org/members/fpt-archive-articles/2023-03-fresh-produce-harvesting-equipment-a-review-of-cleaning-and-sanitizing-practices-and-related/
- https://www.nifa.usda.gov/sites/default/files/resource/Guide%20to%20Washing%20Fresh%20Produce508.pdf

