This site is supported by our readers. We may earn a commission, at no cost to you, if you purchase through links.
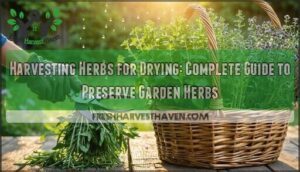
That’s when essential oils are most concentrated, giving you maximum flavor punch. Cut stems about one-third down, choosing healthy growth just before flowers appear.
Clean gently, remove damaged leaves, and make certain they’re completely dry before starting your chosen drying method. Whether you’re air-drying bundles or using a dehydrator, timing beats everything else.
Master this window, and your winter cooking will thank you with vibrant flavors that store-bought herbs simply can’t match.
Table Of Contents
- Key Takeaways
- Harvesting Herb Basics
- Preparing Herbs for Drying
- Drying Methods Compared
- Harvesting for Peak Flavor
- Drying Herbs Effectively
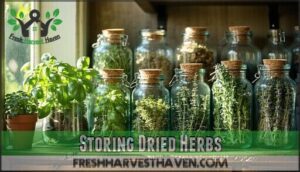
- Storing Dried Herbs
- Frequently Asked Questions (FAQs)
- Are dried herbs as good as fresh?
- How long do dried herbs last?
- Can I dry different herbs at the same time?
- What is the best way to dry out fresh herbs?
- What herbs should you not dry?
- Is it better to dry herbs on the stem or off?
- How to preserve herbs?
- How to use fresh and dried herbs together?
- How do you dry herbs in the oven in Pennsylvania?
- How do you harvest herbs?
- Conclusion
Key Takeaways
- Harvest at the perfect time – Cut herbs mid-morning after dew evaporates but before heat kicks in, when essential oils are most concentrated for maximum flavor punch.
- Pick before flowers appear – You’ll get the best flavor intensity by harvesting foliage just before flowering, when plants haven’t diverted energy to bloom production.
- Ensure herbs are bone-dry – Test by crushing leaves between your fingers—they should crumble easily without any flexibility to prevent mold during storage.
- Store properly for lasting flavor – Keep dried herbs whole in airtight glass containers away from light and heat, replacing them every 6-12 months when flavor fades.
Harvesting Herb Basics
You’ll want to get the basics right before you start snipping away at your herb garden.
The key is knowing which herbs dry well, having the right tools on hand, and timing your harvest perfectly to capture peak flavor.
Choosing Herbs for Drying
Not all herbs dry equally well. Some varieties preserve their bold flavor profiles and aroma retention better than others, making smart selection essential for herb drying for flavor.
Smart selection separates successful herb drying from flavorless disappointment.
Choose oil-rich herbs like rosemary or thyme for bold flavors and lasting aromas in your dried herb collection.
Herb families like mint, Mediterranean herbs, and woody perennials offer excellent drying suitability thanks to their natural oil content and lower moisture levels.
Here are the best herbs for drying based on flavor intensity and drying yields:
- Mediterranean herbs – Rosemary, thyme, and oregano maintain potent flavors
- Mint family varieties – Spearmint, peppermint, and lemon balm dry beautifully
- Woody perennials – Sage and lavender offer strong medicinal properties
Tools for Harvesting Herbs
Sharp harvesting knives or quality scissors beat dull tools every time.
Scissors vs. pruners depends on your herbs—scissors work for delicate leaves, while pruners handle woody stems.
Use gathering baskets to prevent crushing freshly cut herbs.
Sterilize your herb harvesting tools between plants to avoid spreading disease.
For efficient cutting, consider specialized herb shears.
Root harvesting tools like small spades help with perennial herbs.
Seed collection tools guarantee clean harvests.
Timing of Harvest
Now that you have the right tools, Optimal Time makes all the difference in herb harvesting. Morning Harvest after dew evaporates but before heat dissipates oils delivers maximum flavor and potency.
Here’s your timing strategy for when to harvest herbs:
- Pre-Bloom Harvest foliage herbs before flowering prevents bitterness
- Pick flowers just after buds appear but before full bloom
- Collect seeds when they’re mature and dark brown
- Focus on Seasonal Timing – early summer and pre-frost weeks
- Consider Regrowth Impact – never cut more than one-third midseason
To encourage regrowth, use the cut-and-come-again method. Herb harvesting techniques rely on perfect timing. You’ll preserve essential oils and guarantee your herb drying efforts produce flavorful results that’ll enhance your cooking all year long.
Preparing Herbs for Drying
Once you’ve harvested your herbs, you’ll need to prepare them properly to guarantee successful drying and maximum flavor retention.
This vital step involves cleaning away debris, removing any damaged portions, and thoroughly drying wet herbs to prevent mold during the drying process.
Washing and Cleaning Herbs
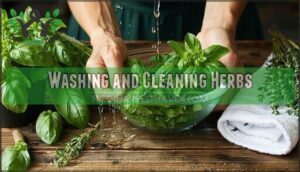
Before preparing herbs for drying, proper herb washing and herb cleaning are essential steps.
Gentle handling prevents bruising delicate leaves while removing pests and debris. Rinse herbs under cool water only when necessary—excessive washing frequency strips valuable essential oils.
Water quality matters; use clean, cool water for a quick swish rather than aggressive scrubbing. Pat herbs completely dry on clean towels after drying after washing.
This careful herb preparation and herb handling preserves maximum flavor and prevents mold during the drying process.
Removing Damaged Leaves
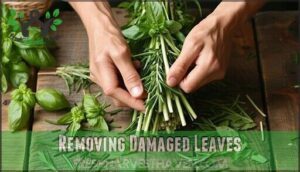
Why let damaged leaves sabotage your herb harvest? Before preparing herbs for drying, conduct thorough leaf inspection to remove discolored, wilted, or pest-damaged foliage.
Proper handling during herb cleaning prevents leaf diseases from spreading during the drying process. Use clean scissors to snip away brown spots and pest damage from each stem.
This post-harvest care step guarantees your harvesting herbs efforts aren’t wasted. Cutting herbs for drying requires attention to detail—even small imperfections can compromise your entire batch.
Herb preparation starts with quality control, so don’t rush this vital step in your drying journey.
Drying Wet Herbs
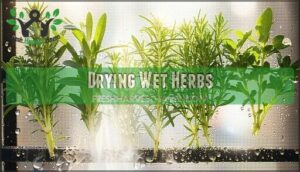
After washing your herbs, thorough drying prevents mold from ruining your harvest.
Pat herbs gently with clean kitchen towels, then focus on these essential drying herbs steps:
- Spread herbs in single layers on mesh screens or paper towels
- Guarantee proper airflow importance around all surfaces
- Control humidity control in your herb drying environment
- Use blotting techniques for delicate leaves
- Allow complete initial drying before storage
Proper mold prevention through effective herb drying techniques guarantees your herbs stay fresh longer.
Drying Methods Compared
You’ve got several options for drying your freshly harvested herbs, and each method has its own advantages depending on your time, equipment, and the type of herbs you’re working with.
Let’s compare the four main drying techniques so you can choose the best approach for your herb-preserving needs.
Air Drying Herbs
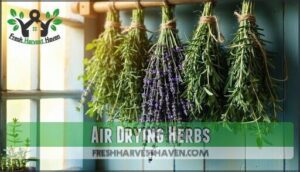
Air drying herbs between warm walls and cool breezes creates the perfect environment for preserving garden treasures.
You’ll create small, loose bundles to guarantee proper airflow importance around each stem, preventing trapped moisture that leads to mold prevention issues. Bundle size matters—think pencil-thick rather than baseball-bat thick for even drying.
Your ideal drying location should be warm, dark, and dust-free with humidity effects kept low. A herb drying rack can help with this process.
Air drying herbs takes patience, requiring 1-3 weeks depending on thickness. Herb drying techniques like this time-tested method preserve essential oils naturally, making it the gold standard among herb drying methods for home gardeners.
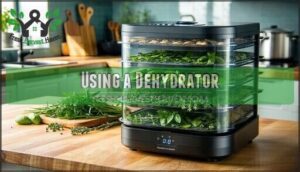
Using a Dehydrator
Food dehydrators excel at dehydrating herbs with precision control. Set your dehydrator temperature between 95-105°F to preserve essential oils while guaranteeing thorough drying. Most dehydrator models offer adjustable settings perfect for herb drying methods.
Arrange herbs in single layers on trays—proper herb placement prevents uneven drying and mold growth. Herb drying time typically ranges from 1-4 hours depending on moisture content and leaf thickness.
To guarantee the herbs are safe for long-term storage, consider drying fresh vegetables using similar methods.
Check progress regularly during dehydrator drying. Troubleshooting dehydrators becomes easier when you monitor herbs closely. They’re ready when leaves crumble easily between your fingers, indicating complete moisture removal.
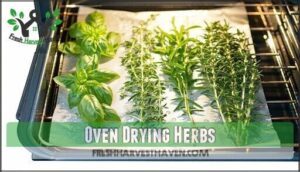
Oven Drying Herbs
Your oven can effectively dry herbs when you don’t have a dehydrator. Set your oven temperature to 90-110°F to preserve essential oils and prevent burning.
Place herbs on parchment paper over a baking sheet, spacing them in a single layer for even airflow. Keep the door position slightly ajar to allow moisture to escape and maintain proper ventilation.
Drying time typically ranges from 1-4 hours depending on herb thickness. Check every 15-20 minutes, implementing gentle herb rotation to guarantee uniform drying.
This method is useful for finding herbs for sale. Monitor closely since oven drying herbs requires attention to prevent scorching.
When leaves crumble easily between your fingers, they’re ready. This method works well for drying herbs at home when weather won’t cooperate with air drying.
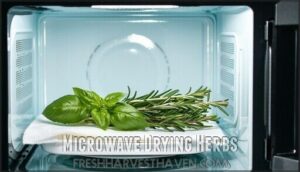
Microwave Drying Herbs
For lightning-fast herb drying, your microwave becomes an invaluable ally in preserving garden bounty. This quick method maintains flavor retention while dramatically reducing drying time from weeks to mere minutes.
Perfect microwave drying herbs technique:
- Herb placement: Arrange herbs in single layer between paper towels
- Microwave wattage: Use 50% power to prevent scorching delicate leaves
- Drying time: Process in 30-second intervals for ideal control
- Moisture check: Test crispness between each heating cycle
- Flavor retention: Cool completely before storing in airtight containers
This herb drying method works exceptionally well for drying herbs at home, especially delicate varieties like basil and cilantro that benefit from gentle, rapid moisture removal.
Harvesting for Peak Flavor
When you harvest herbs at their peak flavor, you’ll lock in the most potent oils and aromas for your dried herb collection.
The secret lies in timing your harvest perfectly—catch foliage before flowering, flowers just as buds appear, and seeds when they’ve turned dark and mature on the plant, which helps in preserving the potent oils.
Harvesting Foliage
Three key principles guide successful foliage harvesting: Optimal Timing, proper Cutting Techniques, and gentle Handling Foliage. Harvest in early morning after dew evaporates but before heat dissipates essential oils.
Use clean scissors for Preventing Damage and cut no more than one-third of stems for Encouraging Growth.
| Herb Type | Best Harvest Stage | Cutting Method |
|---|---|---|
| Basil | Before flowering | Pinch above leaf pairs |
| Sage | Mid-morning | Cut 3-4 inches from base |
| Thyme | Peak oils present | Trim outer stems first |
| Rosemary | Year-round | Select woody stems |
Select vibrant, healthy leaves while avoiding yellowed portions. These harvesting methods guarantee quality herb clippings perfect for drying herbs and preserve fresh herbs‘ maximum potency.
Harvesting Flowers
When you spot buds forming but flowers haven’t fully opened, it’s harvesting time for maximum Flower Maturity and Fragrance Impact.
Best Varieties like lavender and chamomile retain their Color Retention when picked at this sweet spot. Medicinal Flowers pack their strongest punch now.
Single flowers need full blooming, while spiky clusters work best partially open. Regular harvesting methods keep your plants producing more blooms throughout the season.
Harvesting Seeds
When it comes to harvesting herb seeds for drying herbs, timing makes all the difference between success and disappointment. Wait until seeds reach full Seed Maturity – they’ll turn dark brown or black, signaling peak flavor and viability.
Here’s your step-by-step approach to Seed Separation and collection:
- Use paper bags with small holes to catch falling seeds during harvest
- Check for proper color change and dryness before collecting herb seeds
- Harvest in morning after dew evaporates for best results
- Place seed heads in warm, dry locations for complete Seed Drying
- Perform Viability Testing by placing seeds in damp paper towels
Unlike foliage and flowers, seeds need extra patience. Proper pruning guarantees continuous yields and healthy plant health.
Once collected, proper Seed Storage guarantees you’ll have flavorful seasonings and future plantings ready at the right time. During this process, seeds require careful handling, and the right conditions make all the difference. Proper pruning promotes healthy growth, leading to a strong and resilient plant, which is also very resilient.
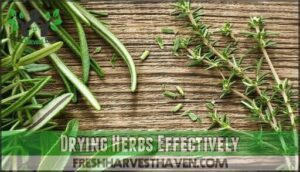
Drying Herbs Effectively
Once your herbs are properly dried, you need to make certain they’re completely moisture-free before storing them away.
Test for dryness by crushing a leaf between your fingers—it should crumble easily without any hint of flexibility or dampness, which ensures they are completely dry.
Ensuring Herbs Are Dry
Proper herb drying requires achieving bone-dry texture for mold prevention.
The crumble test confirms readiness—leaves should crumble easily between fingers.
Drying time varies from 6 days for small-leaved herbs to 2 weeks for larger varieties.
Perform regular moisture checks by bending stems; they should snap cleanly rather than bend.
Even drying guarantees ideal preservation and maximum flavor retention.
Storing Herbs Whole
Once your herbs are completely dry, storing them whole maintains maximum flavor and potency. Whole herbs retain essential oils better than crushed ones, extending their shelf life substantially.
Whole Herb Benefits include superior Moisture Control and enhanced aroma retention. Here’s how to store them properly:
- Choose airtight lids on glass jars for the best Container Size Matters – select containers that match your herb quantity
- Keep entire stems and leaves intact until you’re ready to cook
- Select a cool, dark Storage Location away from heat and sunlight
- Crush only what you need for each recipe to preserve remaining herbs
This approach to storing dried herbs guarantees your herb storage system maximizes flavor retention. To further extend their shelf life, consider using opaque glass containers.
Replacing Old Herbs
Over time, dried herbs lose their flavor intensity and herb potency, making herb replacement essential for vibrant cooking.
Flavor fading typically occurs within 6-12 months, though herb lifespan varies by type.
Visual cues like faded color signal potency loss.
Taste-test your stash regularly—if herbs taste like cardboard, it’s time for a garden refresh.
Don’t let lackluster seasonings sabotage your culinary adventures.
Substituting Dried for Fresh
Now that you’ve stored your herbs properly, you’ll want to master substituting dried herbs for fresh ones. Flavor intensity changes dramatically when herbs dry—they become concentrated powerhouses that pack more punch than their fresh counterparts.
Proper herb substitutes require understanding these aroma differences and making smart recipe adjustments.
- Follow the onethird rule: use 1 teaspoon dried for every 3 teaspoons fresh
- Add dried herbs early in cooking to release their herb flavor
- Try rehydration techniques like soaking in warm water for delicate dishes
- Check herb equivalents charts when experimenting with new varieties
- Taste and adjust—your palate’s the best judge of perfect seasoning
Storing Dried Herbs
Once your herbs are completely dry, proper storage becomes essential to maintain their flavor and potency for months to come.
You’ll need to protect them from light, air, and moisture while keeping them organized and easily accessible in your kitchen, which is crucial for their potency.
Choosing Airtight Containers
Your dried herbs deserve better than a shoebox shoved in the back of your pantry. Container Materials make all the difference—glass jars with airtight lids beat plastic every time for preserving herbs. Size Matters too; oversized containers let air sneak in and steal flavor.
Here’s your container checklist:
- Choose glass jars over plastic for superior Sealing Mechanisms
- Pick containers that fit your herb quantity perfectly
- Look for dark glass to prevent Light Exposure damage
- Verify airtight lids click shut completely for Humidity Control
- Test seal quality before storing your precious drying herbs harvest
Labeling and Dating Containers
Your container’s labeling system determines whether you’ll confidently reach for oregano or accidentally grab mystery herbs six months later.
Proper labeling and dating aren’t just organizational habits—they’re vital for tracking shelf life and guaranteeing information accuracy when drying herbs.
Use waterproof labels or masking tape on glass jars and airtight lids.
Include the herb name and harvest date for effective shelf life tracking.
Here’s your container labeling guide:
| Label Type | Best For | Durability |
|---|---|---|
| Waterproof Labels | Glass jars | Excellent |
| Masking Tape | Airtight lids | Good |
| Chalk Labels | Smooth surfaces | Fair |
| Paper Tags | Any container | Poor |
| Dry Erase | Metal lids | Temporary |
Following these dating conventions and labeling best practices guarantees your herb drying container labeling system works flawlessly, preventing confusion and waste.
Storing in Cool Dark Places
Once you’ve labeled your containers, location matters just as much. Cool dark places protect your drying herbs from light exposure and temperature control issues that destroy flavor. Container types like glass jars work best for humidity levels management.
Your pantry becomes a fortress, guarding shelf life while preserving herbs stays simple and effective.
- Store dried herbs away from stoves, windows, and heat sources that accelerate flavor loss
- Choose locations with consistent temperatures between 60-70°F for ideal air drying herbs preservation
- Keep glass jars in cabinets or pantries where direct sunlight can’t reach them
- Check your cool dark place regularly to verify containers stay sealed and herbs remain crisp
Frequently Asked Questions (FAQs)
Are dried herbs as good as fresh?
Fresh herbs pack more punch than dried ones, but you’ll still get plenty of flavor from properly dried herbs.
You’ll lose some essential oils during drying, but the convenience makes it worthwhile.
How long do dried herbs last?
Properly stored dried herbs typically last 1-3 years when kept in airtight containers away from light and heat.
You’ll know they’re losing potency when their color fades and aroma weakens noticeably.
Can I dry different herbs at the same time?
Yes, you can dry different herbs simultaneously using food dehydrators with multiple shelves. However, avoid mixing strong-scented herbs like mint with delicate ones, as flavors can transfer and affect taste.
What is the best way to dry out fresh herbs?
Bundle basil, sage, and thyme together, then hang them upside down in a warm, dark spot. You’ll have perfectly dried herbs in one to three weeks without losing flavor.
What herbs should you not dry?
Most delicate herbs like basil, cilantro, and parsley don’t dry well because they lose flavor and become papery.
You’ll get better results freezing these tender herbs instead of drying them out.
Is it better to dry herbs on the stem or off?
Amazingly, you’ll find that keeping herbs on the stem makes drying much easier.
Stems provide natural handles for bundling and hanging, plus they protect delicate leaves from damage during the process.
How to preserve herbs?
Harvest herbs in early morning after dew evaporates but before sun dissipates oils.
Dry using air-drying, dehydrators, or ovens at low temperatures.
Store properly dried herbs in airtight containers away from light.
How to use fresh and dried herbs together?
Imagine this scenario: you’re sprinkling dried oregano into your pasta sauce while tossing fresh basil leaves on top.
Use dried herbs early in cooking for deep flavor, then add fresh ones at the end for bright, aromatic finishing touches.
How do you dry herbs in the oven in Pennsylvania?
Set your oven to the lowest temperature, ideally below 100°F.
Place herbs on parchment-lined racks in single layers.
Leave the door slightly open for ventilation and turn herbs every thirty minutes until crisp.
How do you harvest herbs?
The early bird catches the worm, and morning’s your golden window for harvesting herbs.
Pick them after dew evaporates but before heat dissipates those precious oils that pack the flavor punch.
Conclusion
Why spend months nurturing your garden only to lose those precious flavors to poor timing?
Mastering harvesting herbs for drying transforms your summer abundance into year-round culinary gold.
You’ve learned the critical morning harvest window, proper preparation techniques, and various drying methods that preserve essential oils.
Now you can confidently cut, clean, and dry your herbs when they’re at peak potency.
Your pantry will overflow with vibrant, homegrown seasonings that outshine any store-bought alternative, making your harvest a true summer abundance.
- https://extension.oregonstate.edu/food/preservation/drying-herbs-sp-50-921
- https://extension.colostate.edu/topic-areas/nutrition-food-safety-health/herbs-preserving-and-using-9-335/
- https://www.smithsonianmag.com/arts-culture/saving-the-flavor-of-fresh-herbs-44057191/
- https://doi.org/10.3923/ajcs.2018.151.159
- https://mountainroseherbs.com/the-healing-garden

