This site is supported by our readers. We may earn a commission, at no cost to you, if you purchase through links.
 Harvesting peppers for storage starts with timing—pick them when they’ve reached full size and developed their mature color.
You’ll want to cut, not pull, peppers from the plant using clean shears to avoid damaging the stem. For sweet peppers, harvest when they’re firm and glossy, while hot peppers can stay on the plant longer for maximum heat development.
Handle hot varieties with gloves to protect your skin.
Store fresh peppers in the refrigerator’s crisper drawer for up to two weeks, or freeze them whole for longer storage. The key is harvesting regularly to keep plants producing throughout the season, and knowing which preservation method works best for your pepper variety.
Table Of Contents
- Key Takeaways
- Choosing The Right Peppers
- Identifying Ripe Peppers
- Harvesting Techniques
- Storing Fresh Peppers
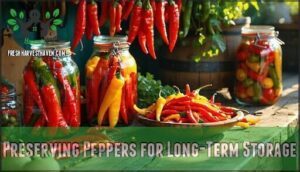
- Preserving Peppers for Long-Term Storage
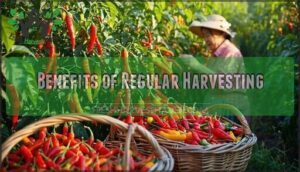
- Benefits of Regular Harvesting
- Frequently Asked Questions (FAQs)
- How to can peppers for long term storage?
- How do you harvest and store peppers?
- Is it better to freeze peppers whole or sliced?
- How do you store peppers after harvesting?
- How do you dry peppers for long term storage?
- Is it better to freeze or dry peppers?
- How to store peppers after harvesting?
- Should you wash bell peppers before storing in the fridge?
- How to store peppers after harvest?
- How do you can peppers for long term storage?
- Conclusion
Key Takeaways
- Harvest at the right time – Cut peppers when they have reached full size and have developed their mature color, using clean shears rather than pulling to avoid plant damage.
- Handle hot peppers safely – You will need protective gloves and eye protection when harvesting spicy varieties to prevent painful capsaicin burns on your skin.
- Store fresh peppers properly – Keep them in your refrigerator’s crisper drawer for up to two weeks, or freeze them whole for longer storage without washing them first.
- Harvest regularly for maximum production – You will boost your total harvest significantly by picking peppers every few days, which tricks plants into producing more fruit throughout the season.
Choosing The Right Peppers
You’ll need to pick peppers at the right stage of ripeness to guarantee they store well and maintain their flavor.
Different pepper varieties have specific indicators that tell you when they’re ready for harvest, whether you want them green and mild or fully colored and at peak flavor.
Bell Peppers Vs Hot Peppers
When choosing between bell peppers and hot peppers for your garden, you’ll want to evaluate their distinct flavor profiles and how each type performs in different storage methods.
Bell peppers deliver sweet, crisp flavors with higher water content, making them perfect for fresh eating and short-term refrigeration, while hot peppers pack concentrated heat levels that actually help preserve them longer through natural capsaicin content.
Hot peppers outlast sweet varieties thanks to their natural capsaicin preservation power.
Each type offers unique culinary uses and nutritional differences that affect your harvesting strategy:
- Bell peppers: Mild, sweet taste with thick walls; excellent for stuffing, roasting, or raw consumption; higher vitamin C content but shorter storage life
- Hot peppers: Intense heat levels from jalapeños to habaneros; ideal for salsas, hot sauces, and spice blends; capsaicin naturally extends shelf life for better preserving peppers
Growing conditions remain similar, but your intended use determines which variety suits your pepper storage needs best.
Knowing when to harvest bell peppers is vital, as color indicates ripeness and prime flavor.
Days to Maturity
Understanding Variety Maturity Times transforms your pepper harvesting timing from guesswork into science.
Early Varieties like jalapeños reach harvest readiness in 70-80 days, while Late Season champions like habaneros need 90-120 days.
Climate Impact affects these timelines—cooler regions slow the pepper ripening process, while heat accelerates pepper ripening stages.
Track your days to maturity from transplant date, not seed starting, for accurate Harvest Timing predictions.
Color Indicators
Color indicators provide your roadmap to perfect pepper harvesting.
Watch for these three distinct ripening stages:
- Green phase: Fresh, mild peppers with lower heat levels
- Transition period: Gradual pigment changes starting at blossom end
- Full maturity: Vibrant varietal colors indicating peak sweetness
Visual cues make pepper storage timing foolproof—color development tells you exactly when your peppers have reached their flavor potential.
Identifying Ripe Peppers
You’ll know your peppers are ready for harvest when they reach their mature color and feel firm to the touch.
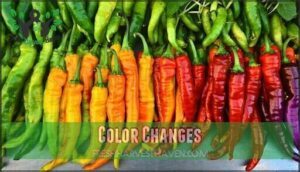
The key signs include vibrant color changes from green to red, yellow, orange, or purple, along with physical indicators like corking (fine brown streaks) on hot peppers and proper sizing for the variety.
Color Changes
Recognizing ripe peppers requires careful observation of their ripening stages and color development. Each pepper variety follows a predictable color progression that signals key harvest timing for pepper storage. Green peppers gradually shift through intermediate hues before reaching their mature varietal colors—red, orange, yellow, or deep purple.
These color indicators directly correlate with flavor profiles and nutritional changes, making visual assessment vital for successful pepper harvesting. Understanding these transformations helps you capture peak flavor and storage potential:
- Immature green peppers offer mild flavors and longer refrigerated storage life
- Half-colored peppers show partial ripening with developing sweetness and complexity
- Fully colored peppers deliver maximum flavor intensity and concentrated nutrients
- Deep, glossy surfaces indicate complete ripeness and ideal sugar content
- Uniform color distribution signals even ripening throughout the pepper
Monitor your peppers daily during peak season, as color development accelerates in warm weather. Harvest timing depends on your intended use—green for crisp cooking applications, fully colored for maximum flavor impact and successful pepper ripening preservation methods.
Corking and Fine Streaking
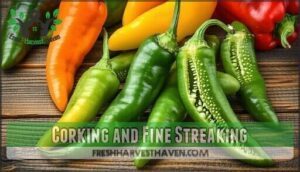
When those telltale fine lines appear across your pepper’s skin, you’re witnessing nature’s ripeness indicators in action. Corking causes these distinctive marks—thin streaks or rough patches that signal peak maturity rather than damage.
Different varieties show unique streaking effects: jalapeños develop fine network lines, while poblanos display broader corking patterns. Bell peppers, for example, show ripeness with uniform, glossy color.
Variety susceptibility varies considerably—some peppers cork heavily while others barely show marks. This natural scarring actually improves storage impact by indicating ideal harvest timing for maximum flavor retention.
Sizing and Shape
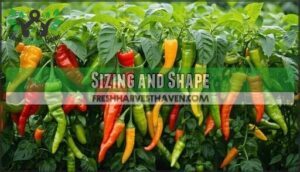
Beyond visual cues like corking, pepper dimensions and shape consistency offer reliable indicators of harvest readiness.
You’ll notice that ripe peppers develop their characteristic proportions and maintain uniform contours that signal peak maturity.
When evaluating your peppers for ideal harvest timing, check these key factors:
- Varietal Standards – Bell peppers need 4+ inches while jalapeños reach maturity at 3-4 inches for superior flavor
- Shape Variation – Fully developed peppers maintain consistent, uniform contours without irregular bulges or flat spots
- Size Consistency – Mature peppers feel substantial and firm, matching expected dimensions for their variety
- Visual Appeal – Well-formed peppers display proper proportions that indicate complete cellular development
Most pepper varieties achieve their ideal proportions before full color changes occur, making sizing and shape excellent early indicators.
You’ll quickly develop an eye for recognizing when your peppers have reached that perfect "just right" size that signals perfect pepper harvesting timing.
Harvesting Techniques
Once you’ve identified ripe peppers, you’ll need the right technique to harvest them without damaging the plant.
Using proper tools and methods guarantees your pepper plants keep producing while giving you the best peppers for storage.
Pinching Vs Cutting
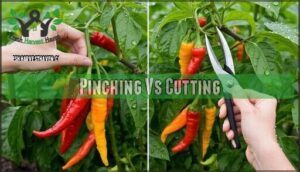
When harvesting peppers, you’ll face a choice between pinching and cutting that directly impacts both stem damage and plant health.
Pinching works for smaller varieties with tender stems, but aggressive tugging causes unnecessary stress that reduces future yields.
For most pepper size categories, cutting delivers superior results, especially with thicker-stemmed varieties like bell peppers.
Always use pepper harvesting tools like sharp pruning shears or clean knives for precise cuts that minimize trauma.
Tool sterilization between plants prevents disease spread.
Leave a small stem attached to each pepper—this simple step extends storage life substantially.
Harvesting speed improves dramatically when you master these pepper harvesting techniques:
- Your plants reward gentle pepper stem cutting with abundant future harvests
- Each clean cut reduces stress and disease potential for healthier plants
- Proper harvesting peppers technique guarantees months of fresh produce enjoyment
Master the pinching vs cutting decision, and you’ll maximize both immediate harvest quality and long-term plant productivity.
Tools Needed
Your pepper harvesting success depends on having the right tools ready.
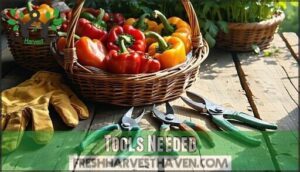
Sharp harvesting shears or pruning shears make clean cuts without damaging stems, while herbal snips work perfectly for thin-stemmed varieties like Thai chiles.
Protective gloves prevent capsaicin burns that’ll have you regretting bare-handed harvesting for hours.
Keep clean clippers and cleaning tools handy—capsaicin residue transfers easily to other garden tasks.
A shallow basket prevents bruising your harvest, and sharp clippers guarantee you’re not wrestling with tough stems.
Many retailers offer specialized pepper shears for efficient harvesting.
Handling Hot Peppers
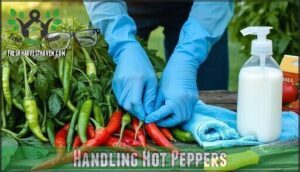
When handling hot peppers, proper protection prevents painful capsaicin exposure that can ruin your gardening experience.
Hot peppers contain varying pepper heat levels, making glove protection essential for safe harvesting.
Essential Safety Equipment:
- Nitrile gloves – Choose thick, puncture-resistant gloves that resist capsaicin oils better than latex alternatives
- Eye protection – Safety glasses prevent accidental splashing when harvesting spicy varieties above eye level
- Long sleeves – Protect exposed skin from pepper juices that can cause burning sensations
- Proper ventilation – Work in well-ventilated areas to avoid inhaling airborne capsaicin particles
After handling hot peppers, washing hands thoroughly with dish soap breaks down capsaicin oils effectively.
Keep milk nearby as an emergency remedy for skin irritation.
Remember that capsaicin lingers on surfaces, so tool cleaning with bleach solution prevents cross-contamination to other garden areas or future harvests.
Leaving Stem Attached
That small stem acts as nature’s freshness seal—don’t discard it! After safely harvesting peppers with protective gear, you’ll want to preserve that natural barrier.
Cut peppers with sharp pruners, leaving about ¼ inch of stem attached. This technique prevents stem rot by creating a clean seal that blocks bacteria and moisture loss. Drying stems actually strengthen this protective barrier over time.
The proper stem length serves multiple purposes: pest prevention by eliminating entry points, easier handling during transport, and extended storage life.
Whether you’re refrigerating fresh bell peppers or preparing hot varieties for pepper storage methods, intact stems maximize freshness.
Factor With Stem Without Stem
This simple step works across all storing peppers approaches.
Your harvesting peppers technique directly impacts storage success—that little stem stub becomes your pepper’s personal bodyguard, protecting against spoilage while maintaining peak flavor and texture for weeks longer than stemless alternatives.
Storing Fresh Peppers
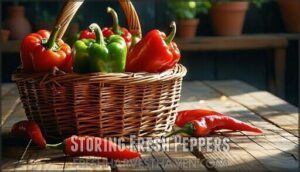
Once you’ve harvested your peppers, you’ll need to store them properly to maximize their freshness and prevent spoilage.
The storage method you choose depends on how quickly you plan to use them and what preservation goals you have in mind.
Counter Storage
Most folks think storing peppers on the counter is as simple as tossing them in a bowl, but there’s actually a science to keeping these colorful harvests fresh at ambient temperature.
You’ll want to place your freshly harvested peppers in a single layer on a dry, shaded surface where air circulates freely around each one. The sweet spot for counter storage sits between 68-72°F, away from direct sunlight exposure that can quickly soften your peppers.
Different pepper varieties handle room temperature differently—thick-walled bell peppers typically maintain ideal ripeness for 2-3 days, while thinner-skinned hot peppers may only last 1-2 days. Don’t wash your peppers before storing them, as moisture becomes their enemy.
- Daily inspection ritual: Check each pepper every morning, using the firmest ones first and removing any showing wrinkled skin or soft spots.
This harvesting peppers method works beautifully for extending shelf life when you’re planning to use them within days, making counter storage one of the most practical pepper storage methods.
Refrigeration
Refrigeration consistently proves itself as the gold standard for extending pepper storage life. Store your peppers in the crisper drawer at 45-50°F to maintain ideal freshness and prevent chilling injury that occurs below 45°F.
Use perforated plastic bags with paper towels to control humidity levels while preventing condensation buildup.
| Storage Method | Duration | Quality Notes |
|---|---|---|
| Counter Storage | 3-5 days | Quick deterioration |
| Refrigeration | 2-3 weeks | Maintains crispness |
Different pepper types have varying storage duration needs – hot peppers typically last longer than sweet varieties when refrigerating.
Keep peppers away from ethylene-producing fruits like apples to prevent premature ripening. Your pepper storage tips should include checking stored peppers every few days, removing any showing spoilage signs.
Proper fridge storage maintains vitamin C content and prevents the soft spots that plague improperly stored peppers.
Freezer Storage
When refrigeration won’t cut it for long-term storage, freezing becomes your go-to method for preserving peppers through winter months. This pepper freezing technique keeps your harvest fresh for up to 12 months without special equipment.
Here’s your step-by-step approach to successful pepper freezing:
- Wash and dry completely – Remove all dirt and moisture to prevent freezer burn
- Remove stems and seeds – Cut peppers into your preferred size for easier thawing methods
- Flash freezing on baking sheets – Prevents pieces from clumping together in storage
- Transfer to freezer bags – Remove excess air for ideal container choice results
- Label with date and variety – You’ll thank yourself later when sorting through your stash
Unlike other preservation methods, blanching peppers isn’t necessary before freezing. Your pepper bagging should focus on airtight storage to maintain quality. While frozen peppers lose some crispness when thawed, they retain their distinctive flavors perfectly for cooked dishes where texture changes won’t matter.
Preserving Peppers for Long-Term Storage
When you’re dealing with a bumper crop of peppers, you’ll need reliable preservation methods to enjoy your harvest year-round.
These four proven techniques—canning, pickling, freezing, and dehydrating—will keep your peppers fresh and flavorful for months, whether you’re working with sweet bells or fiery habaneros.
Canning in Water
While refrigeration works well for short-term storage, canning in water offers a proven method for long-term preserving peppers. However, canning safety requires attention to acidity levels since peppers are low-acid foods.
You’ll need proper jar sterilization and must add lemon juice or citric acid to each jar before processing.
Here’s your step-by-step approach:
- Sterilize jars and remove pepper stems and seeds
- Pack peppers tightly, add acid, then cover with boiling water
- Process in a water bath canner for 10-15 minutes
This recipe selection guarantees safe, flavorful peppers year-round.
Pickling
While water bath canning preserves peppers with heat, pickling transforms them into tangy, flavorful treats that can brighten your meals for months.
Start by sterilizing your jars and creating balanced pickling brines using vinegar with at least 5% acidity—this guarantees safe preservation.
Mix water, salt, and your chosen vinegar, then customize with pickling spices like garlic, dill, or peppercorns for unique flavor profiles.
Slice peppers uniformly to ensure even penetration and maintain that satisfying crunch.
You can create sweet pickles using apple cider vinegar or spicy pickles by including hot varieties in your mix.
Fermented peppers develop complex flavors over time, while quick refrigerator pickles offer immediate satisfaction.
For safe processing, remember to sterilize jars properly.
Pack peppers into jars, leaving ¼-inch headspace before sealing.
These preserving techniques for pepper preservation keep your harvest delicious for up to a year when stored properly in cool, dark conditions.
Freezing
Blanching peppers isn’t necessary when freezing, making this preservation method incredibly simple.
Flash freezing your sliced peppers on a baking sheet prevents them from sticking together in storage. Transfer frozen pieces to airtight bags, removing excess air to prevent freezer burn.
Pepper halving or slicing before freezing saves prep time later. Your pepper freezing duration extends up to 12 months when properly stored.
- Thawing methods: Add frozen peppers directly to cooked dishes—they’ll soften perfectly without prior thawing, maintaining their vibrant flavor.
Dehydrating
While freezing works well, dehydrating transforms peppers into concentrated flavor powerhouses that last indefinitely.
Set your dehydrator to 125°F and slice larger varieties uniformly—smaller peppers can stay whole. The indoor drying process takes 4-24 hours depending on thickness. Your peppers are ready when they snap cleanly rather than bend.
Temperature control guarantees maximum flavor enhancement without burning. A dedicated pepper tool can streamline the process.
- Store these brittle treasures in airtight containers with desiccant packets to prevent moisture reabsorption and maintain their punch for up to a year.
Benefits of Regular Harvesting
You’ll boost your pepper harvest substantially when you pick regularly throughout the growing season.
Frequent harvesting tricks your plants into producing more flowers and fruit instead of putting energy into ripening existing peppers.
Encouraging Fruit Production
Your pepper plants work like a production factory—the more you harvest, the more they’ll produce.
Regular harvesting peppers triggers hormonal responses that boost fruit development, making it one of the most effective pepper harvesting methods available.
Looking at this engaging content about pepper harvesting, here’s a short blockquote that captures the same practical, enthusiastic tone:
Pick peppers regularly to keep your plants producing all season long.
The benefits of regular harvesting extend beyond simple collection.
When you remove mature peppers, your plants redirect energy toward new blossoms and fruit development.
This creates a continuous cycle of production throughout the growing season.
Maintain consistent watering practices and proper sunlight exposure to maximize these effects.
Most pepper plant harvest operations see dramatic improvements—often doubling production—when combined with proper pruning techniques.
Your plants can’t get overloaded if you’re consistently picking, creating nature’s perfect productivity system for pepper plants.
Preventing Overloading
Three strategic approaches prevent your pepper plants from buckling under their own success.
Regular pepper harvesting reduces branch stress substantially, while proper plant spacing and support structures keep heavy-laden plants upright. Smart pruning techniques redirect energy efficiently:
proper vegetable harvesting guide guarantees peak flavor.
- Harvest promptly when peppers reach full size to prevent branch breakage
- Install tomato cages early before plants become top-heavy from fruit load
- Remove lower leaves to improve airflow and focus energy on pepper production
Extending The Harvest Season
Why extend your pepper harvest when you could be picking fresh peppers for months instead of weeks? Strategic planning transforms your garden from a brief summer sprint into a marathon of continuous production.
Here are five proven methods to maximize your harvest window:
- Succession Planting – Stagger new pepper seedlings every 2-3 weeks for continuous harvests throughout the season
- Protective Structures – Use row covers, cold frames, or mini hoop tunnels to shield plants from temperature drops
- Crop Rotation – Plan pepper varieties with different maturity dates to spread out your harvest timing
- Pest Management – Keep plants healthy longer with regular monitoring and organic control methods
- Soil Health – Maintain nutrient-rich soil through composting and mulching for sustained production
Smart pepper care means you’ll harvest ripe peppers well past the first frost. I’ve successfully picked fresh peppers in November using these harvesting tips, turning what used to be a six-week season into nearly four months of homegrown pepper varieties.
Cold Frames
Since winter doesn’t mean the end of pepper season, cold frames become your secret weapon for extending pepper season well beyond frost. These mini-greenhouses create the perfect microclimate, maintaining interior temperatures up to 18°F warmer than outside air while providing essential frost protection for your pepper plants.
You can find specialized supplies readily for cold frame pepper growing.
Cold frame design focuses on maximizing light transmission while maintaining proper cold frame ventilation to prevent overheating on sunny days. Your peppers’ cold hardiness improves dramatically in this controlled environment, with plants continuing to produce fruit for weeks after unprotected varieties have died.
Winter pepper storage becomes effortless when peppers ripen naturally in their protected space, developing better flavor and thicker walls than rushed harvests.
Container Growing
Beyond cold frames’ protective benefits, container growing lets you control your pepper harvest environment with precision while preparing for efficient storage later.
Growing peppers in containers maximizes yields through strategic management of growing conditions. You’ll find container growing particularly valuable when harvesting peppers for storage since you can move plants to optimize ripening before harvest.
Here’s how to succeed with container growing:
- Container size – Use 5-gallon pots minimum (12 inches wide, 10 inches deep) for proper root development
- Soil choice – Select well-draining potting mix with lower nitrogen but higher phosphorus and potassium
- Watering needs – Monitor daily since containers dry faster than ground beds
- Sunlight exposure – Position for 6-8 hours direct sun daily
Compact varieties like ‘Jalapeno’ and ‘Mini Bell’ work best in containers. You’ll get better frost protection by moving containers indoors when temperatures drop. Pepper plants in containers warm up faster in spring, extending your growing season for storing peppers effectively.
Indoor Storage
Indoor storage transforms your pepper harvest into a year-round supply when done right.
Your refrigerator’s crisper drawer works best for short-term storing peppers – wrap them in paper towels to maintain humidity control while preventing moisture buildup.
For longer storage, find a cool spot like your basement where temperature effects stay steady at 45-55°F.
Proper air circulation prevents mold, while minimal light exposure keeps peppers fresh.
Choose breathable container choice options like mesh bags over plastic for indoor storage success.
Frequently Asked Questions (FAQs)
How to can peppers for long term storage?
Pressure canning is required for safely preserving peppers long-term due to their low acidity.
You’ll need a pressure canner, clean jars, and proper technique to achieve safe temperatures that eliminate harmful bacteria.
How do you harvest and store peppers?
Cut pepper stems with sharp pruners, leaving a short stub attached. Harvest every few days to encourage production. Store fresh peppers in the refrigerator’s crisper drawer for 1-2 weeks.
Is it better to freeze peppers whole or sliced?
You’ll get better results slicing peppers before freezing them. Sliced peppers freeze faster, thaw more evenly, and you can use exactly what you need without defrosting the entire batch.
How do you store peppers after harvesting?
Store fresh peppers in your refrigerator’s crisper drawer at 40-45°F for 1-2 weeks.
Don’t wash them first—just brush off dirt.
For longer storage, freeze whole or sliced peppers in airtight bags for up to 12 months.
How do you dry peppers for long term storage?
Take jalapeños from your garden – they’ll transform from fresh to flavor-packed.
Hang whole peppers on string in a dry, well-ventilated area until brittle.
Store in airtight containers for concentrated heat.
Is it better to freeze or dry peppers?
Both methods work well, but it depends on your needs.
Freezing preserves texture and works great for cooking—you’ll get peppers that behave more like fresh ones in recipes.
Drying concentrates flavors and saves freezer space, perfect for spice blends and long-term storage, using a method that depends on your needs.
How to store peppers after harvesting?
Like a gardener’s treasure chest, freshly harvested peppers need proper care to maintain their quality.
Refrigerate peppers at 40-45°F in the crisper drawer for 1-2 weeks, or freeze them for longer storage.
Should you wash bell peppers before storing in the fridge?
No, don’t wash bell peppers before storing them in the fridge.
Brush off dirt instead, then wash right before eating or cooking.
Extra moisture from washing can speed up spoilage and reduce their storage life.
How to store peppers after harvest?
Keep your pepper harvest fresh like treasure in a vault.
Refrigerate peppers at 40-45°F in the crisper drawer for 1-2 weeks, or freeze them for long-term storage up to 12 months.
How do you can peppers for long term storage?
Pressure canning is essential for peppers due to their low acidity. You’ll need a pressure canner, not a water bath canner, to safely preserve them long-term.
Conclusion
Smart gardeners know that timing beats everything else when harvesting peppers for storage.
Just like checking your bank account before a big purchase, you’ll want to inspect your peppers daily once they reach maturity.
Your success depends on selecting the right harvesting method for your pepper variety and storage goals.
Whether you’re freezing bell peppers for winter stir-fries or dehydrating jalapeños for year-round heat, proper harvesting peppers for storage techniques guarantee maximum flavor and nutrition retention.
Regular harvesting keeps your plants productive until frost arrives.

