This site is supported by our readers. We may earn a commission, at no cost to you, if you purchase through links.

A tomato plant doesn’t care that you live on the fourth floor. Given a 5-gallon bucket, decent potting mix, and a sunny balcony rail, it’ll produce enough fruit to embarrass your neighbor’s backyard garden. That’s the quiet revolution happening on patios, rooftops, and fire escapes everywhere—people growing vegetables in containers and actually eating well from them.
The trick isn’t luck or a green thumb. It’s knowing which pot suits which crop, what goes into the mix, and how to keep roots happy without a single square foot of ground. Get those fundamentals right, and your containers become one of the most controllable growing environments you’ll ever work with.
Table Of Contents
- Key Takeaways
- Choose Containers That Fit Crops
- Prepare The Right Potting Mix
- Pick Container-Friendly Vegetables
- Plant Seeds and Seedlings Correctly
- Water and Feed Consistently
- Maintain Healthy Container Harvests
- Frequently Asked Questions (FAQs)
- What do you put in the bottom of a vegetable container?
- What vegetables are best to grow in containers?
- What do you put in the bottom of a vegetable planter?
- Can you grow vegetables in containers?
- What vegetables grow well in containers?
- What can you grow in a container garden?
- How do you grow a vegetable garden in a container?
- What is vegetable container gardening?
- What size container do you need to grow vegetables?
- What vegetables grow best in containers?
- Conclusion
Key Takeaways
- container size and material picking the right container size and material for each crop, like 12 to 18 inches deep for tomatoes and peppers, or just 6 to 8 inches for leafy greens, sets up your harvest before you even add soil.
- soilless blend Skip garden soil entirely and mix up a soilless blend with about 10% compost and a 50/50 perlite and coir combo, keeping the pH between 6.0 and 6.5 so roots stay aerated and well‑fed.
- Compact varieties Compact varieties like Tiny Tim and Sun Gold tomatoes, bush beans, and quick‑growing radishes show that a small pot can still produce a surprisingly big harvest.
- steady routine Sticking to a steady routine of morning watering, slow‑release fertilizer every 6 to 10 weeks, and biweekly liquid feeding keeps your container garden thriving all the way through harvest.
Choose Containers That Fit Crops

Your container choice can make or break your harvest before you even plant a single seed. Size, material, and drainage all play a part in how happy your veggies turn out to be. Let’s break down what actually matters when you’re picking the right home for your plants.
Get the basics right here, and you’ll set yourself up for the kind of bountiful, easy-pick yields covered in this guide to harvesting vegetable garden beds.
Best Pot Materials
Material matters more than you’d think. Plastic pots are lightweight, weather-resistant, and budget-friendly, though they fade and warp in scorching heat. Ceramic terracotta pots breathe better, wicking moisture for steadier watering, but they crack when frost hits. Fabric pots offer unparalleled portability for balconies.
Whiskey barrels and window boxes bring rustic charm.
Concrete’s thermal mass stabilizes roots, while glazed ceramic locks in moisture beautifully. Concrete planters weight can reach several hundred pounds, making relocation difficult without equipment.
Minimum Pot Depths
Once you’ve settled on a material, depth becomes your next decision. Think of it this way: cramped roots mean stunted harvests.
Leafy greens like lettuce and spinach thrive in 6–8 inches. Tomatoes and peppers need 12–18 inches for taproots to stretch properly. Carrots demand at least 12 inches to grow straight. Match your pot depth to your crop, and you’re already halfway there.
Drainage Hole Requirements
Depth sorted — now let’s talk holes. At least one drainage hole per gallon of soil keeps roots from drowning.
Larger pots need 6–8 holes, spaced near the outer edges for even drainage. For ceramic pots, drill carefully with a carbide bit.
Line the bottom with gravel or mesh to prevent soil washout, and always empty saucers after watering to avoid root rot.
Mobility and Placement
Now that drainage is sorted, think about where your container actually lives.
South- or west-facing spots give fruit-bearing vegetables their 6–8 required sunlight hours daily. On a balcony, track how shade shifts seasonally.
- Shelter containers from wind to cut drying
- Move pots off asphalt during peak heat
- Keep paths clear for safe, ergonomic repositioning
Container size affects how easily you can relocate when microclimates shift.
Self-watering Container Options
One smart upgrade for small space gardening is a self-watering container. These work through capillary action — wicking moisture upward from a built-in reservoir (1–15 liters) into your potting soil, so roots drink only what they need. A clear water level indicator tells you when to refill.
Clean the reservoir each season to block algae before it takes hold.
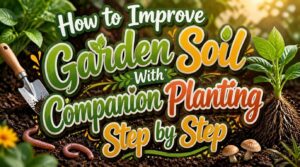
Prepare The Right Potting Mix

What you put in your containers matters just as much as which containers you choose. The right potting mix sets your vegetables up for strong roots, steady growth, and a harvest worth bragging about. Here’s what you need to know to get the mix right.
Potting Mix Vs Garden Soil
Never use garden soil in containers — it compacts like concrete, smothers roots, and drains poorly. Worse, it can carry soil-borne diseases straight to your seedlings.
Garden soil in containers compacts like concrete, smothers roots, and delivers disease straight to your seedlings
A soilless potting mix stays light and aerated, letting roots breathe freely. It drains fast, resists compaction, and is commonly sterilized. The tradeoff? It’s nutrient-light, so you’ll need to feed your plants regularly.
Compost and Organic Matter
Adding compost transforms a nutrient-light potting mix into a genuine growing powerhouse. Mix in 10% compost by volume — that’s roughly one part compost for every nine parts mix.
Mature compost delivers nitrogen (1.5–3%), phosphorus, and potassium, plus micronutrients like zinc and iron.
It also boosts moisture retention by up to 50%, so your containers won’t dry out as fast.
Perlite, Coir, and Drainage
Think of perlite and coir as a dream team for your containers.
Perlite — a lightweight volcanic glass — punches air pockets into your mix, keeping roots breathing and draining fast.
Coir (coconut husk fiber) balances that by holding moisture longer between waterings.
A 50/50 blend of both gives most vegetables exactly what they need: airflow without drought stress.
Soil PH for Vegetables
Soil pH is basically your mix’s control dial for nutrients.
Most vegetables thrive between 6.0 and 6.5 — where phosphorus, calcium, and magnesium stay fully available.
Drop below 6.0, and blossom end rot can creep into your tomatoes.
Test with a basic soil test kit, and if your irrigation water runs alkaline, that alone can quietly shift your pH over time.
What Goes at Bottom
What’s actually sitting at the bottom of your pot matters more than most beginners realize.
A 1–2 inch layer of coarse perlite or gravel improves drainage and keeps roots from drowning. Lay a thin sheet of landscape fabric over it to stop potting soil from washing through the drainage holes. Proper drainage isn’t optional — it’s your roots’ first line of defense.
Pick Container-Friendly Vegetables

Not every vegetable is built for container life, but plenty of them absolutely thrive in it. The trick is knowing which varieties are bred to stay compact and still produce like champs. Here are the best picks to start with:
Compact Tomato Varieties
Few vegetables reward container gardeners faster than compact tomatoes — if you pick the right variety. Match the plant to your pot and you’re halfway there.
- Tiny Tim — only 12–18 inches tall, producing 25–50 fruits per plant in a small pot
- Sun Gold — a cherry tomato powerhouse yielding up to 200 fruits in a 14-inch container
- Bush Early Girl — a determinate tomato that thrives in a 5-gallon container, ripening in tidy clusters
- 4th of July — stays 18–24 inches tall and tolerates mildly saline municipal water without skipping a beat
Peppers and Eggplants
After tomatoes, peppers and eggplants earn their place in containers. Jalapeños and Shishitos thrive in 2–3 gallon pots with 6–8 hours of sun. ‘Patio Baby’ eggplant stays compact. Peppers deliver about 80 mg vitamin C per 100g; eggplants offer chlorogenic acid polyphenols. Harvest when firm — glossy skin signals eggplant readiness, full color signals peppers. Refrigerate both up to one week.
| Crop | Container Size | Nutritional Highlight |
|---|---|---|
| Jalapeño Pepper | 2 gallons | High capsaicin, rich vitamin C |
| Shishito Pepper | 2–3 gallons | Mild heat, ~80 mg vitamin C per 100g |
| Patio Baby Eggplant | 5 gallons | Chlorogenic acid polyphenols |
Leafy Greens and Herbs
After peppers, leafy greens are a welcome change. Lettuce fits 6–8 inch pots; kale needs 3 gallons. Spinach delivers vitamins A, C, and K at just 7 calories per cup. Cut-and-come-again — snip 2–3 inches above soil — keeps your harvest coming all season.
- ‘Butterhead’ for mild salads
- Dwarf kale for continuous harvest
- Basil near tomatoes deters pests
- Crisper bag keeps greens fresh
Carrots, Radishes, and Beets
Root vegetables are the hidden gems of container gardening.
Radishes mature in just 25–30 days — perfect for impatient beginners.
Carrots like ‘Short n Sweet’ and radish ‘Sora’ thrive in 1-quart to 1-gallon pots at least 6 inches deep.
Beets reward you twice: harvest both roots and edible greens.
All three prefer loose, well-drained mix with a pH around 6.0–6.8.
Bush Beans and Cucumbers
Bush beans and cucumbers are surprisingly easy wins for container gardeners.
Bush beans thrive in 5–7‑gallon pots, stay compact, and actually fix nitrogen in the soil — naturally enriching it for neighboring plants.
Cucumbers need at least a 12‑inch‑deep pot and a trellis to climb. Keep temperatures between 70–85 °F and water evenly to prevent bitter fruits.
Harvest beans at 4–6 inches for the most tender pods.
Plant Seeds and Seedlings Correctly
Getting seeds and seedlings off to a strong start in containers is where your garden either takes root or stumbles. A few key decisions — spacing, support, and smart plant pairings — make all the difference between a thriving pot and a tangled mess. Here’s what you need to know to plant with confidence.
Sowing Seeds in Pots

Seed sowing depth is easy — bury each seed at roughly twice its own width. Tiny seeds need just a 1–2 mm cover of fine seed starting mix. Press lightly for good seed-to-soil contact, then bottom-water so you don’t displace them. Label every pot with the crop name and sowing date.
Three quick rules for your container garden:
- Keep the potting mix evenly moist, never soggy
- Use a gentle spray bottle for small seeds
- Sow in a warm spot to speed germination
Transplanting Young Vegetables

Before moving seedlings outdoors, harden them off — start with just 2 hours outside on day one, adding an hour daily. This prevents transplant shock by easing them into sun and wind gradually.
When planting, bury tomatoes 2–3 nodes deep to build stronger roots. Set other transplants so soil sits just below the first true leaves, firm the mix gently, then water well to close any air pockets.
Spacing by Crop Type

Crowding your containers is like rush-hour traffic — nobody moves well. Tomatoes and peppers need 45–60 cm between plants; leafy greens like lettuce fit comfortably at 15–30 cm apart.
- Compact crops (radishes, carrots): thin to 5–8 cm within rows
- Bush beans: 15–20 cm apart encourages airflow and reduces disease
- Leafy greens: 15–30 cm spacing speeds production
Good spacing lets light reach every leaf evenly.
Trellises and Cages

Install trellises at planting time — not after roots have settled in. Wooden cedar frames last 4–6 years; metal wire cages (6–8 gauge) improve airflow and cut fungal risk. Bamboo works for peas and beans but needs annual checks for splits.
Modular kits assemble fast and travel with your pots. Wall-mounted systems free up floor space on tight balconies.
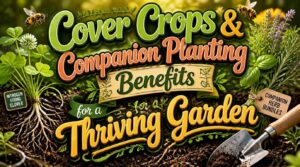
Companion Planting in Containers

Think of your container as a tiny neighborhood — the right neighbors make everyone thrive.
- Match water needs: pair basil with tomatoes; both drink deeply.
- Balance nutrients: heavy feeders like peppers do well beside modest herbs.
- Deter pests: aromatic dill or basil naturally repels aphids.
- Attract pollinators: compact marigolds draw beneficial insects to fruiting crops.
Place tall growers north so they don’t shade low companions.
Water and Feed Consistently

Containers dry out faster than garden beds, so getting your watering and feeding routine right makes all the difference. Once you nail the rhythm, your plants will reward you with steady, healthy growth all season long. Here’s what you need to know to keep them thriving:
Checking Soil Moisture
Before you water, check the soil first — stick your finger 1–2 inches deep and water only when that top layer feels dry. A digital moisture meter takes the guesswork out entirely; just calibrate it for your container mix.
Wilting that bounces back after watering signals underwatering, while yellowing lower leaves often mean the roots are staying too wet.
Morning Watering Routine
Once you know the soil is dry, timing your water matters just as much as how much you give. Water between 6 and 9 a.m. — foliage dries fast in morning air, cutting fungal risk dramatically.
A simple morning routine keeps your container garden thriving:
- Check moisture first
- Water at the base for 20–30 minutes
- Adjust frequency during hot spells to every one to two days
Preventing Soggy Roots
Even perfect morning timing can’t rescue roots trapped in soggy soil. Drainage hole optimization means 3–5 holes per pot so water can exit fast.
| Problem | Fix |
|---|---|
| Standing water | Raise with pot feet |
| Compacted base | Add coarse base layers |
| Moisture guessing | Use a moisture meter |
Perched water prevention always starts with a bottom perlite layer — never skip it.
Slow-release Fertilizer Schedule
Once your drainage game is solid, feeding your plants becomes the next big win. Slow-release fertilizer mixed into your potting soil at planting supplies nutrients for 6–10 weeks — no guesswork needed.
- Biopolymer coatings slow nutrient diffusion, matching release to plant uptake
- Warmer soil accelerates your fertilizer regimen’s nutrient availability
- Coated granules prevent salt buildup by smoothing delivery across the season
- Drier periods naturally delay nutrient leaching
Liquid Feeding for Harvests
After your slow-release granules have done their 6–10 weeks of heavy lifting, liquid feeding takes over. Every two weeks, apply fish emulsion, compost tea, or seaweed extract directly at the base.
These fast-acting solutions reach roots quickly, delivering precise nitrogen, potassium, and micronutrients. Keep your liquid feed pH between 6.0–6.5 — that sweet spot prevents nutrient lockout and salt buildup in your containers.
Maintain Healthy Container Harvests

Your plants are in the ground—well, the pots—and growing strong, but the job’s not over yet. Healthy harvests take a little ongoing care, from fending off bugs to knowing when to refresh the soil. Here’s what to keep on your radar to keep those containers thriving all season long.
Sunlight and Wind Protection
Too much sun can stress your plants just as fast as too little. Track sun exposure daily, then use mobile shade panels or adjustable shade sails during peak afternoon heat.
Windbreak screens cut gusts 20-60%, protecting tender stems. Reflective mulch bounces light upward, easing soil temperature swings. Watch your container’s microclimate—light intensity and temperature tolerance vary by spot, so adjust shading and screens seasonally for steady, happy growth.
Heat and Frost Management
When temperatures swing to extremes, your containers need a backup plan. Your hardiness zone sets frost expectations — but a temperature monitor at canopy level catches the real danger.
- Cover with frost cloth on calm, clear nights
- Move pots indoors during hard freezes
- Harden off seedlings gradually before outdoor placement
- Avoid heat-retaining surfaces like asphalt on scorching days
Organic Pest Control
Bugs happen — even in pots. Spot trouble early by checking leaves weekly for aphids or chewed edges.
| Pest | Organic Fix |
|---|---|
| Aphids | Neem oil, ladybugs |
| Caterpillars | Bt spray |
| Spider mites | Insecticidal soap |
Add row covers as physical barriers, spray garlic deterrents, and apply treatments in early morning for safe, effective pest control in containers.
Cut-and-come-again Harvesting
Think of cut-and-come-again harvesting as a renewable lease on your leafy greens.
Snip outer leaves 2–3 inches above soil, leaving the central crown untouched, and new growth returns within 7–14 days.
Lettuce, kale, and Swiss chard can deliver 3–6 weeks of successive harvests this way.
Use clean, sharp scissors, harvest every 5–12 days, and feed regularly to sustain plant vigor.
Reusing Pots and Soil
Don’t toss last season’s containers just yet — a little care goes a long way.
Scrub pots with water, then disinfect using a 10% bleach solution to kill lingering pathogens before replanting.
Refresh tired soil with these simple fixes:
- Replace the top 6 inches with fresh potting mix
- Blend old soil with worm castings or organic compost at a 2:1 ratio
- Solarize reused soil under clear plastic during hot weather to eliminate pests naturally
Frequently Asked Questions (FAQs)
What do you put in the bottom of a vegetable container?
Start with a drainage layer — 1–2 inches of gravel, broken pottery, or perlite — at the bottom. Top it with landscape fabric to keep potting mix from clogging your drainage holes.
What vegetables are best to grow in containers?
The best picks are cherry tomatoes, lettuce, bush beans, peppers, and radishes — compact, productive, and forgiving for beginners who want real harvests without a yard.
What do you put in the bottom of a vegetable planter?
A thin drainage layer — coarse gravel, chipped brick, or expanded clay pellets — sits at the bottom. Cover it with breathable fabric so your potting mix stays put and roots stay airy.
Can you grow vegetables in containers?
Like a window box turned into a tiny farm, containers prove urban gardening limits don’t have to limit you. With the right pot size, quality potting mix, and best veggies for containers, small-space gardening succeeds.
What vegetables grow well in containers?
Tomatoes, peppers, leafy greens, and herbs all thrive beautifully in pots. Compact dwarf varieties like ‘Patio’ tomatoes or bush beans fit tight spaces, while carrots and radishes handle deep containers surprisingly well.
What can you grow in a container garden?
Container garden vegetables include dwarf plant varieties of tomatoes, compact veggie types, leafy greens, herbs, climbers that use vertical growing space, container vegetable options needing root vegetable depth, and your favorite edible herb selection too.
How do you grow a vegetable garden in a container?
Forget the myth that containers always stunt yields — right pot size selection, quality potting mix, and steady watering let container garden vegetables thrive, turning small-space gardening into a confident, surprisingly productive, real garden success story.
What is vegetable container gardening?
Vegetable container gardening means growing veggies in pots instead of garden beds, perfect for patios, balconies, or tiny urban spaces. It puts you in control of soil, sunlight, and placement, making small-space gardening doable anywhere with a sunny spot.
What size container do you need to grow vegetables?
Think of container size like shoes — too small and everything cramps up fast. Minimum container size starts at 5 gallons for tomatoes, while leafy greens thrive in 2 to 3 gallon pots.
What vegetables grow best in containers?
Dwarf tomatoes, peppers, lettuce, basil, and beans all excel in pots, plus compact cucumbers, shallow-rooted carrots and radishes, herbs, and fast-growing edible microgreens—nearly any vegetable thrives with proper root crop depth and dwarf variety selection.
Conclusion
Picture that 5-gallon bucket on your balcony rail, heavy with ripening tomatoes, swaying like it’s already won a quiet contest.
That’s what growing vegetables in containers gives you: real harvests pulled from borrowed space, with nothing but sunlight, the right mix, and your own steady hands.
No backyard, no acreage, no excuses.
Just water it, feed it, watch it grow.
The fourth floor was never a limit.
It was room enough to grow, right there.
- https://www.containedcreations.com/blog/best-practices-watering-container-gardens
- https://extension.umd.edu/resource/maintaining-container-grown-vegetables
- https://www.therustedgarden.com/blogs/vegetable-gardening-tips-blog/how-to-water-your-vegetable-beds-container-gardens-calculating-temperature-and-water-frequency
- https://www.almanac.com/content/container-gardening-vegetables
- https://savvygardening.com/best-potting-soil-for-vegetables