This site is supported by our readers. We may earn a commission, at no cost to you, if you purchase through links.
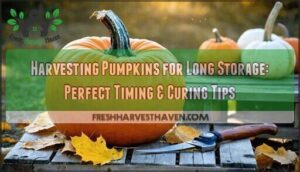
The stem should look dry and woody, while the vine begins dying back naturally. Cut the stem about two inches from the pumpkin using clean, sharp pruning shears—never pull or twist them off.
After harvest, cure your pumpkins in a warm, sunny spot for 10-14 days to toughen the skin. This hardening process is like giving your pumpkins armor against rot and decay.
Once cured, store them in a cool, dry place with good air circulation. The secret lies in understanding exactly when that perfect window opens, and it’s crucial for long-term storage to get it right, ensuring your pumpkins have the best chance of surviving with their full, deep color intact, and the rind feels rock-hard, which is a result of the cure.
Table Of Contents
Key Takeaways
- Time your harvest perfectly – You’ll know pumpkins are ready when they’re fully colored with rock-hard rinds and brown, woody stems, but don’t wait too long, since frost can ruin your entire harvest.
- Cut with care to prevent damage – Use sharp, clean tools to cut stems 2-4 inches from the pumpkin at a slight angle; never pull or twist them off, since damaged stems create entry points for rot.
- Cure for maximum storage life – After harvest, cure your pumpkins in warm, sunny conditions (80-85°F) for 10-14 days, while rotating them regularly to harden the skin and seal minor wounds.
- Store in ideal conditions with regular checks – Keep cured pumpkins at 50-60°F with good airflow on breathable surfaces, like cardboard, and inspect them weekly for soft spots or mold to catch problems before they spread.
Harvest Timing Indicators
You’ll know your pumpkins are ready for harvest when their skin reaches full color and feels rock-hard under your fingernail.
The stem should appear brown and woody, while the curly tendrils near the fruit turn brown and die back naturally, indicating the pumpkin is fully mature with a rock-hard skin.
Mature Color and Hard Rind
Looking beyond surface appearances, you’ll know your pumpkins are ready when their mature color reaches full intensity without any green patches.
The rind hardness should resist your fingernail’s scratch test—a key ripeness indicator. Each variety displays unique color uniformity patterns, so familiarize yourself with your specific type.
This combination of deep, consistent coloring and rock-hard skin signals perfect timing for pumpkin harvesting and successful curing pumpkins for long-term pumpkin storage.
Stem Appearance and Vine Dieback
Watch for the browning stem and dying vine tendrils as your pumpkin reaches peak maturity. The stem should appear woody and brown, signaling it’s ready to naturally separate from the vine.
Vine health deteriorates as nutrients flow into the developing fruit.
Key stem maturity signs to watch:
- Brown tendrils curling and drying near the attachment point
- Woody stem texture that’s firm yet beginning to separate naturally
- Dying vine sections showing yellow or brown coloration around the fruit
Proper stem care during this phase guarantees a maximum nutrient supply transfer.
Observing the stem can be a visual ripeness indicator.
Handle the stem gently – it’s your pumpkin’s protective seal for long storage.
Avoiding Early Frost and Green-Tinted Pumpkins
A single frost below 28°F can ruin your entire harvest.
Don’t let one cold night destroy months of hard work.
You must pick pumpkins before frost hits, even if they’re still green-tinted.
Green pumpkins won’t ripen after frost damage and quickly rot in storage.
Watch weather forecasts closely and harvest immediately when frost threatens.
Mature fruits with hard rinds survive storage best, but immature pumpkin risks include poor flavor and shortened shelf life.
To guarantee proper preservation, consider curing pumpkins properly after harvesting.
Optimal Harvest Period for Cooking Pumpkins
Timing your harvest correctly makes all the difference in flavor development and nutritional content.
Most cooking pumpkins reach peak ripening stages between late September and early October, roughly 90-110 days after planting.
You’ll want to coordinate your pumpkin harvesting techniques with local frost dates, picking at least 10 days before hard freeze.
Different variety differences affect sweetness levels, but all benefit from proper harvest timing and pumpkin curing process for ideal pumpkin storage conditions.
Proper Harvest Techniques
Once you’ve determined your pumpkins are ready, it’s time to harvest them with the right technique to maximize storage life.
Using sharp, clean tools and gentle handling methods will protect your pumpkins from damage that could lead to premature rot.
Cutting The Stem With Sharp Tools
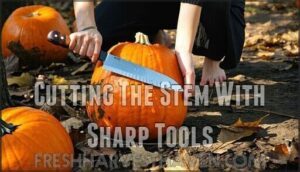
Sharp tools make all the difference when it’s time to harvest your pumpkins. Clean cuts prevent disease and guarantee your pumpkins store properly for months.
Sharp tools prevent disease and ensure proper storage—your harvest depends on clean cuts.
Here are 5 essential pumpkin harvesting techniques for perfect stem cutting:
- Use sharp knife or pruning shears – Dull blades crush stems and invite rot
- Cut at slight angle – This helps water run off the cut surface
- Leave 3-4 inches of stem – Short stems create entry points for mold
- Sanitize tools between cuts – Tool sanitation prevents spreading disease between plants
- Cut carefully to prevent vine damage – Other pumpkins need those vines healthy
The stem length you leave acts like a natural cork, sealing your pumpkin against bacteria. Angle matters because it prevents moisture from pooling on the cut. For best results, consider investing in high-quality cutting tools. Safe handling starts with proper stem cutting during pumpkin harvesting season.
Sanitizing Equipment and Handling Pumpkins Gently
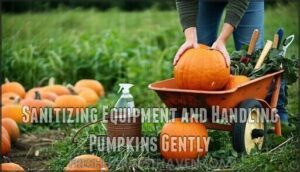
Clean your cutting tools with a bleach solution before each cut to prevent disease transfer.
Tool sanitization stops rot from spreading between pumpkins. A reliable sanitizing solution is essential for preventing contamination.
Handle each fruit like you’re carrying eggs – support the bottom with both hands. Prevent bruising by avoiding drops or rough handling.
Clean handling means washing your hands first. Protect the stem at all costs since damage creates entry points for mold and bacteria.
Transporting Pumpkins With Care and Protection
Once you’ve harvested your pumpkins, gentle handling becomes your top priority.
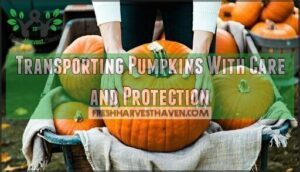
Never carry them by the stem—it’ll snap and create an entry point for rot. Instead, cradle each pumpkin in your palms like precious cargo.
Use wheelbarrows or carts lined with blankets, straw, or other soft surfaces to prevent bruises and blemishes during transport. Consider using a specialized pumpkin moving solution for larger harvests.
Secure transport methods protect your investment and maximize storage life, ensuring that your pumpkins remain in good condition.
Curing Process Essentials
After harvest, you’ll need to cure your pumpkins to maximize their storage potential and develop better flavor.
This critical step hardens the rind, heals minor surface wounds, and prepares your pumpkins for months of storage, which is essential to maximize their quality.
Ideal Temperature and Humidity Conditions
Temperature control makes or breaks your curing success.
Set your storage environment between 80-85°F for ideal results.
Humidity levels should stay at 80-85% to prevent shriveling without encouraging mold growth.
Air circulation prevents stagnant pockets that invite rot.
Use fans for gentle movement around each pumpkin.
Monitor conditions with a digital hygrometer for effective humidity management and rot prevention to ensure ideal results.
Curing Duration and Rotation for Even Hardening
Proper curing duration spans 10-14 days, but rotation frequency makes all the difference in hardening consistency.
Turn your pumpkins every few days to prevent flat spots and guarantee even curing across the entire surface. Properly curing pumpkins helps to extend storage life for several months.
- Rotate every 2-3 days for uniform rind development and color
- Check for soft spots during each turn to catch problems early
- Maintain spacing between pumpkins while rotating to maximize airflow
This rotation prevents blemishes and creates that rock-hard shell you need for longterm pumpkin storage success.
Preventing Rot and Maintaining Air Circulation
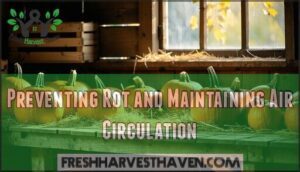
Good air circulation prevents mold and rot during curing.
Space your pumpkins so they don’t touch each other – this airflow importance can’t be overstated.
Place them on breathable surfaces like straw or cardboard, never directly on concrete.
Check humidity levels stay around 50-70% for ideal mold prevention.
Rotate pumpkins weekly for even drying.
Early detection of soft spots helps you remove problem pumpkins before rot spreads to healthy ones.
Consistent watering practices, similar to those for preventing blossom end rot, are essential for overall plant health.
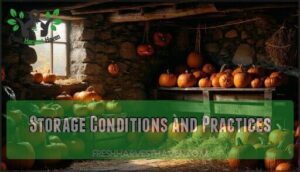
Storage Conditions and Practices
Once you’ve properly cured your pumpkins, you’ll need to create the right storage environment to keep them fresh for months.
The key is finding that sweet spot between cool temperatures and good airflow that prevents both freezing damage and unwanted moisture buildup, which is crucial for maintaining the pumpkins’ freshness, and this can be achieved by ensuring good airflow.
Ideal Temperature and Humidity Ranges
Once you’ve cured your pumpkins, maintaining precise temperature control becomes your storage game-changer.
Keep your pumpkins between 50°F and 55°F—anything cooler risks chilling injury, while warmer temperatures speed up dehydration.
Humidity levels should stay between 50% and 75% to prevent both shriveling and mold growth.
Use monitoring equipment like thermometers and humidity strips to track conditions.
Good air circulation prevents condensation formation, which can quickly turn your perfect pumpkins into mushy disappointments, highlighting the importance of good air circulation and maintaining the right conditions to avoid chilling injury.
Using Porous Surfaces and Avoiding Stacking
Beyond just temperature control, your storage surface choice can make or break your pumpkin’s longevity. Choose breathable materials like cardboard or straw instead of concrete or plastic that trap moisture and create pressure points.
- Cardboard vs Straw: Both provide excellent airflow maintenance, but cardboard’s easier to replace while straw offers superior cushioning for damage prevention.
- Single Layering: Never stack pumpkins—each needs its own space for proper storage ventilation and mold avoidance.
- Airflow Importance: Position pumpkins with gaps between them to prevent moisture buildup that leads to rot.
Regular Inspection for Rot and Damage
Once your storage setup is ready, you’ll need to monitor your pumpkins like a hawk. Check each one weekly for early rot signs and soft spots that signal trouble ahead.
Look for mold prevention opportunities by removing damaged pumpkins immediately. Proper airflow importance can’t be overstated for successful longterm storage. It’s also important to keep in mind soil aeration benefits for your pumpkins during storage to prevent fungal issues.
| What to Check | Warning Signs |
|---|---|
| Skin Surface | Dark spots, wrinkles, soft areas |
| Stem Area | Black mold, wet patches, smell |
| Bottom Contact | Mushiness, discoloration, pest damage |
Regular pumpkin inspection prevents one bad fruit from spoiling your entire harvest through pumpkin spoilage spread.
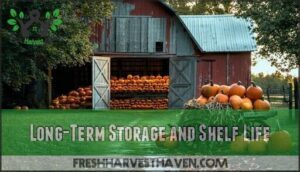
Long-Term Storage and Shelf Life
With proper storage techniques, you can keep your pumpkins fresh for 2-6 months, with some heirloom varieties lasting up to 9 months.
The key is maintaining consistent cool temperatures and checking regularly for any signs of spoilage that could spread to your entire harvest.
Extending Shelf Life With Proper Storage
With proper attention to your storage environment, you’ll dramatically extend your pumpkins’ shelf life from months to nearly a year.
Create the ideal conditions by focusing on these essential elements:
- Maintain 50-60°F temperatures in dark spaces
- Guarantee excellent air circulation around each pumpkin
- Control humidity levels between 50-70% consistently
- Use stacking alternatives like cardboard or wooden shelves
- Implement rot prevention through regular weekly inspections
These pumpkin storage methods transform your harvest into longterm storage success by allowing you to keep your pumpkins for a longer period, making the most out of your harvest.
Factors Affecting Storage Life and Quality
Several factors substantially impact how long your pumpkins will last in storage. Pre-harvest conditions like weather and soil moisture affect skin thickness. Varietal differences matter too—some types naturally store six months while others decline after two.
Physical damage from rough handling creates entry points for rot. Disease presence during growing spreads quickly in storage.
Your storage environment’s temperature and humidity control everything else. Following pumpkin storage best practices, maintaining proper pumpkin storage temperature around 50-60°F, and keeping pumpkin storage humidity at 50-70% prevents most issues.
Consistent postharvest pumpkin care and effective pumpkin rot prevention start with choosing healthy, undamaged fruit.
Tips for Maintaining Pumpkin Quality and Freshness
Maintaining your harvest requires vigilance against common threats that shorten pumpkin storage duration.
Regular checks help you catch problems before they spread to your entire collection.
Here are key pumpkin storage best practices for extending pumpkin life:
- Pest prevention – Check for rodent damage and seal storage areas
- Disease control – Remove moldy pumpkins immediately to prevent spread
- Airflow importance – Space pumpkins apart for proper ventilation
- Handling bruises – Inspect gently and use damaged ones first
Smart variety selection also impacts pumpkin preservation success rates. To inhibit spoilage, verify proper temperature and humidity during storage.
Frequently Asked Questions (FAQs)
How to preserve pumpkin for winter?
Harvest pumpkins when fully orange with hard rinds, leaving 3-4 inch stems.
Cure them at 80-85°F for 10 days, then store in cool, dry places at 50-60°F on cardboard or straw.
What diseases affect stored pumpkin quality?
Like unwelcome guests at your harvest party, several diseases can crash stored pumpkins.
Black rot, bacterial soft rot, and anthracnose turn your carefully cured treasures into mushy disappointments if moisture sneaks in.
Can you eat pumpkin seeds after harvest?
Yes, you can absolutely eat pumpkin seeds after harvest.
They’re nutritious and delicious when roasted.
Simply scoop them out, rinse off the pulp, season as desired, and bake at 300°F for twenty minutes until golden and crispy.
How do weather conditions impact harvest timing?
Weather acts like nature’s stopwatch, dictating when you’ll harvest your pumpkins.
Frost threatens immature fruits with rot, so you’ll need to pick before freezing temperatures hit.
Rain delays curing, while warm, dry conditions help ripen pumpkins perfectly.
The key to successful pumpkin harvesting is understanding how weather conditions impact the process.
What pumpkin varieties store longest naturally?
Heirloom varieties like Jarrahdale, Blue Hubbard, and Cheese pumpkins naturally store longest—up to nine months when properly cured and stored.
Their thicker rinds and lower water content help them resist rot better than typical carving pumpkins, which is why heirloom varieties and their storage capabilities are notable.
Should you wash pumpkins before long storage?
Don’t wash pumpkins before storage. Water can seep into tiny cracks and cause rot. Simply brush off dirt gently with your hands or a soft cloth to keep them dry.
Conclusion
Mastering harvesting pumpkins for long storage transforms your garden’s bounty into months of delicious meals.
You’ve learned the vital timing indicators, proper cutting techniques, and essential curing process that creates that protective armor against decay.
Your careful attention to storage conditions—cool temperatures, good airflow, and regular inspections—will reward you with fresh pumpkins well into winter.
Success lies in patience and following each step precisely for maximum shelf life.

