This site is supported by our readers. We may earn a commission, at no cost to you, if you purchase through links.

The stem should appear dry and woody, not green.
This typically happens 100-120 days after planting.
Cut the squash from the vine with pruning shears, leaving about an inch of stem attached.
Harvest before the first hard frost, but after the squash reaches full maturity.
A ripe butternut will sound hollow when tapped and have no soft spots.
The longer it stays on the vine (within reason), the sweeter it becomes.
Proper timing guarantees maximum flavor and months-long storage potential.
Table Of Contents
Key Takeaways
- Wait for proper ripeness signals – You’ll know it’s ready when the skin turns completely tan-beige, feels hard when pressed with your fingernail, and the stem appears dry and woody rather than green.
- Harvest before the first hard frost – Cut the squash from the vine using pruning shears, leaving about an inch of stem attached, even if it’s slightly underripe to avoid frost damage.
- Cure your squash for maximum storage – After harvesting, cure them for 10-14 days at 80-85°F with good air circulation to harden the skin and concentrate sugars.
- Store properly for long-term use – Keep cured butternut squash at room temperature (50-55°F) with good airflow, and they’ll last up to 12 months when stored correctly.
Harvesting Butternut Squash
Harvesting butternut squash at the right time guarantees peak flavor and maximum storage life.
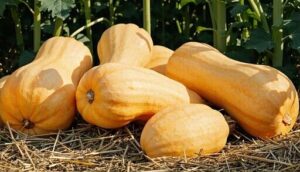
You’ll know it’s ready when the skin turns completely tan, the stem browns, and your fingernail can’t pierce the tough rind.
Identifying Ripeness
Like a perfectly ripe peach, your butternut squash signals readiness through multiple ripeness indicators.
Like nature’s own timer, your butternut squash announces harvest time through unmistakable ripeness signals.
Check for uniform tan color with no green patches, hard skin that resists fingernail pressure, and a dry brown stem.
Evaluate squash maturity products to aid in determining readiness.
The squash should feel heavy for its size after 100-120 days to maturity, confirming proper development and peak harvest timing.
Checking for Frost
Watch your local weather closely as winter approaches.
Frost impact on butternut squash can be devastating, turning firm flesh mushy and ruining your harvest. Cold damage occurs when temperatures drop below 32°F, so you’ll need immediate action when frost threatens.
Don’t let winter’s first frost steal your harvest—act fast when temperatures threaten to drop below freezing.
Protect squash by harvesting before the first killing frost, even if they’re not perfectly ripe. An unripe harvest beats losing everything to freeze damage.
Determining Optimal Harvest Time
After checking for frost threats, you’ll need to combine multiple ripeness signs for perfect butternut squash harvest timing.
Look for complete tan color without green patches, brown corked stems, and hard rinds that resist the fingernail test.
Most varieties reach maturity 100-120 days after planting, weighing 2-3 pounds when fully developed and ready.
How to Harvest Butternut Squash
Once you’ve confirmed your butternut squash is ripe, proper harvesting technique protects both fruit and plant. Sharp garden shears or a knife work best for clean cuts that won’t damage the vine.
Follow these steps for successful butternut squash harvest:
- Cut the stem 1-2 inches from the fruit – Never pull squash by hand, as this damages vines and creates entry points for rot. The stem acts as a natural seal during storage.
- Handle gently to prevent bruising – Damaged squash spoils quickly and won’t store well. Treat each fruit like you’re handling eggs.
- Harvest before frost regardless of ripeness – Even slightly unripe squash can finish maturing indoors, but frost-damaged fruit won’t recover.
Different varieties show subtle harvest timing differences. Waltham Butternut may retain green streaks near the stem even when mature, while other types turn completely tan.
The fingernail test helps confirm readiness across all varieties – mature skin resists puncturing. For summer squash, a similar test helps determine optimal harvest readiness. Remove any damaged fruit immediately for quick use, saving perfect specimens for long-term storage.
Curing Butternut Squash
Once you’ve harvested your butternut squash, you’ll need to cure them properly to maximize their storage life and flavor.
This simple process involves exposing the squash to warm, dry conditions that harden the skin and concentrate the natural sugars inside.
Ideal Curing Conditions
Four key elements create perfect curing conditions for butternut squash.
Maintain temperature between 80-85°F and humidity levels at 80-85% for ideal skin hardening. Verify good air circulation using slatted shelves or racks to prevent moisture buildup and mold.
Cure for 10-14 days in indirect sunlight, avoiding direct UV exposure that can crack skin and reduce quality.
To achieve the best results, consider using a curing process monitor to ensure optimal curing process.
Turning and Monitoring Squash
You’ll need to turn your squash daily during the curing process to guarantee even hardening of the rind on all sides.
This simple rotation prevents moisture buildup and promotes proper air circulation around each butternut squash.
Monitor temperature control and humidity levels closely, as consistent conditions prevent rot and help your ripe butternut squash develop that tough, protective skin for long-term storage, ensuring the squash undergoes a proper hardening.
Benefits of Curing
Curing butternut squash transforms your harvest into a storage powerhouse. This process hardens rind and seals cuts, creating a natural barrier that reduces pathogens and extends storage life substantially.
As moisture evaporates, flavor concentration increases, making your squash sweeter and more delicious. Properly cured butternut squash can last months longer than uncured fruit, maximizing your harvest’s value.
Ideal storage requires humidity and temperature control.
Storing Butternut Squash
Once you’ve properly cured your butternut squash, you’ll need to store it correctly to maximize its shelf life and maintain quality.
The storage method you choose depends on how long you want to keep your squash and your available space.
Refrigerator Storage
Refrigerator storage works best for cut butternut squash, not whole ones.
Store peeled, cubed pieces in airtight containers at 34-40°F for ideal temperature control. This method provides three to five days of storage duration while preventing spoilage signs like brown spots or sliminess.
Whole squash suffers chilling injury below 50°F, causing texture loss and accelerated decay.
To extend its shelf life, consider freezing butternut squash for longer-term storage.
Room Temperature Storage
You can store properly cured butternut squash at room temperature for up to three months.
Place them on a wire rack or wooden shelf in a cool, dry area away from direct sunlight.
Ideal conditions include temperatures between 50-55°F with good air circulation.
Check storage location regularly for signs of spoilage to maximize shelf life.
Proper storage helps maintain peak nutrition and flavor to ensure peak quality.
Freezing and Dehydrating
For long-term storage beyond room temperature options, freezing and dehydrating offer excellent preservation methods.
Blanch peeled squash cubes for three minutes before freezing to maintain flavor and texture.
Dehydrating sliced squash at 125-135°F creates shelf-stable snacks while preserving most nutrients.
Both methods minimize food waste and extend your harvest’s usability substantially, making them ideal for long-term storage.
Post-Harvest Care Tips
Once you’ve harvested your butternut squash, proper post-harvest care guarantees maximum storage life and quality.
Clean handling and regular monitoring will help you enjoy your homegrown squash for months to come.
Handling and Cleaning Squash
After proper storage conditions are set, focus on gentle handling during your post-harvest care routine. Clean hands prevent contamination while moving your butternut squash.
Follow these steps for effective surface cleaning and pathogen removal:
- Wipe with dry cloth – Remove dirt without adding moisture
- Inspect for cuts – Check thoroughly for damage prevention needs
- Handle minimally – Reduce bruising through careful movements
- Separate damaged fruit – Set aside any requiring immediate consumption
To maintain cleanliness, consider using specialized cleaning options.
Checking for Damage and Spoilage
After harvest, inspect each squash carefully for signs of damage that could spell trouble down the road.
Look for dark spots, soft areas, cuts, or bruises on the skin—these create entry points for mold and bacterial growth.
Damaged squash won’t store well and should be used immediately to prevent rot from spreading to healthy fruits.
Proper handling can minimize bruising and damage to ensure healthy fruits and prevent rot from spreading.
Extending Shelf Life
Maximizing your butternut squash’s storage life requires attention to ideal humidity levels around 50-85% and temperature control between 50-55°F.
Select disease-resistant varieties and use proper storage containers with good airflow.
These longterm storage conditions prevent spoilage, extending your squash storage methods effectiveness for months of delicious meals ahead.
Frequently Asked Questions (FAQs)
Does butternut squash need to cure after picking?
Like a fine wine aging, your butternut squash needs curing after picking.
Cure for 7-14 days at 80-85°F with good airflow.
This hardens the skin, heals cuts, and concentrates sugars for better flavor and extended storage life.
Can you eat butternut squash seeds raw?
Yes, you can eat butternut squash seeds raw, but they’re tough and bland. Roasting them with salt and spices makes them much more enjoyable and digestible, similar to pumpkin seeds.
What pests commonly attack butternut squash plants?
You’ll face squash vine borers and squash bugs as your main threats.
These pests also commonly include aphids that can spread diseases to your plants, potentially causing wilting and death.
Maintaining a vigilant watch for signs of infestation is essential for early intervention.
How do you know if soil is ready?
The old saying "test the waters" applies perfectly here.
Check if you can easily work the soil six inches deep without clumping.
The ground should crumble nicely in your hands, not stick together like clay.
Can butternut squash cross-pollinate with other varieties?
Yes, butternut squash can cross-pollinate with other winter squash varieties like acorn, delicata, and hubbard since they’re all Cucurbita pepo species. However, cross-pollination only affects seeds, not current fruit flavor.
Whats the best fertilizer for butternut squash?
You’ll need balanced fertilizer like 10-10-10 or 12-12-12 NPK at planting.
5-10-10 or 16-16-8 formulas work well too.
Apply when seedlings emerge and again mid-season for maximum growth.
Conclusion
Properly stored butternut squash can last up to 12 months when cured correctly.
Now that you’ve learned how to harvest butternut squash, you can enjoy fresh, homegrown produce well into winter.
Remember to check your stored squash regularly for soft spots and use damaged ones first.
With proper timing and storage techniques, you’ll maximize both flavor and shelf life. Your patience during harvest will reward you with sweet, nutritious squash for months ahead.
- https://www.doesitgobad.com/does-butternut-squash-go-bad/
- https://www.yahoo.com/lifestyle/why-never-store-butternut-squash-134023899.html
- https://www.realsimple.com/how-to-store-butternut-squash-8713625
- https://www.menusano.com/effects-of-cold-storage-on-the-nutritional-value-of-supermarket-foods-and-vegetables/
- https://www.healthygreenkitchen.com/how-to-freeze-butternut-squash/

