This site is supported by our readers. We may earn a commission, at no cost to you, if you purchase through links.
Your oregano survived the winter, but your basil didn’t make it past the first frost—and that’s exactly how it should be. While many gardeners assume all herbs need the same winter treatment, perennial varieties like thyme and rosemary can handle temperatures down to -20°F with proper container setup, while annual herbs simply won’t survive no matter how carefully you protect them.
The difference between success and frozen disappointment comes down to matching your overwintering strategy to each herb’s natural hardiness. Container growing adds another layer of complexity since roots face harsher conditions than their in-ground counterparts, but with the right techniques—from insulated pots to strategic indoor moves—you can keep your favorite culinary herbs thriving through the coldest months and ready to flourish again come spring.
Table Of Contents
- Key Takeaways
- Choosing Herbs for Overwintering in Containers
- Preparing Herb Containers for Winter
- Prepping Herbs for Overwintering Success
- Overwintering Methods: Indoor and Outdoor Strategies
- Winter Care and Spring Transition for Container Herbs
- Frequently Asked Questions (FAQs)
- Will herbs survive winter in pots in winter?
- How do you overwinter herbs?
- Do herbs in pots come back every year?
- What herbs should be cut back for winter?
- How do you overwinter potted herbs?
- Should I cut back my herbs for winter?
- How to overwinter container herbs?
- What are the best perennial herbs for containers?
- How to overwinter potted herbs?
- Can herbs overwinter outside?
- Conclusion
Key Takeaways
- Perennial herbs like thyme, oregano, and sage can survive temperatures down to -20°F in containers with proper insulation, while annual herbs like basil won’t survive frost regardless of protection methods.
- Container herbs face harsher winter conditions than in-ground plants because exposed roots are vulnerable to freeze-thaw cycles, requiring strategic insulation through bubble wrap, mulch layers, and elevated positioning.
- Success depends on matching your overwintering strategy to each herb’s hardiness zone and lifecycle—hardy perennials can stay outdoors with protection in zones 5-8, while tender herbs need indoor relocation before the first frost.
- Winter preparation starts with adjusting care routines after the first hard frost: reduce watering to 20-30% of summer levels, stop fertilizing, prune back damaged growth, and apply 2-3 inches of mulch to stabilize soil temperature.
Choosing Herbs for Overwintering in Containers
Not all herbs face winter with the same resilience, and your success depends largely on choosing varieties that match your climate and growing conditions. Some perennial herbs shrug off freezing temperatures, while others need extra protection or a spot indoors to survive.
Understanding which herbs fit your hardiness zone and whether you’re working with annuals or perennials will guide your overwintering strategy from the start.
Best Perennial Herbs for Winter Survival
When choosing perennial herbs for container overwintering, you’ll find certain varieties are proven cold-weather champions. Their resilience gives you confidence through unpredictable winters.
- Thyme hardiness and chive resilience stand out—with up to 80% survival rates in protected containers, even during harsh zone 5 winters
- Oregano survival reaches 85% with proper mulching techniques
- Lemon balm and sage overwintering excel in insulated setups, tolerating temperatures down to -20°F
To prevent infestations, it’s important to check for insects before bringing plants indoors.
Understanding Herb Hardiness Zones
Once you know which herbs can tough it out, you’ll need to match them to your USDA growing zone. The USDA map divides regions into 13 zones based on minimum winter temperatures—each zone spanning 10°F. Zone 5 dips to -20°F, while Zone 8 stays above 10°F.
However, zone limitations exist: microclimates, snow cover, and container practices alter survival odds. Changing climate conditions are causing a northward shift in these zones, so gardeners should stay informed. Climate impacts from warming trends shift boundaries, so check your updated zone rating.
| Zone | Temperature Range | Recommended Herbs |
|---|---|---|
| 5 | -20°F to -10°F | Thyme, oregano, sage |
| 6 | -10°F to 0°F | Parsley, lavender |
| 8 | 10°F to 20°F | Rosemary, bay laurel |
Selecting Annual Vs. Perennial Herbs
Beyond zone ratings, lifecycle differences shape your overwintering strategy. Annual herbs like basil and cilantro finish their lifecycle in one season and won’t survive frost—you’ll need to bring them indoors or replant each spring. Perennial herbs, including thyme and rosemary, regrow from established roots year after year.
Container suitability varies too: hardy herbs like chives tolerate smaller pots, while perennials need deeper containers with insulation to protect roots from freeze-thaw cycles.
Preparing Herb Containers for Winter
Before winter sets in, your herb containers need some attention to help your plants make it through the cold months ahead. The right setup can mean the difference between thriving herbs come spring and a container full of disappointment.
Winter prep determines whether your container herbs thrive come spring or end in disappointment
Let’s look at the key factors that’ll give your containerized herbs their best shot at winter survival.
Choosing The Right Container Size and Material
Your container’s size and material impact how well herbs survive the cold. Think of it as winter armor for roots—some materials hold heat better than others.
- Container size: Use pots at least 6–7 inches wide for single herbs; 18–20 inches for mixed plantings to prevent pot bound roots
- Material impact: Wood and resin offer enhanced thermal regulation; plastic retains more moisture
- Winter durability: Fiberglass withstands freeze-thaw cycles; terracotta cracks easily in fluctuating temperatures
Ensuring Adequate Drainage and Insulation
Without proper drainage, your herbs will drown before they freeze. Drill holes every 3–4 inches across the container bottom, then raise pots on bricks to prevent waterlogging.
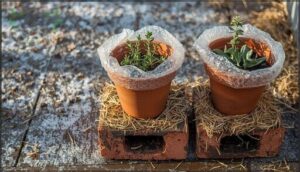
For insulation, wrap containers with bubble wrap—it creates an air barrier that protects roots from frost. Add 2–3 inches of straw mulch on the soil surface to stabilize temperature and shield roots from harsh winter conditions.
Amending Soil for Winter Conditions
Healthy soil is your herb’s winter safety net. Before temperatures drop, boost nutrient cycling with these soil amendments:
- Spread 1 inch of compost onto container soil to improve aeration and moisture retention through freeze-thaw cycles.
- Apply 2–3 inches of organic mulch like pine straw to stabilize soil temperature and insulate roots.
- Test and adjust pH to 6.0–7.0 using dolomitic lime for better nutrient uptake.
- Incorporate aromatic herb residues to increase organic matter and reduce harmful nematodes by up to 75%.
Prepping Herbs for Overwintering Success
Getting your herbs ready for winter isn’t complicated, but timing and technique make all the difference. Think of it as tucking your plants in for a long nap—they need a proper trim, adjusted care, and a protective blanket of mulch to make it through the cold months ahead.
Here’s how to prep your container herbs so they’ll wake up healthy and vigorous come spring.
Pruning and Cleaning Herbs Before Winter
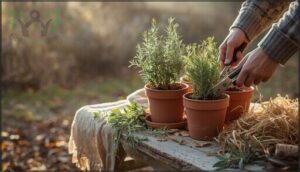
Pruning techniques and herb cleaning set the stage for successful dormancy preparation. Trim perennial herbs after the first hard frost, cutting back to a few inches above the soil to minimize wind and water loss while protecting herbs from cold. Remove no more than one-third of growth at once.
Wash thoroughly to eliminate pests and debris, then dry completely before winter trimming for frost protection.
Adjusting Watering and Fertilizing Routines
Winter demands a complete shift in your watering schedules and fertilizer types. Cut irrigation to once every 10–21 days—roughly 20–30% of summer volumes—since cold slows water uptake dramatically. Check soil moisture using the lift test: a heavy pot signals overwatering, the leading cause of container herb failure.
Reduce fertilizing to every 8–12 weeks using slow-release formulas, protecting flavor while supporting dormancy.
Mulching and Protecting Herb Roots
Think of mulch as a winter blanket that keeps soil temperature steady and prevents freeze-thaw whiplash in container herbs. Apply a 2–3 inch layer after the first hard frost to lock in root hardiness and boost moisture retention. Organic options like straw or shredded leaves insulate down to -20°F while supporting root development.
Here’s how insulation techniques amplify winter protection:
- Wrap containers with bubble wrap or burlap to shield potted herbs from temperature swings
- Choose pine straw for acid-loving herbs—it creates breathable warmth
- Position strategically against walls or under eaves to block wind chill
- Monitor moisture during mild spells; mulch retains water but roots still need occasional drinks
- Layer compost beneath decorative mulch types for dual-purpose insulation and spring nutrition
Overwintering Methods: Indoor and Outdoor Strategies
Once you’ve prepped your herbs, you’ll need to decide where they’ll spend the winter—and how much protection they’ll need to make it through. Your choice depends on the herb’s cold tolerance, your climate, and whether you have indoor space to spare.
Let’s look at the main strategies for keeping container herbs alive until spring.
Bringing Herbs Indoors for Winter
Successfully shifting herbs inside requires careful indoor herb acclimation. Gradually moving plants to shadier spots before the final indoor shift reduces transplant shock.
Indoor lighting is vital; position herbs near south-facing windows or use grow lights for 12-16 hours daily. Monitor soil moisture closely, as overwatering causes root rot.
Perform winter pruning to remove damaged foliage, and maintain temperatures between 55-70°F for ideal indoor herb care during dormancy.
Outdoor Protection Techniques for Containers
While bringing herbs indoors works well, overwintering potted herbs outside is achievable with proper container insulation and frost covers. Protecting herbs from wind and cold safeguards your outdoor potted herbs through harsh conditions.
Four Essential Root Guarding Strategies:
- Wrap containers with bubble wrap to prevent freeze-thaw damage
- Raise pots on bricks to avoid moisture accumulation
- Position near south-facing walls for added warmth
- Group containers together to create protective microclimates
Using Mulch, Covers, and Shelters Effectively
Beyond container protection, you’ll want to add layers that work together. Applying 2 to 3 inches of organic mulch after the first heavy frost insulates roots down to -20°F while retaining moisture. Pair this with horticultural fleece or burlap wraps around foliage to block drying winds. Wire cages filled with leaves create effective shelters, and simple hoop tunnels maintain stable microclimates throughout winter.
| Protection Layer | Materials to Use | Primary Benefit |
|---|---|---|
| Soil Mulch | Pine straw, shredded bark, coco hulls | Temperature regulation and moisture retention |
| Container Wrap | Bubble wrap, burlap | Root zone insulation against freeze-thaw cycles |
| Plant Cover | Horticultural fleece, breathable fabric | Wind protection and frost shield |
| Structural Shelter | Wire cages with leaves, hoop tunnels | Microclimate creation and snow deflection |
| Windbreak Addition | Straw bales, evergreen placement | Reduced moisture loss from cold gusts |
Winter Care and Spring Transition for Container Herbs
Once your herbs are settled in for winter, your job isn’t quite done. Keeping an eye on their environment and catching problems early makes all the difference between herbs that merely survive and those that thrive come spring.
Let’s walk through the essential care steps that will keep your container herbs healthy through winter and ready for their shift back outdoors.
Monitoring Temperature and Humidity
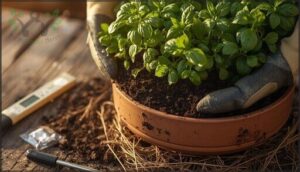
Regularly monitoring temperature and humidity keeps your container herbs thriving through winter. Place basic monitors at plant level to track real-time conditions—aim for daytime temperatures between 65-70°F and nighttime drops to 55-60°F for indoor herb gardening.
Maintain humidity levels at 40-60% by misting Mediterranean herbs like rosemary twice weekly, while basil needs daily attention during dry indoor gardening periods.
Managing Pests and Preventing Disease
Inspect your herbs weekly for aphids, spider mites, and fungal disease before problems spread. Remove visible pests by hand or spray with soapy water—simple, effective pest control methods that work indoors and out.
Yellow sticky traps catch flying insects early, while biological agents like predatory mites offer organic solutions for persistent infestations.
Winter sanitation matters: clear fallen leaves promptly and avoid evening watering to prevent disease.
Gradual Acclimation and Spring Maintenance
When spring arrives, move your herbs gradually over one to three weeks to avoid shock. Start by placing pots outdoors during warm days, bringing them inside at night. Acclimation temperatures between 50°F and 70°F work best.
Monitor humidity levels around 50-60%, increase watering as new growth appears, and prune dead foliage to encourage bushiness rather than leggy growth.
Frequently Asked Questions (FAQs)
Will herbs survive winter in pots in winter?
Potted herbs’ winter survival hinges on plant hardiness and protective practices. Perennial herbs like oregano, mint, and thyme generally thrive with proper pot insulation methods, while frost-tender annuals rarely survive freezing temperatures without indoor overwintering.
How do you overwinter herbs?
Overwintering herbs requires stopping fertilization by late summer, reducing watering, pruning damaged foliage, and applying mulch for root insulation.
Cold protection methods include indoor relocation, frost prevention covers, or sheltered outdoor placement depending on hardiness zones.
Do herbs in pots come back every year?
If you think herbs magically return each season without help, you’re in for disappointment. Perennial herb regrowth depends on proper herb container care—winter survival rates drop sharply when winterhardy overwintering perennial herbs face freeze-thaw cycles and poor dormancy mechanisms without adequate potted herbs protection and regrowth factors support through overwintering herbs practices.
What herbs should be cut back for winter?
Hardy perennials like sage, oregano, and thyme benefit from cutting back herbs to 4-6 inches after hard freezes.
Tender herbs such as rosemary need aggressive pruning techniques near ground level for effective frost protection.
How do you overwinter potted herbs?
Your potted herbs won’t survive winter by sheer willpower alone—they need cold protection through root insulation, frost prevention, and proper herb dormancy management, whether you choose indoor herb overwintering or outdoor overwintering container gardening methods.
Should I cut back my herbs for winter?
Yes, but timing matters. Prune perennial container herbs lightly after the first frost, not before—early cutting can trigger tender new growth.
For annual herbs, cut back completely once frost hits to prevent pests overwintering.
How to overwinter container herbs?
Like a winter coat for roots, container insulation protects herbs from freeze-thaw damage.
You’ll prioritize drainage importance, adjust watering frequency, maintain indoor herb overwintering setups, and prepare spring acclimation for potted herbs.
What are the best perennial herbs for containers?
Mint, oregano, rosemary, sage, thyme, lemon balm, and chives thrive as potted herbs in containers.
These hardy herbs survive winters in zones 4–8, with perennial herb longevity reaching 5–7 years given proper soil drainage needs.
How to overwinter potted herbs?
Think of winter herb care as tucking your garden to sleep.
Overwintering herbs requires moving tender plants indoors before frost, insulating outdoor containers with mulch, reducing watering frequency, and protecting roots from freeze-thaw cycles.
Can herbs overwinter outside?
Perennial herbs like thyme, oregano, and sage thrive outdoors through winter in zones 6-8, with over 70% surviving in containers when protected.
Annual herbs struggle, showing below 30% survival rates without substantial protection.
Conclusion
Think of your container herbs as passengers on a ship—some are built for the voyage through icy waters, while others need shelter below deck. By matching each plant’s hardiness to the right protection strategy, you’ve given them what they need to reach spring safely.
Overwintering herbs in containers isn’t about fighting nature; it’s about working with it. Your reward? Fresh flavors waiting when warm weather returns, roots intact and ready to thrive again.


