This site is supported by our readers. We may earn a commission, at no cost to you, if you purchase through links.
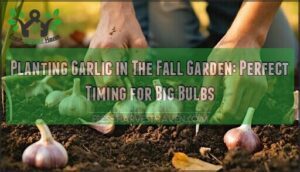
Plant after the autumnal equinox in late September, when soil temperatures cool but before the ground freezes.
This timing lets garlic develop strong root systems during winter’s chill, which they need to form those plump, flavorful bulbs you’re after.
Choose seed garlic over grocery store varieties for better results.
Plant cloves pointed-end up, about 2 inches deep and 4-6 inches apart in well-draining soil.
The secret lies in understanding exactly when your specific climate calls for planting and how soil preparation can make or break your garlic game.
Table Of Contents
- Key Takeaways
- Fall Garlic Planting
- Preparing Garlic Soil
- Planting Garlic Techniques
- Caring for Garlic Plants
- Harvesting Garlic Bulbs
- Frequently Asked Questions (FAQs)
- How late can I plant garlic in the fall?
- What not to plant near garlic in the fall?
- Should I water newly planted garlic in the fall?
- How to prepare a garlic bed in the fall?
- Can garlic be planted in containers or pots?
- How do you prevent pests in garlic crops?
- What companion plants work well with garlic?
- Is crop rotation necessary for growing garlic?
- Can garlic be grown indoors year-round?
- Can you plant garlic cloves that have already sprouted?
- Conclusion
Key Takeaways
- Plant garlic 4-6 weeks before your first frost – typically after the autumn equinox in late September, when soil temperatures drop to 50-60°F for proper root development
- Choose seed garlic over grocery store varieties and plant the largest cloves pointed-end up, 2 inches deep and 4-6 inches apart in well-draining soil with a pH of 6.0-7.0
- Prepare your soil with 2-3 inches of compost or aged manure before planting to create loose, fertile conditions that prevent rot and encourage robust bulb growth
- Apply mulch after planting and remove scapes from hardneck varieties in late spring to direct energy into bulb development for a bigger harvest next summer
Fall Garlic Planting
You’ll get your biggest garlic bulbs when you plant in fall, not spring.
Fall planting gives garlic the cold winter chill it needs to form those fat, flavorful bulbs you’re after.
Winter’s bite transforms garlic cloves into garden gold—patience pays off with bigger, bolder bulbs.
Ideal Time for Planting
Timing makes all the difference when planting garlic in your fall garden.
Plant your garlic cloves 4-6 weeks before the first expected frost, typically after the autumn equinox in late September.
This window allows proper root development before winter dormancy begins.
When soil temperatures hover between 50-60°F, you’ve hit the sweet spot for ideal growth.
Regional variations matter—adjust your timing based on local frost dates for the best results, considering the importance of proper root development and the impact of local frost dates.
Planting by Hardiness Zones
Your hardiness zone determines which garlic varieties will thrive in your fall garden.
Hardneck varieties suit zones 1-5, while softneck garlic prefers zones 8-12.
Zone-specific varieties guarantee climate suitability and proper bulb development.
Consider microclimate considerations and regional soil types when selecting garlic cloves.
Winter protection needs vary by zone, with colder areas requiring deeper planting and mulching for frost date impact management.
To improve weed control, consider using compost as mulch for proper bulb development.
Avoiding Early Planting
Patience pays off in garlic planting, but keenness doesn’t.
Planting too early after the autumnal equinox triggers premature sprouting, leaving plants vulnerable to frost damage.
This reduces yield substantially since young shoots can’t survive winter’s harsh conditions.
Monitor soil temperature closely—wait until it drops below 60°F consistently.
Early fall planting disrupts proper root development, creating winter vulnerability that compromises your entire harvest.
Gardeners can also benefit from cooler weather advantages for healthier growth and a better harvest.
Preparing Garlic Soil
Success with your garlic harvest starts with giving your bulbs the perfect growing foundation.
You’ll need to create loose, well-draining soil that’s rich in organic matter and slightly acidic to help those cloves develop into plump, flavorful bulbs.
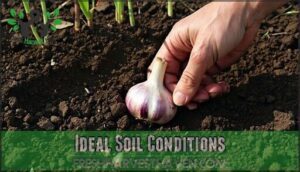
Ideal Soil Conditions
Success in garlic soil preparation begins with well-draining soil that won’t waterlog your bulbs.
Your garden soil needs good drainage, rich organic matter, and a slightly acidic pH between 6.0-7.0.
Think of it as creating a cozy neighborhood for garlic—loose, fertile ground where roots can spread easily.
Proper soil preparation and nutrient balance prevent rot while encouraging robust growth.
To achieve this pH, you might consider using a soil testing kit.
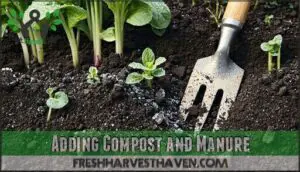
Adding Compost and Manure
For best results, add 2 to 3 inches of well-rotted compost and aged manure before planting garlic.
These soil amendments boost nutrient density and improve drainage. The manure benefits include slow-release nitrogen, while compost types like leaf mold enhance soil structure.
To find the right blend, consider garlic compost products. Apply these amendments during fall soil preparation for ideal garlic growth with slow-release nitrogen.
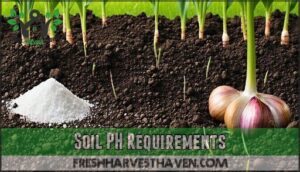
Soil PH Requirements
Testing your soil’s pH reveals the secret to successful garlic cultivation. Your bulbs crave that sweet spot between 6.0 and 7.0 for maximum nutrient availability.
Proper fertilization helps with bulb development and root strength, leading to a successful harvest.
Here’s your soil pH game plan:
- Test annually – Use a simple pH meter or test strips before planting season
- Add lime – Raise acidic soil (below 6.0) with agricultural lime applied months ahead
- Apply sulfur – Lower alkaline soil (above 7.0) with elemental sulfur mixed 6-8 inches deep
- Monitor results – Retest after amendments to confirm you’ve hit the target range
Planting Garlic Techniques
Now that you’ve prepared the perfect soil, it’s time to plant your garlic cloves properly for the best results.
Getting the technique right makes all the difference between small, disappointing bulbs and the large, flavorful garlic you’re hoping for.
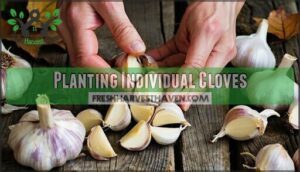
Planting Individual Cloves
Before you separate those cloves, remember that bigger really is better. Choose the largest, healthiest cloves from your seed garlic—they’ll produce the biggest bulbs.
When breaking apart the bulb, handle each clove gently to keep the papery skin intact. This natural wrapper protects against rot and disease.
It’s important to select quality garlic cloves for planting. Plant each clove with its pointed end facing up; this guarantees proper growth direction and prevents confusion underground, ensuring the development of a healthy and strong garlic plant with biggest bulbs.
Depth and Spacing Requirements
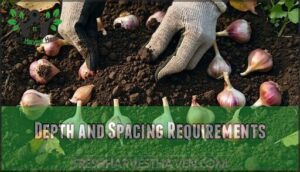
Plant your cloves 2 inches deep with the pointed end up to prevent frost heave.
Space them 4-6 inches apart in rows 12 inches wide for proper airflow needs and bulb size development.
This garlic planting depth protects against winter damage while allowing strong root development.
Proper garlic planting spacing prevents crowding, ensuring each bulb has room to reach full size during your fall planting season, which is crucial for proper airflow.
Using Quality Seed Garlic
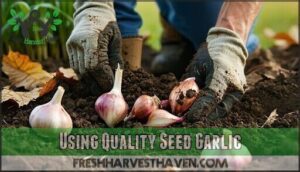
Quality seed garlic makes the difference between thriving bulbs and garden disappointment.
Skip grocery store garlic—it’s often treated to prevent sprouting and may carry diseases that’ll sabotage your harvest.
Choose disease-free garlic from these trusted sources:
**Smart gardeners skip the grocery store garlic—it’s treated to prevent sprouting and may sabotage your harvest.
- Local farmers’ markets – Hand-pick healthy bulbs adapted to your climate
- Certified seed companies – Guarantee variety suitability and disease-free stock
- Online specialty retailers – Wide selection with detailed growing guides
- Fellow gardeners – Share proven varieties that perform well locally
Select large, firm cloves for planting—bigger seed garlic produces bigger bulbs at harvest time.
To guarantee the best growth, consider conducting soil tests before planting.
Caring for Garlic Plants
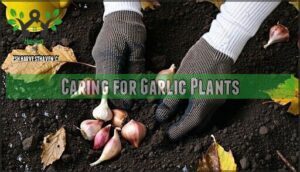
Once you’ve planted your garlic cloves in the fall, proper care guarantees they’ll develop into plump, flavorful bulbs by summer harvest.
With the right combination of mulching, watering, and fertilizing, your garlic will thrive through winter and spring to reward you with a bountiful crop.
Mulching and Watering
After your fall planting, apply several inches of organic mulch around your garlic for winter protection.
Straw, shredded leaves, or wood chips work great for weed suppression and moisture retention.
Water every 3-4 days until sprouting, then reduce watering frequency to every 10-14 days.
Keep soil moisture consistent but not waterlogged—soggy garlic is unhappy garlic!
Fertilizing Garlic Plants
Beyond mulching and proper watering, your garlic needs strategic feeding to reach its full potential. Think of fertilizer as garlic’s breakfast – timing matters more than quantity.
Start with soil testing to identify what nutrients you’re missing, then choose between organic options like compost and manure or synthetic garlic fertilizer for targeted nutrition.
- Nutrient Timing: Apply nitrogen-rich fertilizer in early spring when shoots emerge, then switch to phosphorus-heavy feeds as bulbs form
- Fertilizer Types: Use liquid fish emulsion fertilizer every 2-3 weeks or slow-release organic pellets for steady feeding
- Deficiency Symptoms: Watch for yellowing leaves (nitrogen shortage) or stunted growth (phosphorus deficiency) to adjust feeding
- Organic Options: Blood meal provides quick nitrogen, bone meal adds phosphorus, and aged compost improves overall soil health
- Fall Planting Setup: Mix balanced fertilizer into soil before planting, then resume feeding when spring growth begins
Removing Scapes
After fertilizing your garlic plants regularly, you’ll need to watch for scapes on hardneck varieties.
These curly flower stalks appear in late spring and should be snipped off to direct energy into bulb development.
Don’t worry—softneck garlic won’t produce scapes, so you can skip this step entirely.
| Scape Management | Hardneck Varieties | Softneck Varieties |
|---|---|---|
| Scape Production | Produces curly scapes | No scapes produced |
| When to Cut | Late spring/early summer | Not applicable |
| Cutting Techniques | Snip 6 inches above bulb | No cutting needed |
| Flavor Impact | Concentrate energy in bulbs | Natural bulb focus |
Harvesting Garlic Bulbs
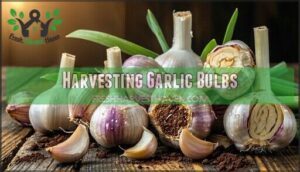
After months of watching your garlic grow, you’ll know it’s ready when the bottom leaves turn brown but a few green leaves remain at the top.
Don’t wait too long—harvest too late and the bulbs might split or rot in the ground, which can be prevented by timely action.
Identifying Harvest Time
Timing your garlic harvest correctly means watching for telltale signs that whisper "we’re ready." You’ll know it’s harvest time when these visual cues appear:
- Browning Percentage: About 50% of leaves turn yellow-brown
- Stalk Condition: Lower leaves dry while top ones stay green
- Bulb Size: Underground bulbs feel firm and well-developed
The harvest window typically opens in mid-summer when leaf color changes signal bulb maturity.
Proper harvesting also requires stopping water supply about two weeks prior.
Don’t wait too long—overripe garlic splits and won’t store well.
Curing and Drying Garlic
Proper curing transforms freshly harvested garlic into long-lasting kitchen gold.
After harvesting garlic, brush off excess dirt but don’t wash the bulbs.
Bundle small groups together or spread them on screens in a warm, dry, well-ventilated area.
The curing process takes two to four weeks, allowing the outer papery layers to dry completely, and good airflow prevents mold and enhances flavor development.
Once necks feel completely dry and papery, your garlic is ready for storage preparation, and this step is crucial for maintaining the garlic’s quality, which is the ultimate goal of the curing process.
Storing Harvested Garlic
Once you’ve cured garlic properly, ideal storage conditions guarantee maximum shelf life. Store bulbs in a cool, dry place with good air circulation and humidity control around 60%.
Here’s your storage game plan:
- Choose breathable containers – Use mesh bags or paper bags, never plastic
- Maintain cool temperatures – Keep between 32-50°F in a pantry or cellar
- Practice pest prevention – Regularly inspect and remove any sprouting bulbs
Braiding garlic stalks creates an attractive storage method that’s both functional and decorative. With proper garlic storage techniques, your harvest can last 3-6 months, giving you homegrown flavor all winter long.
Frequently Asked Questions (FAQs)
How late can I plant garlic in the fall?
You can plant garlic as late as 3-4 weeks before the ground freezes.
While earlier planting is ideal, late planting still works if you give cloves time to establish roots before winter dormancy sets in, allowing for complete establishment before the cold weather.
What not to plant near garlic in the fall?
Like a garden where certain plants become unwelcome neighbors, you shouldn’t plant beans, peas, or other legumes near garlic.
They compete for nutrients and can stunt garlic’s growth.
Also avoid planting asparagus nearby, as it creates too much shade for your garlic bulbs.
Should I water newly planted garlic in the fall?
Yes, you’ll want to water newly planted garlic every 3-4 days until it sprouts. This keeps the soil moist enough for root development without drowning your cloves before winter arrives.
How to prepare a garlic bed in the fall?
Before planting, you’ll want to choose the perfect spot and get your soil ready. Dig deeply and work in 2-3 inches of compost or well-rotted manure for rich, well-draining soil.
Can garlic be planted in containers or pots?
Container gardening transforms your windowsill into a garlic paradise.
You’ll absolutely succeed with deep pots (8+ inches), well-draining soil, and proper spacing.
Choose smaller varieties, water consistently, and protect from extreme cold for delicious homegrown bulbs.
How do you prevent pests in garlic crops?
You’ll want to prevent garlic pests through crop rotation, mulching, and companion planting with marigolds or nasturtiums.
Remove debris regularly, monitor for aphids and thrips, and use row covers during vulnerable growth periods for protection.
What companion plants work well with garlic?
You’ll love planting garlic alongside tomatoes, peppers, and roses – it repels aphids and other pests naturally. Try lettuce, spinach, and herbs too for a thriving garden partnership.
Is crop rotation necessary for growing garlic?
Studies show garlic planted in the same spot reduces yields by 20-30% after just two years.
You’ll definitely want to rotate your garlic every 2-3 years to prevent soil-borne diseases and maintain healthy harvests.
Can garlic be grown indoors year-round?
You can grow garlic indoors year-round, but it won’t form proper bulbs without a cold period. Try growing garlic greens instead—they’re delicious and much easier to manage indoors.
Can you plant garlic cloves that have already sprouted?
Yes, you can plant sprouted garlic cloves.
Those green shoots won’t hurt your harvest.
Just plant them carefully with the sprout pointing up, about two inches deep.
The cloves will still develop into full bulbs next summer, with the sprout pointing up being a key factor in their growth.
Conclusion
Like a gardener putting seeds to bed for winter’s rest, planting garlic in the fall garden sets you up for a bountiful harvest next summer.
You’ve learned the timing, soil prep, and planting techniques that transform small cloves into impressive bulbs.
With proper care through winter and spring, your patience pays off with homegrown garlic that beats store-bought varieties every time.
Start planning your fall garlic patch now.
- https://www.ncbi.nlm.nih.gov/pmc/articles/PMC8589488/
- https://www.facebook.com/thesimplegardenlife
- https://ag.umass.edu/home-lawn-garden/fact-sheets/growing-garlic-getting-started
- https://extension.umn.edu/vegetables/growing-garlic
- https://extension.missouri.edu/news/garlic-secret-weapon-of-ancient-olympians

