This site is supported by our readers. We may earn a commission, at no cost to you, if you purchase through links.
 You can transform your garden’s seasonal bounty into year-round nutrition by mastering five proven preservation methods.
Freezing maintains peak nutritional value for 8-12 months, while water bath canning creates shelf-stable jams and jellies that last indefinitely when stored properly.
Dehydrating concentrates natural sugars into portable snacks, and proper storage techniques prevent spoilage while maximizing your investment.
These methods reduce food waste by up to 60% and cut grocery costs substantially, which is a significant benefit of using these preservation techniques.
Each technique requires specific preparation steps and storage conditions to guarantee food safety and maximum flavor retention throughout the preservation process, ensuring that you can enjoy your preserved foods while maintaining their nutritional value and taste.
Table Of Contents
- Key Takeaways
- Economic and Environmental Benefits of Fruit Preservation
- Freezing Fresh Fruit for Long-Term Storage
- Canning Techniques for Garden-Fresh Fruit
- Dehydrating and Drying Methods for Fruit
- Safe Storage and Labeling of Preserved Fruit
- Frequently Asked Questions (FAQs)
- How to preserve fruit from a garden?
- What is the best way to preserve fresh fruit?
- Can you freeze fresh fruits and vegetables for later use?
- How do you increase the shelf life of fresh fruit?
- How do you preserve homegrown fruit?
- Does fruit stay fresh longer in mason jars?
- How do you store fruit so it stays fresh?
- How do you keep fresh fruit fresh longer?
- How do farmers keep fruit fresh?
- How do you store fruit after harvesting?
- Conclusion
Key Takeaways
- You can cut food waste by up to 60% and save money by freezing, canning, and dehydrating your garden’s fruit.
- You’ll keep fruit safe and flavorful longer by using airtight containers, labeling batches, and controlling storage temperature and humidity.
- Freezing preserves peak nutrition for 8-12 months, while water bath canning and dehydrating create shelf-stable options for year-round use.
- By mastering these methods, you’ll boost your household’s food security and lower your environmental impact.
Economic and Environmental Benefits of Fruit Preservation
You’ll cut grocery costs while protecting the planet when you preserve your garden’s fruit harvest.
This simple practice prevents up to 60% of potential fruit waste, reducing greenhouse gas emissions while building food security for your household, and it is a way to protect the planet.
Transform your garden’s abundance into year-round savings while protecting the planet from unnecessary waste
Reducing Food Waste and Saving Money
Everyone can slash grocery bills by preserving fresh fruit instead of watching it rot.
Food recovery through proper fruit storage tips transforms your garden harvest into year-round savings.
These sustainable living practices reduce household waste by up to 60%, making eco friendly preservation both economically smart and environmentally responsible for cost savings.
Lowering Environmental Impact
Preserving fresh fruit transforms your carbon footprint from a heavy burden into a lighter load.
When you preserve garden harvest instead of letting it rot, you’re practicing sustainable food practices that slash methane emissions from landfills.
Your eco friendly preservation methods reduce transportation needs, cutting fossil fuel consumption.
These green living choices support sustainable practices while keeping more nutrients on your plate than in waste bins.
By using effective fruit preservation methods, you can enjoy your harvest throughout the year.
Supporting Self-Sufficiency
When you master garden fruit storage and preserving garden harvest techniques, you’re building genuine Food Security for your household.
Sustainable Living means depending less on grocery store prices and supply chain disruptions.
Strategic Garden Planning with Crop Rotation maximizes your Fruit Harvesting seasons, while canning fresh fruit and freezing fresh fruit extends your harvest months beyond the growing season.
These food preservation methods transform you from grocery store dependent to self-reliant.
Freezing Fresh Fruit for Long-Term Storage
Freezing stands as the most accessible preservation method for garden fruit, requiring only proper preparation and adequate freezer space.
Transform your garden’s abundance into year-round treasures with simple preparation and freezer space
You’ll maintain peak nutritional value and flavor when you follow specific techniques for different fruit types, ensuring your harvest stays fresh for 8-12 months.
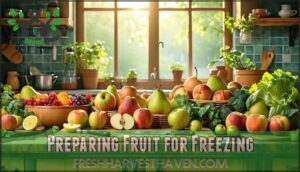
Preparing Fruit for Freezing
Fresh fruit selection starts your freezing journey right. Choose firm, ripe specimens without bruises or soft spots.
Wash thoroughly under cold water, then dry completely to prevent ice crystals. Remove stems, pits, and damaged areas before cutting larger fruits into uniform pieces.
Apply lemon juice to prevent browning in apples, pears, and peaches during frozen storage. To guarantee the best results, follow proper freezing fruit methods for preserving your fresh fruit.
Best Practices for Berries and Stone Fruit
During peak ripeness, berries benefit from gentle fruit cleaning and immediate berry sorting to remove damaged specimens.
Sort berries by size for uniform freezing, while stone fruits require pitting before fruit packaging to maximize freezer space efficiency.
Stone fruit ripening occurs best at room temperature before freezing, ensuring ideal texture retention. Proper harvest timing prevents premature deterioration during fresh fruit preservation.
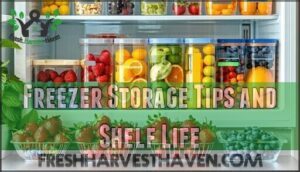
Freezer Storage Tips and Shelf Life
Proper container selection becomes your first line of defense against freezer burn. Use moisture-resistant, airtight containers or freezer bags, removing excess air before sealing.
Maintain freezer temperature at 0°F consistently. Label containers with freezing dates—most frozen fruit maintains quality for 8-12 months in cold storage when properly packaged.
To prevent degradation, understanding freezer burn prevention is also essential for long-term storage.
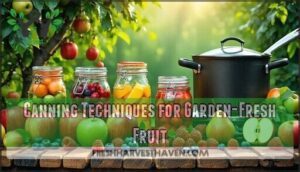
Canning Techniques for Garden-Fresh Fruit
Canning transforms your garden’s fruit harvest into shelf-stable treasures that’ll last for months without refrigeration.
You’ll use the water bath method for high-acid fruits like apples and berries, creating everything from classic strawberry jam to pickled pears in sweet syrup.
Water Bath Canning for High-Acid Fruits
High-acid fruits like peaches and berries are perfect candidates for water bath canning, where boiling water reaches 212°F to eliminate harmful microbes.
You’ll need proper acid testing to guarantee safety—fruits with pH below 4.6 work best for fresh fruit canning.
Essential steps include fruit sterilization, maintaining proper jar sealing, and pressure monitoring throughout processing to guarantee effective food preservation methods.
Effective food preservation methods are vital for maintaining the quality and safety of the canned fruits.
Making Jams, Jellies, and Preserves
Sweet success starts with proper fruit preparation and tested jelly recipes.
You’ll transform your fresh fruit into golden jams using preserve methods that capture summer’s essence.
Sterilize jars, combine fruit with sugar and pectin, then boil until gelling point.
These canning tips guarantee your preserving summer fruit efforts create delicious spreads from your fruit from garden bounty.
To achieve the best results, understanding a reliable Fruit Jam Maker is essential for consistent flavor and texture, which are key to sweet success.
Pickling and Preserving in Syrup
Branch out from traditional canning by exploring fruit syrups and pickling spices for unique preserves.
Sugar preservation creates sweet, shelf-stable treats while pickled fruits offer tangy alternatives.
Canned peaches in light syrup maintain texture better than heavy versions.
These garden fruit preservation methods expand your preserving summer fruit toolkit beyond basic fruit jellies, giving you creative options for dehydrating fruit alternatives using proper fruit storage containers.
Dehydrating and Drying Methods for Fruit
Dehydrating removes moisture from fresh fruit while concentrating natural sugars and flavors, creating shelf-stable snacks that last for months.
You can use electric dehydrators, conventional ovens, or traditional air-drying methods to transform your garden’s bounty into convenient dried fruit.
Using Dehydrators and Ovens
Dehydrators and ovens transform fresh garden produce into concentrated, shelf-stable treats.
Both methods require temperature control and proper dehydration times for ideal results.
- Dehydrator Tips: Set temperature at 135-140°F for consistent fruit preservation methods
- Oven Safety: Use 150-200°F with door slightly ajar for moisture escape
- Temperature Control: Monitor heat levels to prevent over-drying delicate fruits
- Dehydration Times: Plan 6-36 hours depending on fruit type and thickness
Dehydrating fruit concentrates flavors while maintaining nutritional value. You can even make fruit leather from pureed garden fruit preservation projects. Effective food dehydrator machines are essential for achieving the best results in fruit preservation.
Sun Drying and Air Drying Techniques
Nature’s oldest preservation method harnesses sun’s power and air circulation for dehydrating fruit.
Sun drying works best in hot, dry climates with low humidity, while air drying suits cooler environments.
Both methods require proper preparation and monitoring for successful garden fresh produce preservation.
| Method | Best Conditions | Drying Time |
|---|---|---|
| Sun Drying | 85°F+, |
low humidity
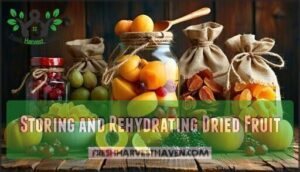
Storing and Rehydrating Dried Fruit
Store your dried fruit in airtight containers away from light and moisture to maximize shelf life.
Glass jars or vacuum-sealed bags work best for fruit storage solutions.
Label containers with dates—most dried fruits last 6-12 months.
For fruit rehydration, soak pieces in warm water for 10-15 minutes before using in recipes or eating fresh.
Safe Storage and Labeling of Preserved Fruit
Proper storage techniques determine whether your preserved fruit lasts months or spoils within weeks. You’ll need airtight containers, stable temperatures, and clear labeling systems to track freshness and prevent waste.
Choosing Airtight Containers
Proper container selection forms the foundation of successful food preservation and seasonal produce storage.
Your choice directly impacts how long your preserved fruit maintains quality and safety.
- Glass mason jars with new metal lids create reliable airtight seals for canned preserves and pickled fruits
- Food-grade plastic containers with secure snap-on lids work well for frozen fruit portions and dried apple chips
- Vacuum-sealed bags remove excess air to prevent freezer burn and extend storage life substantially
- Metal tins with tight-fitting lids protect dried fruit from moisture while maintaining flavor integrity
Container materials matter because they interact with your preserved food over months of storage.
Glass jars offer the best chemical stability, while BPA-free plastic provides lightweight convenience.
Quality airtight seals prevent contamination and preserve nutritional value.
Smart jar selection and proper lid options create the barrier between successful preservation and spoiled fruit.
Understanding fruit dehydration methods is vital for maintaining the quality of preserved fruit.
Proper Storage Conditions
Once you’ve selected the right storage containers, maintaining ideal conditions becomes your next priority.
Keep preserved fruit in cooler spaces below 70°F with humidity control to maximize shelf life.
Temperature monitoring prevents spoilage, while consistent storage conditions guarantee your food preservation efforts succeed.
Dark pantries or basements work well for most food storage solutions, protecting your seasonal produce preservation investments with humidity control and maintaining conditions below 70°F for optimal food preservation.
Labeling and Tracking Shelf Life
Track each preserved batch with Food Labels showing processing date and method used.
Create an inventory management system noting expiration dates for different preservation techniques.
Fresh frozen fruit lasts 8-12 months, while canned preserves keep 1-2 years when stored properly.
Follow food safety guidelines by rotating stock regularly.
These storage tips and kitchen preservation habits guarantee you’ll enjoy seasonal produce preservation year-round.
Frequently Asked Questions (FAQs)
How to preserve fruit from a garden?
Fresh fruit flourishes when you freeze, ferment, or can it correctly.
You’ll master preservation by choosing water bath canning for high-acid fruits like berries, or try dehydrating apples and pears for healthy snacks.
What is the best way to preserve fresh fruit?
Freezing offers you the simplest preservation method—just wash, dry, and freeze berries or sliced fruit in airtight containers.
For longer storage, try dehydrating or canning using tested recipes to maintain safety and flavor.
Can you freeze fresh fruits and vegetables for later use?
You can absolutely freeze most fruits and vegetables for later use. Freezing halts bacterial growth at zero degrees Fahrenheit, keeping produce safe for months while preserving nutritional value effectively.
How do you increase the shelf life of fresh fruit?
Store fruit properly by controlling temperature, humidity, and airflow. Refrigerate berries immediately, keep apples in crisper drawers, and separate ethylene producers like bananas from sensitive fruits.
How do you preserve homegrown fruit?
You can preserve homegrown fruit through multiple methods: freeze berries and stone fruits in airtight containers.
Dehydrate apples and pears into chips, or create jams and jellies using water bath canning for long-term storage.
Does fruit stay fresh longer in mason jars?
Looking for better fruit storage? Mason jars won’t substantially extend fresh fruit’s lifespan compared to proper refrigeration, but they’ll protect against moisture and contamination while maintaining quality for several days.
How do you store fruit so it stays fresh?
Refrigerate most fruits to slow ripening and extend freshness by several days. Store apples, berries, and grapes in perforated bags to maintain humidity while preventing moisture buildup that causes rot.
How do you keep fresh fruit fresh longer?
Maximize freshness by controlling temperature, humidity, and ethylene exposure. You’ll store different fruits separately since some produce ethylene gas that accelerates ripening in others nearby.
How do farmers keep fruit fresh?
Commercial farmers use controlled atmosphere storage, which adjusts oxygen and carbon dioxide levels in refrigerated warehouses.
You’ll find they also apply protective wax coatings, harvest at ideal ripeness stages, and maintain precise temperature chains from field to market.
How do you store fruit after harvesting?
An apple a day keeps the doctor away," but proper storage keeps your harvest fresh longer.
You’ll need cool temperatures, proper ventilation, and humidity control to maintain quality and prevent spoilage after picking your fruit.
Conclusion
Successfully preserving fresh fruit from garden requires mastering multiple techniques, maintaining proper storage conditions, and following safety protocols.
You’ll maximize your harvest value through freezing, canning, and dehydrating methods that extend shelf life substantially.
These preservation approaches reduce waste while providing year-round access to nutritious garden produce.
With consistent application of these five proven methods, you’ll transform seasonal abundance into lasting food security for your household.
- https://www.lazayafruits.com/preserved-fruits-blog/modern-fruit-preservation-methods/
- https://grow.ifa.coop/food-preservation/harvest-to-table-a-guide-to-garden-food-preservation
- https://lacrosse.extension.wisc.edu/family-living-and-nutrition-education/preserve-what-you-grow/
- https://www.forbes.com/sites/daphneewingchow/2020/10/31/fruit-and-vegetable-spoilage-is-a-hidden-cause-of-underdevelopment/
- https://areco.org.es/wp-content/uploads/2021/02/20130516_SIM%20Endbericht_Verluststudie_final_english.pdf

