This site is supported by our readers. We may earn a commission, at no cost to you, if you purchase through links.
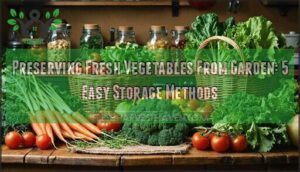
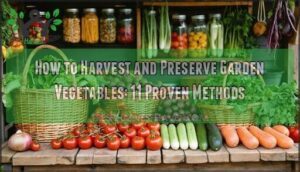
 Preserving garden produce for freezing starts with selecting peak-ripeness vegetables and fruits without bruises or soft spots.
You’ll want to wash thoroughly, trim into uniform pieces, and blanch most vegetables to stop enzyme activity that causes mushy textures. Blanching times vary—peas need just 1-2 minutes while corn requires 4-7 minutes.
After blanching, plunge vegetables into ice water baths to halt cooking. Flash freeze on baking sheets before transferring to airtight containers or vacuum-sealed bags.
Proper technique retains up to 95% of vitamin C and extends shelf life to 18 months. The secret lies in timing, temperature control, and smart packaging choices.
Table Of Contents
- Key Takeaways
- Selecting and Inspecting Garden Produce
- Preparing Vegetables for Freezing
- Why Blanch Vegetables Before Freezing?
- Blanching and Cooling Methods
- Freezing Techniques for Garden Produce
- Preventing Freezer Burn and Quality Loss
- Storing and Handling Frozen Produce
- Frequently Asked Questions (FAQs)
- How do you preserve vegetables for freezing?
- Can I freeze vegetables without blanching them first?
- Can you freeze vegetables straight from the garden?
- How do you freeze vegetables without them getting mushy?
- How do I prepare my garden for freezing?
- Which vegetables should not be frozen?
- How do you freeze fresh vegetables from the garden?
- What vegetables can be preserved by freezing?
- What are two vegetables that should not be blanched before freezing?
- Can herbs be frozen directly without preparation?
- Conclusion
Key Takeaways
- You’ll get the best results by harvesting at peak ripeness – choose firm, brightly colored produce without bruises or soft spots, as damaged areas compromise quality during freezing and storage.
- Blanching isn’t optional for most vegetables – this 1-7 minute boiling water treatment stops enzyme activity that causes mushy textures and color loss, preserving up to 95% of vitamin C for 18 months.
- Flash freezing prevents clumping and maintains quality – spread blanched vegetables on baking sheets before transferring to airtight containers, which gives you individual pieces that won’t stick together.
- Proper packaging and 0°F storage are crucial – remove all air from containers, label with dates and contents, and maintain consistent freezer temperature to prevent freezer burn and maximize shelf life.
Selecting and Inspecting Garden Produce
The quality of your frozen vegetables starts with selecting perfect produce from your garden.
You’ll want to harvest fruits and vegetables at peak ripeness, when they’re firm, brightly colored, and free from bruises or soft spots that can affect texture after freezing.
Choosing Peak Ripeness
Everyone knows that timing matters for the best harvest for food preservation.
You’ll achieve superior freezing results by selecting produce at its peak ripeness using these visual cues and taste testing methods:
Peak ripeness delivers the sweetest rewards when time meets perfect harvest timing
- Corn kernels that pop with sweet juice when pressed – indicating perfect sugar content for the freezing process
- Tomatoes with deep, vibrant colors that yield slightly to gentle pressure – ensuring maximum flavor retention in frozen vegetables
- Green beans that snap crisply without bending – signaling ideal texture for freezer storage
- Berries with uniform color saturation and natural bloom – guaranteeing seasonal variations won’t compromise quality during the freezing process
Checking for Bruises and Damage
Examine each piece carefully before freezing.
Soft spots and bruises create entry points for bacteria, compromising your frozen vegetables’ quality.
Press gently to check firmness—damaged areas feel mushy or yield easily.
Look for dark spots, cuts, or wrinkled skin that signal deterioration.
Even minor damage spreads during blanching and freezer storage, affecting texture and flavor.
One key indicator is fruit skin texture that can reveal underlying damage.
When in doubt, trim away questionable areas or use damaged produce immediately rather than preserving it, as this helps maintain the frozen vegetables’ quality and ensures you are working with soft spots that are minimal.
Prioritizing High-Quality Fruits and Vegetables
Quality beats quantity when selecting produce for your freezer storage chart.
Choose fruits and vegetables at Ideal Maturity with firm textures and vibrant colors.
Variety Selection matters—some cultivars freeze better than others.
Organic Considerations include avoiding chemical residues that may affect frozen vegetables.
Proper Pest Management guarantees clean produce.
High Nutrient Density varieties retain more vitamins after blanching and food preservation, giving you better results from your freezing efforts, with Quality being key, and considering Organic factors, and the importance of Proper management.
Preparing Vegetables for Freezing
Proper preparation sets the foundation for successfully freezing your garden vegetables.
You’ll need to wash, trim, and cut your produce correctly to guarantee the best texture and flavor when you’re ready to use it, with complete concepts in mind to ensure the best results.
Washing and Trimming Techniques

Once you’ve selected quality garden produce, proper washing becomes your first defense against contamination. Clean running water removes dirt removal and pesticide residue from seasonal produce.
Different vegetables need specific approaches for ideal food preservation results.
Follow these washing steps for leafy greens and root vegetables:
- Rinse under cold running water using proper tools like vegetable brushes
- Soak heavily soiled items for several minutes before scrubbing
- Pat dry completely before blanching or direct freezing
To prevent disease, consider disinfecting gardening tools before harvest, ensuring proper tools are used and maintaining clean running water for the best preservation results.
Cutting Uniform Pieces for Even Freezing

Once you’ve washed your produce, uniform size matters for consistent freezing results.
Cut vegetables into similar-sized pieces using sharp knife skills – whether dicing or slicing depends on your intended use.
Proper cutting equipment guarantees even pieces that freeze and thaw at the same rate, which prevents some pieces from becoming mushy while others stay frozen during food preservation methods.
Removing Seeds and Cores

Once you’ve cut uniform pieces, proper seed and core removal prevents texture issues and bitter flavors that can develop during freezing.
Seeds contain enzymes that continue working even at freezer temperatures, affecting quality.
- Use specialized seed removal tools like melon ballers for small seeds and apple corers for tough centers
- Save viable seeds from heirloom varieties before blanching – they won’t germinate after food preservation methods
- Remove large seeds completely from peppers, squash, and tomatoes to prevent mushiness when thawing
- Don’t waste cores – compost them or use for making vegetable stock before freezing your prepared produce
Why Blanch Vegetables Before Freezing?

You’ll want to blanch your vegetables before freezing because it stops enzyme activity that causes color changes, texture loss, and nutrient breakdown during storage.
This quick heat treatment preserves the quality and extends the freezer life of your garden produce by several months, which is a key factor in maintaining the quality of your garden produce.
Enzyme Activity and Texture Preservation
Enzymes naturally break down vegetables after harvest, causing texture changes and nutrient loss during frozen storage.
Nature’s enzymes don’t stop working after harvest—they keep breaking down your vegetables even in the freezer
Blanching provides enzyme inhibition by applying heat before freezing, maintaining cell wall integrity throughout preservation.
This food preservation method prevents mushy vegetables and color degradation.
Without blanching, frozen produce deteriorates quickly, making this step essential for successful food preservation methods combining freezing and canning techniques.
Recommended Blanching Times by Vegetable
Getting your blanching times right makes the difference between crisp, colorful vegetables and mushy disappointments.
Here’s your go-to timing guide:
- Quick blanchers (1-2 minutes): Peas and leafy greens like spinach
- Standard timing (3 minutes): Green beans, broccoli, and cauliflower
- Longer process (4-7 minutes): Corn kernels and thick asparagus stalks
Time variations depend on vegetable types and sizes.
Over-blanching risks destroy texture and nutrients.
Remember altitude adjustments – add one minute per 1,000 feet above sea level for proper blanching benefits in your food preservation methods.
Preventing Nutrient Loss
Blanching protects your harvest’s nutritional powerhouse.
Without it, enzymes continue breaking down vitamins during storage.
Fresh vegetables lose up to 50% of vitamin C within three months of freezing, but blanched produce retains most nutrients for eight months or longer.
| Vegetable | Vitamin C Retention (Blanched) | Vitamin C Retention (Unblanched) |
|---|---|---|
| Broccoli | 85% after 6 months | 45% after 3 months |
| Green Beans | 90% after 8 months | 60% after 4 months |
| Carrots | 95% after 10 months | 70% after 5 months |
| Peas | 80% after 6 months | 40% after 3 months |
| Spinach | 75% after 4 months | 35% after 2 months |
The retention of vitamins, especially vitamin C, is significantly higher in blanched vegetables, making blanching a crucial step in preserving your harvest.
Blanching and Cooling Methods
Once you’ve properly blanched your vegetables, the cooling process is just as critical for preserving quality and stopping the cooking action.
An ice water bath immediately after blanching locks in nutrients and maintains that perfect texture you’re working so hard to achieve, which is a key step in preserving quality.
Boiling Water Blanching

Boiling water blanching stands as the gold standard for food preservation methods.
You’ll need a large pot filled with water—about one gallon per pound of vegetables.
Here’s your step-by-step process:
- Bring water to a rolling boil and add vegetables in small batches
- Start timing immediately when water returns to boiling
- Remove promptly and plunge into ice water to stop cooking
This scalding method offers superior blanching benefits compared to blanching alternatives, ensuring your freezing and canning efforts yield restaurant-quality results.
A proper boiling water container is essential for safety.
Steam Blanching

Steam blanching offers gentler treatment than boiling water methods, making it perfect for delicate vegetables like broccoli and cauliflower.
This scalding alternative preserves more nutrients while achieving the same enzyme-stopping benefits.
Equipment options include steamer baskets, bamboo steamers, or electric steamers. You can explore options for vegetable steaming devices online.
Blanching duration typically matches boiling times for most vegetable types. Steam blanching works exceptionally well for food preservation methods requiring careful texture control.
Transferring to Ice Water Baths

Once you’ve finished blanching, immediately transfer vegetables to an ice water bath to halt the cooking process and lock in that vibrant color and crisp texture.
- Prepare your ice bath beforehand – Fill a large bowl with equal parts ice and cold water, making certain you have enough space for your vegetables.
- Work quickly during transfer – Use a slotted spoon or spider strainer to move vegetables from boiling water directly into the ice bath within seconds.
- Maintain proper cooling time – Keep vegetables submerged for the same duration as your blanching time to guarantee complete temperature reduction.
- Monitor water quality – Replace the ice water bath if it becomes cloudy from repeated use, as bath contamination can affect your produce’s quality and safety.
Freezing Techniques for Garden Produce

Once you’ve properly blanched and cooled your vegetables, it’s time to freeze them using techniques that preserve quality and prevent waste.
The right freezing methods will keep your garden harvest fresh-tasting for months while making meal prep easier throughout the year.
Flash Freezing for Individual Pieces
Why struggle with clumpy frozen vegetables when flash freezing delivers professional results?
Spread blanched produce on baking sheets in single layers, ensuring pieces don’t touch.
This tray freezing method prevents clumping and creates IQF advantages for best produce quality.
After deep freezing for two hours, transfer individual pieces to storage containers.
This technique works perfectly for freezing berries and chopped vegetables alike.
Packaging in Airtight Containers
After flash freezing, proper packaging safeguards your produce’s quality. Choose vacuum sealing or rigid containers with tight-fitting lids to prevent freezer burn. Container types matter—plastic, glass, or stainless steel work well for airtight storage.
To maintain superior quality, it’s vital to follow pretreatment guidelines.
- Select freezer-safe containers with straight sides for easy removal
- Leave proper headspace to accommodate food expansion during freezing
- Remove excess air using vacuum sealers or manual pressing techniques
- Check sealing techniques to guarantee moisture-resistant, odorless packaging materials
Labeling and Dating for Easy Tracking
Master your freezer inventory with smart labeling systems that prevent mystery packages and food waste. You’ll save time and money when every container tells its story at a glance.
| Information to Include | Example Format |
|---|---|
| Produce Type & Variety | "Green Beans – Blue Lake" |
| Processing Date | "Frozen: 08/15/2024" |
| Blanching Details | "Blanched 3 min" |
| Best Use Timeline | "Use by: 08/2025" |
| Quantity/Serving Size | "2 cups (4 servings)" |
Labeling best practices transform chaotic freezers into organized food preservation systems. Date code systems guarantee proper inventory rotation, while clear freezer organization helps you follow consumption timelines.
To maintain peak quality, consider blanching vegetables before freezing. These home food preservation methods work alongside freezing and canning to maximize your garden’s potential.
Preventing Freezer Burn and Quality Loss

You’ll need the right packaging and techniques to prevent freezer burn from destroying your carefully prepared garden produce.
Proper air removal and freezer organization make the difference between vegetables that taste fresh months later and those that end up in the compost bin.
Choosing Moisture-Resistant Packaging
Your choice in packaging materials can make or break your frozen garden produce.
Freezer bags work well for most vegetables, while rigid containers protect delicate items.
Vacuum sealing removes moisture and air, extending storage life substantially.
Glass jars offer sustainable options but need headspace for expansion.
Choose thick, moisture-resistant materials designed specifically for freezing to maintain quality and prevent freezer burn.
Removing Air Before Sealing
Excess air accelerates freezer burn by creating ice crystals that damage your produce’s texture and flavor.
Vacuum sealing offers the gold standard for air displacement, but you can achieve similar results using freezer bags.
Press out air manually or use the water displacement method—submerge filled bags in water until air bubbles escape, then seal. Leave minimal headspace in rigid containers, as trapped air becomes your enemy during deep freezing.
Organizing Your Freezer for Best Results
Properly organizing your freezer dramatically extends produce quality and prevents waste.
Strategic placement guarantees consistent temperatures while smart labeling keeps your freezer inventory current and accessible.
- Use FIFO Method: Place newer items behind older ones for proper rotation
- Create Temperature Zones: Store delicate items away from door and vents
- Choose Container Types: Match rigid containers for liquids, bags for solids
- Label Everything: Include contents, date, and blanching notes for easy identification
- Maximize Space Optimization: Stack flat packages and use vertical dividers efficiently
Storing and Handling Frozen Produce

Once your produce is properly frozen, smart storage practices keep it fresh for months.
You’ll need to maintain consistent freezer temperature and follow storage guidelines to get the best results from your preserved harvest.
Maintaining Optimal Freezer Temperature
Your freezer’s temperature directly impacts your garden produce’s quality and safety.
Set it to 0°F (-18°C) for ideal food preservation.
Temperature monitoring prevents spoilage during power outages, while proper freezer organization guarantees even cooling.
This sweet spot maximizes energy efficiency without compromising your blanching and freeze efforts, keeping your hard work from turning into expensive compost.
Using Storage Charts for Shelf Life
Storage charts become your roadmap for quality control once your garden produce enters the freezer.
These references track shelf life timelines, helping you rotate stock efficiently while maintaining peak flavor and nutrition.
- Chart Accuracy: Trust USDA and university extension sources for reliable freezing timelines
- Produce Variation: Different vegetables have unique storage windows – berries last 6-12 months while blanched carrots extend to 18 months
- Update Frequency: Check digital charts periodically as food preservation research advances
Both printable charts and digital versions work well for regular freezing schedules, supporting your food preservation goals.
To maximize longevity, consider the importance of consistent freezer temperature.
Thawing and Using Frozen Garden Produce
Beyond proper storage comes the art of thawing methods and cooking frozen seasonal produce.
Most vegetables cook beautifully straight from the freezer without thawing, preserving texture changes that blanching created.
For recipe adaptations, add frozen vegetables during the last few cooking minutes, which maintains nutrient retention while delivering fresh-picked flavor year-round.
Frequently Asked Questions (FAQs)
How do you preserve vegetables for freezing?
Strike while the iron’s hot" – blanch your vegetables in boiling water for 2-3 minutes, then plunge into ice water to stop cooking.
Pat dry, package in airtight containers, and freeze immediately for best quality.
Can I freeze vegetables without blanching them first?
You can freeze most vegetables without blanching, but they’ll lose quality faster. Blanching preserves color, texture, and nutrients by stopping enzyme activity that causes deterioration during storage.
Can you freeze vegetables straight from the garden?
Like your great-grandmother’s icebox days, you can freeze fresh garden vegetables, but blanching first preserves color, texture, and nutrients better.
Without blanching, vegetables may become mushy and lose flavor over time.
How do you freeze vegetables without them getting mushy?
Blanch vegetables for 2-4 minutes in boiling water, then plunge into ice water immediately. This stops enzymes that cause mushiness. Drain thoroughly, package in airtight containers, and freeze quickly.
How do I prepare my garden for freezing?
Your garden’s bounty becomes winter’s treasure when you harvest at peak ripeness.
Blanch vegetables for 2-3 minutes, then plunge into ice water to stop cooking and preserve that garden-fresh color and crunch, which helps to make your garden’s bounty a winter’s treasure.
Which vegetables should not be frozen?
Lettuce, cucumbers, radishes, and tomatoes won’t freeze well – they’ll turn mushy. Potatoes become grainy, while celery loses its crunch. You’ll want to avoid these watery vegetables completely.
How do you freeze fresh vegetables from the garden?
Most vegetables freeze well after blanching – quickly boiling then ice-water shocking to stop enzymes.
Blanch broccoli, carrots, green beans for 2-3 minutes.
Skip blanching for peppers and onions.
Freeze immediately in airtight containers.
What vegetables can be preserved by freezing?
Almost all vegetables freeze well, including broccoli, carrots, green beans, peas, corn, spinach, and peppers. You’ll want to blanch most before freezing to preserve color and texture.
What are two vegetables that should not be blanched before freezing?
Surprisingly, you’ll save time since peppers and onions don’t need blanching before freezing. Unlike most vegetables, these two freeze well without the extra step, maintaining their flavor and texture naturally.
Can herbs be frozen directly without preparation?
Yes, you can freeze most herbs directly without blanching.
Simply wash, pat dry, and freeze whole or chopped in airtight containers.
Delicate herbs like basil may darken but retain flavor perfectly.
Conclusion
Like Odysseus returning from his epic journey with treasures intact, you’ve now mastered preserving garden produce for freezing.
These seven expert techniques—from selecting perfect specimens to maintaining ideal storage conditions—ensure your harvest retains maximum nutrition and flavor.
You’ll confidently blanch vegetables at precise timing intervals, flash freeze for quality preservation, and prevent freezer burn through proper packaging.
With these skills, your frozen garden bounty will deliver restaurant-quality results months later, transforming winter meals into vibrant celebrations of summer’s abundance, with maximum nutrition.