This site is supported by our readers. We may earn a commission, at no cost to you, if you purchase through links.
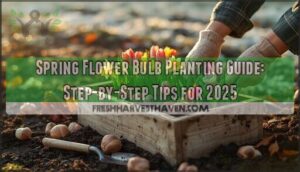
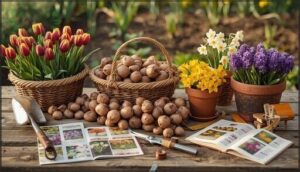
Choose beginner-friendly varieties like daffodils and crocuses, then prepare well-draining soil by adding compost and clearing weeds. Plant bulbs at depths three times their height, water thoroughly, and mulch for protection.
The magic happens when spring arrives and your patience pays off with stunning blooms that’ll make neighbors wonder about your secret gardening wisdom.
Table Of Contents
- Key Takeaways
- When to Plant Spring Flower Bulbs
- Choosing The Right Spring Bulbs
- Preparing Soil for Bulb Planting
- Where to Plant Spring Bulbs
- How to Plant Spring Bulbs Step by Step
- Designing Beautiful Spring Bulb Displays
- Caring for Spring Bulbs After Planting
- Top 6 Products for Successful Bulb Planting
- Frequently Asked Questions (FAQs)
- When should I plant bulbs for spring flowers?
- Should you soak spring bulbs before planting?
- How many spring bulbs should I plant together?
- What is the general rule for planting bulbs?
- What happens if you plant flower bulbs in the spring?
- When to plant spring bulbs?
- How to plant spring flower bulbs?
- Where should I plant spring bulbs?
- What are spring flower bulbs?
- When should I plant spring flowers?
- Conclusion
Key Takeaways
- Plant bulbs 4-6 weeks before your first hard frost to give them time to establish roots without triggering premature sprouting that winter would kill.
- Choose well-draining soil and plant at twice the bulb’s height – a 2-inch bulb goes 4 inches deep, pointy end up, with proper spacing for healthy development.
- Group bulbs in clusters of 5-10 for maximum visual impact rather than scattering individual bulbs, and layer different varieties at varying depths for extended bloom periods.
- Leave yellowing foliage intact for 6-8 weeks after blooms fade to allow nutrients to flow back into the bulb for next year’s display – resist the urge to cut back too early.
When to Plant Spring Flower Bulbs
Timing is everything when planting spring flower bulbs – plant too early and they might sprout prematurely, too late and they won’t develop strong root systems. You’ll want to get your bulbs in the ground 4-6 weeks before your area’s first hard frost, which gives them enough time to establish roots without triggering early growth.
Ideal Planting Times by USDA Zone
Your USDA Zone determines when you’ll plant spring bulbs for gorgeous blooms. Zones 3-4 need early fall planting in late August through September when soil drops below 60°F. Zones 5-6 plant mid-fall (September-October), while Zone 7 waits until late fall. Southern zones 8-9 plant November-December, and zones 10+ require pre-chilling bulbs before winter planting.
Signs The Ground is Ready
Feel the soil with your fingers—it should be cool but not frozen, crumbling easily without clumping into muddy balls. When soil temperature drops to 40-50°F and ground moisture feels right for digging, you’re ready for planting spring bulbs.
Check that frost dates haven’t arrived yet, giving bulbs time to establish roots before winter’s grip tightens.
Avoiding Common Timing Mistakes
Poor timing sabotages even gardeners’ best intentions. Spring bulbs need proper frost dates and climate considerations to establish roots before winter dormancy. Here’s what derails planting schedules:
- Planting too early – Warm soil triggers premature sprouting, leaving tender shoots vulnerable to frost damage.
- Missing zone hardiness windows – Ignoring your specific planting instructions based on local bloom timing creates establishment failures.
- Skipping soil preparation time – Rushing without proper drainage improvements dooms spring-planted bulbs to rot.
Choosing The Right Spring Bulbs
Selecting the right spring bulbs sets the foundation for months of stunning garden color from early March through late May. You’ll want to match bulb varieties to your growing conditions, bloom preferences, and experience level to guarantee planting success.
Best Bulbs for Beginners
Your garden’s success starts with foolproof Easy Care Bulbs that forgive rookie mistakes. Choose Hardy Varieties like daffodils, crocuses, and alliums for Simple Planting adventures. These Beginner Flowers naturalize easily, creating stunning Spring Bulbs displays year after year.
Low Maintenance champions like tulips and hyacinths practically plant themselves, making your first bulb garden feel like a breeze. For ideal growth, consider using Easy Care products to improve your gardening experience.
Understanding Bulb Types
Understanding bulb types transforms your spring planting success. True bulbs like tulips contain layered scales storing nutrients, while corms such as gladiolus feature swollen stems with papery coverings. Tubers including dahlias possess multiple growing eyes, and rhizomes like irises spread horizontally underground.
Tuberous roots store energy differently than other bulb anatomy structures, requiring specific rhizome care and planting techniques for ideal results.
Selecting Bulbs for Color and Bloom Time
The secret to stunning Spring Bulbs lies in strategic Bulb Selection based on Bulb Color Schemes and Bloom Time Variations. Choose early, mid, and late-season varieties for extended Seasonal Bloom Cycles.
Consider Flower Height Considerations—plant tall daffodils behind shorter crocuses. Mix Petal Texture Options like smooth tulips with ruffled hyacinths for visual interest when Planting Spring Flowers.
Sourcing Quality Bulbs
Quality bulbs start with reputable nursery selection and thorough bulb inspection. Check online retailers with strong grower reviews and bulb certification standards. Examine bulbs for firmness, weight, and intact papery skin. Avoid soft, moldy, or lightweight specimens when buying quality bulbs.
Spring bulbs from certified sources guarantee better germination rates for your spring planted bulbs investment.
Preparing Soil for Bulb Planting
Your bulbs won’t thrive in compacted, poorly draining soil that’s cluttered with weeds and debris. Proper soil preparation creates the foundation for healthy root development and stunning spring blooms.
Improving Drainage and Texture
Poor drainage spells doom for your bulbs, turning your garden dreams into a soggy nightmare. Waterlogged soil creates the perfect breeding ground for rot and disease. Here’s how to transform heavy clay or compacted earth into bulb paradise:
- Test drainage by digging a 12-inch hole and filling it with water – it should drain within 24 hours
- Break up compacted layers by loosening soil to 8-inch depth using a garden fork
- Create raised beds 4-6 inches high for naturally better water movement and soil aeration
- Mix in coarse sand (not fine sand) to improve texture enhancement without affecting water retention
Understanding soil health basics is vital for creating a favorable environment for your spring flower bulbs.
Adding Organic Matter and Compost
Mixing compost into your bulb beds creates the perfect foundation for spring blooms. Blend one part finished compost with four parts native soil, working it twelve inches deep. This soil enrichment boosts nutrient cycling while improving drainage—your bulbs get fed without sitting in soggy conditions.
Quality compost provides slow-release organic fertilizers that support healthy root development and stronger flower production. Proper bulb planting depths are essential for ideal growth and bloom.
Clearing Rocks and Weeds
Before you can achieve ideal planting depth for your spring bulbs, remove all rocks larger than a quarter and pull existing weeds by their roots. Break up compacted clumps with a garden fork during your soil preparation phase. This debris management step prevents competition for nutrients and guarantees proper root development.
Clear pathways allow bulbs to establish strong foundations.
Garden cleanup now saves you headaches later when your flowers are trying to push through cluttered soil.
Where to Plant Spring Bulbs
Choosing the right location sets the foundation for your bulbs’ spring success. Your planting site will determine whether you’ll enjoy vibrant blooms or face disappointing failures come springtime.
Sunlight and Shade Requirements
Most spring bulbs thrive in Full Sun with 6+ hours of direct sunlight daily. Tulips and daffodils show best performance in full sun locations, while shade-tolerant options like snowdrops handle Partial Shade beautifully.
Morning Sun benefits early bloomers like crocuses, though Afternoon Shade can reduce flowering by 30-50%.
Consider your garden’s Sunlight Requirements when selecting bulbs for different zones.
Garden Beds Vs. Containers
Container versatility offers distinct advantages over traditional garden beds when planting spring bulbs. Containers provide excellent drainage systems and allow precise soil mix control, while bed preparation requires more extensive work. Container depth should accommodate proper planting depth—typically three times the bulb’s height. Use quality potting soil rather than garden soil for containers. Bulb baskets simplify harvest and storage. Garden layout flexibility makes containers perfect for patios, balconies, or experimental plantings before committing to permanent garden beds. When selecting containers, consider the importance of proper garden container sizes to promote healthy growth.
Planting Around Trees and Shrubs
Planting around existing trees and shrubs requires careful consideration of Tree Root Systems and available Soil Shade conditions. These established plants create unique microclimates perfect for certain Spring Bulbs when you understand proper Bulb Placement strategies.
Here’s your Garden Integration approach:
- Choose shade-tolerant varieties like snowdrops and winter aconites for dense canopy areas
- Maintain proper Planting Depth even when working around surface roots
- Plant bulbs at least 3 feet from trunk bases to avoid root competition
- Select early-blooming varieties that flower before trees fully leaf out
This Shrub Companion planting creates natural woodland gardens.
Avoiding Problem Spots
Avoid areas prone to standing water, where bulb rot thrives in soggy conditions. Skip spots with heavy foot traffic that causes root damage, and steer clear of low-lying zones where soil erosion washes away your investment.
Install wire mesh or chicken wire for effective pest control against hungry critters.
Following proper spring bulb care prevents overwatering disasters.
How to Plant Spring Bulbs Step by Step
Now you’re ready to get your hands dirty and transform your garden with spring’s most reliable performers. The actual planting process is straightforward when you follow proper depth guidelines and spacing techniques that promote healthy root development and stunning seasonal displays.
Digging The Right Depth and Spacing
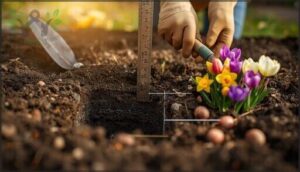
Proper bulb planting depth determines whether you’ll enjoy stunning blooms or disappointing duds. Follow the “twice the height” rule: a 2-inch bulb needs 4-inch depth. Tulips require 6-8 inches, daffodils 6 inches, and crocus 3-4 inches.
Space large bulbs 4-6 inches apart, small ones 2-3 inches. This spacing prevents overcrowding and promotes healthy root growth through adequate soil preparation.
Planting in Clusters and Layers
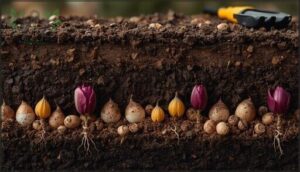
Once you’ve mastered planting depth, cluster planting transforms ordinary displays into stunning visual gardens. Group 5-7 bulbs together for maximum impact, spacing them 2-3 inches apart within each cluster. Try lasagna planting by layering different bulb combinations at varying depths – place larger bulbs like tulips deeper, then add smaller crocus above.
This bulb spacing creates natural-looking drifts with remarkable garden texture and extended bloom periods. To achieve superior results, understanding proper soil conditions is essential for the health and growth of your spring flowers.
Watering After Planting
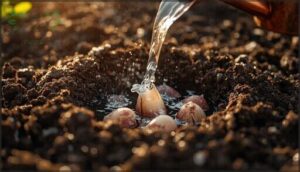
Once you’ve tucked your spring bulbs into their cozy soil beds, give them a thorough drink to settle the earth around them. Proper soil moisture helps establish root hydration without creating waterlogged conditions that spell disaster.
Water deeply but infrequently—think of it as giving your bulbs a satisfying gulp rather than constant sips. Good drainage systems prevent soggy situations that rot bulbs before they even get started.
Mulching for Protection
After planting your bulbs, apply a protective layer of garden mulch to safeguard them through winter’s harsh conditions. This essential step in your bulb planting guide guarantees successful spring blooms.
- Mulch Materials: Use organic options like shredded leaves, straw, or wood chips for ideal soil insulation and gradual decomposition that enriches your garden soil preparation.
- Winter Protection: Apply 2-3 inches of mulch after the ground begins freezing to prevent temperature fluctuations that damage dormant bulbs.
- Moisture Retention: Quality mulching maintains consistent soil moisture levels while preventing waterlogged conditions that cause bulb rot during spring thaw.
- Weed Suppression: Proper mulch application blocks sunlight from reaching weed seeds, reducing competition for nutrients when your bulbs emerge in spring.
Designing Beautiful Spring Bulb Displays
Creating stunning spring bulb displays requires strategic planning that goes beyond simply planting individual bulbs. You’ll achieve the most dramatic visual impact by grouping bulbs in clusters and layering different varieties to extend your blooming season from early March through late May.
Cluster Planting for Impact
Creating stunning spring displays starts with strategic bulb grouping. Plant bulbs in odd-numbered clusters of 5-7 for natural visual impact rather than single specimens scattered across beds. This bulb planting guide technique mimics nature’s growth patterns while maximizing garden texture and color schemes.
| Bulb Combinations | Visual Impact |
|---|---|
| Purple crocuses + yellow daffodils | Bold contrast that stops traffic |
| White tulips + pink hyacinths | Soft romance for intimate spaces |
| Blue grape hyacinths + orange tulips | Energizing pop of complementary hues |
| Mixed alliums + low daffodils | Architectural drama with plant layering |
Smart bulb garden design means thinking beyond individual flowers. Group similar heights together, then add variety through color schemes rather than mixing different bulb types randomly. This spring gardening tip creates cohesive drifts that photograph beautifully and provide maximum wow factor when neighbors peek over the fence. Understanding proper spring flowering bulbs is essential for a successful garden design.
Succession Planting for Longer Blooms
Bloom staggering transforms your bulb garden design from a brief spring show into months of sequential blooms. Plant early, mid, and late-season spring bulbs for prolonged color from February through May. Stagger planting dates with summer varieties like gladiolus every two weeks for continuous flower waves.
This layered planting approach enhances your garden’s impact while storing bulbs becomes unnecessary as different varieties naturally extend the display period.
To achieve ideal results, consider the staggered blooming technique for a vibrant garden.
Combining Heights and Colors
Strategic Color Schemes and Height Variations transform your garden into a stunning tapestry. Position tall tulips behind shorter crocuses, creating Visual Layers that draw the eye upward. Mix warm yellows with cool purples for vibrant Bloom Combinations.
Consider Flower Heights when selecting Planting Bulb Combinations—dwarf varieties work perfectly as foreground plants, while standard Spring Bulbs provide dramatic backdrops with varied Garden Textures.
Layering Bulbs (Lasagna Planting)
Bulb layering transforms your garden into a blooming powerhouse through deep planting techniques. This lasagna gardening method stacks different bulb types at varying depths, creating sequential flowering displays that last months.
Here’s your stacked blooms strategy:
- Plant large bulbs (tulips, daffodils) 6-8 inches deep
- Layer medium bulbs (crocuses) at 4 inches
- Top with small bulbs (grape hyacinths) at 2 inches
- Space bulbs properly to avoid overcrowding
- Water thoroughly after each layer
This spring gardening technique prolongs bloom time while minimizing space.
Caring for Spring Bulbs After Planting
Once you’ve planted your spring bulbs, proper aftercare guarantees they’ll reward you with vibrant blooms year after year. The key lies in understanding their natural cycle and providing just the right amount of attention without overdoing it.
Watering and Fertilizing Needs
After your bulbs settle into their new home, proper watering and fertilizing becomes your secret weapon for stunning spring blooms. You’ll want to give newly planted bulbs a thorough drink, then ease back as winter approaches.
| Care Activity | Timing & Method |
|---|---|
| Initial watering after planting | Deep soak immediately, then weekly until ground freezes |
| Spring fertilizer application | Apply slow-release bulb fertilizer when shoots emerge |
| Soil moisture monitoring | Check weekly; soil should feel like a wrung-out sponge |
| pH levels adjustment | Test soil; maintain 6.0-7.0 for ideal nutrient uptake |
| Summer bulb fertilizing | Feed monthly during growing season with balanced fertilizer |
Your watering schedule should match nature’s rhythm. Regular moisture helps establish strong root systems, but soggy conditions spell disaster for bulb aftercare. When caring for summer bulbs, a consistent nutrient balance prevents weak stems and poor flowering. Monitor soil moisture levels and adjust your flower bulb care routine accordingly.
Allowing Foliage Dieback
After your spring bulbs finish their colorful show, resist the urge to immediately tidy up. Post bloom care requires patience during the natural dieback process.
You’ll need to leave the yellowing foliage intact for six to eight weeks, allowing leaf senescence to complete. This bulb rejuvenation period lets nutrients flow back into the bulb for next year’s display.
Protecting From Pests and Critters
Wildlife can turn your bulb investment into an expensive buffet. Squirrels and chipmunks dig up freshly planted tulips within days.
Install wire mesh barriers 12 inches below ground for maximum protection. Hardware cloth with half-inch openings blocks most rodents effectively. Organic repellents like cayenne pepper sprays deter persistent diggers.
Avoid bone meal fertilizers that attract unwanted visitors to your garden plants.
Digging Up and Storing Bulbs
When fall frost arrives, you’ll need to lift tender bulbs that can’t survive winter outdoors. Dig carefully around each bulb to preserve the root system, then follow these bulb storage tips:
- Cut stems back to 2-3 inches after first frost kills foliage
- Brush off excess soil gently during bulb cleaning process
- Dry bulbs in warm, ventilated area for 7-10 days
- Store in mesh bags or cardboard boxes for proper winter protection
- Check monthly during dormancy requirements period for rot
Top 6 Products for Successful Bulb Planting
Having the right products can make the difference between struggling with bulb planting and enjoying a smooth, successful experience that leads to stunning spring blooms.
These six carefully selected items will help you create the perfect growing conditions and achieve professional results in your garden.
1. Organic Bulb Fertilizer and Plant Food
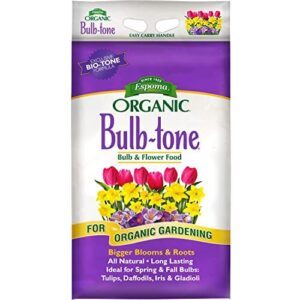
During the vital weeks after planting, your bulbs need proper nutrition to develop strong root systems and prepare for spring’s stunning show. Organic bulb fertilizer with a 3-5-3 formula provides the perfect phosphorus boost for healthy flowering.
Mix it into soil before planting, avoiding direct contact with bulbs to prevent rot. The slow-release formula feeds gradually through winter, supporting natural growth cycles while enriching soil biology for healthier, more vibrant blooms.
Best For: Gardeners looking to naturally nourish tulips, daffodils, and other bulbs while improving soil health and supporting long-term plant vitality.
- Slow-release organic formula provides steady nutrition throughout winter and spring growing seasons
- Enhances soil biology with beneficial microbes while avoiding harmful chemical buildup
- Contains optimal 3-5-3 nutrient ratio with extra phosphorus for stronger root development and more vibrant blooms
- Strong odor may be unpleasant during application and can linger in garden areas
- Limited availability in retail stores often requires online ordering for consistent supply
- Restricted to bulb plants only, requiring separate fertilizers for other garden needs
2. caladium bulbs fancy mix pack
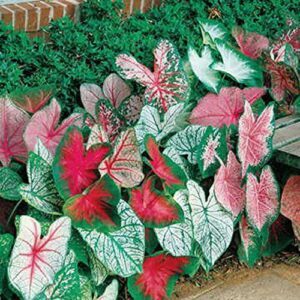
Five distinct caladium varieties create stunning foliage displays in shaded garden spaces. These heart-shaped beauties thrive in partial shade with warm soil above 70°F, producing vibrant pink, red, white, and green patterns. Plant bulbs eye-side up, 1.5-2 inches deep after nighttime temperatures stay above 60°F.
You’ll see colorful leaves emerge within 3-8 weeks, transforming boring corners into a tropical paradise.
To facilitate proper growth, it’s vital to understand proper summer bulb care techniques, which is essential for achieving healthy development, and this is key to successful gardening.
Best For: Gardeners wanting to add vibrant, low-maintenance foliage color to shaded areas without worrying about deer damage.
- Creates stunning tropical displays with heart-shaped leaves in pink, red, white, and green patterns that thrive in shade
- Deer resistant and easy to grow, requiring minimal maintenance once established in proper conditions
- Versatile planting options for both indoor containers and outdoor gardens, with bulbs that can be stored and replanted
- Slow to establish with sprouting taking 3-8 weeks, and some bulbs may take up to 2 months to emerge
- Temperature sensitive requiring warm soil above 70°F and protection from cold, limiting outdoor growing seasons
- Quality inconsistency with some suppliers providing small, dried, or damaged bulbs that affect performance
3. Tropicana Canna Lily Rhizome Plant
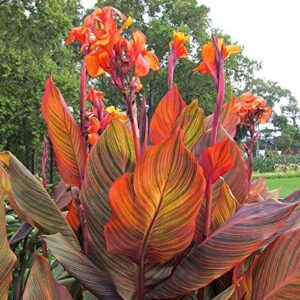
With rhizomes as large as your fist, Tropicana Canna Lily transforms ordinary gardens into tropical paradises. You’ll get stunning orange blooms paired with burgundy foliage striped in red, pink, yellow, and green—it’s like having a sunset in your garden.
Plant these heat-loving rhizomes after soil reaches 60°F in zones 7-11, spacing them 18-24 inches apart. They’ll reach 3-5 feet tall and attract hummingbirds all summer long.
Best For: Gardeners in zones 7-11 who want to create dramatic tropical displays with bold foliage and vibrant orange blooms that attract hummingbirds.
- Stunning dual-purpose plant with both eye-catching orange flowers and colorful striped burgundy foliage
- Heat-tolerant and low-maintenance once established, requiring only regular watering and basic care
- Fast-growing with impressive 3-5 foot height that creates instant tropical impact in gardens
- Limited to warmer climates (zones 7-11) and requires indoor storage in colder regions
- May not bloom in the first year and needs proper spacing and staking for optimal growth
- Some customers report inconsistent rhizome quality and shipping issues from certain retailers
4. lucifer crocosmia lily flower bulbs
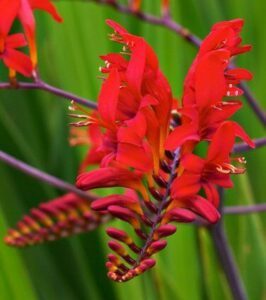
These vibrant red blooms pack serious visual punch in your spring garden. Lucifer crocosmia bulbs thrive in zones 5-9, reaching 3-4 feet tall with sword-shaped foliage that stays attractive all season.
Plant them 3-5 inches deep in well-drained soil after the last frost when temperatures hit 55°F consistently. They’ll reward your patience with 4-6 weeks of stunning red flowers that hummingbirds absolutely adore.
Mass plantings create the most dramatic impact in your landscape.
Best For: Gardeners wanting reliable, low-maintenance perennial flowers that attract hummingbirds and create dramatic color displays in zones 5-9.
- Produces stunning bright red blooms for 4-6 weeks each season while attracting beneficial pollinators like hummingbirds and bees
- Thrives as a hardy perennial that returns year after year with minimal care, expanding into larger clumps over time
- Offers dual-purpose beauty with both colorful flowers for cutting and attractive sword-shaped foliage that remains ornamental all season
- May take 1-2 years to establish full flowering after initial planting, requiring patience before peak performance
- Some customers report issues with bulb quality, including withered bulbs or difficulty getting them to sprout successfully
- Higher price point at $10 per single bulb compared to similar products available from other retailers
5. Dahlias Flower Bulbs For Garden
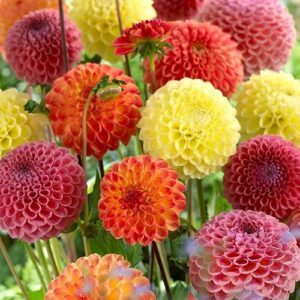
Producing stunning dinner-plate blooms up to 10 inches across, dahlias transform any garden into a showstopper from midsummer through fall.
These tender tubers need warm soil (60°F+) and full sun, planted 4-6 inches deep after frost danger passes. You’ll want to stake tall varieties and pinch growing tips at 12-16 inches for bushier plants.
Regular feeding every two weeks keeps these heavy feeders blooming prolifically. In zones 7 and below, dig up tubers after first frost for winter storage.
Best For: Gardeners who want spectacular large blooms for cutting gardens and landscape focal points, with the patience for proper tuber storage in colder climates.
- Massive dinner-plate blooms up to 10 inches create stunning visual impact from midsummer through fall
- Prolific bloomers that provide excellent cut flowers lasting up to a week in arrangements
- Wide growing range (zones 3-10) with proper winter storage techniques
- Requires annual digging and storage of tubers in zones 7 and below after first frost
- High maintenance needs including regular feeding every two weeks and staking for tall varieties
- Quality control issues with some suppliers delivering damaged or unlabeled tubers
6. Tropical White Pineapple Lily Bulbs
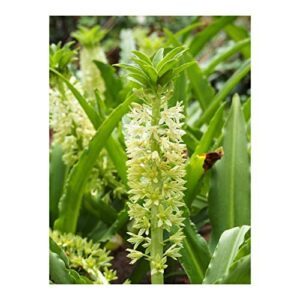
These exotic beauties transform summer gardens into tropical paradises with their distinctive pineapple-shaped flower spikes. You’ll plant these bulbs 4-6 inches deep in well-draining soil after frost danger passes.
They’ll reward you with 18-24 inch tall white star-shaped blooms that last 6-8 weeks, attracting butterflies and bees.
Perfect for cutting gardens, they thrive in full sun with regular watering and make stunning focal points in borders or containers.
Best For: Gardeners who want to add exotic tropical flair to their landscape with unique, long-lasting blooms that attract pollinators and work well in cutting gardens.
- Distinctive pineapple-shaped flower spikes create striking focal points with 6-8 weeks of blooms
- Easy to grow with minimal maintenance requirements in well-draining soil and full sun
- Excellent for cut flower arrangements and attracts beneficial pollinators like butterflies and bees
- Not frost-hardy and requires lifting or protection in zones colder than 8-11
- Needs consistent moisture and well-draining soil to prevent bulb rot
- Susceptible to slug and snail damage on succulent foliage
Frequently Asked Questions (FAQs)
When should I plant bulbs for spring flowers?
You’ll want to plant spring-flowering bulbs in fall, about 4-6 weeks before your first hard frost hits. This timing lets them develop strong roots before winter’s chill triggers their blooming cycle.
Should you soak spring bulbs before planting?
Soaking spring bulbs isn’t necessary and can actually harm them. Most bulbs prefer dry storage and direct planting.
If bulbs feel soft or shriveled, a brief soak helps rehydrate them before planting.
How many spring bulbs should I plant together?
Imagine this: your garden bursting with waves of color instead of scattered lonely blooms.
Plant spring bulbs in clusters of 5-10 for maximum visual impact, spacing them naturally like they’d grow in the wild.
What is the general rule for planting bulbs?
Plant bulbs at a depth that’s twice their height – so you’d plant a 2-inch bulb 4 inches deep. This rule guarantees proper root development and protection from temperature extremes while allowing shoots to emerge successfully in spring.
What happens if you plant flower bulbs in the spring?
A gardener plants tulip bulbs in May, only to watch nothing emerge—the bulbs lack winter’s chill needed for spring blooms.
You’ll disrupt their natural cycle, causing poor flowering or complete failure since most spring bulbs require cold dormancy periods to bloom properly.
When to plant spring bulbs?
Fall’s your window for spring bulb success. You’ll want to plant them 4-6 weeks before your first frost hits, giving roots time to establish before winter’s chill sets in.
How to plant spring flower bulbs?
Digging the perfect holes isn’t rocket science—you’ll bury bulbs at twice their height, pointy end skyward. Choose well-draining soil, add compost, and water thoroughly after planting.
Where should I plant spring bulbs?
Choose sunny spots with well-drained soil for spring bulbs. They’ll thrive in locations getting 5-6 hours of direct sunlight daily. Avoid waterlogged areas that cause rot, and prepare loose soil 8 inches deep for ideal root development.
What are spring flower bulbs?
Like nature’s hidden treasures buried beneath winter’s blanket, spring bulbs are underground storage organs that gather energy and nutrients. You’ll plant these dormant beauties in fall, and they’ll reward you with vibrant blooms after cold temperatures break their slumber.
When should I plant spring flowers?
Plant your spring-flowering bulbs in fall, about 4-6 weeks before the first frost hits your area. This timing lets them develop strong roots before winter’s chill triggers their beautiful spring awakening.
Conclusion
Research shows gardeners who follow proper fall planting schedules enjoy 90% higher spring bloom success rates compared to rushed plantings. Your spring flower bulb planting guide success depends on consistent care through winter months.
Remember that bulbs need 12-16 weeks of cold vernalization to bloom properly. Water sparingly during dormancy, mark planting locations, and resist the urge to dig them up.
Come spring, you’ll be rewarded with vibrant displays that transform your garden into a neighborhood showpiece.
- https://www.longfield-gardens.com/article/bloom-time-chart-for-spring-and-summer-bulbs
- https://wayne.ces.ncsu.edu/2023/11/plant-bulbs-this-fall-for-spring-flowers/
- https://www.brecks.com/blogs/blog-post/when-to-plant-spring-bulbs
- https://www.shawnee.k-state.edu/lawn-garden/Time%20to%20Plant%20Spring-flowering%20Bulbs.pdf
- https://www.adrbulbs.com/Blog-Post/Flower-Bulb-Planting-and-Storage

