This site is supported by our readers. We may earn a commission, at no cost to you, if you purchase through links.

Most herb gardens don’t fail because of bad luck—they fail because of mismatched expectations. A rosemary plant drowning in soggy soil, basil starving for sun on a north-facing windowsill, mint quietly consuming everything within reach.
These aren’t rare disasters; they’re the default outcome when you plant first and learn later. The good news: herbs are forgiving once you understand what they actually want. Get the fundamentals right—location, soil, water, and a bit of timely pruning—and you’ll have more fresh thyme, basil, and cilantro than your kitchen knows what to do with.
Table Of Contents
- Key Takeaways
- Choose The Best Location for Herbs
- Select Herbs Suited to Your Climate
- Plan Your Herb Garden Layout
- Prepare Soil for Healthy Herb Growth
- Planting Herbs: Seeds, Starts, or Cuttings
- Water and Feed Herbs Correctly
- Prune and Harvest for Maximum Yield
- Manage Pests and Common Herb Problems
- Preserve Herbs for Year-Round Use
- Top 3 Must-Have Herb Gardening Tools
- Frequently Asked Questions (FAQs)
- How to have a successful herb garden?
- What is the mother of all herbs plant?
- What are common herb growing mistakes?
- What is the most successful way to grow herbs?
- What are the best tips for growing herbs?
- What is the best layout for an herb garden?
- How to grow a successful herb garden?
- What month should you start an herb garden?
- What is the best advice for growing herbs?
- What herbs should not be planted together?
- Conclusion
Key Takeaways
- Most herb gardens fail not from bad luck but from mismatched conditions — get the light, drainage, and watering right for each specific herb and the rest falls into place.
- Group herbs by water needs rather than convenience, keeping drought-tolerant Mediterranean herbs like rosemary and thyme separate from moisture-lovers like basil and cilantro.
- Pruning and harvesting are active yield tools, not afterthoughts — cut no more than one-third at a time, pinch early and often, and you’ll keep plants bushy and productive all season.
- Preserving your harvest through drying or freezing in oil extends the value of your garden well past the growing season and locks in far more flavor than store-bought dried herbs.
Choose The Best Location for Herbs
Location is everything regarding herbs — get it wrong and even the toughest plants will struggle. Before you put a single seed in the ground, you need to think about sunlight, space, and whether you’re growing indoors or out.
Good soil prep matters just as much as placement — these vegetable garden care tips can help you build the strong foundation your herbs need from day one.
Here’s what to nail down first.
Sunlight Requirements for Herb Gardens
Without the right light, your herb garden doesn’t stand a chance. Most herbs demand 6 to 8 hours of daily sun — that’s non-negotiable for full flavor and bushy growth. Light intensity directly drives essential oil production, so a sunny location isn’t just preferred, it’s powerful. For details on how much sun different herbs need, check out this herb sunlight requirements chart.
Know your herbs’ sunlight requirements:
- Full sun herbs (rosemary, thyme, basil) — need maximum daily sun
- Shade-tolerant herbs (mint, cilantro, chervil) — manage well with 4 hours
- Morning sunlight spots — ideal balance of strong light without afternoon heat stress
Indoor Vs. Outdoor Herb Placement
Once you’ve locked in your light exposure, the next call is where to actually grow.
Indoor herb gardening keeps temperature control easy and humidity levels manageable — but outdoor gardening rewards you with natural air circulation that container gardening indoors just can’t match.
Your space optimization strategy drives this decision. Kitchen windowsill or backyard bed, smart herb garden design means placing herbs where you’ll actually use them.
For more details on benefits of indoor herb gardens, consider how fresh flavor and year-round convenience can boost home cooking.
Maximizing Space With Containers or Beds
Now, space strategy gets fun. A 10-inch container accommodates most culinary herbs with room to breathe. Raised beds built 8 to 12 inches high give roots what they need without hogging your yard.
For gardening with limited space, vertical planters and tiered stands flip the script entirely — growing upward instead of outward. Smart herb garden design and compact planting turn even a narrow balcony into a productive herb beds setup.
Select Herbs Suited to Your Climate

Not every herb belongs in every garden — and forcing the wrong one into your climate is a losing battle before you even start.
The good news is that once you know your conditions, picking the right herbs gets a whole lot easier. Here’s what you need to think through before you plant a single seed.
Full Sun Vs. Partial Shade Herbs
Not all herbs play by the same rules — and that’s your first real herb plant selection decision.
Full sun herbs like rosemary, thyme, and oregano demand 6 to 8 hours of direct light daily, pushing photosynthesis rates high enough to produce dense, flavorful foliage.
Shade-tolerant options like cilantro and parsley thrive with 4 to 6 hours. Match light intensity to herb classification, and harvesting becomes straightforward.
Best Herbs for Hot and Cool Regions
Climate is the silent boss of your herb garden — and it decides what thrives before you plant a single seed. Match your regional herb choices to your growing conditions, and you’ll harvest fresh herbs all season long.
- Hot regions: Rosemary, oregano, thyme, lavender — heat tolerant herbs built for sun and drought
- Tropical climates: Thai basil, lemongrass, culantro — climate resilient herbs that laugh at humidity
- Cool climates: Chives, tarragon, sage — cold climate herbs surviving down to -20°F
- Seasonal herb rotation: Containers let you overwinter tender culinary herbs indoors
Matching Herbs to Your Cooking Needs
Your kitchen should drive every decision in your herb garden. Think about what you actually cook.
Love Italian? Basil, oregano, and thyme cover your flavor profiles and herb pairings beautifully. Into Mexican food? Cilantro is non-negotiable.
Fresh herbs like dill and parsley reward simple meal planning and easy cooking techniques. Match your culinary herbs to your plate first — then build your herb garden around that.
Plan Your Herb Garden Layout
A good layout is what separates a garden that works from one that doesn’t.
Get this part right, and everything else — watering, harvesting, pest control — becomes easier.
Here’s what to focus on when planning your herb garden layout.
Grouping Herbs by Water Needs

Watering everything the same way is one of the fastest ways to kill your herb garden. Smart herb grouping based on water requirements saves time and prevents overwatering disasters.
- Drought tolerance group: Rosemary, thyme, sage, and lavender share a soak-and-dry watering schedule — perfect for one dedicated irrigation zone.
- Moisture lovers: Basil, parsley, cilantro, and dill need evenly moist soil moisture and frequent, lighter watering.
- Mint family: Mint, lemon balm, and marjoram thrive together in consistently damp zones.
- Container strategy: Match thirst levels in each pot to simplify your watering schedule dramatically.
- Water conservation win: Separate irrigation zones prevent wasted water and protect roots from rot.
Arranging for Easy Access and Harvest

Your layout is the difference between a garden you use and one you ignore. Raised beds 3 to 4 feet wide give you clean center access from both sides — no stomping through soil.
Put short herbs like thyme up front for easy pruning and harvesting, taller dill toward the back. Smart pathway design and plant spacing mean every stem stays within reach, making container gardening and garden planning and layout genuinely straightforward.
Companion Planting for Herbs

Some plants are your garden’s best bodyguards. Strategic companion planting turns your herb garden into a self-defending system. Basil beside tomatoes takes care of pest control naturally — deterring aphids and whiteflies without chemicals. Rosemary near cabbage repels beetles through its oils alone.
Strategic companion planting transforms your herb garden into a self-defending system that repels pests naturally
But keep mint containerized; its invasive management is non-negotiable. These herb pairings deliver real growth enhancement while simplifying herb care. That’s not gardening luck — that’s smart design.
Prepare Soil for Healthy Herb Growth

Good soil isn’t just a nice-to-have — it’s the foundation everything else builds on.
Get it wrong and even the toughest herbs will struggle, no matter how much sun or water you throw at them.
Here’s what you need to know to set your soil up right.
Importance of Well-Draining Soil
Soggy soil is the silent killer of any herb garden. Poor drainage suffocates roots, blocks root oxygenation, and opens the door to root rot fast.
Strong soil quality starts with structure — here’s what well-draining soil actually does for your herbs:
- Keeps oxygen flowing to roots so nutrient availability stays consistent
- Fosters healthy soil microbes that break down matter into food
- Prevents waterlogging during heavy watering sessions
- Creates stable conditions for growing herbs long-term
Adding Compost or Organic Matter
Once your drainage is sorted, compost becomes your best ally. Organic matter feeds soil life, improves structure, and keeps nutrients cycling steadily through your herb roots — no synthetic shortcuts needed.
| Organic Matter Type | Best Use |
|---|---|
| Garden compost | All-purpose herb beds |
| Leaf mold | Moisture-sensitive herbs |
| Well-rotted manure | Basil, parsley, leafy herbs |
Mix 1–3 inches into your top layer before planting. That’s organic herb gardening working for you.
Adjusting Soil PH for Different Herbs
pH is where most herb gardens quietly fail. Get your soil testing done before you plant — most herbs want pH levels between 6.0 and 7.5.
- Rosemary and basil lean acidic herbs, preferring 5.0–6.5
- Marjoram tolerates alkaline conditions up to pH 8.0
- Lime application raises acidic soil gradually over months
- Sulfur lowers pH when soil preparation reveals high alkalinity
Know your numbers. Control your garden.
Planting Herbs: Seeds, Starts, or Cuttings

How you start your herbs matters more than most people think. Seeds, transplants, and cuttings each have their place — and picking the wrong method can cost you weeks of growing time.
Here’s what you need to know about each approach.
When to Sow Seeds Vs. Transplants
Fast-growing herbs like basil and dill are ideal candidates for direct sowing — solid seed starting tips that save you money and skip transplant shock entirely.
For starting an herb garden with perennials like rosemary, buy transplants. Frost date management is everything: sow tender annuals only after your last frost, when soil temperature hits 60–70°F. Better germination rates, better timing, better harvest.
Propagating Herbs From Cuttings
Want more control over your herb supply? Herb propagation from cuttings gives you exactly that. Take 4–6 inch stem selections from non-flowering growth, strip the lower leaves, and dip the end in rooting hormones for stronger results.
Tuck them into perlite or sand — both reliable rooting mediums — and keep moisture consistent. Most cuttings root in 4–6 weeks using these cutting techniques.
Avoiding Transplant Shock
Transplant shock can set your herb garden back weeks — but seven to ten days of hardening off prevents most of it.
Start seedlings with one to two hours of outdoor shade, then gradually increase light and time. Handle root balls gently, water management before and after planting, and never let roots dry out.
Firm soil around each plant to eliminate air pockets and support strong soil acclimation from day one.
Water and Feed Herbs Correctly

Watering and feeding herbs isn’t complicated, but getting it wrong is one of the fastest ways to kill an otherwise healthy plant.
Different herbs have very different needs, and treating them all the same is a mistake you don’t want to make. Here’s what you need to know to keep your herbs fed, watered, and thriving.
How Often to Water Different Herbs
Not all herbs drink the same. Your watering schedules need to match each plant’s personality — and ignoring that kills more herb gardens than anything else.
- Mediterranean herbs like rosemary, thyme, and oregano need deep soil watering every 10–14 days outdoors
- Soft leafy herbs — basil, parsley, cilantro — want water 2–3 times weekly
- Container herb moisture drops fast; small pots may need daily watering in summer heat
Smart irrigation decisions are your foundation.
Checking Soil Moisture Levels
Before you water, check first — your Finger Test alone won’t cut it.
The Finger Test Method is your simplest soil moisture test: push your finger 1–2 inches into the soil. Dry and clean? Water now. Cool and damp? Wait.
| Soil Moisture Test | What It Tells You |
|---|---|
| Finger Test | Surface-to-mid moisture |
| Wooden Stick | Deep root zone hydration |
| Moisture Meter | Electrical soil hydration levels |
| Visual Check | Color and texture cues |
| Touch + Leaf Check | Full soil quality picture |
Master these, and your watering schedules stop being guesswork.
Fertilizing for Optimal Growth
Feeding your herbs isn’t about more — it’s about smart nutrient balance.
- Leafy herbs like basil thrive on balanced organic fertilizers (3-1-5 NPK) every two to three weeks.
- Woody herbs like rosemary and thyme need lean soil nutrients — fertilize only monthly.
- Potted herbs exhaust nutrients faster; organic gardening tip: dilute to half-strength.
- Overfertilizing kills flavor — excess nitrogen weakens essential oils.
Prune and Harvest for Maximum Yield

Most gardeners water and feed their herbs well but then leave them to grow wild — and that’s where the yield starts to suffer. Knowing when to cut and how to harvest makes all the difference between a plant that thrives and one that quits on you.
Here’s what you need to know to keep your herbs producing all season long.
When and How to Harvest Herbs
Timing is everything in herb care and harvesting. For the best flavor, your harvest timing should hit early morning — after dew dries but before midday heat burns off those essential oils.
Target younger leaves for leaf selection; they’re more tender and potent. With harvesting techniques, never cut more than one-third of the plant at once. That single rule keeps your herb harvesting steady all season long.
Pruning Techniques for Bushy Growth
Want a fuller, denser herb garden? Pruning is your power move. Master these techniques:
- Use pinching methods — pinch the top 1–2 inches of stems with your fingers.
- Apply leaf node removal by cutting just above the second or third node.
- Choose the right pruning tools — fingertips for soft stems, sharp snips for woody ones.
- Practice smart stem cutting at 45-degree angles on thicker growth.
- Repeat regularly for consistent bushy formation throughout the season.
Preventing Bolting and Early Flowering
Bolting is your herb garden’s surrender flag — the moment your plant stops feeding you and starts thinking about its future. Smart variety selection, such as choosing slow-bolt cilantro, and heat stress management through afternoon shade buy you weeks.
Keep nutrient balance steady with a balanced fertilizer. This table maps your flower suppression strategy:
| Trigger | Fix | Herbs Affected |
|---|---|---|
| High light intensity | Afternoon shade | Cilantro, Dill |
| Heat stress | Morning watering | Parsley, Basil |
| Nutrient imbalance | Balanced 10-10-10 feed | Most leafy herbs |
Pinch buds the moment they appear.
Manage Pests and Common Herb Problems

Even the healthiest herb garden will face pests and disease at some point — that’s just part of growing things.
The good news is you don’t need harsh chemicals to keep your plants clean and productive. Here’s what to watch for and how to handle it.
Identifying Herb Garden Pests
Pest identification is your first line of defense in any garden pest control strategy. Aphids cluster on tender stems and curl leaves — spot them early for effective aphid control.
Spider mites leave stippled foliage and fine webbing. For herb garden troubleshooting, check leaf undersides daily. Slugs leave shiny slime trails overnight.
Knowing what you’re dealing with is the foundation of smart, confident pest management.
Organic Pest Control Solutions
Once you know what you’re up against, you can hit back hard — without chemicals. Neem oil use is your go-to: mix 2 tablespoons with mild soap in a gallon of water and spray every 7–14 days.
Garlic spray suffocates soft-bodied insects on contact. For organic herb gardening and sustainable gardening practices, attracting beneficial insects through flowering herbs and using physical barriers like row covers completes your pest management arsenal.
Recognizing and Treating Disease
Bugs aren’t your only enemy. Fungal infections and bacterial diseases can quietly wreck your herb garden before you notice.
Watch for white powder on leaves — that’s powdery mildew. Yellow-haloed spots? Bacterial leaf disease. Root rotting usually follows overwatering, so check those roots: brown and slimy means trouble.
For herb garden troubleshooting, pull severely infected plants entirely and improve airflow. Neem oil tackles early fungal issues well.
Preserve Herbs for Year-Round Use

All that work growing herbs deserves a payoff that lasts past summer. The good news is you’ve got a few solid options for keeping that harvest useful well into winter.
Here’s what actually works.
Best Methods for Drying Herbs
Drying herbs is one of the smartest moves in herb preservation. Air drying works beautifully for low-moisture herbs like rosemary and thyme — just bundle them loosely and hang upside down in a warm, dry spot.
Need speed? Dehydrator use at 95–115°F dries most herbs in 1–4 hours. The microwave method processes small batches fast, while oven drying at 170°F works as a solid backup.
Freezing Herbs in Oil or Water
Frozen harvest starts with the right call: oil or water?
- Oil medium locks in volatile flavor compounds better than water freezing alone.
- Fill each cube two-thirds full, then top with oil or water.
- Freeze overnight, then transfer for proper freezer storage in labeled bags.
- Oil cubes last 6–12 months; water cubes fade faster.
- Herb preservation through freezing beats dried herbs for off-season cooking every time.
The decision between oil and water is crucial for the longevity and flavor of the frozen harvest.
Storing Fresh Herbs for Maximum Flavor
Fresh herbs don’t forgive neglect. Your best herb storage tips start with method: stand tender herbs like parsley and cilantro upright in a jar of water, loosely tented with a plastic bag.
For rosemary or thyme, a barely damp paper towel and a zip bag work better. Smart refrigeration methods and consistent herb care and harvesting extend shelf life up to three weeks, locking in full flavor preservation.
Top 3 Must-Have Herb Gardening Tools
The right tools can mean the difference between a thriving herb garden and a frustrating one.
You don’t need a shed full of gear — just a few key items that actually earn their place. Here are the top three tools worth having on hand.
1. Sereniseed Organic Herb Seeds

Everything starts with the seed. Sereniseed’s 10-pack gives you USDA Certified Organic, 100% non-GMO culinary herbs — basil, cilantro, thyme, parsley, and more — packed fresh for this season and next.
Oregon Tilth certification means no synthetic pesticides, no shortcuts. Germination is guaranteed, and a seed-starting video guide comes with it. Whether you’re growing in beds or containers, this is a solid foundation.
| Best For | Home cooks and beginner gardeners who want a clean, organic herb garden without a lot of guesswork. |
|---|---|
| Brand | Sereniseed |
| Material | Organic/Non-GMO |
| Weight | 1.13 ounces |
| Indoor Use | Yes |
| Herb Compatible | Yes |
| Beginner Friendly | Yes, includes guide |
| Additional Features |
|
- USDA Certified Organic through Oregon Tilth — no synthetic pesticides, no corners cut
- Germination is guaranteed, and a seed-starting video guide makes it beginner-friendly
- Open-pollinated varieties mean you can save seeds from your best plants year after year
- A few users reported uneven germination on certain herbs, so results can vary
- Some herbs in the mix have specific care needs that beginners might not expect
- Only 10 varieties, which may feel limiting if you’re looking to grow a wider selection
2. Viparspectra Led Grow Light

No window? No problem. The VIPARSPECTRA P1000 puts 100W of full-spectrum light — 660nm red, 730nm far-red, and balanced white — exactly where your herbs need it.
It covers a 2×2 ft flowering space and runs as efficiently as a 250W HPS. Dial it back for seedlings, chain multiple units together, and you’re running a serious indoor setup without burning out your wallet.
| Best For | Indoor gardeners and hobbyist growers who want an efficient, low-cost light for small spaces like a 2×2 tent. |
|---|---|
| Brand | VIPARSPECTRA |
| Material | Aluminum |
| Weight | 4.2 pounds |
| Indoor Use | Yes |
| Herb Compatible | Yes |
| Beginner Friendly | Yes, easy dimmer |
| Additional Features |
|
- Full spectrum coverage (red, far-red, and white) supports every stage from seedling to flower
- Only draws 100W but performs like a 250W HPS — your electricity bill will thank you
- Fanless design runs silent, and the dimmer plus daisy chain feature make it easy to scale up
- Real-world flowering coverage can fall short of the advertised 2×2 ft — closer to 1.5×1.5 ft for some growers
- The driver casing has shown cosmetic wear over time according to some users
- The waterproof diode coating can look uneven straight out of the box
3. Herb Drying Net Rack
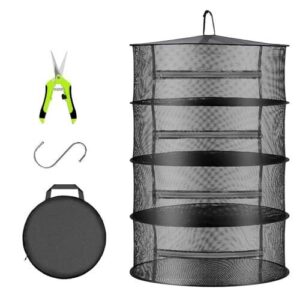
All that effort growing herbs deserves a proper finish. The HYDGOOHO Herb Drying Net Rack gives your harvest a clean exit — mesh tiers with zippered compartments, an S-hook for hanging, and enough airflow to dry herbs evenly without trapping moisture.
It protects against bugs too. Hang it in a warm, shaded spot, load it loosely, and your herbs stay flavorful long after the season ends.
| Best For | Home gardeners and herb growers who want a simple, clean way to dry and preserve their harvest without bugs or moisture getting in the way. |
|---|---|
| Brand | HYDGOOHO |
| Material | Mesh |
| Weight | 1.37 pounds |
| Indoor Use | Yes |
| Herb Compatible | Yes |
| Beginner Friendly | Yes, easy load |
| Additional Features |
|
- Mesh design lets air flow freely around your herbs, so they dry evenly and keep their flavor
- Zippered compartments keep bugs out and make loading and unloading pretty hassle-free
- Folds down into a pouch and hangs with an S-hook, so it’s easy to store or move around
- Folding it back into the pouch can be a bit of a wrestling match, especially at first
- Some people notice a strong smell from the material right out of the package
- It can be tricky to keep balanced and steady on a windy day
Frequently Asked Questions (FAQs)
How to have a successful herb garden?
Studies show home herb gardens can cut fresh herb costs by up to 80%.
Success comes down to sun, soil, and smart harvesting — get those three right, and your garden basically runs itself.
What is the mother of all herbs plant?
Meet Plectranthus amboinicus — the mother of all herbs. It’s a bold, semi-succulent perennial with thick, velvety leaves that smell like oregano. One plant seasons soups, treats coughs, and repels insects.
What are common herb growing mistakes?
The biggest mistakes? Overwatering, poor light, and wrong soil. Mediterranean herbs like rosemary hate soggy roots.
Most herbs need 6–8 hours of sun daily. Neglecting pruning makes plants leggy and flavorless fast.
What is the most successful way to grow herbs?
Growing herbs well isn’t magic — it’s just smart matching. Give them the right light, drainage, and water rhythm, and they practically take care of themselves.
What are the best tips for growing herbs?
Start with the right spot — at least 6 hours of sun, well-draining soil, and herbs that match your climate. Water smart, prune often, and harvest in the morning for peak flavor.
What is the best layout for an herb garden?
Think of it as “zoning with intention.” Put sun lovers like rosemary and thyme where light hits hardest. Group herbs by water needs. Keep kitchen staples close to your door.
How to grow a successful herb garden?
Pick a sunny spot with 6–8 hours of light, use well-draining soil, water deeply but infrequently, prune often, and match each herb to your climate. That’s your blueprint for success.
What month should you start an herb garden?
Wondering when to dig in? For most gardeners, late April through May is your sweet spot — once nights stay reliably above 45°F.
In warmer zones 8 and 9, you can push that to late February or March.
What is the best advice for growing herbs?
Give your herbs six-plus hours of sun, well-draining soil, and deep watering.
Harvest no more than one-third at a time, and prune regularly to keep plants bushy and productive.
What herbs should not be planted together?
Mint and fennel are garden bullies — keep them away from basil, cilantro, and parsley. Lavender and rosemary also clash with moisture-loving herbs like cilantro, since their water needs completely conflict.
Conclusion
Picture a small kitchen windowsill—three containers, decent light, soil that drains well. Within six weeks, that simple setup produces more basil than one household can use. No special talent required.
These tips for a successful herb garden work because they align with what herbs actually need, not what’s convenient. Respect the light, the drainage, and the harvest timing. Do that consistently, and your garden won’t just survive—it’ll outgrow your recipes.
- https://homesteadandchill.com/grow-herbs-101-kitchen-herb-garden/
- https://ucanr.edu/site/uc-master-gardeners-santa-clara-county/herb-gardening-basics
- https://www.ruralsprout.com/space-saving-herb-garden/
- https://www.canr.msu.edu/resources/container_gardening_with_vegetables_herbs
- https://www.epicgardening.com/indoor-herb-mistakes/