This site is supported by our readers. We may earn a commission, at no cost to you, if you purchase through links.

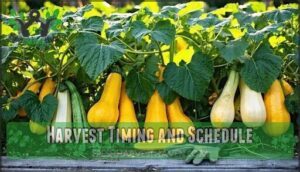
The skin transforms from green to deep golden yellow, while the rind hardens enough to resist your fingernail—nature’s simple scratch test.
Look for a matte finish replacing the glossy sheen, and check that the stem has turned brown and cork-like. The ground spot where the squash rests should shift from white to cream or orange.
Don’t rely solely on calendar dates since weather affects timing. Harvest before the first frost hits, as cold temperatures damage the flesh and reduce storage life.
Perfect timing means better flavor, firmer texture, and months of winter storage ahead—but there’s an art to recognizing these subtle changes that separates novice gardeners from seasoned pros.
Table Of Contents
- Key Takeaways
- Spaghetti Squash Overview
- When to Harvest Spaghetti Squash
- Signs of Maturity and Ripeness
- Harvesting Techniques and Tools
- Harvest Timing and Schedule
- Curing and Storage Methods
- Ripening Spaghetti Squash Off Vine
- Storing Spaghetti Squash for Winter
- Common Mistakes to Avoid
- Frequently Asked Questions (FAQs)
- How do you harvest Spaghetti squash?
- When should you harvest Spaghetti squash?
- How do you know if Spaghetti squash is ready to harvest?
- Can you leave squash on the vine too long?
- Can spaghetti squash ripen after picking?
- What pests commonly attack spaghetti squash?
- How do you prepare soil for planting?
- Can you grow spaghetti squash in containers?
- What companion plants work best together?
- Can you eat unripe spaghetti squash safely?
- Conclusion
Key Takeaways
- Watch for color changes: You’ll know your spaghetti squash is ready when the skin transforms from green to deep golden yellow with a matte finish, replacing the glossy sheen of immature fruit.
- Use the fingernail test: Press your fingernail firmly against the rind – if it resists puncture and feels hard, your squash has reached perfect ripeness and is ready for harvest.
- Check the stem condition: Look for a brown, dry, cork-like stem that’s turned from green and flexible to hard and woody, indicating the plant has completed its growth cycle.
- Harvest before frost hits: Don’t rely on calendar dates alone – monitor weather forecasts and harvest all mature squash before temperatures drop below 32°F to prevent flesh damage and extend storage life.
Spaghetti Squash Overview
You’ll enjoy growing spaghetti squash, a unique winter variety that transforms into pasta-like strands when cooked and typically weighs 3-8 pounds at maturity.
This warm-season crop requires 90-110 days from planting to harvest, thriving in temperatures above 70°F with full sun exposure and well-draining, nutrient-rich soil, making it a great choice for gardens with well-draining conditions.
Growth Cycle and Requirements
Understanding your spaghetti squash’s growth cycle helps guarantee perfect harvesting spaghetti squash timing.
From planting timeline to maturity takes 90-110 days, requiring consistent sunlight needs of 6-8 hours daily.
Temperature impact becomes vital—growth halts below 60°F.
Proper soil nutrients and watering practices support healthy development through flowering and fruit set phases.
Most varieties reach spaghetti squash ripeness around 100 days, making timing essential for achieving ripe spaghetti squash with ideal flavor and texture for harvest.
Ideal Temperature and Soil Conditions
Your spaghetti squash thrives in a warm location with temperatures consistently above 70°F.
The soil quality matters tremendously—aim for well-draining, nutrient-rich ground with a soil pH between 6.0-6.8.
Poor drainage spells disaster, so consider soil amendments like compost if your garden holds water.
These heavy feeders need plenty of nutrients throughout their growing season, and think of temperature range as your squash’s comfort zone; anything below 60°F stops growth cold, which is why maintaining the right temperature is crucial for the growing season.
Sunlight and Watering Needs
Your spaghetti squash thrives with consistent daily sun hours and proper irrigation schedule.
These sun-loving plants need full sunlight exposure to develop ideal ripeness indicators for harvest timing.
Essential sunlight and watering requirements include:
- Daily Sun Hours: Provide 6-8 hours of direct sunlight for maximum light intensity and healthy fruit development
- Water Depth: Maintain consistent soil moisture with deep, infrequent watering rather than shallow, frequent applications
- Irrigation Schedule: Water 1-2 inches weekly, adjusting based on rainfall and soil moisture levels to prevent stress
When to Harvest Spaghetti Squash
Timing your spaghetti squash harvest correctly transforms a mediocre meal into a culinary masterpiece.
You’ll want to wait 90-110 days from planting, though varietal differences mean some mature faster.
Weather impacts ripening substantially—consistent temperatures above 70°F speed development, while cool spells delay it.
Your ideal harvest window typically opens in late September through early fall.
Extended harvest periods allow you to pick multiple fruits as they ripen individually.
Don’t rush the process; patience rewards you with perfect spaghetti squash color and texture for exceptional post-harvest handling.
Signs of Maturity and Ripeness
Knowing when your spaghetti squash is perfectly ripe can mean the difference between tender, flavorful strands and a disappointing, mushy mess.
You’ll need to look for several key visual and tactile cues that signal your squash has reached peak maturity and is ready for harvest.
You’ll be checking for signs that indicate your squash has reached its peak maturity.
Color and Texture Changes
Your squash’s appearance tells the whole ripeness story. Watch for these visual cues that signal perfect harvest timing.
Watch your squash transform from green to golden – nature’s own harvest countdown begins
The skin transforms dramatically as sugars and carotenoids develop, creating nature’s own ripeness indicator system.
- Skin Color Evolution – Deep golden yellow replaces any green patches, with uniform coloration indicating complete maturity and peak beta-carotene content.
- Rind Hardness Development – The surface becomes tough and resistant to scratching, protecting against environmental stressors during storage.
- Matte Finish Appearance – Glossy skin dulls to a consistent matte appearance, while the ground spot shifts from pale to cream or orange tones.
Fingernail Test and Stem Condition
The fingernail test provides a reliable gauge for spaghetti squash ripeness.
Press your nail firmly against the rind – mature squash resists puncture, while immature ones dent easily.
This puncture resistance signals proper rind hardness.
Check the stem too: it should feel dry, tough, and cork-like, shifting from green flexibility to brown and dry hardness.
A hard stem combined with fingernail test success confirms ideal harvest timing.
Vines and Stems Turning Brown
Beyond the fingernail test, watch for nature’s final signal: vine drying and stem hardening. These visual cues indicate nutrient depletion and water stress as your plant prepares for dormancy.
When vines turn brown, your spaghetti squash has reached peak maturity:
- Brown vines signal the plant’s energy has shifted from growth to seed production
- Hard stems replace supple stems, becoming woody and resistant to bending
- Drying vines show the plant is naturally shutting down photosynthesis
- Disease impact becomes less concerning as the plant completes its lifecycle.
Use clean pruners to harvest when these brown indicators appear. Similarly, you should look for flopping onion tops as a sign of maturity for onions.
Harvesting Techniques and Tools
Once your spaghetti squash shows all the ripeness signs, you’ll need the right tools and technique to harvest it safely.
Sharp, clean pruning shears or garden scissors are essential for making clean cuts that prevent disease and promote proper healing of the stem, using sharp tools to ensure a safe harvest.
Using Sharp Pruners or Shears
Once you’ve confirmed your spaghetti squash shows proper ripeness signs, grab your pruning shears or sharp knife for clean harvesting.
Blade sharpness matters—dull tools crush stems and invite rot. Before cutting, sterilize your pruner with rubbing alcohol to prevent disease spread.
Consider using specialized cutting tools for a cleaner cut. Position shears at a 45-degree stem angle, leaving 2-3 inches attached.
Clean pruner maintenance guarantees smooth cuts every time when harvesting vegetables like ripe spaghetti squash, ensuring a proper harvesting process with sharp tools and clean cuts.
Handling and Supporting The Squash
When you harvest a mature spaghetti squash, proper lifting prevents damage to its hard rind.
Support the body from underneath rather than grabbing the stem, which can break easily. Gentle handling is key – avoid bruising by cradling the squash like a football.
For heavy ripe spaghetti squash weighing up to eight pounds, use both hands. Consider net support for extra security during transport from vine to storage, ensuring the squash is handled with gentle handling.
Avoiding Damage and Rot
Protect your spaghetti squash from spoilage by using clean tools and practicing gentle handling during harvest.
Cut stems in dry weather to prevent fungal infections, and support the fruit’s body rather than grabbing the stem.
Avoid creating bruises or cracks that invite rotting—damaged rinds turn mushy quickly.
Sterilized pruning shears make clean cuts that heal properly, while rough handling guarantees disappointing storage results, emphasizing the importance of proper handling.
Harvest Timing and Schedule
You’ll want to reference your seed packet’s estimated harvest date as a starting point, but don’t rely on it exclusively since weather and growing conditions affect timing.
The real key is checking multiple ripeness indicators together—color, stem condition, and the fingernail test—rather than depending on calendar dates alone, and this approach ensures a more accurate harvest by considering growing conditions.
Estimated Ripen-by Date on Packet
Your seed packet holds the key to timing your harvest correctly.
Most spaghetti squash packets list 80-100 days from planting, with typical maturation falling between 90-100 days after germination.
However, don’t treat these numbers as gospel—they’re educated guesses.
Weather changes, soil fertility, and regional variations can shift ripening timelines by 5-10 days.
Smart gardeners mark planting dates and compare them with packet estimates, then adjust expectations based on local conditions and variety ripening differences.
They understand that these estimates are subject to variation, making it essential to monitor the ripening timelines and adjust accordingly to achieve the best harvest.
Checking for Ripeness and Readiness
Several key indicators help you determine when your spaghetti squash has reached perfect ripeness.
Watch for these telltale signs to confirm you’re picking at peak quality:
- Skin Appearance – The rind transforms from shiny to a matte, dull finish with uniform golden color
- Fingernail Test – Press your nail against the surface; ripe squash resists indentation completely
- Stem Condition – The stem turns brown and dry, indicating maturity
- Ground Spot – The bottom changes from pale yellow to cream or orange
- Sound Test – Tapping produces a hollow sound, like knocking on a door
Harvesting Before First Frost
Timing matters when harvesting winter squash – frost can turn your perfect spaghetti squash into mush overnight.
You’ll need to monitor weather forecasts closely and harvest before temperatures drop below 32°F. Even light frost damages the flesh and reduces storage life substantially.
| Frost Scenario | Action Required |
|---|---|
| Frost Warning Issued | Harvest all mature squash immediately, regardless of size |
| Light Frost Occurred | Check for soft spots; use damaged squash first for cooking |
| Hard Freeze Expected | Complete harvest within 24 hours; prioritize largest fruits |
Cold protection methods like row covers can extend harvest timing by several days, but they’re temporary solutions.
If frost catches you off-guard, salvage options include using slightly damaged squash immediately rather than storing them. Proper harvest readiness assessment becomes vital when racing against dropping temperatures.
Curing and Storage Methods
Once you’ve harvested your spaghetti squash, proper curing transforms it from garden fresh to storage-ready gold.
This critical step, followed by correct storage conditions, can extend your squash’s life from weeks to months.
Warm and Dry Curing Location
After harvesting, you’ll need proper curing conditions to maximize your squash storage life.
Think of curing as giving your spaghetti squash a spa treatment before winter storage.
Here’s your curing checklist:
- Temperature Control: Maintain 80-85°F in your well-ventilated location for the best duration of 1-2 weeks
- Airflow Importance: Guarantee excellent ventilation to reduce humidity levels and prevent moisture buildup
- Preventing Rot: Choose a dry location away from damp basements or enclosed spaces
This curing process toughens the skin and seals small cuts, creating the perfect foundation for long-term storage in a cool, dry location later.
Consistent results require curing temperature control.
Ideal Storage Temperature and Humidity
Your squash’s storage success hinges on maintaining the sweet spot: 50-55°F with 50-70% humidity levels.
Store in a cool, dry location like your pantry or basement with proper air circulation.
This temperature range prevents cold injury while slowing ripening, extending storage duration up to three months.
Avoid refrigerators—they’re too cold.
Good ventilation prevents moisture buildup, your key to spoilage prevention.
Proper Handling and Support
Handle your harvested squash like precious cargo to prevent rot and extend storage life.
Proper support prevents bruising, while gentle transport maintains quality throughout curing and storage phases.
- Support from bottom – Never lift by stem; cradle the body to avoid stem breakage and entry points for decay
- Use soft padding – Place towels or foam between squash during transport to prevent surface damage and bruising
- Consider netting options – Mesh bags or hanging nets distribute weight evenly and improve air circulation
- Clean gently – Remove soil with dry cloth before storage, avoiding water that promotes rot prevention issues
- Check stem attachment – Confirm 2-3 inches of stem remains firmly attached as your first line of defense against pathogens
Using squash support netting can further aid in proper handling.
Ripening Spaghetti Squash Off Vine
Sometimes you’ll need to ripen spaghetti squash after it’s been removed from the vine, especially if frost threatens before full maturity.
You can successfully ripen slightly immature squash indoors by placing it in a warm, dry location with good air circulation and monitoring it daily for color changes and firmness, which will help achieve full maturity.
Conditions for Ripening
Success lies in creating the perfect environment for your harvested spaghetti squash to ripen.
You’ll need temperatures between 75-80°F with good air circulation to help the skin develop its characteristic color.
Place your squash on absorbent padding in indirect sunlight, ensuring proper spacing for airflow.
| Factor | Optimal Condition |
|---|---|
| Temperature impact | 75-80°F for color development |
| Air circulation | Well-ventilated area prevents mold |
| Sunlight exposure | Indirect light accelerates skin hardening |
| Storage setup | Absorbent padding prevents bruising |
This controlled environment transforms your squash’s flesh into those coveted noodlelike strings while the rind hardens for extended storage.
Monitoring and Maintaining Quality
Once you’ve set up proper conditions for off-vine ripening, consistent monitoring becomes your best friend.
Check your squash every few days for color changes in the skin and firmness, and look for pest control signs like small holes or damage.
Look for disease prevention needs such as dark spots or soft areas, and watch for environmental factors like proper ventilation to help maintain quality during storage.
Keep an eye on spaghetti squash nutrition by ensuring the skin stays firm as it continues to ripen naturally, and remember that proper ventilation is crucial for maintaining quality.
Avoiding Overripening and Spoilage
Once overripeness sets in, you’ll notice telltale rotting indicators like dark, mushy texture and soft spots that compromise your harvest.
Watch for mold prevention by checking stored squash weekly for pest damage or deteriorating skin.
Overripe spaghetti squash develops a soft texture that ruins the signature noodle-like strands you’re after.
Follow these storage tips: consume promptly when you spot changes, and remember these squash harvesting tips for timely consumption before quality declines, which is crucial for timely consumption and to prevent quality declines.
Storing Spaghetti Squash for Winter
Once you’ve harvested your spaghetti squash, proper winter storage extends its life for months of delicious meals.
Follow these storage guidelines to keep your squash fresh and prevent spoilage throughout the cold season, with proper winter storage being key to maintaining its freshness.
Cool and Dry Storage Location
Your winter squash deserves a proper home after harvest.
Store spaghetti squash at 55-60°F in a dark location with good ventilation – think basement or garage.
Humidity control prevents moisture buildup that causes rot, while temperature monitoring guarantees favorable conditions.
Use proper containers like wooden crates or mesh bags for airflow.
Well-ventilated locations extend shelf life substantially, creating ideal conditions for months of fresh squash enjoyment, and these storage tips are essential for proper containers.
Checking for Spoilage and Damage
Regular monitoring prevents your winter storage from turning into a science experiment gone wrong. Identifying Spoilage early saves your entire harvest from contamination.
Check stored squash weekly for these warning signs:
- Soft Spots and mushy spots indication signal internal breakdown
- Mold Growth appears as fuzzy patches or white powdery substance
- Bruises indication show as dark, water-soaked areas spreading outward
- Black flower end indication reveals bacterial infection at blossom end
- Indentations indication from pressure damage create rot entry points
Remove damaged squash immediately to protect healthy ones from cross-contamination.
Using Proper Handling and Support
When to avoid bruising during winter storage, lift squash carefully from underneath rather than grabbing stems.
Proper lifting distributes weight evenly, preventing damage.
Support the body during gentle transport to prevent cracks.
This rot prevention technique maintains squash vine health throughout storage.
To guarantee freshness, consider following vegetable harvest storage tips for ideal conditions.
| Handling Method | Technique | Benefit |
|---|---|---|
| Proper Lifting | Support from bottom | Prevents stem damage |
| Gentle Transport | Two-hand carry | Reduces bruising risk |
| Stem Support | Never lift by stem | Maintains seal integrity |
| Storage Positioning | Stem-side up | Prevents moisture entry |
| Regular Inspection | Weekly checks | Early damage detection |
Common Mistakes to Avoid
Even experienced gardeners can make mistakes that waste months of careful growing.
Timing errors, rough handling, and poor storage choices can turn your perfectly grown spaghetti squash into disappointing mush or inedible fruit, which can be considered a disappointing outcome.
Harvesting Too Early or Late
Timing your harvest wrong sabotages everything you’ve worked for.
Harvest too early and you’ll get bland, watery flesh with poor texture and compromised seed viability.
The rind checks will fail the fingernail test, indicating insufficient flavor development.
Late harvesting creates storage implications like accelerated rot and mushy spots.
Your harvest readiness signs become unreliable when you ignore maturity indicators, leading to yield optimization failures and disappointing results, which can ultimately affect the overall storage implications.
Improper Handling and Storage
Careless handling leads to bruising prevention failures and accelerated decomposition.
You’ll damage your squash’s skin when dropping or rough handling, creating entry points for mold and bacteria.
Poor storage methods with inadequate temperature control and high humidity levels drastically reduce shelf life.
Understanding ethylene production’s impact can also help prevent spoilage.
Store squash in cool, dry conditions with proper ventilation to prevent moisture accumulation and rotting causes that destroy your harvest.
Failing to Monitor and Maintain Quality
Once you’ve mastered proper handling techniques, monitoring your stored spaghetti squash becomes equally important for long-term success.
You can’t just tuck them away and forget about them—they need regular check-ups to catch problems early.
Here’s your quality maintenance checklist:
- Weekly inspections for Rotting Prevention and early Mold Growth detection
- Temperature monitoring to maintain ideal storage conditions and prevent Overripening Signs
- Gentle handling during checks to avoid Bruising Damage that invites Pest Infestation
- Immediate removal of compromised squash to protect your healthy harvest.
Think of it like babysitting your harvest—a little attention goes a long way in preserving your hard work.
Frequently Asked Questions (FAQs)
How do you harvest Spaghetti squash?
Use sharp pruning shears to cut the stem, leaving 2-3 inches attached. Support the squash’s body while cutting—never pull by the stem. Harvest during dry weather before frost hits.
When should you harvest Spaghetti squash?
Harvest when golden-yellow skin turns matte, not shiny. Vines brown and dry out completely. Rind resists fingernail indentation, feeling hard and tough. Cut before first frost hits.
How do you know if Spaghetti squash is ready to harvest?
You’ll know your spaghetti squash is ready when the skin turns from shiny to matte with deep golden-yellow color.
The rind resists fingernail indentation, and the stem browns and dries out completely.
Can you leave squash on the vine too long?
Yes, you can definitely leave squash on the vine too long. Overripe spaghetti squash develops soft, mushy spots and potential mold, compromising both texture and flavor for your kitchen creations.
Can spaghetti squash ripen after picking?
Spaghetti squash won’t ripen much after you’ve picked it.
Unlike tomatoes, it needs the vine’s energy to develop properly.
You’ll get better flavor and texture if you let it fully mature on the plant first.
What pests commonly attack spaghetti squash?
Over 80% of squash plants suffer pest attacks during growing season, making early identification vital.
Common pests include cucumber beetles, squash vine borers, pickleworms, aphids, squash bugs, and whiteflies – with squash bugs being one of the most troublesome, causing wilting and plant death.
Effective pest management strategies can help minimize the damage caused by these troublesome pests.
How do you prepare soil for planting?
Prepare nutrient-rich, well-draining soil by mixing compost or aged manure into your garden bed.
Test pH levels (0-8 works best) and guarantee good drainage.
Till the soil 8-12 inches deep for ideal root development and healthy plant growth.
Can you grow spaghetti squash in containers?
Container gardening works perfectly for spaghetti squash.
You’ll need a large pot, at least 20 gallons, with excellent drainage.
Choose compact varieties and provide sturdy support since vines can sprawl extensively, reaching impressive lengths throughout the growing season.
What companion plants work best together?
Like a garden orchestra, strategic companion planting creates harmony between plants.
Plant marigolds, nasturtiums, and sunflowers near spaghetti squash—they’ll attract beneficial pollinators while deterring harmful pests, boosting your harvest naturally, with companion planting.
Can you eat unripe spaghetti squash safely?
You can eat unripe spaghetti squash, but it won’t have the characteristic stringy texture you’re expecting.
The flesh will be firmer, less sweet, and more like a regular summer squash rather than pasta-like strands.
Conclusion
Surprisingly, knowing when to harvest spaghetti squash isn’t rocket science—yet many gardeners still get it wrong.
You’ll master the timing by watching for golden-yellow skin that resists your fingernail, brown stems, and cream-colored ground spots.
These visual cues, combined with the 90-110 day growth window, guarantee perfect ripeness.
Trust these natural indicators over calendar dates, harvest before frost hits, and you’ll enjoy months of properly stored squash with superior flavor and texture.


