This site is supported by our readers. We may earn a commission, at no cost to you, if you purchase through links.
 You can successfully compost during winter by adjusting your methods for slower decomposition and cold conditions.
Winter composting methods include insulating outdoor piles with tarps or straw, maintaining proper carbon-to-nitrogen ratios, and keeping materials slightly moist but not waterlogged.
Indoor alternatives like vermicomposting with worms or bokashi fermentation work when outdoor temperatures drop too low.
Build larger piles before winter hits—they’ll retain heat better and stay active longer.
Monitor moisture levels since snow and rain can oversaturate your pile, while dry conditions slow breakdown.
The secret lies in working with winter’s pace rather than against it, setting yourself up for rich compost come spring, by understanding the importance of proper carbon-to-nitrogen ratios and using methods like vermicomposting or bokashi fermentation to achieve the best results.
Table Of Contents
- Key Takeaways
- Winter Composting Basics
- Top 6 Winter Composting Essentials
- Preparing Compost Piles
- Maintaining Winter Compost
- Alternative Composting Methods
- Frequently Asked Questions (FAQs)
- What are the best winter composting methods?
- Can You compost in the winter?
- How do I prepare my outdoor compost pile for winter?
- Should you winterize your outdoor compost pile?
- How to compost kitchen waste in winter?
- How do I Hold my compost together in the winter?
- What are the disadvantages of cold composting?
- What is the laziest way to compost?
- How do you compost in the winter?
- What is the best composter for winter?
- Conclusion
Key Takeaways
- Build larger piles for winter success – You’ll need compost piles at least 5-6 feet wide and tall, since they retain heat better and maintain active decomposition even when outdoor temperatures drop below freezing.
- Master the carbon-nitrogen balance – You should maintain a 30:1 ratio of browns to greens and use about two scoops of brown materials (leaves, cardboard) for every shovel of kitchen scraps to generate enough heat for winter composting.
- Focus on proper insulation and moisture control – You’ll want to wrap your bins with straw bales or tarps, position them in south-facing locations, and keep materials at a "wrung-out sponge" dampness level to prevent freezing while supporting microbial activity.
- Switch to indoor methods when needed – You can use vermicomposting with red worms, bokashi fermentation, or countertop composters to maintain year-round composting when outdoor piles become too cold or inaccessible.
Winter Composting Basics

You’ll discover that winter composting works differently than summer methods because cold temperatures slow down microbial activity and change how materials break down.
The key lies in understanding how to maintain proper conditions for decomposition organisms while protecting your compost system from freezing temperatures that can halt the process entirely, which is crucial for successful decomposition.
Microorganisms and Decomposition
While winter slows microbial activity and decomposition rates by up to 90%, resilient organisms like fungi and psychrophilic bacteria keep your pile alive at sub-freezing temperatures.
Winter’s hardy decomposers work tirelessly even when your pile seems frozen solid.
These hardy compost organisms prevent anaerobic conditions that kill beneficial microbes.
Fall composting provides abundant organic material for winter use.
Here’s how to support winter composting methods:
- Turn your pile monthly to boost oxygen flow and reactivate dormant microbes
- Layer greens thinly to maintain steady decomposition without overwhelming cold-adapted organisms
- Monitor moisture levels—soggy piles suffocate aerobic bacteria essential for healthy breakdown
Maintaining Bin Health
Your bin’s health depends on steady care throughout winter’s harsh months. Pest Prevention starts with securing lids tight—raccoons love easy meals.
Odor Control requires adding dry leaves when smells emerge. Check Structural Integrity weekly since freezing can crack containers. Monitor Material Degradation by watching for black, slimy spots that signal trouble.
Compost Maturity slows dramatically in cold weather composting, so patience pays off.
| Health Factor | Problem Sign | Solution |
|---|---|---|
| Pest Prevention | Scattered debris | Tight-fitting lids |
| Odor Control | Ammonia smell | Add brown materials |
| Structural Integrity | Cracks appearing | Repair or replace |
Winterizing Techniques
Proper winterizing techniques transform your frozen compost pile into an active decomposition system.
Cold weather composting requires strategic planning, but these winter composting tips guarantee success:
- Pile Insulation: Wrap bins with straw bales or dried leaves, creating a six-inch barrier that maintains core temperatures above freezing.
- Moisture Control: Keep materials damp like a wrung-out sponge—wet enough for microbial activity, dry enough to prevent ice formation.
- Aeration Strategies: Turn piles on milder days to introduce oxygen and prevent anaerobic conditions that slow decomposition.
Insulating compost properly maintains Carbon Balance while protecting beneficial microorganisms through winter’s harsh conditions.
Top 6 Winter Composting Essentials
Successfully equipping your winter composting setup requires the right tools to maintain heat, moisture, and aerobic conditions during freezing months.
Winter composting success depends on the right tools to keep your pile active when temperatures plummet.
These six essential items will transform your cold-weather composting from guesswork into a precise, productive system that delivers rich compost even when temperatures drop below freezing.
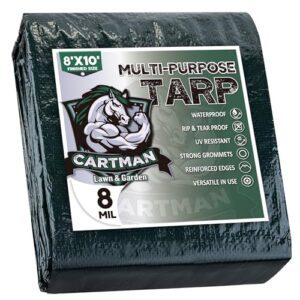
1. Waterproof Green Tarp Protective Cover
 View On Amazon
Anyone can transform their compost pile’s winter survival with proper tarp material selection and placement strategies.
Choose heavy-duty polyethylene with reinforced grommets for maximum durability against harsh weather conditions.
Securing tarps correctly prevents moisture infiltration while maintaining essential airflow for decomposition.
- Tarp size should extend 12-18 inches beyond pile edges for complete coverage and wind resistance
- Tarp placement requires loose draping to allow air circulation while blocking rain and snow accumulation
- Tarp alternatives include old blankets, cardboard sheets, or plywood covers when commercial options aren’t available
Proper insulating compost protection keeps your winter composting materials active throughout cold months.
These winter composting tips guarantee maximum moisture control for successful composting in winter.
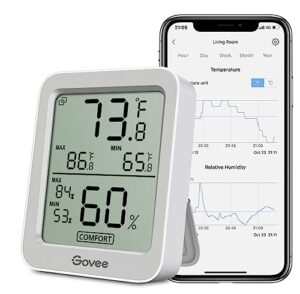
2. Govee Bluetooth Hygrometer Indoor Thermometer
 View On Amazon
While protection keeps moisture out, monitoring what’s happening inside your compost pile is equally important.
The Govee Bluetooth Hygrometer Indoor Thermometer delivers precise readings for successful composting in winter.
Its Swiss-made sensor tracks compost temperature and humidity levels with remarkable Govee accuracy, sending mobile alerts when conditions need adjustment.
The device’s data logging feature helps you understand patterns in your winter compost bin performance.
Though Bluetooth range limits monitoring distance, this $15 tool transforms winter monitoring from guesswork into science.
Best For: Indoor gardeners and composting enthusiasts needing precise environmental tracking.
Key benefits for composting cold climate conditions:
- Real-time tracking – Monitor compost temperature fluctuations during composting low temperatures without stepping outside
- Pattern recognition – Data logging reveals ideal timing for turning or adding materials to maintain decomposition
- Early intervention – Mobile alerts prevent common winter composting failures before they impact your composting in winter efforts
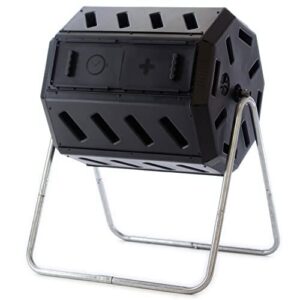
3. Dual Chamber Tumbling Composter Recycled Resin
 View On Amazon
You’ll love this dual chamber system for composting during winter. The dual chamber design lets you add fresh scraps to one side while the other batch composting chamber cures perfectly.
This compost tumbler delivers superior tumbler aeration through easy rotation, keeping decomposition active even in cold climate conditions.
The recycled material construction offers impressive resin durability that withstands freezing temperatures without cracking. Your winter compost bin stays functional when other systems fail.
Consider these key benefits:
- Two independent chambers for continuous composting cycles
- UV-resistant recycled plastic handles harsh winter weather
- Deep mixing fins guarantee thorough aeration with minimal effort
Best For: Eco-conscious composters wanting reliable insulated compost bins performance throughout winter months.
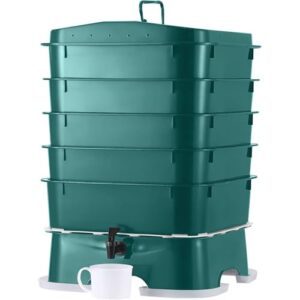
4. Vermihut 5 Tray Worm Composter
 View On Amazon
When indoor space becomes your winter composting sanctuary, the Vermihut 5 Tray Worm Composter transforms kitchen scraps into black gold through efficient vermicomposting. This layering system handles varied worm population sizes while maintaining ideal moisture control for consistent worm castings production.
- Tray capacity: Processes 5 pounds daily with expandable design
- Harvesting castings: Bottom tray collection system streamlines nutrient extraction
- Winter composting advantage: Indoor setup maintains active decomposition year-round
The V-board design prevents odors while coconut mats regulate moisture levels. You’ll appreciate how this composting method keeps working when outdoor piles freeze solid, making it perfect for consistent worm composting throughout cold months.
Best For: Indoor composting enthusiasts seeking odor-free, space-efficient winter solutions.
- Higher price compared to other composting alternatives
- Some users report unclear instructions for setup
- Requires regular maintenance and monitoring of moisture and pH levels
- Odorless design with V-board and coconut mat for indoor or outdoor use
- Processes up to 5 lbs of waste daily, efficiently producing nutrient-rich compost
- Includes tools and free expert support for easier setup and maintenance
5. Down To Earth Alfalfa Meal Fertilizer
 View On Amazon
Alfalfa meal fertilizer transforms your winter composting game by delivering powerful soil enrichment through its unique alfalfa composition. This natural compost activator jumpstarts microbial activity when temperatures drop, making it essential for winter composting success.
- Quick application methods: Sprinkle directly onto compost materials or brew into nutrient-rich tea
- Balanced plant benefits: Provides slow-release nitrogen without burning delicate greens and browns
- Sustainable sourcing: OMRI-listed organic formula supports eco-friendly winter composting activator needs
Best For: Gardeners seeking an organic fertilizer to boost plant growth, improve soil health, and enhance composting.
- Organic, non-GMO, and OMRI Listed for safe use in organic gardening.
- Promotes healthy decomposition as a compost bio-activator.
- Supports robust growth for various plants, including roses and vegetables.
- Considered pricey compared to other organic fertilizers.
- May require frequent application for desired results.
- Nutrient ratio (2-0-1) is lower than some alternatives, limiting immediate impact.
6. Organic Comfrey Leaf Cut Sifted
 View On Amazon
While alfalfa meal provides nitrogen, comfrey leaves deliver a powerhouse of nutrients that’ll transform your winter compost pile. Comfrey Benefits extend far beyond simple composting – these leaves contain potassium, phosphorus, and trace minerals that accelerate decomposition even in cold weather.
The Sifting Process guarantees you’re getting clean, manageable pieces perfect for layering. Comfrey Nutrients break down quickly, creating heat pockets that keep your pile active when temperatures drop. This Organic Certification guarantees you’re adding pure, chemical-free material to your winter composting benefits routine.
Leaf Application couldn’t be simpler – sprinkle dried comfrey between layers of winter garden waste for enhanced compost insulation. The leaves help regulate compost moisture while boosting microbial activity.
Key advantages for winter composting:
- Creates natural heat through rapid decomposition
- Improves moisture retention in frozen conditions
- Adds essential nutrients for spring soil preparation
You’ll notice faster breakdown times and richer compost benefits come spring. Store your comfrey in a dry location to maintain potency throughout winter months.
Best For: Gardeners seeking accelerated decomposition and nutrient-rich compost during cold weather challenges.
Preparing Compost Piles
Setting up your winter compost pile correctly from the start saves you months of frustration and guarantees active decomposition even when temperatures drop below freezing.
You’ll need to evaluate location, materials, moisture levels, and pile size to create a thriving microbial environment that generates its own heat throughout the cold season.
Choosing The Right Location
When selecting your winter composting location, prioritize a south-facing spot that maximizes sun exposure throughout shorter winter days.
Position your bin against a building or fence to create effective wind protection from harsh winter gusts.
Verify water access remains convenient—frozen hoses make moisture management challenging during winter composting.
Check ground conditions for proper drainage to prevent waterlogged conditions that freeze solid.
Consider accessibility through composting snow; you’ll appreciate a clear path when adding kitchen scraps.
For ideal protection, consider using a durable compost covering to shield your pile.
Finally, incorporate compost insulation like straw bales around your compost shelter to trap precious heat and maintain active decomposition even when temperatures plummet.
This approach ensures your compost remains healthy and productive throughout the winter months, with proper drainage and effective wind protection.
Selecting Suitable Materials
Your winter compost thrives with proper Browns and Greens balance—aim for that sweet carbon to nitrogen ratio of 25:1 to 30:1.
Shred materials smaller for faster Decomposition Speed since slow composting winter conditions challenge microbes.
Layer cardboard, dried leaves, and kitchen scraps while Avoiding Toxins like citrus or meat.
Smart Material Size choices create natural insulation against composting snow and ice.
Managing Moisture and Insulation

Your pile’s success hinges on mastering moisture regulation and pile insulation during winter’s harsh conditions.
Aim for that wrung-out sponge feel—too wet invites composting ice, while bone-dry materials won’t decompose.
Wrap bins with winter covers like tarps or bubble wrap for wind protection. Consider using a specialized compost blanket for added protection.
Position your setup south facing to capture maximum solar heat. Layer straw bales around bins for superior compost pile insulation.
Check moisture weekly using the squeeze test to maintain ideal winter composting conditions.
Building a Large Compost Pile

Your compost pile’s foundation determines winter success—think of it as thermal engineering for your backyard. Aim for a five to six-foot pile that acts like nature’s insulation blanket, trapping heat through Material Volume and biological activity.
This Size Benefits approach prevents composting ice and maintains year round composting even during harsh conditions. Balance your compost pile with proper green-to-brown ratios while ensuring Structural Integrity. A 3:1 ratio is ideal for carbon to nitrogen balance.
Layer materials strategically, keeping moisture at wrung-out sponge levels for ideal Heat Retention.
- Create windbreaks using hay bales around your pile’s perimeter for enhanced Pile Insulation
- Position against south-facing walls to maximize solar heat gain and protection
- Add six-inch straw layers on top to prevent winter composting problems
- Turn materials monthly during mild weather to maintain dormant composting activity
Maintaining Winter Compost

Once you’ve established your winter compost pile, maintaining it through the cold months requires consistent attention to four critical factors.
You’ll need to monitor temperature levels, regulate moisture content, continue adding organic materials, and balance your carbon-to-nitrogen ratios to keep decomposition active even when temperatures drop below freezing.
Monitoring Temperature and Aeration
Tracking your core temperature prevents winter composting problems and keeps decomposition humming along.
Check compost pile temperature every 2-3 days using a long-stemmed thermometer—you’re aiming for that sweet spot above 40°F.
Turning frequency matters: rotate weekly to boost oxygen levels without overdoing it.
Compost aeration through gentle mixing maintains moisture balance while supporting steady decomposition rate.
Think of compost turning as giving your pile a burst of renewal—just enough compost heat circulation keeps those microbes happy and working.
Maintaining Even Dampness
Successfully managing moisture management requires consistent Moisture Monitoring throughout winter months.
Your pile should feel like a wrung-out sponge—damp but not dripping. Check the surface regularly since natural insulation and freezing can create dry spots.
Thawing Frozen scraps before adding them boosts Ingredient Dampness levels.
Light Aeration Practices help distribute moisture evenly while Cover Strategies prevent rain saturation, ensuring ideal compost moisture control for continued decomposition.
Adding Scraps Throughout Winter
Keep your scrap storage organized by collecting kitchen scraps in a covered container before adding them to your pile.
Thawing scraps before incorporation accelerates decomposition and prevents pile disturbance from frozen chunks.
Use effective layering methods by alternating greens and browns with each addition.
Clear snow paths for easy access throughout winter composting season.
Freezing scraps won’t harm your cold climate composting efforts, but thawed materials integrate better.
Cover fresh additions with browns to minimize winter odors and deter pests during composting in cold weather.
Balancing The Green-to-Brown Ratio
The carbon-to-nitrogen ratio determines your compost’s success, especially during winter’s challenging conditions.
To keep your garden healthy, remember winter garden maintenance is key.
Ideal Ratios and Material Management:
- Maintain 25:1 to 30:1 carbon-to-nitrogen ratio for maximum heat generation
- Use two scoops brown matter (leaves, cardboard) per shovel green materials (kitchen scraps)
- Nitrogen sources include vegetable peels while carbon sources provide structural stability
- Moisture impact and odor control improve with proper compost ratio balance
Alternative Composting Methods
When outdoor composting slows to a crawl, you can switch to indoor methods that keep decomposition active all winter long.
These alternative techniques work in heated spaces and don’t require the massive pile sizes needed for outdoor winter composting success, utilizing indoor methods effectively.
Vermicomposting With Worms

Worm Bin Setup transforms winter composting into year-round indoor composting. Red wigglers thrive in Temperature Control between 55-75°F, making heated spaces ideal.
Feeding Worms requires reducing portions during cold months—they’ll process kitchen waste slower. Moisture Levels should feel like a wrung-out sponge.
For those interested in setting one up, consider purchasing a worm bin.
Troubleshooting frozen outdoor bins means relocating indoors where your worm bin maintains consistent warmth for efficient winter composting.
Bokashi Fermentation

Bokashi fermentation offers a clever alternative when outdoor composting isn’t practical.
This anaerobic process transforms kitchen waste using beneficial microorganisms, making indoor composting feasible year-round.
Here’s how Bokashi Benefits work:
- Layer food scraps with Bran Inoculation in airtight containers
- Ferment for 10-14 days at room temperature
- Drain nutrient-rich liquid for Winter Storage
- Bury pre-compost for Spring Application
Countertop Composting Bins

Countertop composters bring convenience to your kitchen without the mess of traditional bins.
Choose indoor composting systems that match your bin size needs—compact units work for small kitchens, while larger models handle more food scraps.
Look for tight-fitting lids that provide excellent odor control and prevent indoor pests from discovering your organic waste.
Countertop composters accelerate scrap breakdown through controlled environments, and some models even produce nutrient-rich compost tea for your houseplants.
Position yours near the sink for easy access during meal prep.
Creating a Soil Factory Indoors

Building on countertop composters, you can create your own indoor composting systems that work like a mini soil factory.
Indoor setups handle winter composting when outdoor piles freeze solid.
Here’s how to build your soil amendment production hub:
- Choose containers: Use 10-20 gallon bins with tight lids and ventilation holes
- Layer materials: Start with partially decomposed compost, add composting materials like kitchen scraps, then cover with browns
- Control environment: Maintain 55-80°F temperatures and wrung-out sponge moisture levels
- Manage regularly: Turn weekly for odor control and proper aeration
This approach delivers finished compost in 6-10 weeks versus frozen outdoor piles.
Trench Composting and Drunken Composting

You can revolutionize your winter composting game with trench composting—digging 12-18 inch holes for food scraps that decompose steadily underground.
The drunken materials method adds fermented liquids like beer to boost your decomposition speed by 27%.
These winter application techniques maintain composting in freezing temperatures, delivering impressive soil enrichment and faster decomposition rates than traditional cold composting methods.
Fall composting also offers the benefit of abundant organic material readily available for use.
Frequently Asked Questions (FAQs)
What are the best winter composting methods?
You’ll succeed with larger piles (5-6 feet), proper carbon-nitrogen ratios (30:1), moisture control, and insulation using straw or leaves for heat retention and active decomposition.
Can You compost in the winter?
Compost piles enlarged by 50% in winter maintain core temperatures of 60-160°F, keeping decomposition active. Yes, you can definitely compost in winter using proper techniques and insulation strategies.
How do I prepare my outdoor compost pile for winter?
Enlarge your pile to five-six feet wide for better heat retention.
Add extra browns like leaves or cardboard, maintain proper moisture levels.
And insulate with straw bales or tarps for protection.
Should you winterize your outdoor compost pile?
Yes, you should winterize your outdoor compost pile.
Enlarge it to 5-6 feet, add insulation like straw, and cover with tarps for moisture control.
Position it against south-facing walls for maximum heat retention and continued decomposition.
How to compost kitchen waste in winter?
When winter turns your outdoor pile into a frozen fortress, bring kitchen scraps indoors using bokashi fermentation, vermicomposting with red wigglers, or countertop composters to keep decomposition humming.
How do I Hold my compost together in the winter?
Build larger piles that’re at least five feet wide and tall.
Add straw, leaves, or hay around your bin’s sides for insulation.
Cover with tarps to regulate moisture and place against south-facing walls for warmth.
What are the disadvantages of cold composting?
Why settle for sluggish decomposition when you could speed things up?
Cold composting takes months or years to finish, requires less monitoring but attracts pests, and produces inconsistent results compared to hot composting methods.
This method is often compared to cold composting in terms of efficiency and outcome.
What is the laziest way to compost?
Simply toss your kitchen scraps and yard waste into a pile, then ignore it for a year or two. You’ll eventually get usable compost without any turning or maintenance required.
How do you compost in the winter?
You’ll need to make larger piles that retain heat better—aim for five to six feet wide and tall.
Keep adding browns like leaves and straw, maintain proper moisture levels, and insulate with natural materials.
What is the best composter for winter?
Compost bins enlarged by 50% maintain 60-160°F core temperatures despite freezing conditions.
You’ll want large, insulated systems like double-walled bins with foam insulation or traditional piles measuring five-six feet wide, covered with straw for ideal winter performance.
Conclusion
Ready to transform your winter composting game? These winter composting methods will keep your pile productive even when temperatures drop.
You’ve learned to insulate with tarps, balance carbon-to-nitrogen ratios, and explore indoor alternatives like vermicomposting and bokashi fermentation.
Remember that larger piles retain heat better, while proper moisture management prevents oversaturation or drying out.
Success comes from embracing winter’s slower pace rather than fighting it, setting you up for nutrient-rich compost come spring, and ultimately achieving a productive winter composting process through proper management.
- https://learn.eartheasy.com/guides/how-to-choose-the-right-composter/
- https://soiltesting.cahnr.uconn.edu/selecting-a-backyard-compost-bin/
- https://livinator.com/winter-composting-techniques-for-cold-climates-10-tips-and-easy-methods/
- https://www.compostmagazine.com/which-type-of-compost-bin-is-right-for-you/
- https://www.familyhandyman.com/list/10-tips-winter-composting/