This site is supported by our readers. We may earn a commission, at no cost to you, if you purchase through links.
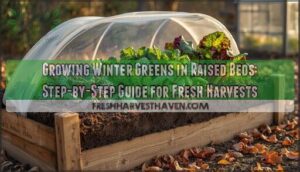
Growing winter greens in raised beds is like having a secret weapon against dreary cold months.
You’ll want to prep your beds in late summer by adding compost and choosing cold-hardy varieties like kale, spinach, and arugula.
These tough greens actually get sweeter after frost hits—nature’s way of making winter gardening worthwhile.
Your raised beds drain better than ground plots, preventing soggy roots that kill plants.
Start seeds in fall, about 10-12 weeks before your first hard freeze, and add row covers or cold frames for extra protection when temps really drop.
The trick is timing your plantings just right to maximize harvests.
Table Of Contents
- Key Takeaways
- Preparing Raised Beds for Winter
- Growing Winter Greens in Raised Beds
- Choosing The Right Winter Greens
- Planting Winter Greens
- Protecting Winter Greens
- Maintaining Winter Greens
- Common Challenges for Winter Greens
- Incorporating Winter Greens Into Meals
- Next Steps for Winter Greens
- Frequently Asked Questions (FAQs)
- What month do you plant winter greens?
- What vegetables should not be grown in a raised bed?
- What is the best winter cover crop for raised beds?
- What are the best greens to grow in raised beds?
- Will plants survive winter in raised beds?
- What to put on raised garden beds for winter?
- How do you plant greens in a raised bed?
- What are the easiest winter vegetables to grow?
- How do I prepare my raised beds for winter?
- Should you leave a raised garden bed bare over winter?
- Conclusion
Key Takeaways
- You’ll want to start planting winter greens 4-6 weeks before your first frost date, choosing cold-hardy varieties like kale, spinach, and arugula that actually get sweeter after frost hits your raised beds.
- Your raised beds need proper winter prep with soil amendments, compost, and good drainage to prevent soggy roots that kill plants during wet winter weather.
- You’ll need protection systems like row covers, cold frames, or hoop houses to create microclimates that boost temperatures by 10-15°F and shield your greens from harsh winds.
- You can harvest fresh winter greens continuously by monitoring for pests, maintaining proper watering schedules, and using succession planting to extend your growing season through the coldest months.
Preparing Raised Beds for Winter
Getting your raised beds ready for winter is like giving them a cozy blanket and a good meal before the cold hits.
You’ll want to clear out the old plants, test your soil, add some compost or amendments, and maybe even tuck in a cover crop that’ll work hard all winter long to keep your soil happy and healthy, which is a good way to prepare them.
Getting your raised beds ready for winter is like giving them a cozy blanket and a good meal before the cold hits.
Removing Weeds and Old Plants
Your winter garden success story begins with autumn housekeeping—clearing raised beds sets the foundation for thriving cold-season crops. Think of it as giving your soil a fresh start before the main event.
Weed identification becomes essential now, as persistent invaders like dandelions and clover establish deep roots. Here’s your cleanup checklist:
- Pull weeds completely with root removal to prevent spring surprises
- Clear spent annuals to break disease cycles and pest hideouts
- Sort healthy debris for composting methods versus diseased plant disposal in trash
- Clean tools with rubbing alcohol for tool sanitation between beds
This soil preparation ritual transforms your raised bed gardening space into winter-ready real estate.
Conducting a Soil Test
With your raised beds cleared, you’re ready to peek under the hood and see what’s really happening down there.
Think of soil testing as your garden’s annual physical—it tells you everything you need to know before winter greens move in.
Here’s your soil detective checklist:
- pH levels – Most winter greens thrive between 6.0-7.0
- Nutrient content – Check nitrogen, phosphorus, and potassium stores
- Soil structure – Sandy, clay, or that perfect loamy sweet spot
- Organic matter – Your soil’s fuel tank for healthy plants
- Micronutrients – Those trace elements that pack a punch
DIY soil test kits work great for basic soil health checks.
Testing frequency should be every 2-3 years, but fall’s perfect timing lets you tackle amendment needs before spring planting season arrives.
Applying Soil Amendments
Amending your soil properly sets the stage for thriving winter greens that’ll make your neighbors green with envy.
After getting your soil test results, it’s time to feed those raised beds with the right nutrients. Fall timing works perfectly since amendments can settle in before your plants need them most.
Your soil craves these organic powerhouses that deliver both immediate and long-term benefits:
- Compost: The ultimate multitasker that improves drainage while slowly releasing nutrients your plants actually use
- Aged manure: Choose well-composted cow or chicken manure for steady nitrogen without burning delicate roots
- Organic matter: Shredded leaves and kitchen scraps boost water retention and feed beneficial soil microbes
- pH adjustment materials: Add lime for acidic soil or sulfur for alkaline conditions based on your test results
Mix these amendments into the top six inches, creating a nutrient balance that’ll support healthy winter harvests. Consider specialized blends for raised beds.
Planting Cover Crops
Once your soil amendments are in place, it’s time to plant nature’s workforce.
Cover crops like winter rye and crimson clover transform your raised beds into living ecosystems that work overtime.
Plant these green guardians 4-6 weeks before frost to establish strong roots.
Winter rye excels at erosion prevention and weed suppression, while legumes like clover provide nitrogen fixation that feeds next season’s vegetables.
This soil enrichment strategy boosts organic matter and creates biodiversity impact that benefits your entire garden.
Your soil health will thank you come spring when you till these powerhouses back into the earth.
Growing Winter Greens in Raised Beds
Success starts with understanding why your raised beds shine during winter months.
These elevated growing spaces transform cold-weather gardening from frustrating to fantastic, giving you fresh winter greens when neighbors are stuck with expensive store-bought options.
Raised bed benefits make winter growing surprisingly manageable:
- Superior drainage keeps roots healthy during wet winter weather
- Warmer soil temperatures give cold weather crops a vital head start
- Easy protection setup lets you quickly add covers when frost threatens
Your choosing raised beds strategy pays off now.
The improved soil structure you’ve built handles winter watering needs better than ground-level gardens.
Best soil blends drain excess moisture while retaining enough for plant roots.
Seasonal extension methods work perfectly with raised beds.
The elevated design makes installing hoop houses or cold frames simple.
Soil preparation you completed earlier creates the foundation for thriving winter greens.
Frost protection becomes manageable when your beds are already the perfect height for covering systems.
Choosing The Right Winter Greens
Not all greens can handle winter’s chill, but the right varieties will keep your raised beds productive when other plants call it quits.
You’ll want to pick cold-hardy champions like kale, spinach, and arugula that actually taste better after a frost touches them.
Kale and Spinach Varieties
Two powerhouse greens will transform your raised beds into a winter feast. Kale and spinach don’t just survive the cold—they actually get sweeter after frost kisses their leaves.
Variety | Cold Tolerance | Best Feature |
---|---|---|
Lacinato Kale | 20°F | Tender, dinosaur-textured leaves |
Red Russian Kale | 10°F | Sweet flavor, beautiful purple stems |
Bloomsdale Spinach | 25°F | Thick, crinkled leaves perfect for cooking |
Kale flavors range from mild and sweet (Red Russian) to robust and earthy (Winterbor). Spinach textures vary too—smooth-leaf varieties work great in salads while crinkled types hold up beautifully in soups.
For kale growing success, try Redbor for stunning purple color. Spinach cultivation thrives with Winter Giant variety. Both crops pack serious nutrition—kale delivers vitamin K while spinach loads you up with iron. Your raised beds will keep producing fresh greens when grocery store prices soar.
Lettuce and Arugula Options
In the case of winter lettuce varieties and arugula, you’re looking at some real cold-weather champions.
Butterhead lettuce like ‘Winter Density’ and ‘Arctic King’ can handle temperatures down to 20°F with proper protection.
These lettuce varieties bounce back from frost like they’re made for it.
For arugula flavors, try ‘Astro’ for mild peppery kicks or ‘Wild Rocket’ when you want something with serious bite.
Cold-hardy varieties of loose-leaf lettuce outperform head types every time in raised beds.
Plant these winter greens 6-8 weeks before your first frost using direct seeding or transplant methods.
Your winter harvest will thank you when fresh salads are still possible while neighbors scrape ice off their cars, making them a great choice for a winter harvest with fresh salads.
Radish and Beet Greens
Don’t overlook radish and beet greens – these winter vegetables pack incredible nutritional benefits that’ll surprise you.
While most gardeners focus on roots, the leafy tops contain six times more vitamin C than radish bulbs and offer exceptional culinary uses in soups and salads.
These cold-hardy varieties thrive in raised beds with simple growing tips:
- Variety selection: Choose ‘Cherry Belle’ radishes and ‘Detroit Dark Red’ beets for tender greens
- Growing winter greens: Plant seeds 1-3 inches apart for maximum leaf production
- Storage methods: Harvest outer leaves regularly while roots continue developing
Micro-Greens for Winter Harvests
While radish and beet greens work beautifully in your raised beds, indoor microgreens become your secret weapon when Old Man Winter arrives with a vengeance.
These miniature marvels pack serious punch into tiny packages. You’ll turn any sunny windowsill into a productive winter harvest station without stepping outside.
Indoor microgreens deliver incredible nutrient density – we’re talking up to 40 times more vitamins than full-grown plants.
Your seed selection matters for successful sprouting techniques:
- Arugula and radish: Peppery kick ready in 7-10 days
- Kale and broccoli: Mild flavor perfect for winter salads in 10-14 days
- Pea shoots: Sweet crunch that grows quickly under basic grow lights.
Simply scatter seeds on moistened potting mix, mist daily, and harvest when they’re 1-2 inches tall. No green thumb required – just consistency pays off with endless microgreens for your growing winter greens collection.
Planting Winter Greens
Getting your winter greens in the ground isn’t rocket science, but timing matters more than you’d think.
You’ll want to start sowing seeds about 4-6 weeks before your first frost hits, giving those little green guys enough time to get their roots settled before winter decides to crash the party, which is all about preparation.
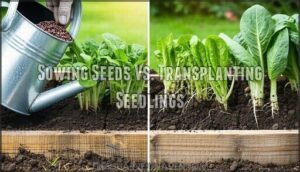
Sowing Seeds in Fall
Having chosen your hardy varieties, it’s time to master the art of fall planting in your raised beds. Germination timing is your secret weapon—count backward 6-8 weeks from your first frost date to find your perfect planting window.
Prepare your raised beds by loosening soil to 6 inches deep, ensuring excellent drainage for healthy root development. Soil temperature should hover around 45-55°F for ideal winter greens germination.
Follow the golden rule for seed depth: plant twice the seed’s diameter. Lettuce needs just a whisper of soil coverage, while spinach can handle deeper placement. Space seeds according to package directions to avoid overcrowded seedling density.
Watering frequency matters—keep soil consistently moist but never waterlogged. Your garden preparation efforts will pay off with thriving winter harvests.
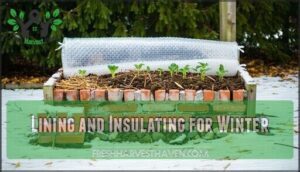
Using Cold Frames and Hoop Houses
Cold frames and hoop houses transform your raised beds into winter green powerhouses.
These frost protection champions create perfect growing environments when outdoor temperatures drop.
Cold frames work brilliantly for smaller beds, while hoop house structures cover larger areas with PVC and plastic sheeting.
- DIY cold frames using old windows cost under $50 and boost temperatures 10-15°F
- Hoop house materials like 6-mil plastic provide excellent insulation and light transmission
- Frame ventilation prevents overheating on sunny days—prop open lids when temps hit 60°F
- Temperature regulation works through thermal mass like water jugs placed inside structures
- Winter light levels stay ideal with south-facing placement and clean covering materials
Consider DIY cold frame options for your winter garden.
Starting Seeds Indoors
Your seed-starting sanctuary can turn any spare room into a winter greens powerhouse. Think of it as your personal greenhouse where you control every detail.
Seed tray types matter—choose ones with drainage holes and individual cells for easy transplanting. Grow light options range from basic fluorescents to full-spectrum LEDs that’ll make your seedlings sing. Position them 2-3 inches above your trays for 14-16 hours daily.
Soil moisture control is your secret weapon. Use a spray bottle to keep things consistently damp but never waterlogged. Nobody likes soggy roots!
Indoor pest control means watching for fungus gnats in overly moist conditions. Hardening seedlings prepares them for outdoor life—gradually expose them to cooler temps before transplanting seedlings to your raised beds.
Transplanting Seedlings Outdoors
Your indoor seedlings are strong and ready to face the world. Now comes the exciting part – moving them to their permanent home in your raised beds.
Hardening Seedlings is like teaching kids to ride bikes. Start with short outdoor visits of 30 minutes, then gradually increase daily exposure over 7-10 days. This prevents transplant shock better than any fancy fertilizer.
Check Soil Temperatures with a thermometer before Transplanting Seedlings. Winter greens need at least 40-45°F to establish properly. Transplanting Depth should match their original containers – no deeper, no shallower. Consider winter sowing basics for a head start next year.
Here’s your transplanting game plan:
- Handle roots gently to minimize Root Disturbance
- Water immediately after planting, then adjust your Watering Schedule
- Install Frost Protection covers before nightfall
Your Coldhardy Varieties will reward your careful work with fresh greens all winter.
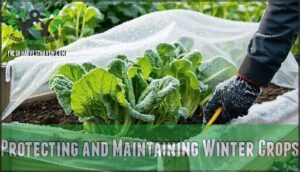
Protecting Winter Greens
You’ve got your winter greens planted, but now they need bodyguards against freezing temperatures.
Think of protection methods as cozy blankets for your raised beds – they’ll keep your greens thriving while neighbors wonder how you’re still harvesting fresh salads.
Creating the right microclimate makes all the difference.
Your plants can handle cold, but they need smart sheltering strategies:
- Row Covers act like lightweight sleeping bags, trapping warmth while letting sunlight filter through
- Cold Frames made from old windows create mini-greenhouses that boost temperatures by 10-15°F
- Mulch Types like straw or shredded leaves insulate roots and prevent soil from freezing solid
- Wind Protection using burlap screens or plywood shields blocks harsh gusts that damage tender leaves
- Holiday Lights strung under covers provide extra heat during brutal cold snaps
These frost protection techniques transform your raised beds into winter oases.
Your greens will thank you with continued harvests throughout the coldest months.
Maintaining Winter Greens
Once your winter greens are planted and protected, you’ll need to stay on top of regular care to keep them happy through the cold months.
Think of it like babysitting your leafy friends – they need just the right amount of water, food, and attention to thrive when most plants are taking a winter nap.
Think of winter gardening as tucking your plants into cozy beds where they’ll dream of spring while still feeding you fresh greens.
Watering and Irrigation Tips
Master winter watering like a pro gardener by switching your approach when temperatures drop.
Your raised beds need winter watering adjustments—less frequent but more strategic. Drip irrigation and soaker hoses become your best friends, delivering precise soil moisture directly to roots while promoting water conservation.
Check the top inch of soil before watering; if it’s dry, it’s time. Water in the morning so plants can absorb moisture before evening frost hits.
Apply mulch around your greens to lock in soil moisture and provide extra frost protection. Remember, soggy winter soil kills more plants than cold weather ever will.
During this season, consider following a once-a-month schedule adjusted for rainfall.
Fertilizing With Compost Tea
Now that you’ve got your watering routine down, let’s talk about feeding those hungry winter greens. Compost tea works like a vitamin smoothie for your raised beds, delivering nutrients your plants can actually use.
Brewing compost tea couldn’t be simpler – think of it as making garden coffee. Here’s your foolproof recipe:
- Fill a mesh bag with quality compost (like stuffing a tea bag)
- Dunk it in a bucket of water for 24-48 hours
- Stir occasionally to release those good nutrients
- Strain out the solids for smooth application
- Pour around plant bases weekly for best results
The organic fertilizer benefits are incredible – you’re not just feeding plants, you’re building soil life. Your winter greens will reward you with darker leaves and stronger growth, even when frost threatens.
Monitoring for Pests and Diseases
Catching problems early saves your winter harvest from disaster.
Weekly inspections help you spot tiny aphids clustering under leaves or silvery slug trails across your greens. Think of yourself as a garden detective—magnifying glass optional but helpful!
Pest/Disease | Signs to Watch For | Organic Controls |
---|---|---|
Aphids | Tiny clusters on leaf undersides | Insecticidal soap spray |
Slugs/Snails | Silvery trails, ragged holes | Diatomaceous earth barrier |
Fungal Issues | Yellow spots, wilting leaves | Copper-based fungicides |
Cabbage Worms | Irregular holes, green larvae | Bacillus thuringiensis (Bt) |
Early pest identification prevents small problems from becoming garden catastrophes. Consider using an aphid control spray for infestations.
Pruning and Training Plants
Your winter greens are like enthusiastic students—they need gentle guidance to reach their full potential. Smart pruning techniques turn scraggly plants into productive powerhouses that’ll keep your raised beds churning out fresh harvests all season long.
Remove dead foliage to prevent disease spread and improve air circulation. Thin crowded plants to maximize sunlight access and reduce frost damage. Pinch growing tips to create bushier leafy greens with more harvestable surfaces. Install training trellises for vertical growth with climbing varieties like pea shoots. Prune away damaged leaves after cold snaps to redirect energy to healthy growth.
Here’s what proper winter pruning brings to your garden:
- Healthier plants that resist disease and bounce back from frost
- Bigger harvests as energy flows to productive leaves instead of dead stems
- Better air circulation that prevents fungal problems in humid conditions
- Stronger root systems that anchor plants against winter winds
- Extended growing season with continuous fresh growth encouraging growth
Don’t overthink shaping plants—just grab your pruners and give those growing winter greens the attention they deserve for your winter harvest!
Common Challenges for Winter Greens
Even the toughest winter greens can face their share of cold-season troubles that’ll test your gardening patience.
From sneaky slugs munching through your kale to unexpected frost damage and mysterious yellowing leaves, you’ll need to stay one step ahead of these common winter challenges.
Slugs and Snails
Those slimy midnight raiders are munching through your winter greens like they’re at an all-you-can-eat buffet.
Understanding the slug lifecycle helps you target these pests when they’re most vulnerable. Snail prevention starts with creating hostile territory around your raised beds.
Copper tape around bed edges
Coffee grounds scattered around plants
Natural predators like toads and birds provide excellent organic slug control, protecting your precious crops.
Frost and Freeze Damage
Frost strikes fast and hits hard, turning your beautiful winter greens into wilted disappointment. Cell damage occurs when ice crystals form inside plant tissues, rupturing delicate membranes. Understanding plant hardiness zones helps you choose varieties that survive freezing temperatures.
- Your heart sinking as blackened kale leaves droop after an unexpected freeze
- The frustration of losing weeks of growth to one brutal cold snap
- Relief flooding through you when frost protection saves your precious spinach
- Pride swelling as neighbors ask how your raised beds still produce fresh greens
Deploy cold frames and row covers as your prevention methods arsenal. Monitor temperatures closely and use gentle thawing techniques after frost events.
Nutrient Deficiencies
Looking at pale, stunted greens can feel like decoding a secret message from your raised beds.
Nutrient deficiencies often masquerade as winter stress, but identifying deficiencies through leaf symptoms helps you take action fast.
Here’s your game plan for preventing imbalances:
- Spot deficiency symptoms early – Yellow leaves mean nitrogen shortage, while purple edges signal phosphorus problems
- Run soil test checks – Testing methods reveal exactly what’s missing before plants suffer
- Choose smart amendment options – Compost tea and worm castings provide gentle fertilizing without shocking cold-stressed roots
Regular soil amendments keep your winter greens thriving instead of just surviving.
Weak plants can also result from insufficient light issues.
Incorporating Winter Greens Into Meals
Your freshly harvested winter greens don’t have to sit in the fridge wondering what they’re meant for – these cold-hardy vegetables shine in everything from crisp salads to hearty soups.
Whether you’re tossing tender spinach into a morning smoothie or sautéing kale with garlic for dinner, you’ll discover that winter greens pack more flavor and nutrients than their summer cousins.
Salads and Sautees
Nothing beats the satisfaction of harvesting fresh greens from your raised beds and turning them into restaurant-quality meals. Your winter bounty deserves simple preparation that highlights natural flavors.
Fresh greens shine brightest when you keep cooking techniques straightforward. Lightly sauté kale with olive oil and garlic for two minutes – any longer ruins the texture. Toss raw spinach and arugula with winter vinaigrettes made from apple cider vinegar and honey.
Greens | Best Cooking Oils | Flavor Pairings | Salad Dressings | Sauté Techniques |
---|---|---|---|---|
Kale | Olive oil, avocado oil | Lemon, garlic, pine nuts | Balsamic, tahini | Quick high heat |
Spinach | Butter, olive oil | Feta, strawberries | Poppy seed, citrus | Gentle wilting |
Arugula | Extra virgin olive | Parmesan, pears | Lemon vinaigrette | Best eaten raw |
Swiss Chard | Coconut oil, butter | Onions, raisins | Apple cider vinegar | Medium heat sauté |
Lettuce | Light olive oil | Tomatoes, cucumber | Ranch, Caesar | Avoid cooking |
Mix textures by combining sautéed leafy greens with raw varieties in the same dish, creating a simple preparation that allows the natural flavors to shine, and using winter vinaigrettes to add a touch of freshness and flavor. This approach will help you enjoy your winter bounty and make the most of your raised beds.
Soups and Stews
Transform your winter greens from raised beds into soul-warming bowls of comfort.
These hearty greens become the star of seasonal recipes when you add them to bubbling pots of garden broth goodness.
Your nutrient-dense harvest adds incredible winter warmth to every spoonful. Unlike delicate salads, soups let you use every leaf and stem for maximum nutrition.
- Kale and spinach work perfectly when stirred in during the final minutes of cooking to preserve their vibrant color and nutrient boost
- Swiss chard pairs beautifully with white beans and garlic for a Mediterranean-inspired bowl of comfort
- Tough outer leaves that aren’t salad-worthy become natural thickeners when simmered long enough
Nothing beats homegrown flavor warming you from the inside out.
Smoothies and Juices
While hearty soups warm you up, smoothies and juices turn your winter greens into liquid nutrition powerhouses.
Your raised beds provide perfect ingredients for green smoothie recipes that pack serious nutrient-dense benefits.
Try massaging winter greens before blending for smoother smoothie bowl ideas that taste amazing.
Adding to Soups and Stews
Winter greens from your raised beds frequently elevate ordinary soups into nutrient-dense comfort food masterpieces.
These leafy treasures offer incredible flavor pairings with hearty broths while delivering serious nutritional benefits.
Here are three cooking methods that’ll make your kitchen smell amazing:
- Quick Stir Method: Add chopped kale or spinach during the last 3-4 minutes of cooking to preserve vitamins and prevent bitterness.
- Creamy Blend Technique: Puree tender greens with broth for silky texture and hidden nutrition your family won’t detect.
- Layered Addition: Start with heartier greens early, then add delicate varieties just before serving for perfect texture contrast.
Roasting vegetables enhances their natural sweetness.
Next Steps for Winter Greens
Now that you’ve mastered the art of winter gardening, it’s time to think about what comes next and how to make your cold-season success even better.
You’ll want to start planning your spring garden while keeping notes on what worked best this winter, plus maybe try a few new varieties that caught your eye, to further enhance your cold-season success.
Planning for Spring Gardens
While your winter greens are still thriving, you’re in the perfect spot to plan your spring garden success.
Think of it as sketching your masterpiece before the canvas is ready. Your raised beds have taught you valuable lessons about what works and what doesn’t.
Here’s your spring planning roadmap:
- Map out Spring Crop Rotation – rotate plant families to prevent soil depletion and disease buildup
- Create your Seed Starting Schedule – mark calendars for indoor sowing dates based on your last frost
- Design your Garden Design Ideas – sketch bed layouts incorporating companion planting strategies
- Plan your Soil Amendment Strategy – order compost and organic fertilizers while prices are lower
Smart garden planning now means you’ll be harvesting fresh spring vegetables while others are just planting seeds.
Learning From Winter Harvests
Your winter harvest just handed you a masterclass in cold-season gardening.
Document which winter greens delivered the best yield analysis and variety performance in your raised beds. Notice how flavor changes made some kale sweeter after frost while others turned bitter.
Track harvest timing patterns – when did your spinach bolt versus when it stayed productive? These winter lessons become your blueprint for next year’s winter gardening success.
Performance Metric | What to Track | Next Year’s Action |
---|---|---|
Harvest Timing | First/last harvest dates | Adjust planting schedule |
Yield Analysis | Total pounds per variety | Focus on top performers |
Flavor Changes | Taste before/after frost | Time harvests better |
Experimenting With New Varieties
After mastering your go-to winter greens, it’s time to become a backyard scientist! Novel greens offer exciting flavor profiles beyond basic kale and spinach.
Your raised beds become testing grounds for discovering which new varieties deliver superior disease resistance and unique textures.
- Asian mustard greens like mizuna for spicy kicks and feathery leaves
- Purple-stemmed bok choy varieties that add visual drama to winter gardens
- Cold-tolerant lettuce hybrids with extended harvest windows and crisp textures
Frequently Asked Questions (FAQs)
What month do you plant winter greens?
Like autumn leaves signaling change, late summer marks your planting window.
You’ll want to sow winter greens seeds in August or early September, about 4-6 weeks before your first frost date arrives.
What vegetables should not be grown in a raised bed?
You shouldn’t grow large spreading vegetables like sprawling squash, massive corn, or deep-rooted trees in raised beds.
They’ll outgrow the space quickly, compete for nutrients, and make maintenance a real headache for you.
What is the best winter cover crop for raised beds?
Think of winter rye as your soil’s best friend—it’s the MVP cover crop for raised beds.
You’ll love how it prevents erosion, adds nitrogen, and breaks up compacted soil while surviving harsh winters effortlessly.
What are the best greens to grow in raised beds?
Kale, spinach, arugula, and lettuce are your best bets for raised bed success. They’re cold-hardy champions that’ll keep producing fresh leaves even when frost kisses your garden goodnight.
Will plants survive winter in raised beds?
Perfectly positioned plants can survive winter wonderfully in raised beds.
You’ll need protective covers, proper mulching, and cold-hardy varieties like kale and spinach.
Success depends on your climate zone and winter protection methods.
What to put on raised garden beds for winter?
Add a thick layer of mulch like straw or shredded leaves to insulate your beds.
You can also plant cover crops or spread compost to feed the soil while it rests this winter.
How do you plant greens in a raised bed?
Worried about cramped spacing? Don’t be.
Fill your raised bed with quality potting mix, space seeds according to packet directions, plant at proper depth, water gently.
You’ll have thriving greens in no time.
What are the easiest winter vegetables to grow?
Spinach, kale, and arugula top the list for beginners.
They’re tough as nails in cold weather, grow fast, and don’t need much fussing.
Start with these three – you’ll be harvesting fresh greens all winter long.
How do I prepare my raised beds for winter?
Clear out old plants and weeds completely.
Test your soil and add compost or aged manure.
Plant cover crops like winter rye.
Mulch everything well to protect soil from freezing temperatures.
Should you leave a raised garden bed bare over winter?
Don’t leave your raised beds sitting naked all winter.
Plant cover crops like winter rye, add compost and mulch, or grow cold-hardy greens.
Bare soil invites weeds and loses nutrients through erosion.
Conclusion
Congratulations—you’ve officially joined the ranks of gardeners who laugh in winter’s face while harvesting fresh greens.
Growing winter greens in raised beds transforms you from someone who sulks about salad prices to a cold-weather champion with dirt under your fingernails.
You’ll soon discover that bragging about homegrown kale in January becomes oddly satisfying.
Keep experimenting with varieties, protect your plants when needed, and enjoy the sweet taste of frost-kissed greens all season long.