This site is supported by our readers. We may earn a commission, at no cost to you, if you purchase through links.
Most gardeners pack it in when the first frost warning hits. They pull the last tomatoes, yank the pepper plants, and call it a season. But lettuce tells a different story—it’s one of the few crops that actually performs better as temperatures drop. Cold slows cell growth, which concentrates sugars and produces leaves that taste sharper and sweeter than anything you’d grow in June.
The catch is timing and protection. Get both right, and you can harvest crisp heads through December and beyond. The following steps walk you through everything—from counting back from your first frost date to choosing varieties bred specifically for cold tolerance.
Table Of Contents
- Key Takeaways
- When to Plant Winter Lettuce
- Choose Cold-Hardy Lettuce Varieties
- Prepare Soil and Growing Space
- Protect Lettuce From Winter Cold
- Top 9 Winter Lettuce Supplies
- 1. Year Round Vegetable Gardener Guide
- 2. Cover Techniques for Vegetable Gardens
- 3. Durolux T5 Grow Light Fixture
- 4. Giantex Portable Wooden Cold Frame
- 5. Half Inch PVC Snap Clamp
- 6. Tierra Garden Easy Fleece Tunnel
- 7. Agfabric 10×25 Freeze Protection Row Cover
- 8. Winter Density Lettuce Seeds
- 9. Stainless Steel Folding Butt Hinge
- Care, Harvest, and Troubleshoot
- Frequently Asked Questions (FAQs)
- How do you grow lettuce in winter?
- Can lettuce grow in cold weather?
- Will lettuce grow in the fall?
- When should you plant lettuce?
- How cold is too cold to grow lettuce?
- Can you grow lettuce in the winter?
- Which lettuce grows best in winter?
- What temperature is too cold for lettuce?
- Can you grow lettuce during the winter?
- Can I just scatter lettuce seeds?
- Conclusion
Key Takeaways
- Cold actually improves lettuce flavor by concentrating sugars, so count back 6–7 weeks from your first frost date to nail the planting window for full-size heads.
- Cold-hardy varieties like Winter Density and North Pole Butterhead survive down to 20°F and keep producing through December with simple protection like a cold frame or fleece tunnel.
- Compost-heavy soil with good drainage is the foundation — top-dress every 4–6 weeks and mulch with 2–4 inches of straw to buffer roots against freeze-thaw stress.
- Cut-and-come-again harvesting — snipping outer leaves while leaving the central growing point intact — delivers 3–5 successive harvests from a single planting all winter long.
When to Plant Winter Lettuce
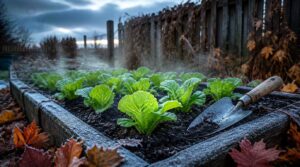
Timing is everything with winter lettuce — get it wrong by even a week or two, and you’re either scrambling to protect young plants from hard frost or missing your harvest window entirely.
Brushing up on cool-weather gardening techniques can help you nail that narrow window between a successful crop and a frost-bitten loss.
Your local first fall frost date is the anchor for everything that follows. Here’s how to build your planting schedule around it.
First Frost Timing
Before you sow a single seed, you need one key number: your average first fall frost date. This is the date when nighttime temperatures routinely drop to 32°F (0°C) — and it drives your entire planting calendar.
That date isn’t universal. Latitude, elevation, and local microclimates all shift it. High elevations and northern regions often see first frosts arrive in September or October, while coastal and southern areas may not see frost until November or December.
You can consult the USDA frost date map for zone‑specific average frost dates.
Full-size Head Schedule
Once you know your first frost date, count backward to set your planting window. For full-size heads, that means transplanting or direct-seeding 6–7 weeks before frost.
Heads need 6–10 weeks to reach a harvestable weight of 12–16 ounces.
Stagger plantings 10–14 days apart to keep fresh heads coming, and aim for 12–14 hours of daily light to tighten leaves.
Baby Greens Schedule
Baby greens are a faster payoff than full-size heads. Sow 5–6 weeks before first frost, spacing seeds one per square inch. They’re ready to cut in 18–25 days at 3–4 inches tall.
- Sow every two weeks for nonstop winter lettuce
- Keep soil moist for reliable germination
- Thin to 2–3 inches apart for even growth
- Harvest outer leaves to trigger regrowth
Indoor Seed Starting
Start seeds indoors 3–4 weeks before transplanting. Fill trays with a sterile seed‑starting mix — never garden soil — and place them on a seed‑starting mat set to 65–75°F.
Bottom‑water to avoid splashing. Maintain 40–60% humidity during germination.
Once sprouts appear, position full‑spectrum grow lights 2–4 inches above foliage for 14–16 hours daily to prevent leggy seedlings.
Direct Sowing Versus Transplanting
Both methods work for winter lettuce — the right choice depends on your timing and conditions.
Direct seeded crops skip transplant shock and develop a single uninterrupted root system, but germination demands soil temperatures of 4–10°C.
Transplanted cold-hardy lettuce establishes faster in cold beds and tolerates sudden freezes better.
If you’re tight on time, transplants win.
Choose Cold-Hardy Lettuce Varieties
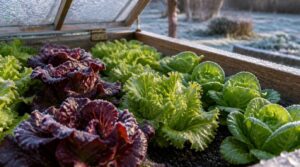
Not every lettuce can handle a hard frost and keep growing. The varieties below are bred specifically for cold tolerance, staying productive well into winter with the right protection. Pick one that suits your setup and you’re already halfway there.
Winter Density Lettuce
Winter Density is a standout choice for growing lettuce in winter. This frost-tolerant variety is a Romaine-Buttercrunch cross that forms compact, upright heads of dark, crisp leaves with a sweet, buttery flavor.
It matures in 54–70 days and holds up beautifully after light freezes, making it ideal for succession planting through the coldest months.
North Pole Butterhead
North Pole Butterhead is a compact, reliable performer for cold-frame winter growing. Its light green heads mature in 50–60 days, delivering a mild, buttery flavor with a crisp, juicy bite.
You can stagger plantings every two weeks for a steady supply.
After harvesting, the plant often regrows baby leaves in mild conditions — stretching your season further with minimal effort.
Dark Red Lollo Rossa
Dark Red Lollo Rossa brings both color and crunch to your winter garden. Its deeply frilled burgundy leaves form an open rosette 8–12 inches wide — striking enough to double as an ornamental.
Cool temperatures actually intensify the red pigmentation, making it look better as nights get colder. It thrives in a cold frame, tolerating light frosts without losing quality, flavor, or that signature mild, nutty bite.
Merlot Looseleaf
Merlot Looseleaf earns its place in any winter lettuce lineup. Its glossy burgundy leaves deepen in color as temperatures drop — that’s the anthocyanin pigment responding to cold, not stress.
It tolerates light frost once established, making it a reliable choice for season extension into December.
Flavor is mild and slightly sweet, with a soft, buttery texture that holds up beautifully in salads.
Green Sweet Crisp Salanova
Green Sweet Crisp Salanova rounds out this cold-hardy lettuce lineup with impressive credentials. It produces compact, heavy heads of crinkled light-green leaves — three times the density of standard varieties — and stays productive from October through March down to 5 °C.
Its sweet, crisp flavor suits salad blends beautifully, and its strong bolting resistance keeps heads intact through cool spells.
Prepare Soil and Growing Space

Good soil is the foundation everything else builds on. Before you worry about frost dates or row covers, getting your growing space right makes the difference between a lettuce crop that limps through winter and one that actually thrives. Here’s what to focus on.
Compost-rich Raised Beds
Think of your raised bed as a living ecosystem, not just a box of dirt. Blend compost with native soil to a depth of 4–8 inches before planting cold-hardy lettuce. Mature compost raises organic matter to 40% in the top foot, improving soil crumb structure for better root penetration and drainage — exactly what winter lettuce needs.
| Compost Benefit | What It Does | Winter Impact |
|---|---|---|
| Microbial activity | Billions of organisms break down matter | Steady nutrient release through cold months |
| Earthworm habitat | Worms aerate and enrich soil continuously | Improved tilth after frost cycles |
| Organic matter | Raises soil structure and pore space | Roots penetrate deeper despite cold |
| Nutrient release timing | Slow nitrogen feeds leafy growth gradually | Reduces frost-sensitive growth surges |
| Moisture retention | Holds water between watering sessions | Less stress during dry winter spells |
Top-dress every 4–6 weeks with additional compost to maintain nutrient availability through harvest. Use only fully matured compost — fresh material locks up nitrogen rather than releasing it. That steady, slow feed keeps your lettuce growing without triggering the soft, frost-vulnerable growth that synthetic fertilizers often cause.
Winter Container Setup
Raised beds give you deep, rich soil — but not every gardener has that space. Containers work beautifully for winter lettuce if you set them up right.
Frost-resistant containers, like heavy ceramic or thick plastic, won’t crack when temperatures drop. Set them on insulating feet to cut heat loss from cold surfaces, and position them against a south-facing wall for maximum winter warmth.
Mulch for Insulation
Once your containers are positioned, give your soil one more layer of defense: mulch. Spread 2 to 4 inches of straw or shredded leaves evenly across the bed surface. This buffers soil temperature overnight, slowing the freeze-thaw cycles that stress roots.
Key organic mulch benefits include:
- Soil temperature stability through cold nights
- Reduced evaporation, keeping moisture available to roots
- Gradual nutrient release as organic material decomposes
- Frost protection without smothering shallow lettuce roots
Keep mulch a few centimeters away from plant stems to prevent crown rot.
Drainage and Moisture Balance
Good mulch sets the stage, but drainage does the heavy lifting. Soil macropores — tiny channels formed by earthworms and old roots — move excess water away from the root zone fast. Without them, perched water builds up beneath the surface, cutting off root zone aeration and inviting rot.
Check moisture at root depth regularly. Consistent soil moisture — not soggy, not bone dry — yields crisper leaves.
Gentle Organic Feeding
Feeding winter lettuce gently is less about quantity and more about timing. Work slow-release compost into your raised bed before planting — this builds a nutrient reservoir that microbial activity unlocks gradually. Add worm castings alongside; they supply nitrogen without burning cold-stressed roots.
Avoid heavy feeds during freezes, as nutrient lockout can stall growth entirely. A light compost tea applied monthly keeps things balanced.
Protect Lettuce From Winter Cold
Once your soil is ready, the next step is keeping cold air from shutting your lettuce down. A good enclosure doesn’t just block frost — it creates a stable microclimate where lettuce can keep growing through the worst of winter. Here are the main options, from simple cold frames to full polytunnels.
Cold Frame Setup
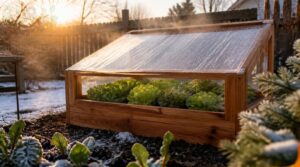
A cold frame works like a personal greenhouse — compact, affordable, and surprisingly effective.
Build a DIY cold frame using a simple 4×4-foot cedar frame topped with a clear polycarbonate or plexiglass lid. Slope the lid higher at the rear to improve sunlight capture and shed meltwater naturally. Face it south to optimize passive solar warmth throughout the short winter days.
Mini Hoop Tunnels

Mini hoop tunnels are one of the most flexible season extension structures you can add to your winter garden. Space arched hoops 12–24 inches apart over your bed, then stretch 4–6 mil polyethylene sheeting across them.
In windy spots, secure guy lines to prevent collapse. Roll back the ends on warmer days for ventilation — keeping your cold-hardy lettuce thriving all season.
Row Cover Layers

Think of row covers as a blanket system — each layer traps a small pocket of warmth between it and the next. Start with a lightweight spunbonded fabric, which transmits 70–90% of light while shielding against light frost.
Add a clear polyethylene outer sheet to boost solar gain. Secure all edges with soil or staples to seal out cold drafts entirely.
Greenhouse and Polytunnel Care
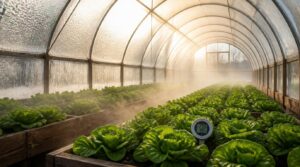
A walk-in polytunnel or greenhouse gives you the most control over winter lettuce production.
Layer bubble wrap along inner walls to cut heat loss by up to 30 percent. Inspect frames monthly for rust or cracks. Clean coverings regularly to maintain light transmission.
Aim for 60 percent humidity, using a hygrometer at canopy level to catch rising moisture early.
Daily Ventilation Needs

Fresh air is your lettuce’s silent partner. Ventilate cold frames whenever temperatures exceed 20 °C — even briefly — to prevent bolting and humidity buildup above 70 percent.
Aim for 0.5 to 1 air change per hour during daylight. This replenishes CO₂, reduces downy mildew risk, and keeps your microclimate stable without overcooling tender leaves.
Top 9 Winter Lettuce Supplies
Having the right tools on hand makes winter lettuce gardening far less guesswork and far more results. The nine supplies below cover everything from seeds and structures to lighting and hardware. Each one earns its place in a serious winter setup.
1. Year Round Vegetable Gardener Guide
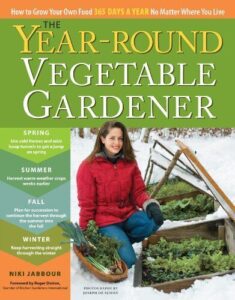
If you’re serious about growing lettuce all winter, the Year Round Vegetable Gardener by Niki Jabbour is worth keeping on your shelf. At $13.17 for 256 pages, it covers season-extension structures, planting calendars, and cold-hardy crop selection in clear, illustrated detail.
It’s aimed at beginners to intermediate growers — not specialists. Note that content reflects 2011 practices, so newer varieties won’t appear.
Still, the structural advice and scheduling guidance hold up well for any winter lettuce setup.
| Best For | Home gardeners at a beginner to intermediate level who want to grow vegetables year-round, especially in cold climates, without spending a lot of money on equipment. |
|---|---|
| Primary Material | Paper / Print |
| Intended Use | Four-season garden planning |
| Reusable | Yes – permanent reference |
| Skill Level | Beginner – Intermediate |
| Weather Resistance | N/A (indoor reference) |
| Assembly Required | None |
| Additional Features |
|
- Covers season-extending structures like hoop tunnels and cold frames with clear DIY instructions, making it easy to get started without a big budget
- Includes detailed planting calendars and interplanting charts that take the guesswork out of scheduling crops across all four seasons
- Well-illustrated and straightforward to follow, with practical advice that holds up for planning winter harvests like lettuce
- Content is based on 2011 practices, so newer vegetable varieties and more recent growing techniques won’t be covered
- Examples lean toward North American climates, which may mean some adaptation is needed for gardeners in other regions
- Building the recommended cold frames and tunnels requires basic carpentry skills, which could be a barrier for some readers
2. Cover Techniques for Vegetable Gardens
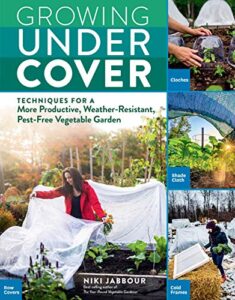
The Year Round Vegetable Gardener pairs well with a hands-on reference like Cover Techniques for Vegetable Gardens (Storey Publishing, $13.84). At 216 pages, it covers cloches, row covers, cold frames, hoophouses, and polytunnels — exactly the structures that keep winter lettuce alive. You’ll find step-by-step DIY construction ideas using low-cost materials, plus a monthly planner with crop-specific tips.
It suits home and urban growers of any scale, offering practical frost, pest, and heat protection guidance throughout the season.
| Best For | Home gardeners, urban growers, and community garden participants who want practical, low-cost ways to extend their growing season and protect crops from frost, pests, and heat. |
|---|---|
| Primary Material | Paper / Print |
| Intended Use | Season-extension cover guide |
| Reusable | Yes – permanent reference |
| Skill Level | Beginner – Intermediate |
| Weather Resistance | N/A (indoor reference) |
| Assembly Required | None |
| Additional Features |
|
- Covers a wide range of protective structures — from simple cloches and row covers to hoophouses and polytunnels — giving growers options at every budget and scale
- Includes step-by-step DIY construction ideas using affordable materials, making it accessible even without prior building experience
- A monthly planner with crop-specific tips helps gardeners know exactly when and how to use each cover method throughout the year
- Focuses specifically on cover solutions, so it won’t serve as a complete standalone guide for gardeners dealing with extreme climates
- Only available in English with no digital edition mentioned, which limits accessibility for some readers
- Some DIY projects may call for tools or materials that aren’t detailed in the instructions, requiring extra research
3. Durolux T5 Grow Light Fixture
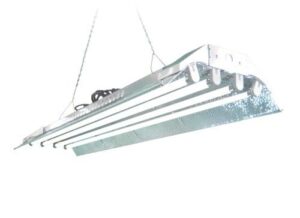
Once your seeds are germinating indoors, consistent light becomes the limiting factor.
The Durolux T5 Grow Light Fixture delivers 20,000 lumens through four 6500 K T5 HO lamps — the cool-blue spectrum lettuce seedlings need for compact, healthy vegetative growth. At just 230 W, it runs efficiently without excessive heat, so you can position it 3–4 inches above foliage.
Its built-in outlet lets you daisy-chain up to five units, scaling coverage as your winter setup grows.
| Best For | Indoor gardeners and hobbyist growers who need strong, efficient light for seedlings, herbs, and leafy greens through the vegetative stage. |
|---|---|
| Primary Material | Metal / Plastic |
| Intended Use | Indoor grow lighting |
| Reusable | Yes – 5-yr warranty |
| Skill Level | Beginner |
| Weather Resistance | Damp/wet rated |
| Assembly Required | Minimal (hang and plug) |
| Additional Features |
|
- Puts out an impressive 20,000 lumens from a 230 W draw, with low enough heat to sit just 3–4 inches above your plants
- Dual on/off switches let you control inner and outer bulb pairs separately, giving you flexible dimming without extra hardware
- The built-in outlet makes it easy to daisy-chain up to five fixtures, so expanding your grow space is as simple as plugging in another unit
- Not compatible with GFCI outlets, which are standard in many garages and basements — you’ll need a regular receptacle nearby
- The housing and sockets have a reputation for flexing or failing after a couple of years, and repairs aren’t straightforward
- At roughly 12 inches wide, the fixture can limit how many trays you fit side by side underneath a single unit
4. Giantex Portable Wooden Cold Frame
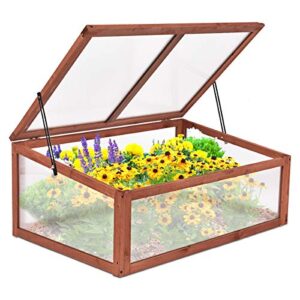
Good lighting gets seedlings started — but once they’re ready for the garden, they need physical protection. That’s where the Giantex Portable Wooden Cold Frame earns its place.
Its solid fir wood frame pairs with a polycarbonate glazing lid to trap solar heat effectively. At just 9.7 lb, you can reposition it easily. The 10-inch adjustable lid stays give you precise ventilation control on warmer days, preventing overheating above 80 °F.
| Best For | Home gardeners and beginners who want an easy, portable way to extend their growing season and protect seedlings from cold, wind, and rain. |
|---|---|
| Primary Material | Wood / Polycarbonate |
| Intended Use | Cold-frame plant shelter |
| Reusable | Yes – seasonal reassembly |
| Skill Level | Beginner |
| Weather Resistance | Partial – untreated wood |
| Assembly Required | Yes – tool-free snap |
| Additional Features |
|
- Tool-free assembly and lightweight design make it simple to set up and move wherever you need it — patio, deck, or garden bed
- Polycarbonate lid traps solar heat efficiently while the 10-inch adjustable stays let you dial in ventilation on warmer days
- Spacious interior fits seed trays, pots, and grow lights with room to spare
- Lightweight build can become a liability in windy conditions — anchoring is a good idea
- Untreated wood is vulnerable to moisture over time, so sealing or painting it is worth the extra step
- Exterior-mounted hinges require clearance when opening, which can be awkward if placed directly over a garden bed
5. Half Inch PVC Snap Clamp
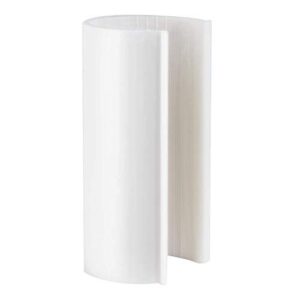
A well-secured hoop tunnel is only as reliable as what holds the cover in place. Half-inch PVC snap clamps attach directly to standard Schedule 40 PVC pipe — no tools required. Each clamp spans 4 inches wide, gripping row cover or poly film tightly against your hoops during frost events.
At 0.31 lb each, they’re lightweight but effective. Space them evenly along the tunnel to prevent sagging. They’re reusable each season, making them a practical, low-cost addition to any winter lettuce setup.
| Best For | Gardeners and homesteaders who use PVC hoop houses or cold frames and want a quick, tool-free way to keep row cover, poly film, or netting firmly in place through wind, frost, and storms. |
|---|---|
| Primary Material | PVC / ABS |
| Intended Use | Hoop-cover film clamp |
| Reusable | Yes – repositionable |
| Skill Level | Beginner |
| Weather Resistance | UV-stabilized |
| Assembly Required | None (snap-on) |
| Additional Features |
|
- Snaps on in seconds without any tools, making it easy to cover and uncover your hoops as the weather changes
- UV-stabilized and frost-resistant construction holds up season after season, so you get reliable reuse without degrading
- Lightweight and affordable — at just 0.31 lb each, they add up to a simple, low-cost solution for securing any winter tunnel
- The tight snap fit can be hard to remove and may pinch fingers, sometimes requiring a tool or careful prying to get off
- Snapping onto thin fabric without pre-securing it first (like with tape) risks tearing the material
- Only fits standard 1/2 in pipe — if your hoops are a different diameter, these clamps won’t work properly
6. Tierra Garden Easy Fleece Tunnel
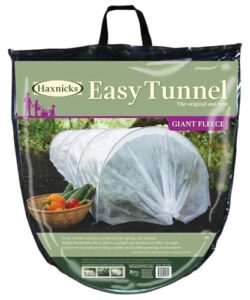
Setting up a hoop tunnel used to mean juggling separate parts. The Tierra Garden Easy Fleece Tunnel removes that hassle entirely with its one-piece accordion design — just expand it and it’s ready.
The 45 gsm UV-stabilized fleece lets in light and moisture while blocking frost down to around 20°F. At 118 inches long, it fits most raised beds. Drawstring ends give you quick ventilation control on warmer days without dismantling anything.
| Best For | Home gardeners who want a quick, no-fuss way to protect vegetables from frost and pests without dealing with complicated assembly or separate parts. |
|---|---|
| Primary Material | Polypropylene / Galvanized Steel |
| Intended Use | Row tunnel frost cover |
| Reusable | Yes – foldable storage |
| Skill Level | Beginner |
| Weather Resistance | UV-stabilized fleece |
| Assembly Required | None (unfold and place) |
| Additional Features |
|
- One-piece accordion design sets up in seconds — no connectors, no tools, no frustration
- 45 gsm UV-stabilized fleece blocks frost while still letting in light and moisture
- Drawstring ends make ventilation easy so plants don’t overheat on warmer days
- Fabric can shift on the hoops over time, leaving gaps that need rocks or stakes to seal
- End openings may flap in strong winds and often need extra tie-downs
- Not waterproof, and the fleece can wear or develop holes after repeated seasons of heavy use
7. Agfabric 10×25 Freeze Protection Row Cover
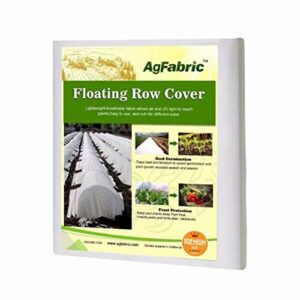
When frost threatens a bigger planting, this cover scales up without fuss. Made from 0.55 oz/yd² non-woven polypropylene, the Agfabric 10×25 shields lettuce down to roughly -28°F while still letting 85% of light through.
Drape it directly over rows, secure edges with stones or soil staples, or stretch it across hoops for a floating tunnel. It doubles as a barrier against wind, hail, and hungry insects.
Just handle the thin fabric carefully — sharp edges can tear it during setup.
| Best For | Gardeners and small-scale growers who need an affordable, easy-to-install cover to protect larger rows of vegetables, fruit trees, and seedlings from frost, wind, hail, and pests throughout the growing season. |
|---|---|
| Primary Material | Non-woven Polypropylene |
| Intended Use | Floating frost row cover |
| Reusable | Yes – multi-season |
| Skill Level | Beginner |
| Weather Resistance | UV-stabilized fabric |
| Assembly Required | None (unroll and lay) |
| Additional Features |
|
- Extends the growing season by trapping heat and moisture, supporting seed germination and protecting winter crops
- Lightweight, breathable fabric still lets through about 85% of light, so plants keep growing even while covered
- Flexible installation options — anchor with stones, soil, or staples, or drape over hoops for a floating tunnel
- Thin fabric can tear at sharp edges or under tension, so it needs careful handling during setup
- Actual roll length sometimes falls short of listed dimensions (e.g., 48 ft instead of 50 ft), which can affect coverage planning
- Durability fades after several harsh seasons, so long-term use may require replacing the cover
8. Winter Density Lettuce Seeds
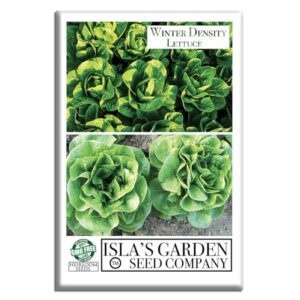
Every winter garden starts with the right seed packet, and Winter Density tops the list for good reason. Each packet holds 1,000 open-pollinated seeds, germinating between 40–60°F. This romaine-butterhead hybrid matures in 54–58 days, forming compact 8-inch heads with dark green, buttery leaves that resist bolting.
Sow seeds 1/8 inch deep, thin to 8–12 inches apart, and stagger plantings every 2–3 weeks. Stored cool and dry, seeds stay viable for 3 years — a smart investment for steady winter harvests.
| Best For | Gardeners in cool or winter climates who want a frost-tolerant, slow-bolting lettuce for fresh salads, sandwich wraps, and long-term seed storage. |
|---|---|
| Primary Material | Organic Seeds |
| Intended Use | Cool-season leafy crop |
| Reusable | No – single planting |
| Skill Level | Beginner – Intermediate |
| Weather Resistance | Cold-tolerant (Zone 3–12) |
| Assembly Required | None (direct sow) |
| Additional Features |
|
- Frost-tolerant and slow to bolt, making it well-suited for cool-season and winter planting
- Forms compact, dense heads with sweet, crisp leaves and reliable 65-day maturity
- Stores well long-term, making it a smart choice for emergency seed reserves
- Prone to bolting once temperatures climb above roughly 72°F (22°C)
- Germination can be inconsistent or slow in fall plantings
- Needs careful thinning to 8–12 inch spacing, since overcrowding hurts head quality
9. Stainless Steel Folding Butt Hinge
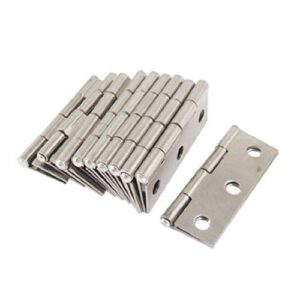
A cold frame lid needs hinges that won’t rust shut by February, and this set delivers exactly that.
Made from corrosion-resistant stainless steel, these ten foldable butt hinges fold flat for storage and mount easily onto thin, lightweight panels.
Each measures 66 x 36 x 1.5mm, with 5mm mounting holes spaced 30mm apart.
Rated for roughly 5 lbs per hinge, they’re built for light-duty use — perfect for cold frame lids, not heavy garden gates.
| Best For | Gardeners and DIYers looking for an affordable way to hinge lightweight builds like cold frame lids, cabinet doors, or small hobby projects. |
|---|---|
| Primary Material | Stainless Steel |
| Intended Use | Cold-frame lid hardware |
| Reusable | Yes – long-term hardware |
| Skill Level | DIY Hobbyist |
| Weather Resistance | Corrosion-resistant |
| Assembly Required | Yes – screw mounting |
| Additional Features |
|
- Corrosion-resistant stainless steel construction stands up to moisture and outdoor use without rusting
- Foldable design makes storage compact and installation straightforward
- Comes as a set of ten, offering good value for multi-hinge projects
- Limited to light-duty applications, with a maximum recommended load of about 5 lb per hinge
- Thin metal can deform under pressure, feeling flimsy in higher-stress situations
- Ships without screws and may have inconsistent countersinking, so extra care is needed during installation
Care, Harvest, and Troubleshoot

Getting your lettuce planted and protected is only half the job. The real test comes in the day-to-day care, where small habits decide whether your harvest thrives or fizzles out. Here’s what to watch for, week after week.
Winter Watering Routine
Watering winter lettuce is less about routine and more about reading the moment. Only water on days above 40°F when soil isn’t frozen.
A quick finger test tells you everything — the top two inches should feel like a wrung-out sponge. For containers, water until drainage runs freely. Once or twice monthly is usually enough.
Light and Temperature Checks
Keep tabs on light and warmth daily — winter conditions shift fast. A quantum sensor at canopy height confirms you’re hitting 150 µmol m2 s-1; pale, washed‑out leaves mean it’s falling short.
Check temperatures every two hours, holding daytime near 15–18 °C and nights no colder than 10 °C. Catching early frost damage protects your whole microclimate.
Aphid and Slug Control
Aphid control starts with daily checks—pinch infested leaf tips early. Organic soap application disrupts their bodies safely. Build beneficial insect habitats with dill or fennel for natural predator promotion; lady beetles handle the rest.
For slug control, rely on copper barrier effectiveness around beds plus simple slug trap methods like shallow beer dishes—classic integrated pest management to protect tender greens.
Preventing Downy Mildew
Beyond pests, downy mildew thrives in damp winter air. Combine airflow optimization, drip irrigation benefits, sanitation protocols, and scouting techniques for true integrated pest management:
- Space plants 12–18 inches apart
- Choose drip irrigation, not overhead watering
- Remove debris weekly; sanitize tools and footwear
- Inspect leaf undersides for early spores
Companion planting strategies and moisture control boost organic pest control naturally.
Cut-and-come-again Harvesting
Good sanitation habits set the stage for smarter harvesting.
Cut-and-come-again harvesting keeps winter lettuce productive for months: snip outer leaves once they reach 6–8 cm, always preserving the central growing point.
Take just a third of the canopy each visit, and expect regrowth within 7–14 days.
Cold-hardy lettuce rewards this rhythm with 3–5 successive harvests, the real payoff of season-extension gardening.
Cut-and-come-again harvesting rewards patient gardeners with three to five successive harvests all winter long
Frequently Asked Questions (FAQs)
How do you grow lettuce in winter?
Growing lettuce in winter means choosing cold-hardy varieties, providing frost protection, and timing your planting carefully. With the right setup — a cold frame or hoop tunnel — fresh salad leaves are yours well into the coldest months.
Can lettuce grow in cold weather?
Yes — lettuce is naturally frost tolerant, thriving between 45–65°F. Cold-hardy varieties like ‘Winter Density’ survive down to 20°F with protection. Growth slows but continues reliably through winter with the right variety and cover.
Will lettuce grow in the fall?
Wondering if autumn’s truly the secret window for lettuce? It is. Well-insulated, cooler soil avoids thermal dormancy, while early succession sowing across your regional frost window builds frost-tolerant, coldhardy winter lettuce through strong seedling establishment.
When should you plant lettuce?
Plant lettuce 6–10 weeks before your first hard frost. For baby greens, sow 2–4 weeks out. Start seeds indoors 3–4 weeks early to sidestep thermal dormancy in warm summer soil.
How cold is too cold to grow lettuce?
Lettuce hits its limit around 25°F (-4°C). Below that, ice forms inside leaf tissue, causing irreversible cell damage. Above freezing, cold-hardy varieties survive — they just grow slowly.
Can you grow lettuce in the winter?
Absolutely — winter lettuce is achievable with the right cold-hardy varieties and frost protection. Cold-tolerant types survive down to 20°F, and simple structures like cold frames or hoop tunnels keep harvests coming through the coldest months.
Which lettuce grows best in winter?
Think of lettuce varieties like winter coats — some barely handle a chill, others laugh at frost. Cold-hardy lettuce like Winter Density and Merlot Looseleaf stay crisp and flavorful even when temperatures dip below freezing.
What temperature is too cold for lettuce?
25°F (-4°C) is the critical threshold — below this, ice forms inside plant cells, causing irreversible tissue damage. Seedlings are even more vulnerable and can die from a single brief freeze.
Can you grow lettuce during the winter?
Yes, you can. Cold-hardy varieties like Winter Density and North Pole Butterhead survive down to 20°F with simple protection. A cold frame or fleece tunnel keeps winter greens productive from October through March.
Can I just scatter lettuce seeds?
You can, but results are hit-or-miss. Even seed distribution and firm soil contact matter most. Lightly rake the surface, scatter, then thin seedlings to 6–8 inches apart once they establish.
Conclusion
Winter isn’t a wall—it’s a filter, separating gardeners who wait from those who harvest. Growing lettuce in winter rewards the grower who plans backward from the first frost, chooses cold-hardy varieties, and builds simple protection from cold frames or row covers.
Those steps aren’t complicated; they’re just deliberate.
By late December, while neighbors eye seed catalogs, you’ll be cutting crisp, sweet leaves that no summer garden ever quite matched.
- https://www.backyardboss.net/cold-hardy-lettuce-varieties-to-grow-this-winter
- https://www.johnnyseeds.com/growers-library/methods-tools-supplies/winter-growing-season-extension/winter-growing-guide-recommended-crops-varieties.html
- https://gardenbetty.com/lettuce-even-in-summer
- https://savvygardening.com/growing-lettuce-in-winter
- https://tuigarden.co.nz/garden-questions/what-are-the-best-lettuce-varieties-to-grow-in-winter