This site is supported by our readers. We may earn a commission, at no cost to you, if you purchase through links.
That first bundle of thyme you hang from a random nail? It’ll mold before it dries, and you won’t know why. Herbs need moving air on every side, not a cozy corner of your kitchen.
Good herb drying racks for beginners fix that problem without costing much or eating up counter space. A wall-mounted rack or a simple screen frame gives each stem room to breathe, which means faster drying and none of that musty, wasted-harvest smell.
Grab some twine and a tape measure. You’re about to turn a few cents of wood and mesh into a setup that saves every leaf you grow.
Table Of Contents
- Key Takeaways
- Choose Your Beginner Herb Drying Rack
- Build a Simple Screen Drying Rack
- Dry Herbs Step by Step
- Top 5 Herb-Drying Rack Essentials
- Frequently Asked Questions (FAQs)
- How to make a drying rack for herbs?
- What to use instead of a drying rack?
- What herbs should you not dry?
- What is the easiest way to dry herbs?
- How long do dried herbs stay potent?
- Can I dry herbs without a rack?
- What temperature ruins dried herb flavor?
- Should I dry herbs indoors or outdoors?
- Can I reuse the screen mesh yearly?
- Conclusion
Key Takeaways
- Herbs need moving air on all sides to dry properly, so give bundles 1-2 inches of space instead of crowding them onto a nail or shelf.
- A simple wooden screen rack, built from cut boards and food-grade mesh, costs little and works just as well as store-bought options.
- The snap test is your best clue for doneness: a stem that snaps cleanly instead of bending means the moisture is truly gone.
- Not every herb belongs on a rack, since basil, parsley, chives, cilantro, and mint lose flavor when air-dried and freeze much better instead.
Choose Your Beginner Herb Drying Rack
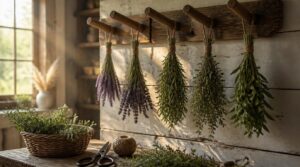
Picking the right rack matters more than people expect, since the wrong one can leave herbs crowded or hanging too loose. You don’t need anything fancy to get started, just something sturdy that fits your wall and your harvest. Here’s what to look for before you build or buy.
Once your rack is up, check out this guide on propagating herb cuttings for your rack to pick varieties that’ll actually take root and thrive together.
Wall-Mounted Rack Types
Before hammering anything together, look at what’s already out there.
Wooden peg racks keep things simple and rustic, while metal grid systems use movable hooks. Shaker peg rails double as tool storage, and hybrid shelf designs or a Farmhouse Rack with Removable S-Hooks add flexibility. Multi-tier wire racks suit tight walls needing volume.
Airflow and Bundle Spacing
Whatever rack you pick, mold is the real enemy, not the design itself. Give bundles 360-degree airflow with 1-2 inches between them, using movable S-hooks to fine-tune herb bundle spacing as they shrink.
- Widen gaps if you spot condensation
- Rotate bundles every few days
- Avoid pressing leaves together
- Keep air moving, not blasting
Harvest Size and Capacity
Good spacing only helps if your rack actually fits the harvest. Most beginner bundles run 5-10 stems, and a 0.3 to 1.2 square meter wall rack works well for that, usually 0.5-2.5kg fresh herbs per session.
Group by herb type first. During peak seasonal harvesting, add tiers, each layer gains roughly 0.15-0.25 square meters, turning slim vertical wall space into real capacity without crowding stems.
Durable, Food-Safe Materials
Once you know how much you’re harvesting, think about what touches your herbs. Food-safe materials matter: stainless steel frames, food grade silicone grips, powder-coated steel, or untreated wood (oiled regularly) all resist mold and residue.
- Stainless steel wipes clean, won’t warp
- Food grade silicone resists staining
- Food-grade window screen or stainless steel mesh for airflow
- Airtight containers for storage later
To make sure safety, always verify that materials are labeled as food-grade certified before use.
Adjustable and Retractable Designs
Space is precious, so look for racks that flex with your needs. Leg extensions and telescoping frames raise or lower drying surfaces for tight kitchens.
Foldout wall mounts tuck flat when empty, while pulley counterweight or tension spring assist systems make height changes easy.
Movable S-hooks and adjustable hanging systems keep airflow steady, letting bundles dry evenly without hogging wall space.
Build a Simple Screen Drying Rack
Once you’ve picked the style that fits your space, it’s time to actually build one. This screen rack is sturdy, cheap, and forgiving enough for a first project. Here’s exactly what you’ll need and how to put it together, step by step.
Once your rack is up, it doubles as the perfect spot to hang herb bundles while you follow this guide to drying and storing fresh herbs for lasting flavor.
Gather Tools and Materials

Before cutting a single wood strip, lay out everything on your workbench. You’ll need wood strips, a staple gun, food-grade window screen, wood glue, and stainless steel screws for your wood frame.
Grab your safety gear: goggles, a dust mask, and gloves. A tape measure, carpenter square, and pencil round out your measuring tools list nicely.
Measure and Cut Boards

Once your wood strips are laid out, grab a tape measure and mark twice: two boards at 24 inches, two at 21 inches. Choose 1 1/2 inch wood for sturdy corners.
Align grain along the longest edge to resist warping. Square each line with a carpenter square, then cut smooth, steady strokes—no rushed sawing.
Pre-Drill and Assemble Frame

Skip the pilot holes and you’ll split your corners—simple as that. Drill small guide holes before driving each 3 inch screw, keeping bits centered and square.
Clamp joints first, then check that both diagonals match for a true square frame.
Use countersinking so screw heads sit flush, protecting hands and herbs alike once your wood strips come together.
Attach Food-Grade Screen Mesh

A taut screen means dry, mold-free herbs—a saggy one means damp pockets. Cut your plastic screen four inches past each edge, fold corners tight, then staple with a heavy-duty gun, pulling snug as you go.
| Fastener | Best Use |
|---|---|
| Staples | Screen edges |
| Screws | Corner joints |
| Spline | Groove-set mesh |
Good tension keeps air circulation even across the whole surface.
Mount and Maintain Rack
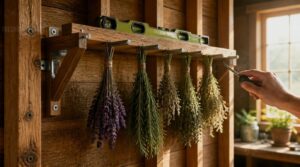
A wobbly rack ruins good herbs fast. Mount into studs (2×4 minimum, 16 inches apart) with corrosion-resistant screws, leaving 1 inch of clearance for airflow.
- Level the rack with a spirit level before final tightening
- Shim uneven walls at mounting points
- Inspect fasteners each season for rust or stripping
- Leave 6-12 inches wall clearance
- Store covered during off-season
Dry Herbs Step by Step
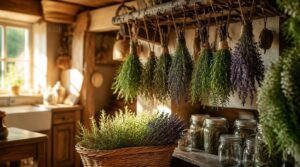
Your rack is built and ready, so now comes the part that actually matters: getting herbs onto it the right way.
A few small habits, done in order, make the difference between fragrant, potent herbs and a sad, moldy mess.
Here’s exactly how to go from garden to jar, one step at a time.
Harvest Herbs at Peak Flavor
Once dew evaporates but before midday sun hits, that’s your window for peak harvest timing.
| Herb Part | Best Timing |
|---|---|
| Leaves | Before flowering |
| Flowers | Just before full bloom |
| Roots/Seeds | Seeds browned, unopened |
Morning dew harvest locks in oils; flower stage picking and root seed timing round out smart flavor preservation before air drying begins.
Wash and Prepare Bundles
Once you’ve picked your herbs, get them under cool water fast. Rinse and Pat Dry removes soil without leaching oils, then pat with a towel.
- Remove Damaged Leaves
- Trim stems evenly
- Tie loosely with twine
Uniform Bundle Sizing (6-12 stems) keeps airflow steady, so nothing dries lopsided on your rack.
Space Herbs for Airflow
Now those bundles need room to breathe. Hang them 2 to 3 centimeters apart, staggered rather than lined up, so leaves don’t overlap and trap moisture.
Use movable S-hooks on your rack for quick spacing tweaks as bundles shrink. Keep air moving with gentle cross breezes, never direct drafts, at 70-95°F, checking occasionally that nothing’s crowded.
Check Dryness With Snap Test
So how do you know it’s truly done? Grab a pencil-thick stem and bend it. A clean snap, not a bend, means moisture’s gone from inside the stem.
A clean snap, not a bend, tells you the moisture is truly gone from the stem
Check every 6-12 hours, testing several stems since one sample can mislead you. Leaves should crackle, look dull, and smell mild, never sour or musty, confirming mold-free, properly dried herbs.
Store in Labeled Jars
Once herbs pass the snap test, get them into a mason jar with an airtight lid right away—air is the enemy now.
Label jars with herb name and drying date; store in a cool, dark spot below 50% humidity. Check monthly for moisture or off smells, and rotate oldest jars forward first.
Top 5 Herb-Drying Rack Essentials
Once your rack is built and mounted, you’ll want the right herbs and hardware to make the most of it. A few tried-and-true picks can save you trial and error, whether you’re hanging bundles or filling shelves. Here are five essentials worth having on hand before your first harvest.
1. Organic Thyme 0.5 Ounce Package
A little clamshell of organic thyme goes a long way once you’ve got a rack going. This 0.5 oz package is USDA Organic, freshly packaged, and ready to season soups, roasts, or a simple roasted vegetable medley.
Rub the leaves between your fingers before adding them to release that earthy aroma. Just check the seal on arrival, since clamshells sometimes pop open in transit, and use it fairly quickly since small batches don’t stretch far.
| Best For | Home cooks who want fresh, aromatic organic thyme on hand for seasoning soups, stews, roasts, and salads without reaching for the dried stuff. |
|---|---|
| Product Type | Herb |
| Organic Certified | Yes |
| Primary Use | Cooking |
| Material | Thyme |
| Storage Related | No |
| Natural Origin | Yes |
| Additional Features |
|
- USDA Organic certified for clean, trusted quality
- Freshly harvested and packaged, so flavor and aroma are at their peak
- Convenient size for quick meal prep whenever a recipe calls for fresh herbs
- Clamshell packaging can sometimes arrive open, risking spilled or bruised herbs
- Small 0.5 oz quantity means frequent repurchasing for regular cooking
- Best used quickly, since freshness and aroma fade over time
2. Wooden Wall Mount Spice Rack
Once your herbs are dried, you need somewhere to keep them within reach, and this torched wood spice rack fits the bill nicely. Four tiers give you visible, organized storage, and the whitewashed, weathered finish suits any farmhouse-style kitchen.
At just 20.8 by 3.3 by 25.2 inches, it mounts easily without eating up counter space. Skip the oversized jars, though; shelf spacing runs about 5.4 inches, so standard containers fit best.
| Best For | Home cooks who want their herbs and spices visible and within arm’s reach while cooking, especially in farmhouse or rustic-style kitchens. |
|---|---|
| Product Type | Storage Rack |
| Organic Certified | No |
| Primary Use | Organization |
| Material | Wood |
| Storage Related | Yes |
| Natural Origin | Yes |
| Additional Features |
|
- Four-tier design keeps spices organized and easy to see at a glance
- Compact, vertical footprint frees up valuable counter and cabinet space
- Weathered whitewash finish adds rustic charm to farmhouse-style kitchens
- Shelf spacing of 5.4 inches won’t accommodate tall or oversized containers
- Needs to be wall-mounted, so proper hardware and installation are required
- Natural torching process means the finish can vary slightly from piece to piece
3. Amazon Grocery Organic Rosemary 0.5 Oz
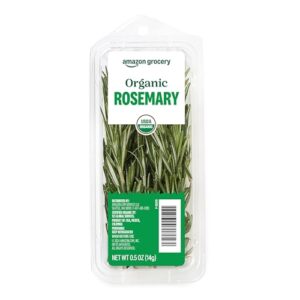
Piney, resinous, just a touch citrusy—rosemary earns its keep in any kitchen. This USDA Organic 0.5-ounce pouch from Amazon Grocery gives you a starter herb worth practicing your drying skills on.
Since rosemary’s woody stems dry beautifully with good airflow, it’s a forgiving pick for a new rack. Wash gently before drying, then store dried sprigs in a sealed glass jar, away from light and heat, so that piney aroma sticks around for months.
| Best For | home cooks who want fresh organic rosemary on hand for roasting meats and vegetables, or for drying their own herbs to keep on the shelf. |
|---|---|
| Product Type | Herb |
| Organic Certified | Yes |
| Primary Use | Cooking |
| Material | Rosemary |
| Storage Related | No |
| Natural Origin | Yes |
| Additional Features |
|
- USDA Organic certified for peace of mind about quality
- Compact size dries well and stores easily in a glass jar
- Versatile use in cooking and even DIY hair care routines
- Small 0.5 oz package may not last long for frequent cooks
- Needs washing before use, adding a prep step
- Freshness depends heavily on how it’s stored after opening
4. New Age Smudges White Sage Bundle
Not every rack has to hold something you’ll cook with. This pack of three white sage bundles, each about 4 inches long, works your drying rack’s airflow skills while giving you a tool for clearing stale energy from a room.
Made in the USA from sustainably sourced California sage, the bundles come with a simple usage guide for lighting and smudging. Store spent bundles in a cool, dry spot, same rules as your kitchen herbs.
| Best For | Anyone looking to bring a simple smudging ritual into their meditation, yoga, or mindfulness routine. |
|---|---|
| Product Type | Herb Bundle |
| Organic Certified | No |
| Primary Use | Smudging |
| Material | Sage & Cotton |
| Storage Related | No |
| Natural Origin | Yes |
| Additional Features |
|
- Made from sustainably sourced California white sage
- Comes with a step-by-step usage guide for lighting and smudging
- Pack of three bundles offers good value for repeated use
- Some bundles may run smaller than the stated 4-inch length
- Unclear whether any fragrance beyond natural sage is added
- Burn time and lighting ease can vary depending on storage and dryness
5. Amazon Grocery Organic Mint 0.5 Ounce
Mint is the herb that teaches patience on your rack, since fresh leaves dry fast but bruise faster if you’re rough with them.
This 0.5 ounce USDA organic pack arrives bright green with a strong, clean aroma, ready for tea, cocktails, or a hummus batch that needs a little lift.
Wash gently, blot dry, and space leaves on your screen with room to breathe. Once crumbly, jar them up for a fresh-mint pantry staple all year.
| Best For | Home cooks and drink enthusiasts who want small batches of fresh, organic mint on hand for teas, cocktails, and dishes like hummus or salads. |
|---|---|
| Product Type | Herb |
| Organic Certified | Yes |
| Primary Use | Cooking |
| Material | Mint |
| Storage Related | No |
| Natural Origin | Yes |
| Additional Features |
|
- USDA certified organic with a strong aroma and bright green color
- Versatile for culinary uses, from garnishes to marinades
- Arrives fresh and ready to use right out of the package
- Small 0.5 ounce size means frequent repurchasing for regular cooks
- Requires washing before use, adding an extra prep step
- Not suitable for medicinal or topical purposes
Frequently Asked Questions (FAQs)
How to make a drying rack for herbs?
Think of it as a wooden picture frame with screen instead of glass. Cut boards to 24 and 21 inches, screw corners, staple on food-grade mesh, then mount to studs for a sturdy, breathable rack.
What to use instead of a drying rack?
No rack? No problem. Try a hanging line with pegs, a screened tray for airflow, or a silicone mat to catch moisture. Even a cabinet shelf with hooks works in a pinch.
What herbs should you not dry?
Basil, parsley, chives, cilantro, and mint don’t dry well—they lose aroma, color, or turn harsh-tasting. Skip your rack for these; freeze them instead to lock in that fresh, bright flavor you worked hard to grow.
What is the easiest way to dry herbs?
Hang bundles on a wall-mounted rack with 2 to 4 inches of spacing, let a gentle breeze pass through, and skip the stacking. Simple airflow beats fancy equipment every time.
How long do dried herbs stay potent?
Like a good bottle of wine, dried herbs age on their own timeline. Whole leaves keep flavor 1 to 3 years, ground herbs fade in 6 to 12 months, and seeds last up to 4 years sealed tight.
Can I dry herbs without a rack?
Absolutely, tie small bundles with twine and hang them upside down somewhere dry and shaded. No rack needed. You can also lay herbs on a baking sheet and use your oven’s lowest setting for quicker results.
What temperature ruins dried herb flavor?
Funny how "low and slow" turns into "burnt and bitter" faster than you’d think. Above 70°C, oils caramelize into a cooked taste. Even 50°C strips 20% of aroma — gentle heat always wins.
Should I dry herbs indoors or outdoors?
Indoors gives you year-round control, protecting color and oils from sun bleaching. Outdoors dries faster in dry climates with good airflow, but humidity or rain can ruin a whole batch fast.
Can I reuse the screen mesh yearly?
Sarah reused the same mesh three seasons running before spotting a tiny rip. Yes, reuse yours yearly if it stays hole-free—just inspect for rust and rips each season, and replace mesh alone if the frame’s still solid.
Conclusion
A good rack works like a quiet friend, holding space so your herbs can breathe instead of rot. That’s the whole secret behind herb drying racks for beginners: airflow, patience, and a little planning.
Build the screen once, and you’ll use it every harvest season for years. Snap-test your stems, jar them labeled and tight, and that windowsill bundle becomes real, fragrant pantry staples.
Your kitchen just got a lot more self-sufficient.